DIY: Interior LED swap (cluster, HVAC, switches, window, *steering wheel)

Yeah, had a faulty LED which put a damper on the fun. Otherwise, it looks awesome both during the day and at night. Can't wait til it's back in for good!
 
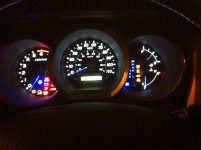
Here is a teaser anyway (you can see the faulty LED under the C side of the temperature gauge

Sh*t happens. Sounds as though you took care of things!

Can't wait to send you my cluster! :snacker:

Yeah, had a faulty LED which put a damper on the fun. Otherwise, it looks awesome both during the day and at night. Can't wait til it's back in for good!

Congrats on your cluster, the teaser photo sure looks hot!!
 
This thread is full of great info.. Looks like i'll be reading this from start to finish.. One side of the backLights on my HVAC LCD screen died last night.. :( Now at night only the driver side info is visible..
 
This thread is full of great info.. Looks like i'll be reading this from start to finish.. One side of the backLights on my HVAC LCD screen died last night.. :( Now at night only the driver side info is visible..

You can get Neo-4 LEDs for your hvac screen. Neo-3 for the buttons on it (reset/mode, recirc, defrost, and the 3 knobs.). All can be found at www.superbrightleds.com

Hope that helps!
 
NOW for what you've all been waiting for (or at least CookieRoe and snowbrdr033 have been waiting for); White and blue Limited gauges!
62765b1c-508e-1012.jpg

62765b1c-509d-074a.jpg

62765b1c-50ae-718e.jpg

62765b1c-50bf-c579.jpg

62765b1c-50d0-3b05.jpg

62765b1c-50de-d8cb.jpg
 
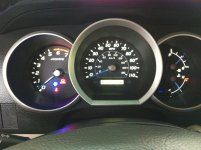
Decided to go from the blue lights on my gauges to white then went with blue needles, still working on the HAVC (need more LEDs). I also changed the color of a few of the icons (door/fogs/gear selection in blue)
The needles look a darker blue than the pic's show.
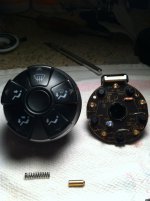
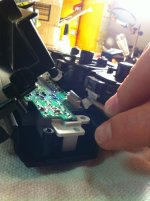
I included a few pictures for anybody that wants to know what the board of the HVAC controls looks like. You will need to solder 3mm for each button the back light is just the screw in type Neo-4. When taking it apart be careful the small spring and pin could pop out (pic 3). Use caution to pull out the wire harness on each one, You pull the small tabs on the ends then pull it out the white plastic clip stays in the harness slides out of that you can see how I removed and installed in pic 4.
 

Attachments

  • IMG_2950.jpg
    IMG_2950.jpg
    135.4 KB · Views: 877
  • IMG_2943.jpg
    IMG_2943.jpg
    137.4 KB · Views: 893
  • IMG_2934.jpg
    IMG_2934.jpg
    127.3 KB · Views: 883
  • IMG_2939.jpg
    IMG_2939.jpg
    129.6 KB · Views: 883
Decided to go from the blue lights on my gauges to white then went with blue needles, still working on the HAVC (need more LEDs). I also changed the color of a few of the icons (door/fogs/gear selection in blue)
The needles look a darker blue than the pic's show.
I included a few pictures for anybody that wants to know what the board of the HVAC controls looks like. You will need to solder 3mm for each button the back light is just the screw in type Neo-4. When taking it apart be careful the small spring and pin could pop out (pic 3). Use caution to pull out the wire harness on each one, You pull the small tabs on the ends then pull it out the white plastic clip stays in the harness slides out of that you can see how I removed and installed in pic 4.


Looks good!
 

Members online

Forum statistics

Threads
278,316
Messages
3,554,124
Members
248,016
Latest member
Advally Service

Trending content

Back
Top