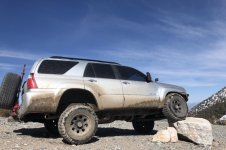
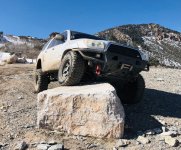
Hi-desert Cheapskate build thread

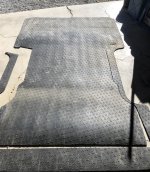
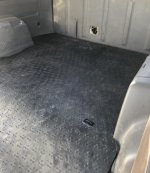
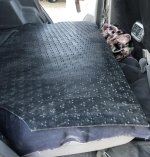
Repurposed a rubber truck bed mat from my brothers full-size dodge and made a new cargo liner. He line-x’d his bed and was gonna throw it away. It covers the cargo area and the folded down seat backs. The one I had made from UHMW was light and strong but it was slick and stuff just slid around too much.
 

Attachments

  • 9C64D438-D6B3-420F-9100-45722F9EEB30.jpg
    9C64D438-D6B3-420F-9100-45722F9EEB30.jpg
    141.3 KB · Views: 250
  • 51A7BBD4-065C-45B9-BE67-5509832235D5.jpg
    51A7BBD4-065C-45B9-BE67-5509832235D5.jpg
    125.6 KB · Views: 250
  • C50434B4-83B4-468B-B469-36D7A455C3BE.jpg
    C50434B4-83B4-468B-B469-36D7A455C3BE.jpg
    130 KB · Views: 255
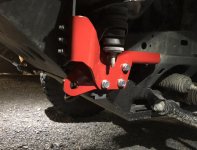
Replace the pan hard bushings with poly Energy Suspension 8.7105. I don’t have a press so I had to drill out the rubber then cut and chisel the outer sleeves. Good times.
 
Last edited:
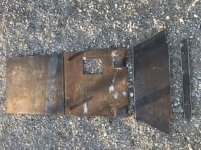
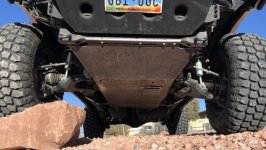
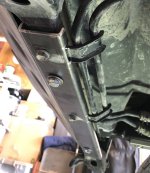
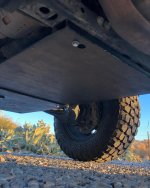
DIY skid plates

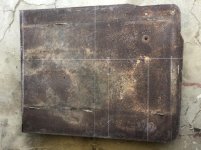
Something I’ve been working on for quite some time here and there is repurposing an old metal work table into skid plates. This rusty chunk of 1/4” plate was free. I’ve been loosely following the diy by [MENTION=429038]y=mx+b[/MENTION]. I faced a number of challenges, first not having a 3 prong 240v outlet then my air compressor not being able to keep up with the Cornwall tools plasma torch my buddy let me borrow, then the torch barely being able to cut 1/4”:(. I had the basic parts and pieces made for a while. I used some 3/16 u channel for the core support. I used 2x2 1/4 wall square tube and 3/16” flat plate for the two front stand offs and made some small spacers for the rear engine crossmember from UHMW. The transmission crossmember stand off is 1x2 rec tubing which was part of the frame of the table I cut up for this. The rest of the 1x2 will be the t-case crossmember. I still need some bracing and side fillers but otherwise I love how this is turning out.

 

Attachments

  • 0EB8A0BD-C441-4A82-8887-3FE03CEC2FA4.jpg
    0EB8A0BD-C441-4A82-8887-3FE03CEC2FA4.jpg
    136.9 KB · Views: 198
  • 316BC65F-195E-40E7-B700-F8D268E65898.jpg
    316BC65F-195E-40E7-B700-F8D268E65898.jpg
    77.4 KB · Views: 204
  • 371101E5-4150-47F6-82E7-8EA935AEE63B.jpg
    371101E5-4150-47F6-82E7-8EA935AEE63B.jpg
    128.3 KB · Views: 198
  • 34737985-736E-4D02-A490-C7572E54EB4F.jpg
    34737985-736E-4D02-A490-C7572E54EB4F.jpg
    122.4 KB · Views: 209
  • 5F89812D-447D-494A-9DBA-3E749D77B76E.jpg
    5F89812D-447D-494A-9DBA-3E749D77B76E.jpg
    130.8 KB · Views: 199
Something I’ve been working on for quite some time here and there is repurposing an old metal work table into skid plates. This rusty chunk of 1/4” plate was free. I’ve been loosely following the diy by [MENTION=429038]y=mx+b[/MENTION]. I faced a number of challenges, first not having a 3 prong 240v outlet then my air compressor not being able to keep up with the Cornwall tools plasma torch my buddy let me borrow, then the torch barely being able to cut 1/4”:(. I had the basic parts and pieces made for a while. I used some 3/16 u channel for the core support. I used 2x2 1/4 wall square tube and 3/16” flat plate for the two front stand offs and made some small spacers for the rear engine crossmember from UHMW. The transmission crossmember stand off is 1x2 rec tubing which was part of the frame of the table I cut up for this. The rest of the 1x2 will be the t-case crossmember. I still need some bracing and side fillers but otherwise I love how this is turning out.
Looks great dude!
 
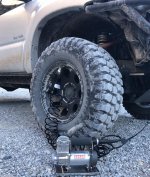
Wife got me a Viair 300p compressor for Christmas. Went out and made good use of it on some trails over the long holiday weekend.
 

Attachments

  • 705A4212-1A5D-4AB6-B678-C0E7D55E5F73.jpg
    705A4212-1A5D-4AB6-B678-C0E7D55E5F73.jpg
    139.3 KB · Views: 343
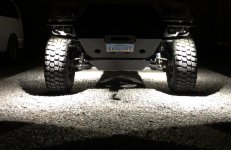
Got my Sealight RGB rock lights installed after fabricating some brackets.
 

Attachments

  • 7A771354-8F3F-4B6D-98D8-396C71320B59.jpg
    7A771354-8F3F-4B6D-98D8-396C71320B59.jpg
    131 KB · Views: 324
Last edited:
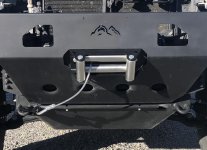
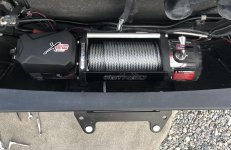
Purchased a Smittybilt XRC Gen2 9500 winch and True North Fab recovery points with frame tie-ins. For ease of installation and time I mounted the control box on the side. It contacts the hood release in the center so that won’t fly. On the side it allows the best access to the control lead. I plan on making a custom aluminum mount for it once I have a little more free time. And I know, my wiring looks like ass.
 

Attachments

  • A62B8DD7-F60B-4061-8E16-06D967B6BA77.jpg
    A62B8DD7-F60B-4061-8E16-06D967B6BA77.jpg
    130.4 KB · Views: 291
  • 268B4C8B-9660-4B45-B88E-77DD584CBEB6.jpg
    268B4C8B-9660-4B45-B88E-77DD584CBEB6.jpg
    139.8 KB · Views: 287
  • B09293A3-C4F0-4279-8AA2-2E3156460D2A.jpg
    B09293A3-C4F0-4279-8AA2-2E3156460D2A.jpg
    119.9 KB · Views: 287
Last edited:
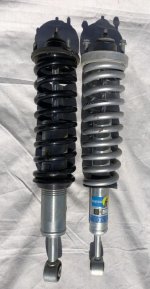
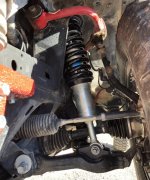
Scored a set of used Bilstein 6112’s and 5160’s for a 5th gen for a great price. Swapped out the current front set ups for the 6112’s. The lower eyelet on the 5th gen shock is about 3/16” wider than a 4th gen. Two minutes with a flap wheel on my grinder and good to go. Installed YotaMafia extended ss brake lines up front too. Did a full brake system flush with synthetic dot 3. I still need new reservoir clamps for the 5160’s before I can use them. I’ll probably just keep them as backups when I have to rebuild the Icon 2.0s.
 

Attachments

  • 4F6B0C56-FD00-4838-A5D6-67C9EDA561D8.jpg
    4F6B0C56-FD00-4838-A5D6-67C9EDA561D8.jpg
    109.9 KB · Views: 290
  • 5B4A89D5-B7AE-4C5A-A68E-E5C054B8B826.jpg
    5B4A89D5-B7AE-4C5A-A68E-E5C054B8B826.jpg
    130.3 KB · Views: 278
Last edited:
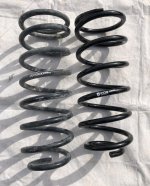
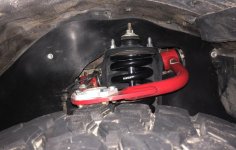
Got the Icon springs installed. Went out for a test and man what a huge difference. 3” 400+ Lb spring definitely don’t flex like these. My suspension as a whole is night and day difference over the Toytec 3” springs on 5100’s with their top spacer and 3” hd rear springs. The heavy springs were awesome when hauling firewood or my side by side but suck for wheeling. I actually bottom out on the rear bumps now. Time for Durobumps in the rear.
 

Attachments

  • 2E051D52-F1B5-4280-A5F6-F1D96E419A7B.jpg
    2E051D52-F1B5-4280-A5F6-F1D96E419A7B.jpg
    115.7 KB · Views: 242
  • 910C1EC9-E4F0-4984-8101-6BA32E9AAD38.jpg
    910C1EC9-E4F0-4984-8101-6BA32E9AAD38.jpg
    142.9 KB · Views: 243
The splash guards I made started to fall apart. Made some new one-piece ones out of some 60 mil hdpe sheet I have.
 

Attachments

  • 60547A03-AC30-453F-847A-673129FBDBDF.jpg
    60547A03-AC30-453F-847A-673129FBDBDF.jpg
    109.1 KB · Views: 228
  • 81391FB6-E83F-413A-8F31-064B4A252F3C.jpg
    81391FB6-E83F-413A-8F31-064B4A252F3C.jpg
    119.3 KB · Views: 229
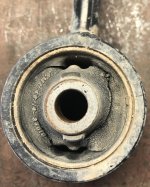
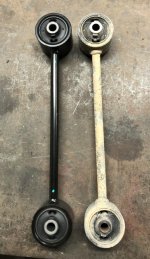
Rear upper control arm bushings were wasted. Swapped out with Moog factory style replacements for now.
 

Attachments

  • 54FA40DA-C3D2-4573-B150-4556663CED61.jpg
    54FA40DA-C3D2-4573-B150-4556663CED61.jpg
    134.6 KB · Views: 200
  • 1165FD8F-CCF2-4710-8354-FE00A3FD42CE.jpg
    1165FD8F-CCF2-4710-8354-FE00A3FD42CE.jpg
    123 KB · Views: 205
Purchased a Smittybilt XRC Gen2 9500 winch and True North Fab recovery points with frame tie-ins. For ease of installation and time I mounted the control box on the side. It contacts the hood release in the center so that won’t fly. On the side it allows the best access to the control lead. I plan on making a custom aluminum mount for it once I have a little more free time. And I know, my wiring looks like ass.

Was it easy to relocate that control box?
 
You can remove your old control arm bushings at your leisure now and install some Super Pro or comparable bushings. I went Super Pro.
 

Members online

Forum statistics

Threads
278,310
Messages
3,554,080
Members
248,016
Latest member
Advally Service

Trending content

Back
Top