Moog greasable ball joint install, and brake calipers. Lossa pictures

scottm

New member
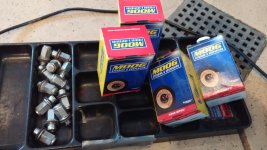
Probably a three-banana job, based on having to make my own adapters for the press, to make this work.

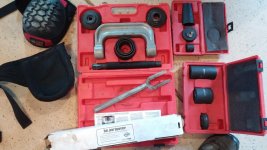
I rented this ball-joint press and adapters from Autozone, 27023, 27163, 27165. Knee-pads, unless you have a lift or thick carpet in your garage, these are a must. I never used the pickle fork.
 

Attachments
  • 2015-01-28 15.54.29.jpg
    2015-01-28 15.54.29.jpg
    134.7 KB · Views: 1,441
  • 2015-01-28 15.53.13.jpg
    2015-01-28 15.53.13.jpg
    134.2 KB · Views: 1,297
Last edited:
Register to hide this ad
It didn't take long to find stuck pistons in my brake caliper. Luckily Autozone has rebuilt Toyota calipers in stock. I always open the bleed screw when pushing brake pistons in, don't like pushing old fluid up.
 

Attachments

  • 2015-01-28 18.09.22.jpg
    2015-01-28 18.09.22.jpg
    134.2 KB · Views: 1,264
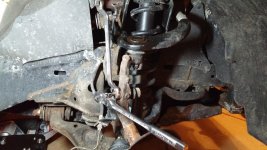
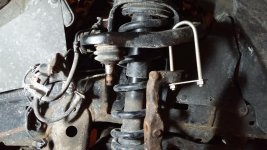
Take the upper bolt of this link arm out to give you room to work. Notice the ball-joint has been soaking in PB-Blaster for days, not sure if it really helped.
 

Attachments

  • 2015-01-28 19.22.19.jpg
    2015-01-28 19.22.19.jpg
    140.8 KB · Views: 1,263
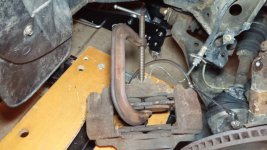
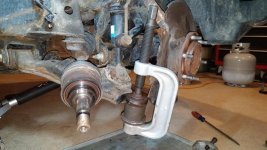
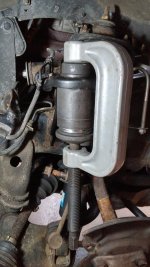
This little pittman press I picked up at a garage sale long ago worked perfectly for popping the ball-joint tapers out of the suspension arms top and bottom. You can rent them from Autozone. Clean and lube the threads, even if it is a rental, you don't want it to fail.
 

Attachments

  • 2015-01-28 20.31.23.jpg
    2015-01-28 20.31.23.jpg
    142.4 KB · Views: 1,256
  • 2015-01-28 20.41.35.jpg
    2015-01-28 20.41.35.jpg
    136.3 KB · Views: 1,261
Last edited:
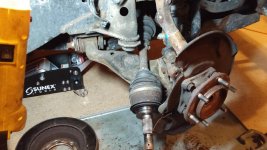
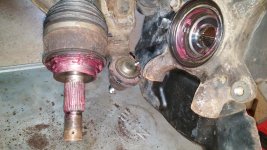
Get the axle out of the hub. If you didn't loosen the axle nut before taking the brake apart it will be very difficult at this stage. Yes I need new axles, but I'll wait 'till they're making noise.
 

Attachments

  • 2015-01-28 21.03.44.jpg
    2015-01-28 21.03.44.jpg
    139 KB · Views: 1,264
My exotic hanger to keep the steering knuckle out of the way.
 

Attachments

  • 2015-01-28 21.05.36.jpg
    2015-01-28 21.05.36.jpg
    140 KB · Views: 1,245
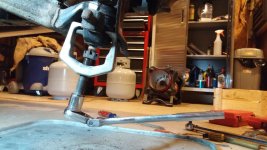
Playing with the ball joint press. These adapter rings/tubes don't quite fit, so this isn't going to work. I ended up making my own out of some structural tubing pieces someone had already cut by mistake at work, how convenient for me. The outside dimension of the flange on the ball-joint my adapter had to fit around is 2.35", if you want to make your own adapters. Or I can loan you these if you are anywhere from west Michigan to O'Hare.

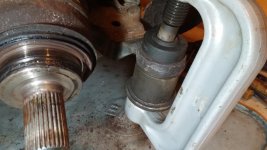
The lower ball joint presses in from underneath, so to remove I have to press down on the ball joint while pushing up on the suspension arm from around the ball joint. I need a piece of tubing that fits around the ball joint flange pretty close.
 

Attachments

  • 2015-01-28 21.17.36.jpg
    2015-01-28 21.17.36.jpg
    139.6 KB · Views: 1,281
Last edited:
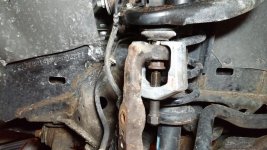
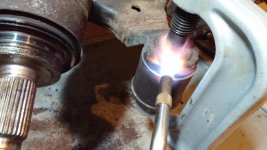
So this is my custom adapter tube, under the arm, with the ball-joint now inside it. The press will push the joint into my tube. My custom tube was thicker-wall than the regular ones, so I needed to grind a flat in one side to fit it into the bottom of the suspension arm. I'm applying a little heat with MAPP gas, after tightening the press until I thought it might snap. I lubed the press threads and cranked on it with a long wrench, was putting a lot of pressure on. I expected to hear a loud bang when it let go, nope, I just noticed the retaining-ring groove was no longer above flush, you can sort of see that in this pic.
 

Attachments

  • 2015-01-29 18.53.20.jpg
    2015-01-29 18.53.20.jpg
    128.9 KB · Views: 1,222
Pressing the new joint in, using the parts in the kits I rented. The tube underneath the ball joint fits around the rubber bellows and pressed the flange of the ball joint up into the arm. The cup-shaped adapter on top is deep enough for the ball joint top to press through the arm.
 

Attachments

  • 2015-01-29 19.05.54.jpg
    2015-01-29 19.05.54.jpg
    132.3 KB · Views: 1,230
Last edited:
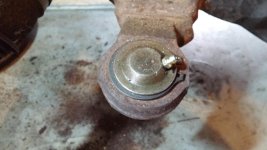
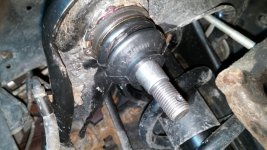
Put on the snap-ring, then put the zirc fitting in. Hopefully you put the hole facing forward or back, otherwise you'll never get a grease gun on these fittings.
 

Attachments

  • 2015-01-30 15.45.21.jpg
    2015-01-30 15.45.21.jpg
    131.8 KB · Views: 1,249
Pressing the upper ball joint out, it presses up and out, only needs to move an inch to be out of the arm. The adapter ring over the top flange is custom, you can't see the lower part of that ring but I cut down the outside diameter to fit into the profile of the upper suspension arm, and over the flange of the ball joint, because my custom tube was too thick-walled.
 

Attachments

  • 2015-01-30 15.20.31.jpg
    2015-01-30 15.20.31.jpg
    136.6 KB · Views: 1,231
Last edited:
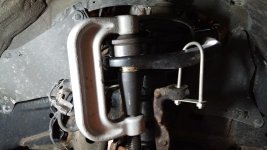
Pressing the new upper ball joint in from above, the new joint is pressing down inside the two tubes I made for this job. Here you can see the upper custom tube has a flat ground into the edge to fit into the bottom of the lower control arm, and the lower tube has the shiny step-down on the outer diameter to fit into the top of the upper control arm.
 

Attachments

  • 2015-01-30 15.33.50.jpg
    2015-01-30 15.33.50.jpg
    138.4 KB · Views: 1,248
Last edited:
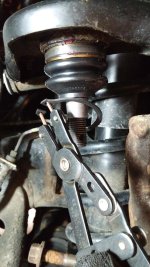
Installing this snap-ring is a pain, wish I'd brought my good snap-ring pliers home from work, but at least I have something. The red is grease, be sure you clean and grease the holes these go into, before pressing in the new ball joints.
 

Attachments

  • 2015-01-30 15.38.42.jpg
    2015-01-30 15.38.42.jpg
    139 KB · Views: 1,224
  • 2015-01-30 15.45.15.jpg
    2015-01-30 15.45.15.jpg
    138.5 KB · Views: 1,221
Last edited:
Clean and grease the hub and axle seals. I'll be replacing these axles before too long, so extra incentive for me to make it easier to take apart.
 

Attachments

  • 2015-01-30 16.33.48.jpg
    2015-01-30 16.33.48.jpg
    142.3 KB · Views: 1,206
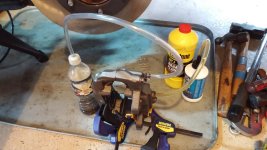
This is what my hokey bench-bleed setup looks like. The bottle on the bleed screw is what I always use when bleeding or pushing pistons in. The blue bottle of fresh fluid is what I use to squeeze fluid into the caliper. I can flow fluid in and out of the caliper this way, bubbles work their way out and up the hoses. I'll do this with the caliper mounted so I can quickly put the brake line on without losing too much fluid. The big pan under everything makes it easy to clean up all the rust, brake dust, and fluids, most autoparts places have these pans.
 

Attachments

  • 2015-01-31 15.40.09.jpg
    2015-01-31 15.40.09.jpg
    135 KB · Views: 1,207
Last edited:
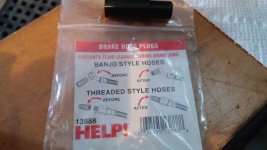
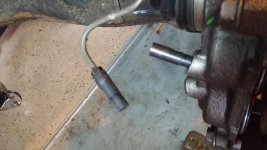
Brake line plugs from Autozone, they work most of the time.
 

Attachments

  • 2015-01-31 15.45.34.jpg
    2015-01-31 15.45.34.jpg
    128.9 KB · Views: 570
  • 2015-01-31 16.24.27.jpg
    2015-01-31 16.24.27.jpg
    136.4 KB · Views: 604
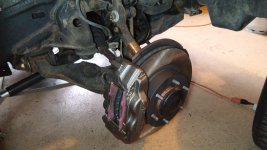
So shiny. I put copper anti-seize under the brake caliper. I used silicone grease on brake parts, dielectric grease. Threaded fasteners got thread-locker, more to keep out corrosion than anything else. After a drive around the block all the lugnuts were loose, probably because of the anti-seize under the caliper squishing out. Notice the brake pins are inserted from the back, to make them easier to push out next time. I use a long drift pin to drive them out, then vise-grips, life in the rust belt.
 

Attachments

  • 2015-02-01 10.16.58.jpg
    2015-02-01 10.16.58.jpg
    134.5 KB · Views: 580
how was the old ball joint? is it already loose inside? what's your mileage now?

The old ball joints weren't bad, and I'm at 145k now. There is still a slight clunk from the front end I can't identify, but at least now I know I won't lose a wheel on the highway. I did this more as preventative, knowing this is one of the very few weak points on the vehicle, and I plan on keeping it a long time.
 

Members online

Forum statistics

Threads
278,317
Messages
3,554,128
Members
248,016
Latest member
Advally Service

Trending content

Back
Top