My 4gunner restore, refurb and re-work

this is a dash cam? what kind of memory card does it support? and does it need to be plugged in full time to work? i kind of want a dash cam

Yes sir, a dash cam. It needs to be plugged in to work. Starting the truck turns on the cam. Takes a micro SD card.

I have always wanted one too. With the amount of crazy crap I have witnessed in my life, if some of it was on camera... WOW.
 
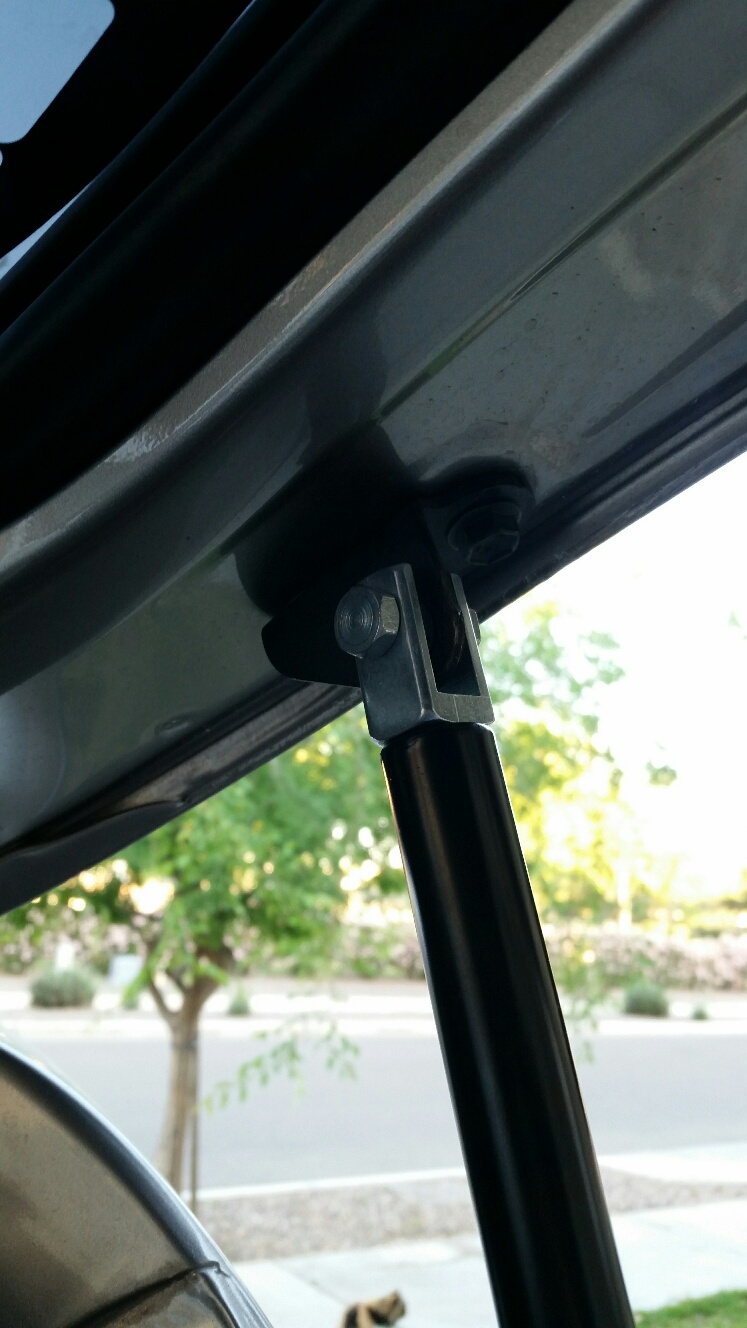
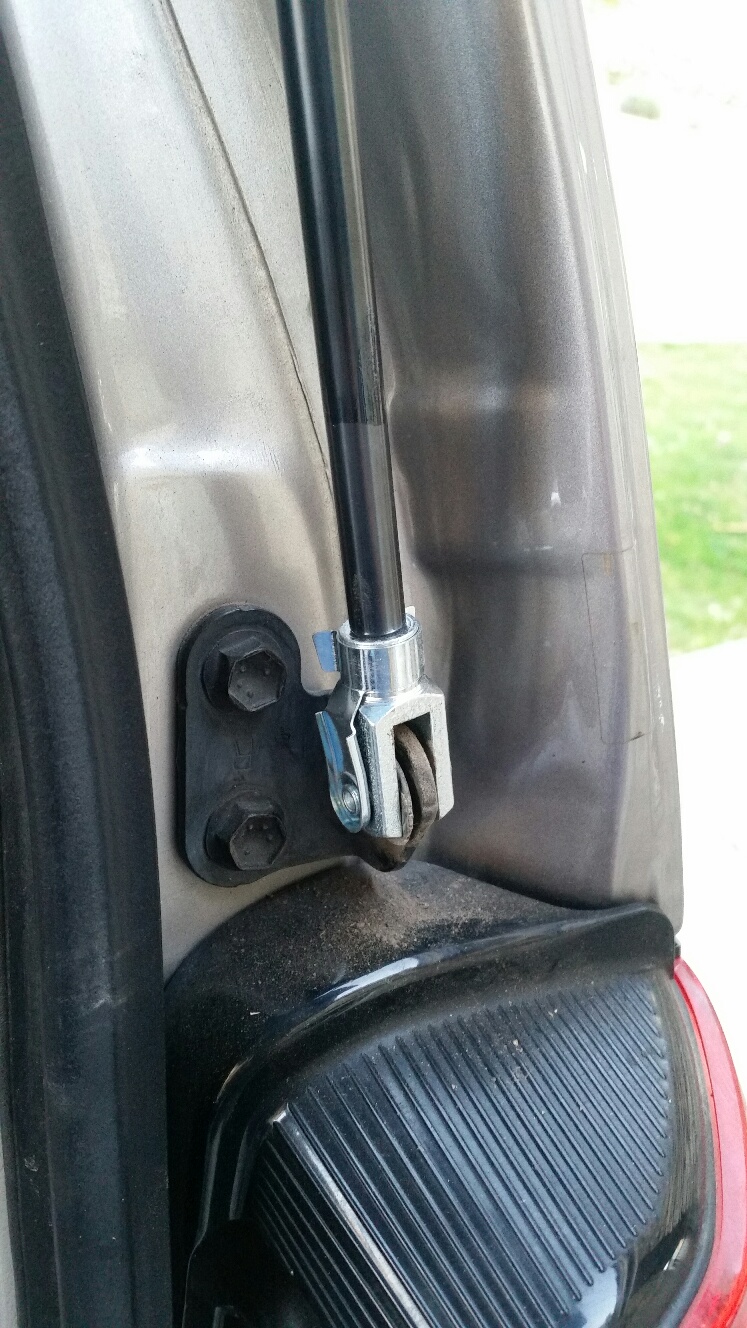
Installed new lift gate struts in both 4runners today. The old ones would hold the back open if you lifted by hand... but in winter, it would fall on your head.
http://www.amazon.com/4286-1996-2002-Liftgate-Lift-Supports/dp/B00SHZK0EQ?ie=UTF8&keywords=4286%20toyota%204runner&qid=1458917374&ref_=sr_1_1&sr=8-1

Total cost was $28 shipped per pair.

Pros:
- Dirt cheap! I could buy quite a few of these sets vs a single OEM set
- Good reviews
- limited lifetime warranty
- Plenty of lifting force. Rear gate actually lifts itself once you start to open it
- Will lift the gate even with the rear window down

Cons:
- Included hardware is cheap / zinc coated steel
- Lower install pin is nice / quick to install. Upper bolt attachment is a universal type fit that uses a bolt vs a pin. The con is... ugly and afraid it will rust after the zinc is worn through. Did I mention they were cheap and work? :reddance:

TOP%20LIFT.jpg


BOTTOM%20LIFT.jpg
 
Last edited:
Installed new lift gate struts in both 4runners today. The old ones would hold the back open if you lifted by hand... but in winter, it would fall on your head.
http://www.amazon.com/4286-1996-200...ota 4runner&qid=1458917374&ref_=sr_1_1&sr=8-1

Total cost was $28 shipped per pair.

Pros:
- Dirt cheap! I could buy quite a few of these sets vs a single OEM set
- Good reviews
- limited lifetime warranty
- Plenty of lifting force. Rear gate actually lifts itself once you start to open it
- Will lift the gate even with the rear window down

Cons:
- Included hardware is cheap / zinc coated steel
- Lower install pin is nice / quick to install. Upper bolt attachment is a universal type fit that uses a bolt vs a pin. The con is... ugly and afraid it will rust after the zinc is worn through. Did I mention they were cheap and work? :reddance:

TOP%20LIFT.jpg


BOTTOM%20LIFT.jpg
I had a huge smile when I read this post. Mine are worn too and that damn door has hit the top of my head a bunch of times LOL. Thanks for the link.
 
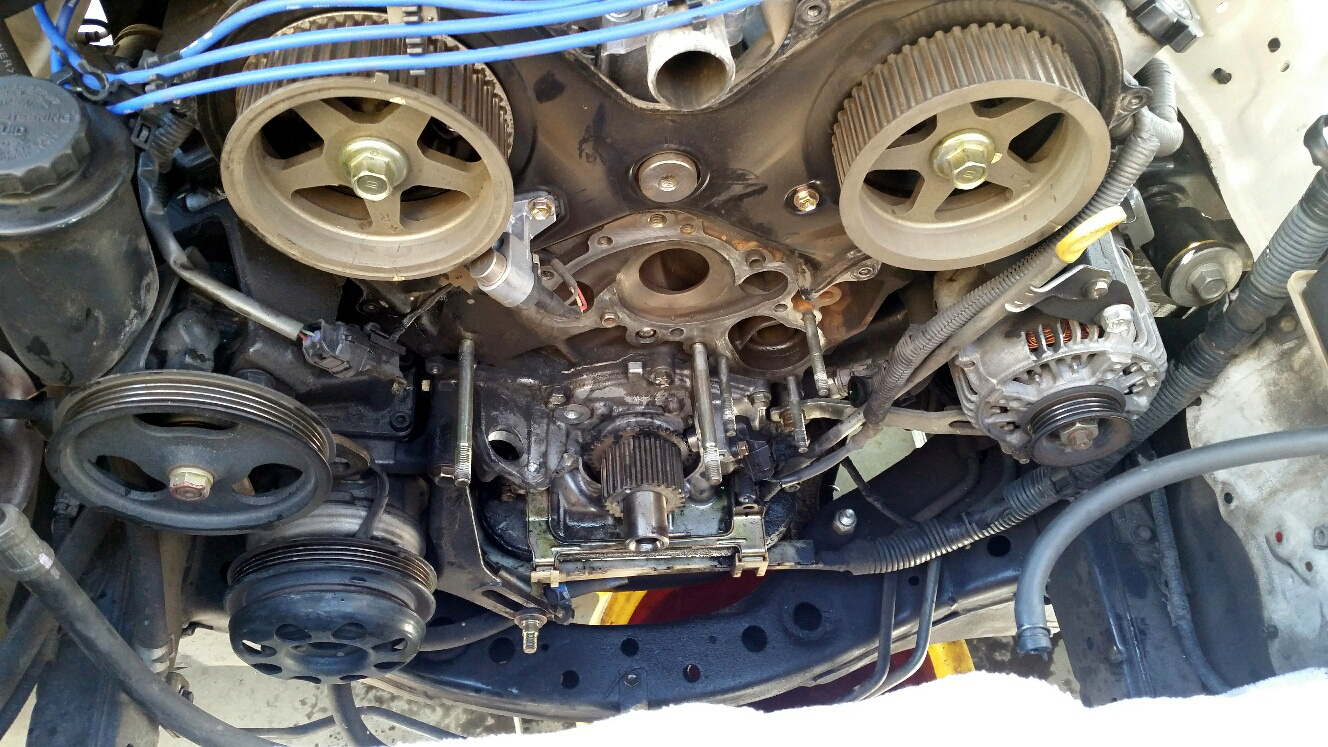
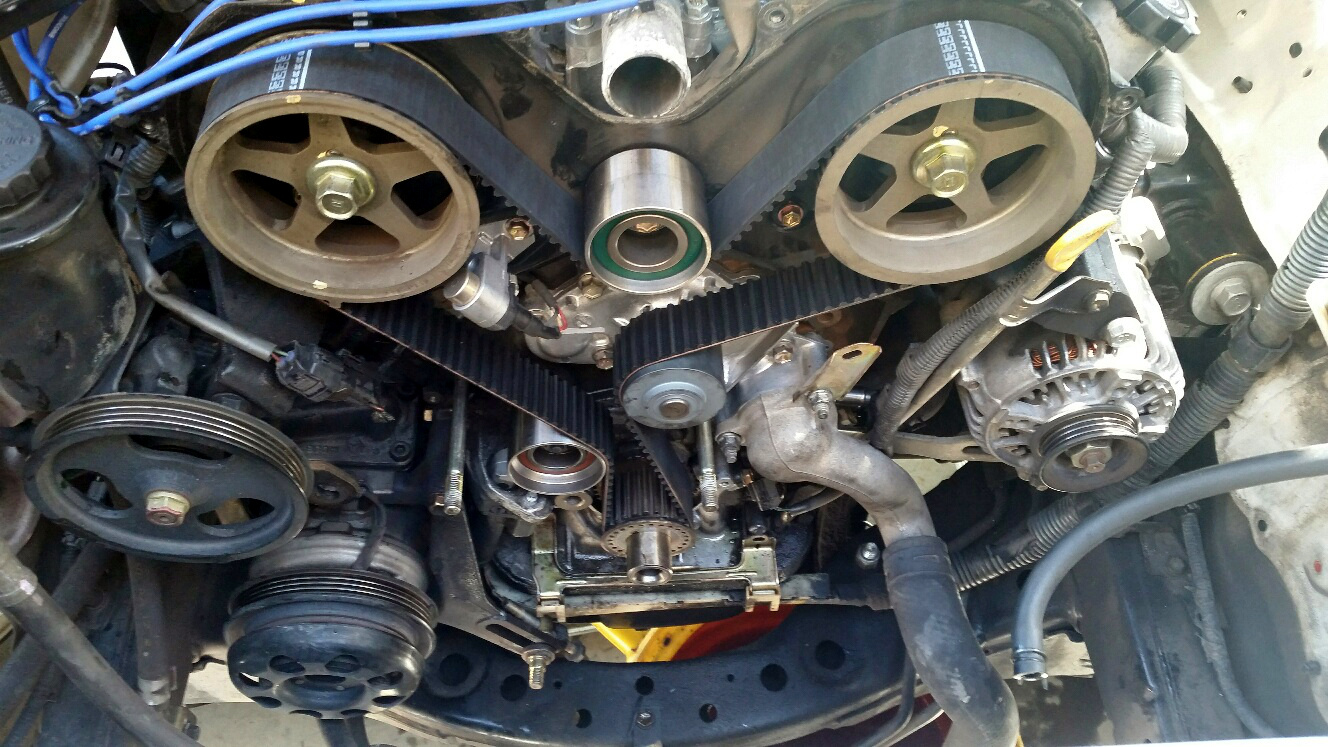
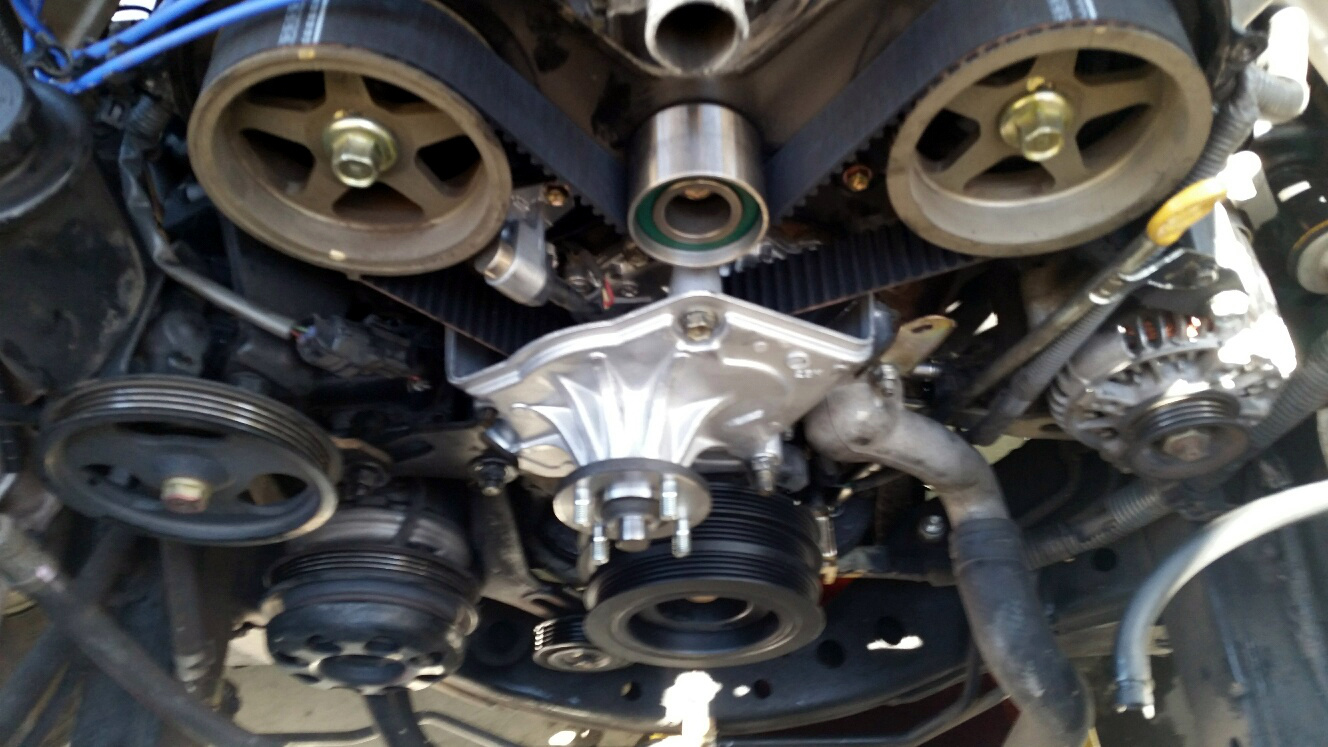
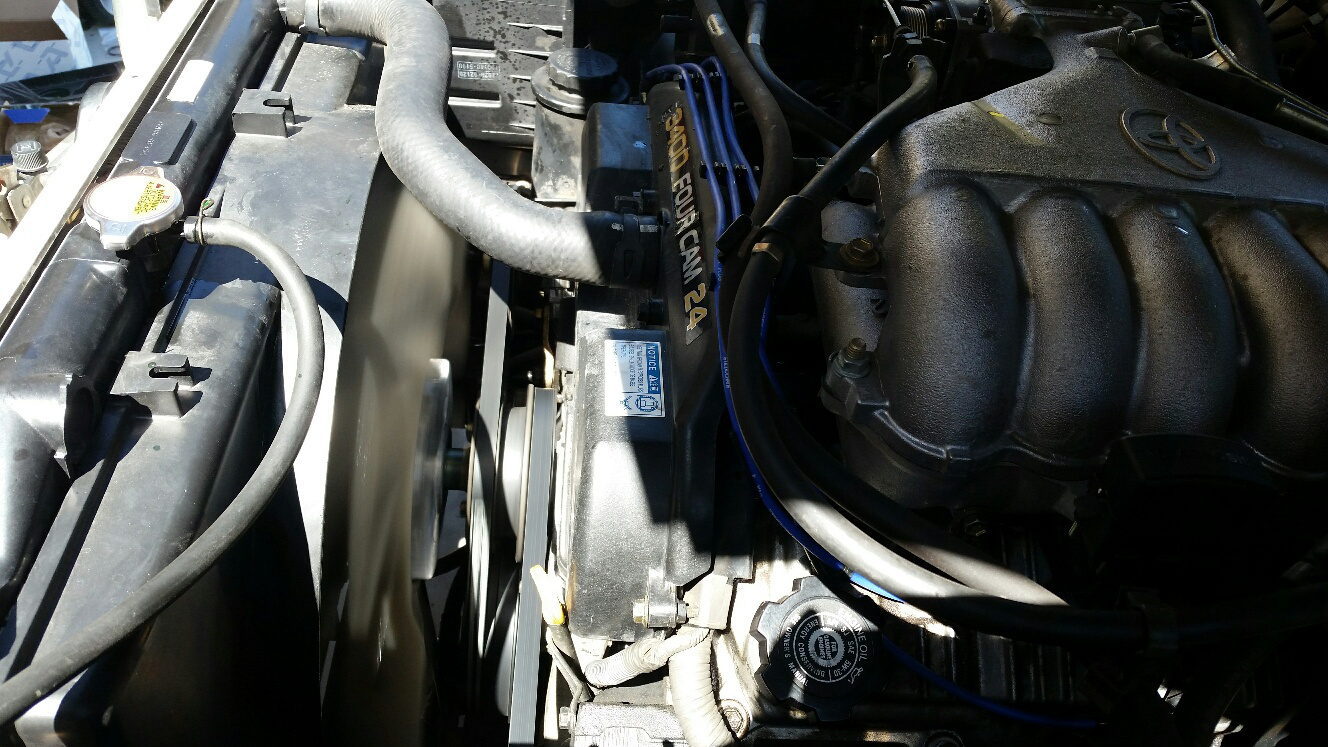
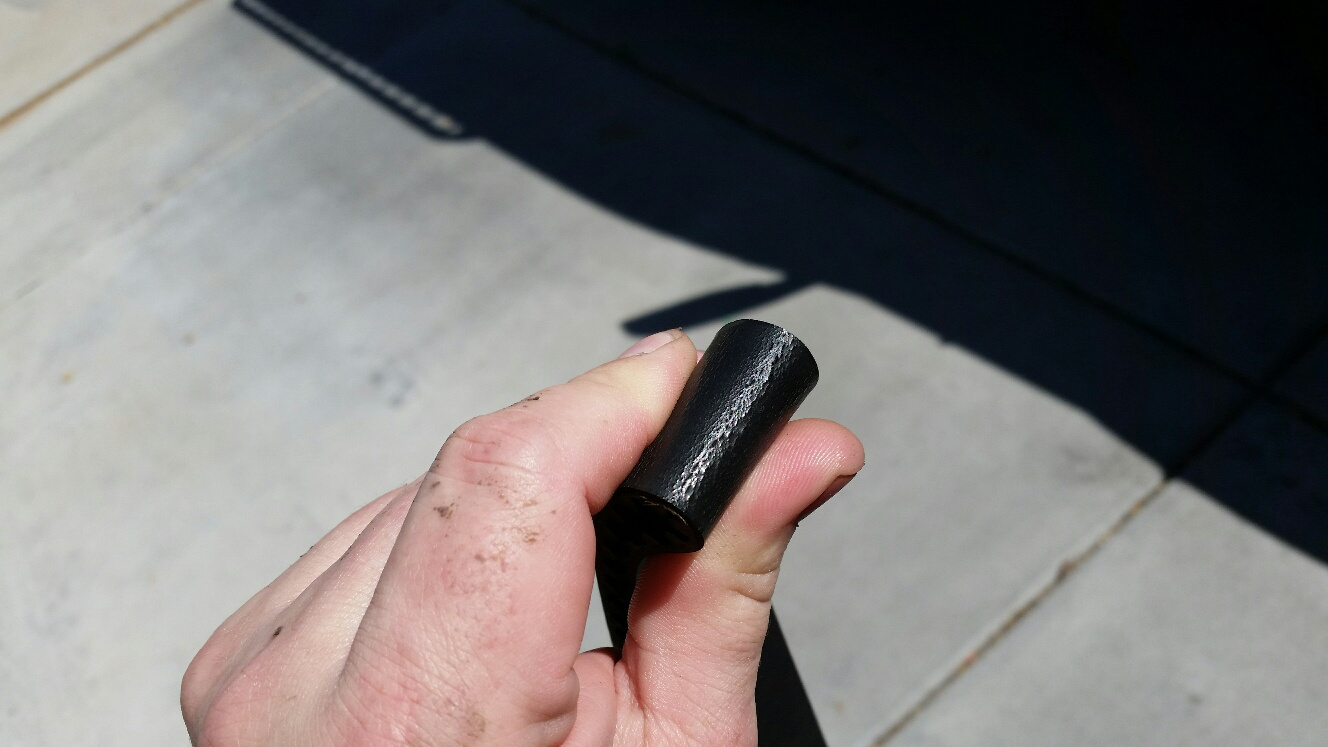
Knocked out the timing belt Saturday on the white gunner. Was not in a rush / 3.5 hours worth of work. All part numbers have been previously listed - but what was changed out for new during this process:
- Gates timing belt kit
- Gates belts
- WP, Tstat and rad cap (new rad a few K ago)
- Fan clutch + fan assembly (blade assembly)
- False waterpump / fan idler
- Crank pulley
- AC belt idler pulley
- Oil Dipstick o-ring
- Made sure to open all heater lines prior to draining coolant

Just a couple random photos of the work.

Looks pretty dirty but most of the black was just belt material that had come off over time. And the oil dipstick o-ring was leaking / will clean that later.
1.jpg


New belt, WP and such in place.
2.jpg


Almost done. Can see the new pulley, false WP / Fan idler
3.jpg


Purring like a kitten - runs smooth as glass!
4.jpg


Old belt was definitely due. Starting to show surface cracks on the outside edge AND on the teeth of the belt, the kevlar or aramid fibers were starting to shred in a few place as the rubber hard worn off to the point it was getting down to them. Car was not at risk reliability wise YET, but I would not have trusted this belt more than 20K more miles at the most.
5.jpg
 
Last edited:
Installed new lift gate struts in both 4runners today. The old ones would hold the back open if you lifted by hand... but in winter, it would fall on your head.
Amazon.com: 4286 Toyota 4Runner 1996-2002 Liftgate Lift Supports Strut, Set of 2: Automotive

Total cost was $28 shipped per pair.

Pros:
- Dirt cheap! I could buy quite a few of these sets vs a single OEM set
- Good reviews
- limited lifetime warranty
- Plenty of lifting force. Rear gate actually lifts itself once you start to open it
- Will lift the gate even with the rear window down

Cons:
- Included hardware is cheap / zinc coated steel
- Lower install pin is nice / quick to install. Upper bolt attachment is a universal type fit that uses a bolt vs a pin. The con is... ugly and afraid it will rust after the zinc is worn through. Did I mention they were cheap and work? :reddance:

I should do mine. Same for me in the winter... won't stay up the last 3 or 4". I got around it by just putting a bigger lift in!! Now it never hits my head! :clap2:
 
Now, I'm definitely on the newbie side of things, but I just finished rebuilding my heads and doing my TB/WP and associated bit, but I did not replace either my crank pulley, nor my fan clutch + assembly. I'm at 105xxx, is this something I should consider getting? I've used all OEM parts so far, and I wanted to do it right the first time. Engine sounds great, belts might need a little adjusting though.
Also, false water pump/fan idler?
 
Appreciated
At 105K, NO need to change out the fan clutch, crank pulley or fan idler (aka false WP). Those are more like 250K mile service items. Fan clutch can exceed that too but that is my personal limit on these items.

For most parts, buy Aisin brand (same as OEM toyota) such as water pumps, fan idlers, fan clutches. For belts, I use gates as they are simply excellent and meet or exceed OEM quality. Otherwise go OEM or Denso when possible.
 
Gotcha, thanks for the info.
And you're right, I could've done it cheaper and gotten the same quality of product. I just didn't know enough to make those choices, and for the layman it's hard to mess up if you just go OEM
 
Replaced the LBJ's on the wifes silver gunner today - they were due.

Recently, she was getting a pop when backing out of the driveway / wheels turned or turning at slow speeds. I was able to replicate it but could not locate the source. When I did the LBJ on the drivers side, I took off the castle nut (with an impact so I had no way to tell the torque on the bolt) on the TRE and set my 3 jaw puller on the TRE and it fell right out of the LBJ arm! :nono: Seems the toyota tech that did the warranty work did not torque the TRE properly. This sucker should have been rock solid and take some serious force to remove :rolleyes: Will see if the noise has gone away now.

Edit: Clunk still present. Troubleshooting this one is proving to be interesting.
 
Last edited:
Replaced the LBJ's on the wifes silver gunner today - they were due.

Recently, she was getting a pop when backing out of the driveway / wheels turned or turning at slow speeds. I was able to replicate it but could not locate the source. When I did the LBJ on the drivers side, I took off the castle nut (with an impact so I had no way to tell the torque on the bolt) on the TRE and set my 3 jaw puller on the TRE and it fell right out of the LBJ arm! :nono: Seems the toyota tech that did the warranty work did not torque the TRE properly. This sucker should have been rock solid and take some serious force to remove :rolleyes: Will see if the noise has gone away now.

Edit: Clunk still present. Troubleshooting this one is proving to be interesting.

Follow you religiously on here. Wanted to say thanks for so many walk throughs on maintenance. It has allowed me to do so much maintenance on my own and keep more of my hard earned money. I had that same popping and thought for sure it was the LBJ, not so much, ended up being the LCA bushings. Try your luck there. BTW I am in the east valley and I would love to tag along on some of your maintenance work in person and learn more.
 
Follow you religiously on here. Wanted to say thanks for so many walk throughs on maintenance. It has allowed me to do so much maintenance on my own and keep more of my hard earned money. I had that same popping and thought for sure it was the LBJ, not so much, ended up being the LCA bushings. Try your luck there. BTW I am in the east valley and I would love to tag along on some of your maintenance work in person and learn more.

Much appreciated - possibly when the new shop is done this winter :) On the clunking, I am now leaning towards a steering rack guide bushing. Since I have an 01 and 02, both have the latest versions and I can re-torque the existing and see if it helps. If it does, I will order new guide rack bushings. Man... hope that is it. I am used to diagnosing things to a science, this has been a bit of a hunt.
 
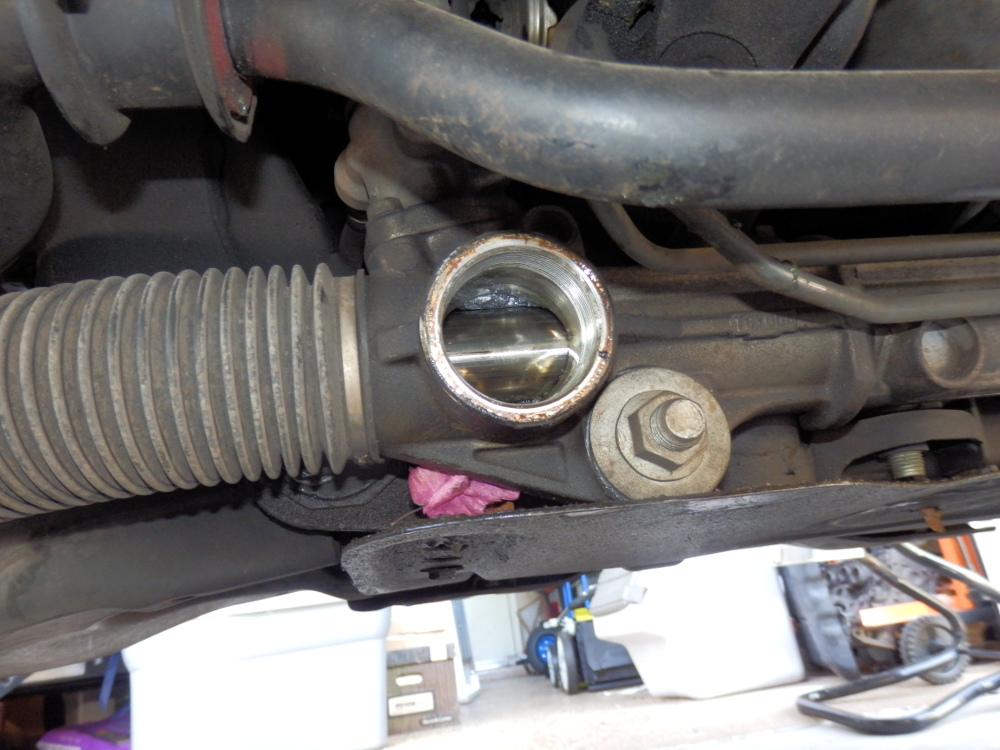
Post I made in the steering rack thread:

Wife is not home so I checked my guide bushing. All was excellent condition :)

Observations:

- I checked the default torque spec that my guide cap was sitting at by loosening the lock nut and setting my torque wrench to 18ft lbs as outlined. I was VERY surprised to find that I was able to rotate the threads well over a full turn, maybe more before reaching 18ft-lbs. This is on a rack that was not making any noise or having issues.
- I tried a second torque wrench to verify the spec and sure enough, 18ft lbs was very tight and bound the steering quite hard the further you turned the wheel. No chance of it returning to center.
- The rack bar is tapered to a centering point. This helps the rack return to center. So if you torque dead center at 18ft lbs, the spring is fully compressed. When you turn the wheel, the guide cannot back off and it binds. I did not try torquing to 18ft lbs when the wheel turned full lock one way or the other - then backing off as described, but I imagine it may work fine.
- When tightening the cap, you can feel when the cap makes contact with the spring and gets tighter and tighter. At a point, you will suddenly feel the back cap make contact with the guide - fully compressing the spring. This is WAY before 18ft lbs. At this point, I backed off 1/8 turn or maybe a tad more so I knew the cap / guide had a little bit of mechanical clearance.
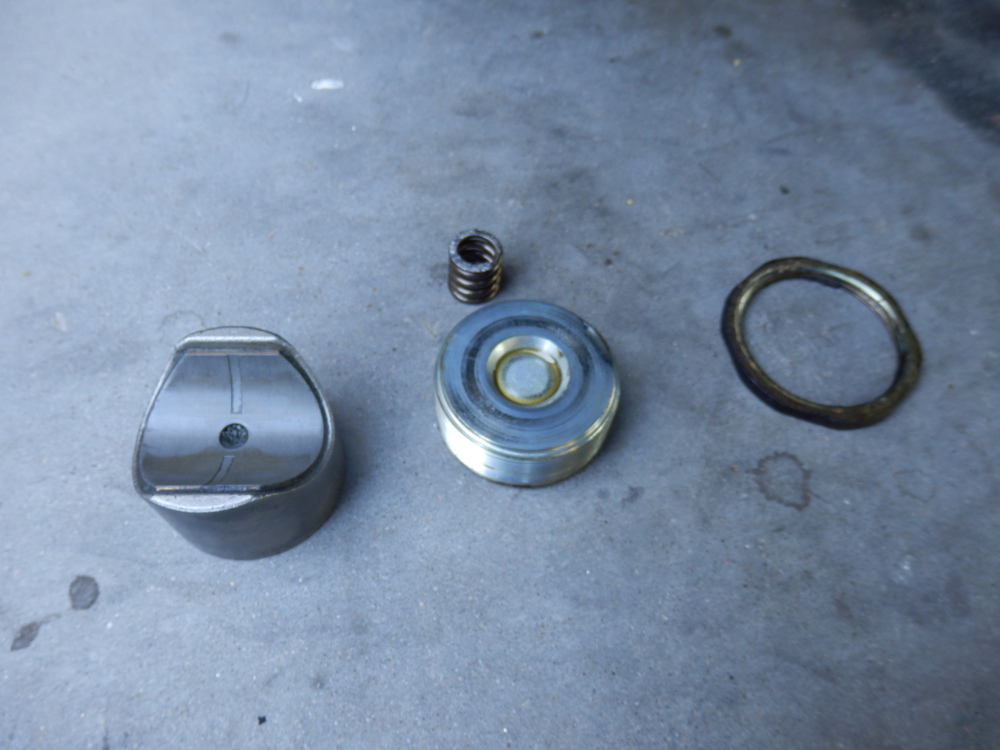
- At 240K miles on my 4runner, the guide had virtually ZERO wear. The actual mating surface is copper or brass with a coating, very similar to a crank or rod bearing. IMO with an 01-02, there is no need to buy replacement parts. I may change my opinion if I find wear in the wifes 02 tomorrow.

Jhelms quick instruction guide for the rack guide if you have an 01-02 or if you purchased the new style guide
- Turn the wheel 1/2-1 turn to the left (VERY IMPORTANT - DO NOT MAKE THE ADJUSTMENT WITH THE RACK CENTERED)
- Loosen the lock nut
- Use whatever tool you have to rotate the large hex cap clockwise until you feel it bind
- Back off of that setting 1/8 to 1/4 turn. This should get you on the money or close. Back off a little more if steering feels to tight

Oh... And the feel? Very nice and tight. Maybe a tad to much as the wheel is a little slow to return but I am good with it. Now I hope the clunk goes away with the wife's :)

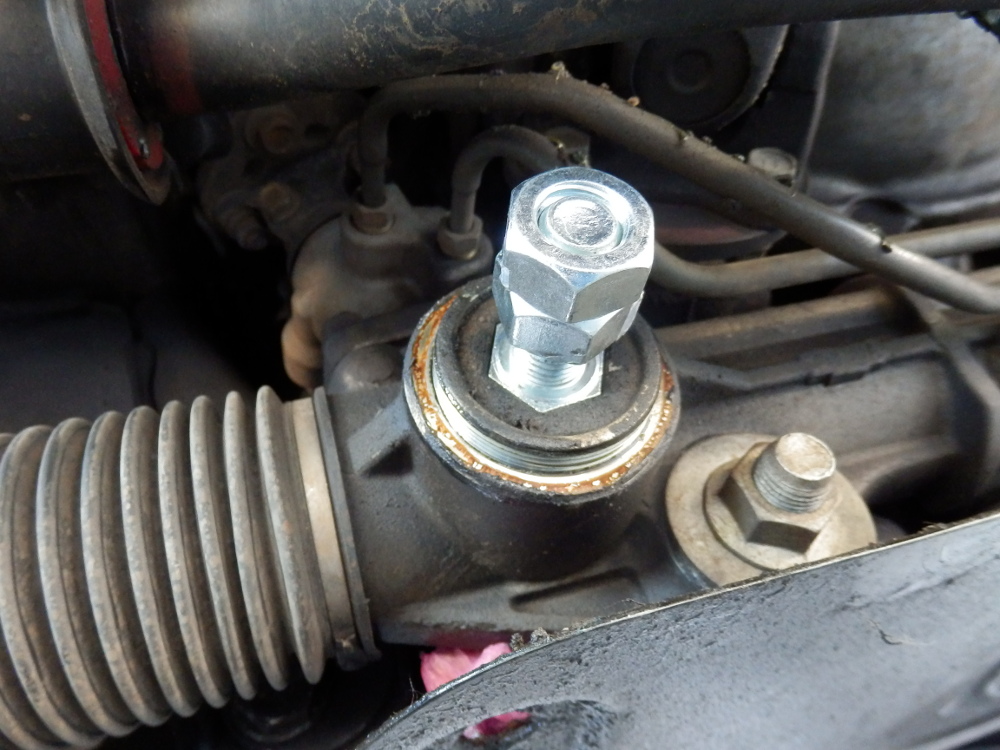
My little ghetto tool made from an M16 bolt and two M16 nuts. Head is a perfect fit.
GHETTO%20TOOL%202.JPG


Guide Removed:
GUIDE%20REMOVED.JPG


Guide at 240K miles:
guide%20at%20240K%20miles.JPG


Edit, checked the wife's steering rack guide and it was loose, but still did not resolve the clunk or alter it in any way. This is maddening! Search continues :)

 
Last edited:
is the clunk only heard when wheels are turned full lock or near it?u


Sent from my iPhone using Tapatalk
 
Notta, most of the time it is only 50-60% into the turn.

Im sure you probably know this one, but try greasing the steering stops. I thought my LBJ's were clunking and it turned out to be the steering stops. It wasn't even at full lock, could be 50-60deg turning into a driveway and it would do it. Greased them up and haven't heard a noise since.

The next problem I'm onto (hence why i'm here) is 'notchy' steering. When I turn the wheels, it is not a smooth motion. Could this be a symptom of the rack guide bushing? I'm going to give it a shot anyway so thanks for the guide!
 
Try torquing down the lower coilover bolt down more. The spec is like 109ft/lb (something like that) but I was having a clunk identical to yours and that's what fixed it. I actually torqued it higher than spec just to be sure and the clunk is completely gone.
 
Thanks guys - I will try both this weekend. VERY Irritated... I am used to diagnosing and finding a noise almost immediately... But it is good to get stumped every now and again :)
 
Jhelms quick instruction guide for the rack guide if you have an 01-02 or if you purchased the new style guide
- Turn the wheel 1/2-1 turn to the left (VERY IMPORTANT - DO NOT MAKE THE ADJUSTMENT WITH THE RACK CENTERED)
- Loosen the lock nut
- Use whatever tool you have to rotate the large hex cap clockwise until you feel it bind
- Back off of that setting 1/8 to 1/4 turn. This should get you on the money or close. Back off a little more if steering feels to tight

Why do you want to turn the steering wheel a half to full turn to the left before making the adjustment to the guide cap? Just wondering because I didn't see it mentioned in any of the instructional threads.
 
Because there is a centering spot (low spot) in the metal on the rack. This helps keep the car pointed straight when the wheel is centered. If you torque and set with the wheel centered, when you try to turn the wheel, it will bind hard. If you turn the wheel and set things as I stated / it will be dead on the first time.

You will read in other posts about people having a hard time getting it right / binding / re-setting over and over. If they follow my guide - it is a 1st time setup.
 

Members online

Forum statistics

Threads
278,316
Messages
3,554,111
Members
248,016
Latest member
Advally Service

Trending content

Back
Top