nglayton's Mod Thread

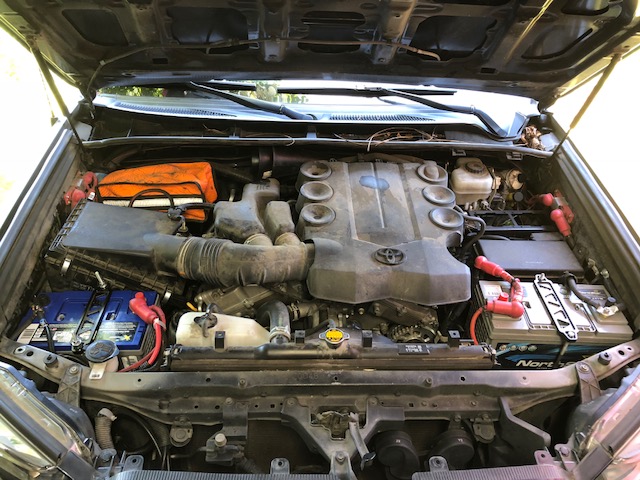
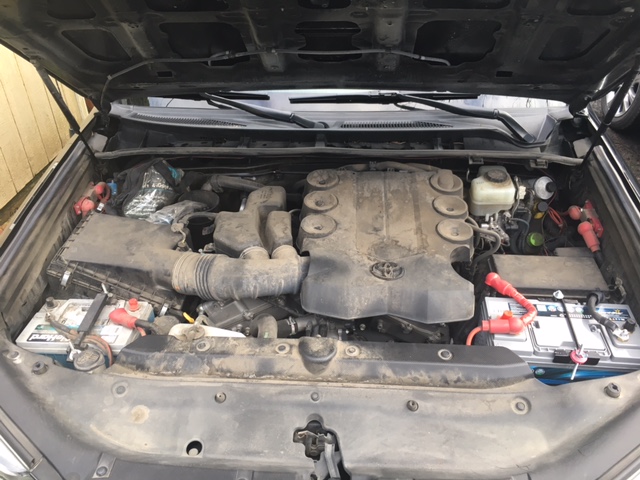
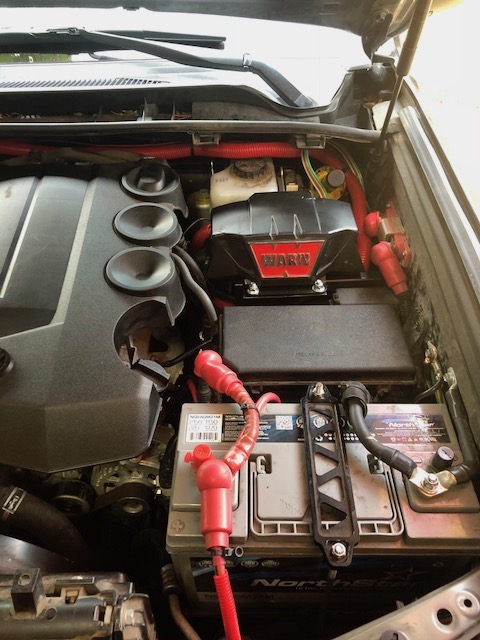
One more picture of the whole thing completed.
http://layton.org/t4r_org/img_b0722.jpg
img_b0722.jpg


I just need to put the air damn back in place and I'm good to go!!

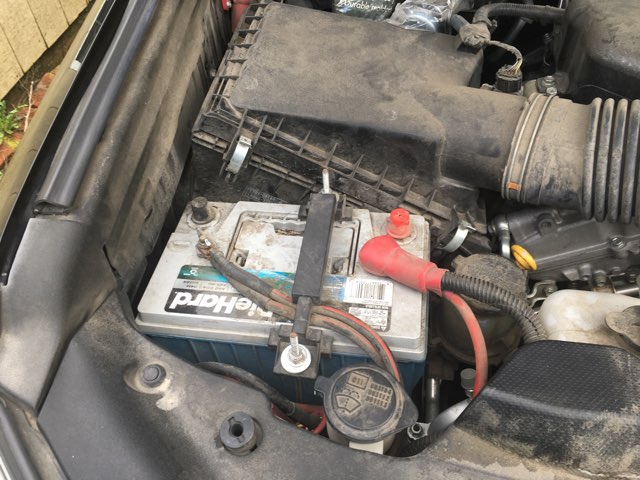
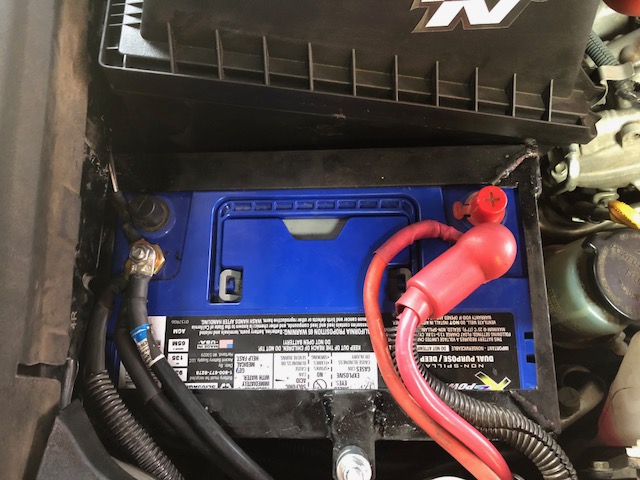
I now have plenty of juice with a group 31M main battery and a group 65M.
103 Ah and 1150 CCA for the 31M
74 Ah and 930 CCA for the 65M - made by Northstar X2 Power

A small upgrade from the group 34M that I had installed
60 Ah and 850 CCA

Next time instead of getting in a hurry and buying from batteries plus I will order another 65M direct from Northstar. My OCD with the colors not matching might get the best of me...

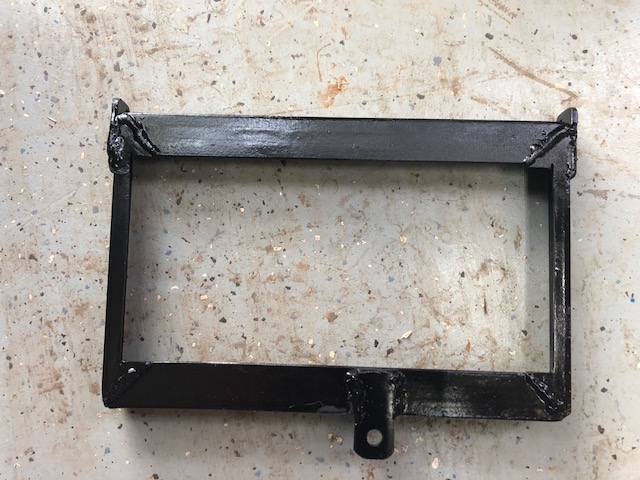
Edit: I made a few improvements --> Custom Group 65m Battery Tie Down
 
Last edited:
Download the software from this link on Amazon, if you don't have a cable this one should work so if you prefer you can just order the whole thing. I've actually used this software with 2 different cables purchased on ebay a couple years ago, so odds are good that pretty much any usb to OBD2 cable work.

To find the link to the software download look at the second picture that is a QRCode. Scan it with your phone and it's a link to the down load.

I found install instructions here.

Just in case....
Unzip the files from the download, and install Techstream. Launch it once and choose your language if needed. If you try to connect to vehicle you will have logon or have a valid serial number. So instead do this:

In the folder where you unzipped the download there is an extra mainmenu.exe file

Copy that extra MainMenu.exe application
Go to Techstream folder where you previously installed techstream --> Open File Location:Program files/Toyota diagnostics/Techstream/bin
Replace the copy MainMenu.exe with the extra one from above.

Now when you launch techstream and connect to your vehicle it should just connect.

I have successfully connected to my vehicle using a mac, VirtualBox and free windows 7 image downloaded legally from Microsoft...just remember when you launch virtual box to setup the USB connection first and then each launch you have to tell VB to connect to the USB device otherwise the host computer will retain control of the USB to OBD2 cable.

Once connected I was easily able to program any of the options available on my 4Runner.

Edit: If my instructions don't work for you, Here's another detailed post on how to get Techstream running

Hi Neal,

Okay, I think a got some of what's needed: Here's what happened in my effort to install/set-up the program...

I was able to use my old MINI-VCI j2534 OBD-ll cable and disc to load the firmware onto my WIN-10 64 laptop... total surprise (also, the drivers didn't install properly (according to a notification). But I still am encountering another problem... Here it's asking me for a LICENCE KEY (below)


This is the problem that I need to know what to do about; it's asking for a password below but I don't have one...


But I think there's a work-around because I'm having less trouble with this win-10 install/set-up than I was using my old win-7 w/virtual XP Mode app.

My Software vers. is "mvci-x64.reg" and "Techstream_Update _V8.10.
021.exe"

...will your procedure resolve my faults with this set-up?

rig, thanks, and cheers!
 
Hi Neal,

But I think there's a work-around because I'm having less trouble with this win-10 install/set-up than I was using my old win-7 w/virtual XP Mode app.

My Software vers. is "mvci-x64.reg" and "Techstream_Update _V8.10.
021.exe"

...will your procedure resolve my faults with this set-up?

rig, thanks, and cheers!

Hey Greg,
Yes, I think it will resolve the user name/password issue.

The key is this part.
In the folder where you unzipped the download there is an extra mainmenu.exe file

Copy that extra MainMenu.exe application
Go to Techstream folder where you previously installed techstream --> Open File Location:Program files/Toyota diagnostics/Techstream/bin
Replace the copy MainMenu.exe with the extra one from above.

I believe, that sadly these are all 'cracked' copies of techstream, even the one I linked to on Amazon. (not exactly on the up and up if you know what I mean)....and that the "extra" mainmenu.exe file has been modified to skip the password requirements, so when the application launches that entire logon screen is bypassed and the length of your 'user license' is set to year 9999 or something like that.
 
Trd cai

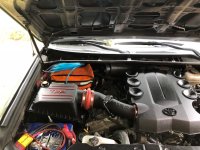
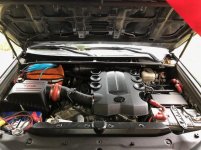
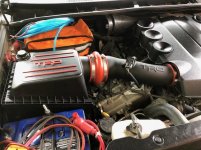
Decided to pull the trigger on this, purely on the looks aspect. I've been reading all the other install threads and just decided I like the way it looked enough to justify the cost.

I installed it today 4th of July because the wife and her honey-do list was getting out of hand. I figure what better way to celebrate the fact that my T4R just rolled over 100,000 miles than to install this. The nations birthday we can celebrate tonight and the honey-do list, well let's face it, it will always be there and will never be done.

A few things:

1) Your 4Runner already has the exact same type of CAI as we are installing. Intake air is sourced from:
EXACTLY THE SAME HOLE IN THE ENGINE BAY TO THE FENDER WELL as you are using now.
2) I did it purely for looks as stated above (I can afford it!)
3) Perhaps a little better MPG's will be a bonus
4) Perhaps a little better clearance for my second battery (65M) would be a bonus (:mad:negative on this, it's the same clearance)
5) I don't care about the possible extra HP or extra noise.
6) Read the other install threads and videos firsts. If you read thru them all you won't even need the instructions.
7) If you are going to do this, DO NOT buy the kit for $400+, order the parts separate and save yourself $150+ (yes, that is what I did) Conicelli Toyota of Conshohock | Genuine OEM Toyota Parts Use code (EBAY10) or (SHIP20) or (WELCOMEBACK10) for a discount.


Below are the part numbers you'll need.
  • PTR03-35090-AA
  • PTR03-35090-AF
  • PTR03-35090-AC
  • PTR03-89100-AA
  • PTR03-89100-AB
  • PTR03-34071
8) Silicone lube spray is for wimps, you don't need it.
9) If this takes you more than 2 hours to install, I suggest a career change, perhaps maybe even some night school. I was done in less the 1.5 hours and that included cleanup, washing and ArmorAll'ing all the other plastic parts under the hood so they looked as good as the TRD CAI did. This is an easy install.
10) I did fill the little hole in the side of the lower air box with the plastic plug from Lowes, because it was simple to do.
11) I DID NOT fill the elongated hole in the bottom of the lower air box with anything. Let it breath a little 1/4" opening of supposedly warmer air...who f'ing cares?
12) If you are worried about extra noise don't be. I can barely tell the difference. (IT DOESN'T HAVE A FRIGHTENING ROAR, as others have stated)
12) I have no whistle as others have stated in other threads.
13) It does feel a bit more responsive on the pedal.
14) I'm using the stock size 4runner K&N oiled filter...but we will see
15) It did not die on me on the first startup after install as others noted.

One last note, it looks better in pics than it does in person. I'll update this post after a few tanks full of gas and report back on mileage in a couple months.

**Update**
7/11/18
- I've had it installed for a week now. It is louder than my initial reaction of barely telling the difference. Not a deal breaker, no one else has mentioned it so I think I'm just listening for it right now. Bottom line is if had come this way from the factory, I probably wouldn't even be thinking about it right now. It's just that after 100k you kind of get used to how things sound. It's different now. I'm sure I will get used to it.

Here the MPG data I promised to post. (FYI, this is tracked on my cellphone app, not the T4R dash gauge)
These are the last 10 tanks fills MPG before install.

14.3
16.2
14.7
15.3
19.5
18.1
16.2
16.6
16.8
14.3
-------
16.2 Average MPG for the previous 10 tanks.

15.3 - This is the tank I transitioned on 3/4 TRD CAI - 1/4 Stock setup.

16.5 on the first full tank w/TRD CAI
17.3 on the second tank.
14.9
15.0 - FYI, for the first time since my first tank in 2011, the trip computer showed a range of over 400 miles.
15.0
16.3
15.3
17.1
15.3
15.7
-------
15.8 - getting closer after 10 tank averages. - .4 mpg loss.

I would like to note that interestingly any tank over 16 was a lot of highway miles, any tank <=15 I was pulling a trailer for a good portion of the tank.

I'll keep tracking it for a few more tanks and see what happens.

I've been trying to get that damn computer to show a range of over 400 since my second tank. It's like a unicorn. I guess it was a fluke.

FYI, I rarely ever fill my rig until the idiot fuel light comes on. (There are exceptions to this 5-6 times a year.)
So these are in the 19-21 gallon fill range that run in the 300'ish mile range per tank.

 

Attachments

  • IMG_0855.jpg
    IMG_0855.jpg
    113 KB · Views: 1,143
  • IMG_0856.jpg
    IMG_0856.jpg
    88 KB · Views: 1,103
  • IMG_0857.jpg
    IMG_0857.jpg
    94 KB · Views: 1,121
Last edited:
ARB Compressor Install Update

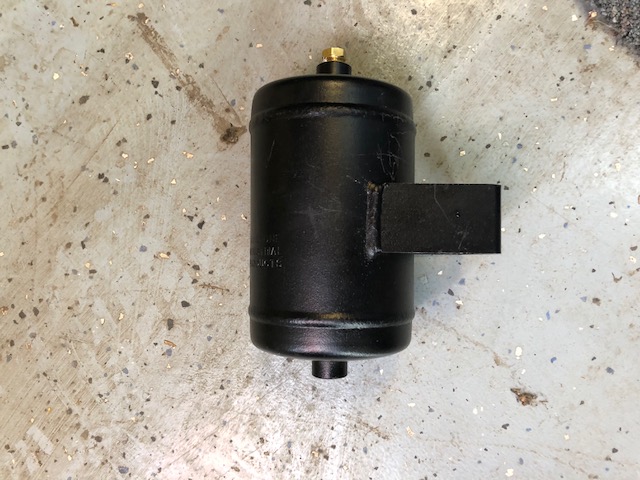
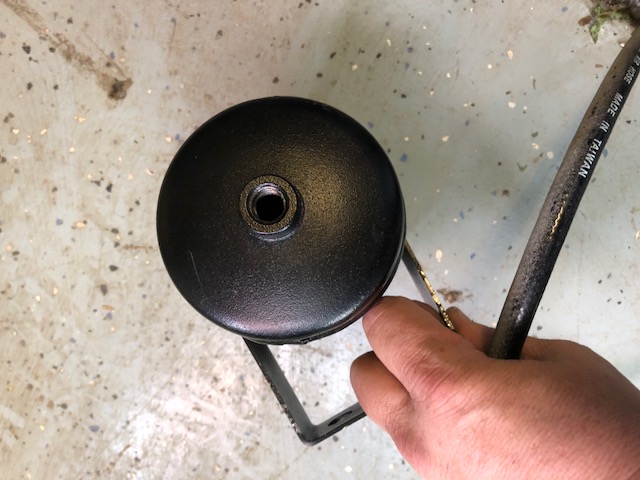
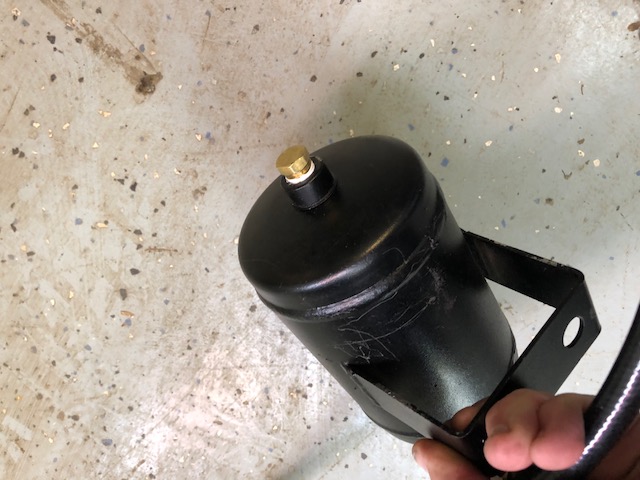
After running my compressor install for a year, I decided I needed to make an update. It worked great the way it was, but I decided I needed to add a small tank and the pressure shut off switch. If you missed my original install check here

So I bought this tank from amazon

img_0849.jpg

img_0850.jpg

img_0851.jpg


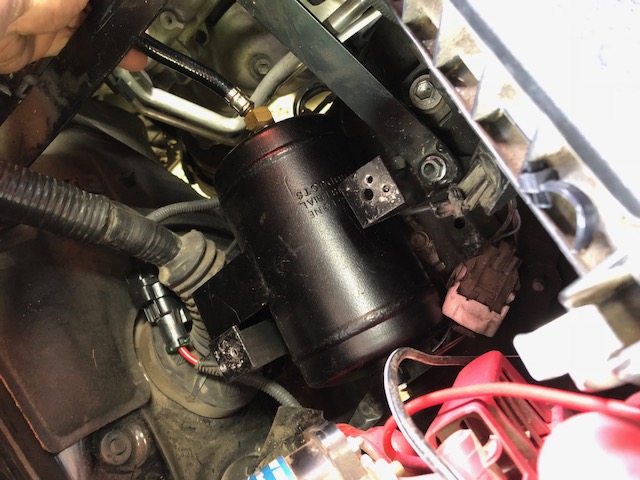
I pulled the compressor and made a test fit underneath. It fit just fine after I removed the wire harness bracket underneath. I simple removed the bracket and rerouted the wires with a zip tie so they didn't require the bracket. The created enough space below the compressor that I could fit the tank.

img_0852.jpg

For now I just zip tied the tank down to get everything in place an test it for a bit. I moved the power switch then promptly broke it so I need to get another one ordered and installed before this is complete.
img_0853.jpg


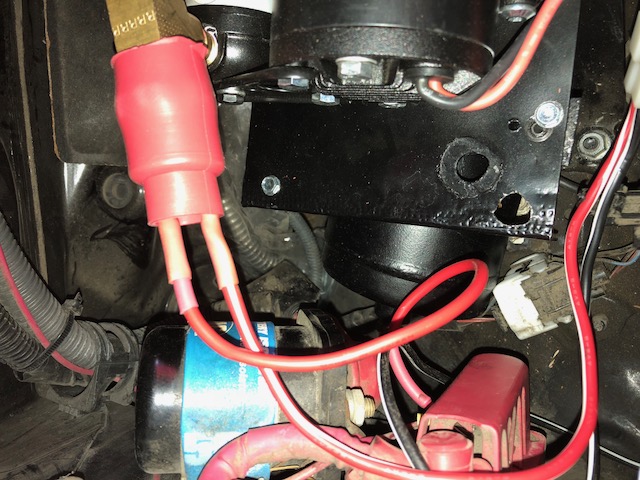
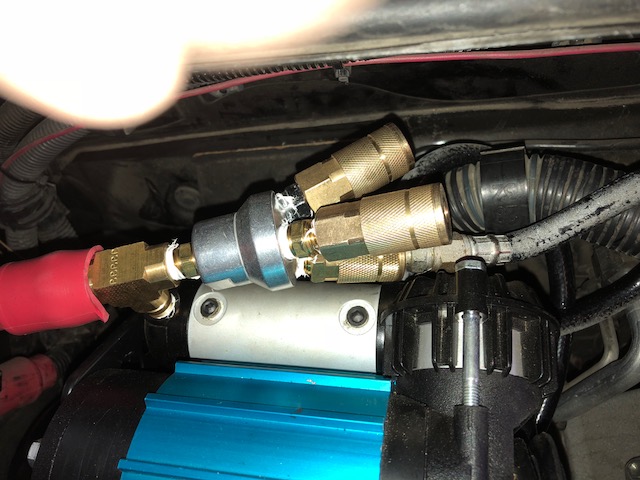
I added the pressure switch into the harness and for now will just use the quick connect to power it off and on.

I added a few air hose fittings on the compressor and attached the tank directly to one of them. The air hose is too long, but it was the shortest one I had on hand. Until I get the replacement power switch it's fine. Once the switch shows up and a shorter hose, I will swap them out.

img_0854.jpg


Now I have a small buffer of airtank and no pop-off valve. Once the tank reaches 100 lbs the cutoff switch kills the power to the compressor. When the pressure falls below 70 it kicks back on.

It all fits nice and neat under the bag just like before and you would never know I had a small tank under there.
 

Attachments

  • IMG_0857.jpg
    IMG_0857.jpg
    94 KB · Views: 1,055
Last edited:
Custom Group 65m Battery Tie Down

A while back I installed a new second battery. I replaced the group 35m with a bigger group 65m battery. You can see the details here --> Dual Battery Upgrade

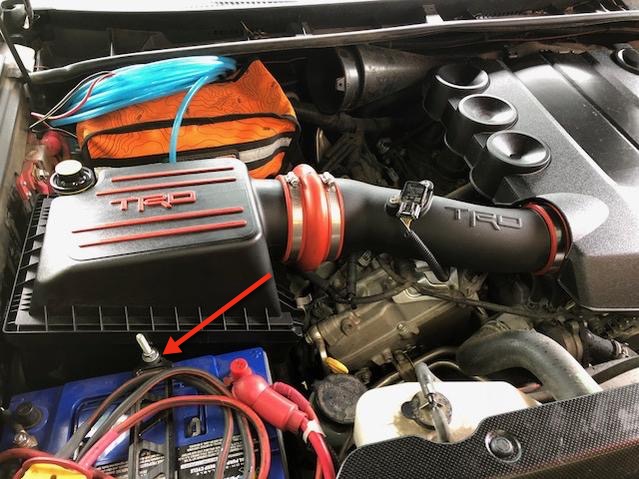
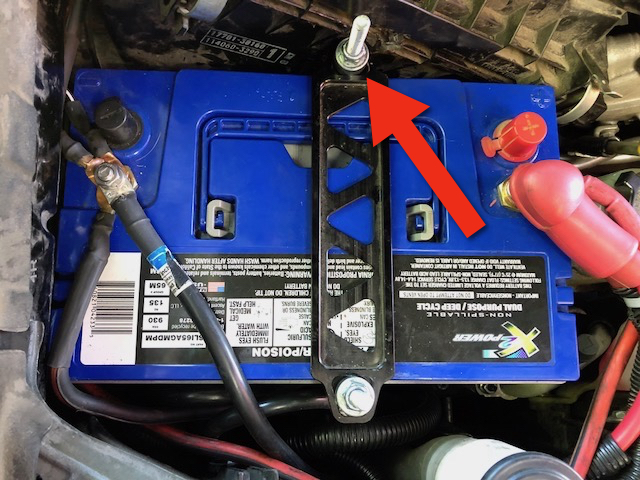
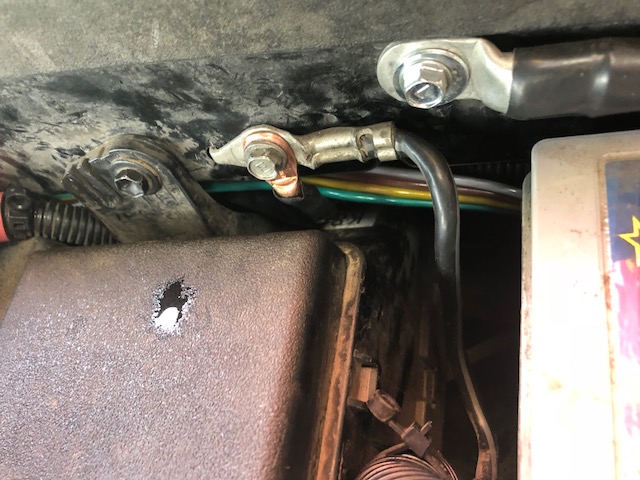
It's a pretty tight fit and I wasn't really happy with the battery tie down situation. You can't really see it very well, but if you look at the RED arrow in these two pictures, you can see where the problem is. The new battery is pretty big and the airbox is crowded up next to it. The tie down sticks out about an inch from the edge of the battery.

It jams into the side of the airbox and actually deforms the box because it's so tight. This happens with both the standard factory airbox and the TRD CAI. One of the reasons I installed the TRD CAI box was to see if I could gain some more clearance space in this area. (The answer is NO, they are the same basic size)

finished.jpg

finishedx.jpg


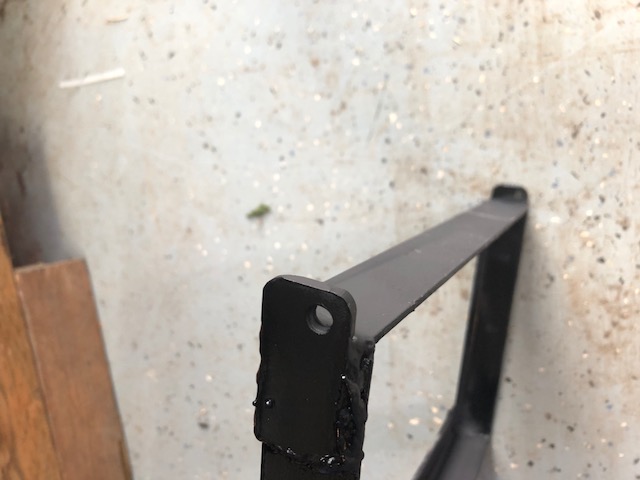
After looking a multiple battery boxes and tie downs and finding nothing that will hold a group 65m I decided I needed to make my own custom tie down and a custom way to tighten it in place.

I fired up the welder and the cutoff saw and whipped up a bracket to hold my 65m down. I added a couple of tabs to attach my bolts and turnbuckles to. I'll spare you all the in progress pics and just show the finished product. The welds aren't perfect but not bad for a weekend welder.....
IMG_0914.jpg

IMG_0915.jpg


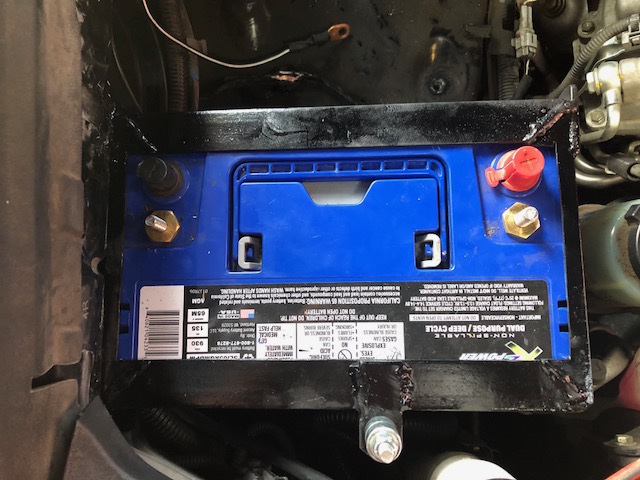
This custom bracket form fits down on the 65m battery. I actually have to install it on the battery before I lower the battery into the engine bay, because once the battery is sitting in place there is very little wiggle room.
IMG_0916.jpg


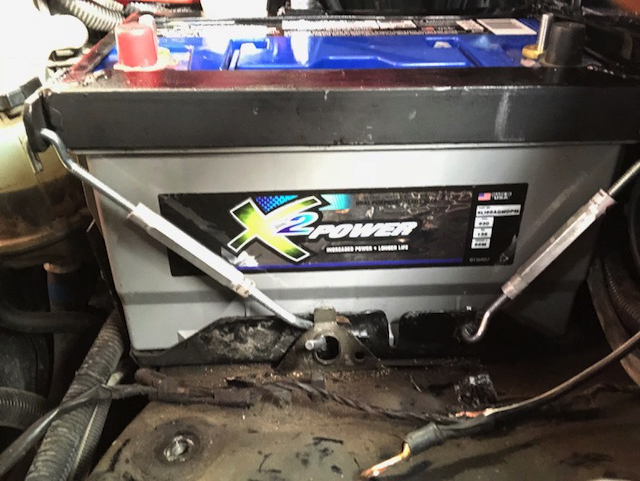
Then I installed the turnbuckles I picked up from the local hardware store and tightened them down. The airbox actually tapers away from the battery below the lid, the battery also tapers away from the airbox, so these turnbuckles being down low aren't even touching the airbox. It's only above the height of the battery where the traditional tie down bolt would be is where the conflict is.
IMG_0919.jpg


Here's the finished look, now the airbox is flush along the length of the battery and not deformed. I cranked down the turnbuckles and the front bolt tight and this battery isn't going anywhere.
IMG_0920.jpg


A couple of minor negatives still:
To remove the battery, I have to pull the airbox. (completely remove it)
The bracket for the turnbuckle on the engine side still hits the airbox. Since taking the pics I cut the upper half off leaving just enough for the turnbuckle to grab. It's better, but if I ever decide to remake this bracket I will drop that tab down another inch to get more clearance.

Still 100% better than before with no deformed airbox or rubbing.
 
Last edited:
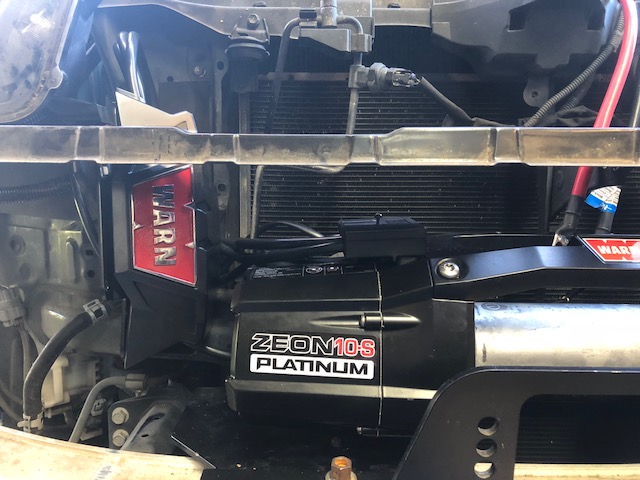
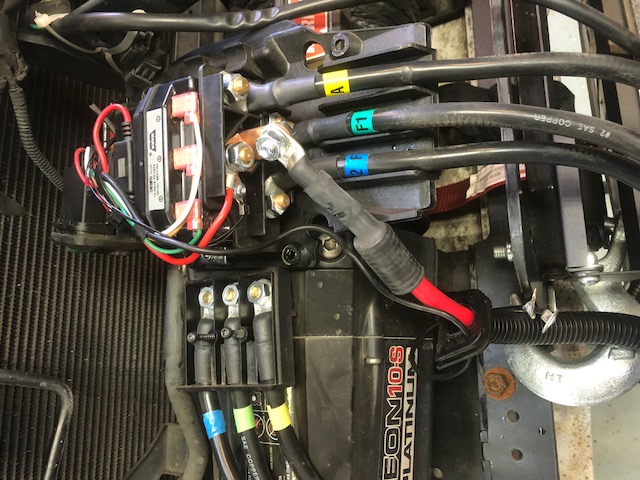
Warn ZEON 10-S Platinum Control pack relocation

If you read through my Hidden Winch Install thread towards the end of the post, I was unhappy with the spot where I had to mount the control module to get clearance.

IMG_0019.jpg


I finally got around to relocating it.

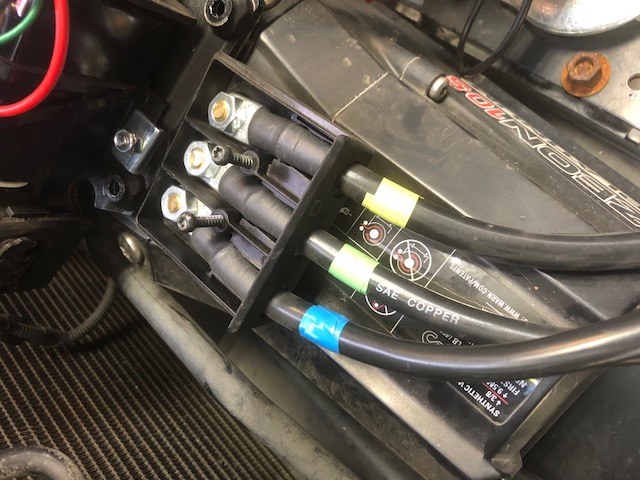
It's a pretty simple task. I just needed longer cable to move it up to the engine bay. Taking the bumper cover off and routing the cables isn't too bad, but finding a suitable mount point is probably the biggest issue. I ended up using my Shrockworks Power Distribution mount for the Warn control pack.


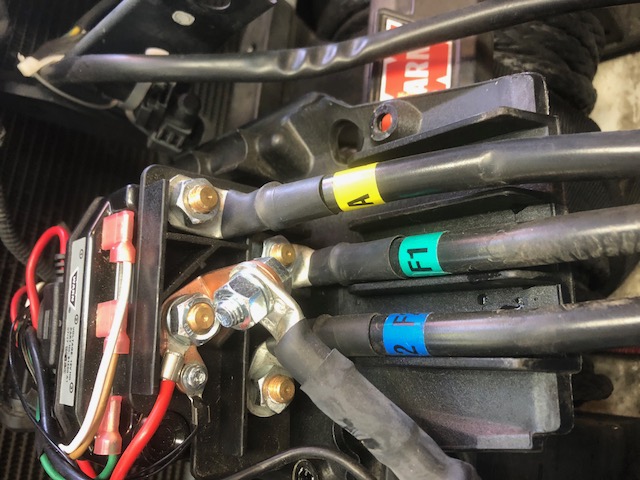
It's just a matter of taking the module apart and putting in longer cables.
IMG_0931.jpg

IMG_0932.jpg

IMG_0933.jpg


The Shrockworks Power Distribution mount is not wide enough to hold the control pack so I had to add a piece of steel and create my own mount point on top of the Shrockworks bracket. I used the Warn relocation bracket with the extra steel to make a good spot to bolt it all down. The Warn control pack is a pain in the butt as you can't take the cover off without access to the bottom, so it all has to be able to come apart to service it if needed.

The clearance is tight with every thing in this area now.
IMG_0940.jpg


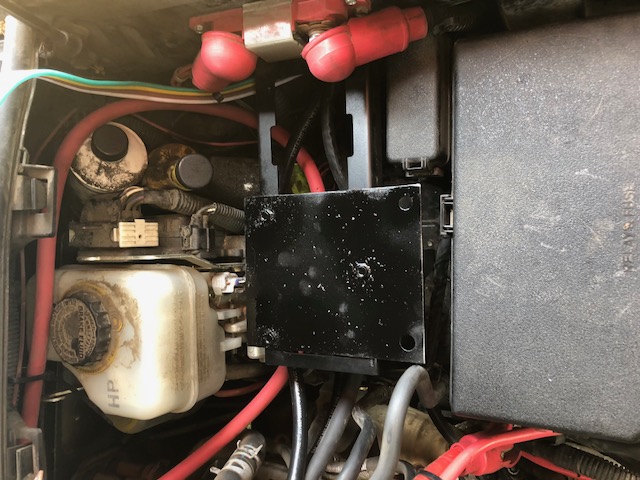
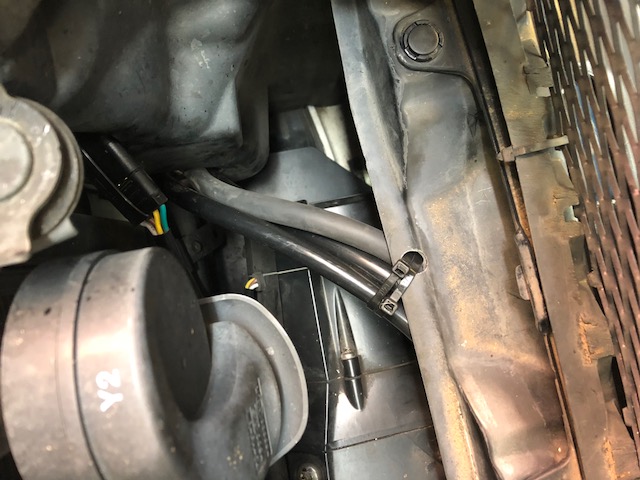
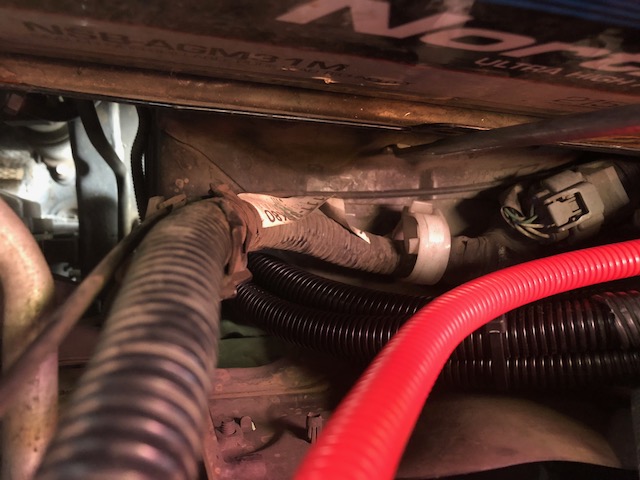
Then it's just a matter of snaking the 3 control cables and the one positive power cable to the new mount location. Here's a couple random shots of it snaking around the engine bay.
IMG_0941.jpg

IMG_0942.jpg

IMG_0943.jpg


Here's the finish look, more accessible when I need to turn it on or add lights etc.
IMG_0945 copy.jpg
 
Last edited:
So I've been running this DC Power XP-270 alternator for about 2 weeks now. Time for a couple of minor observations.

1) the engine idles at a lower speed now and because if this, it's quieter when just sitting an running. I'm sure this is just a small difference and can be adjusted, but I also notice the lower idle speed when I'm at stop signs and start to go. It almost stumbles when I step on the gas, almost.

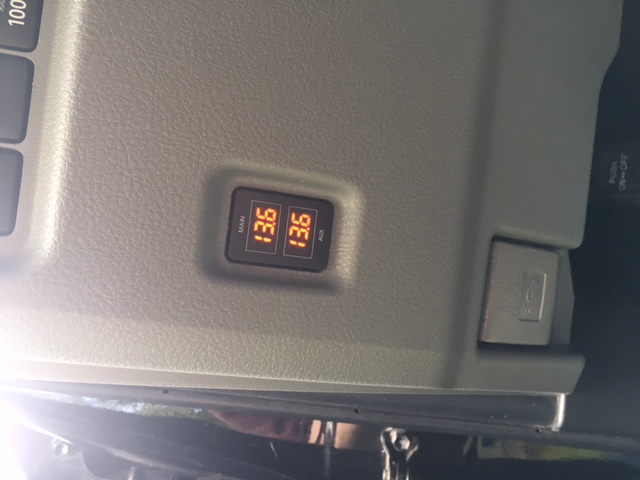
2) Before the upgrade, my voltage meter would run at 13.8v or so for a minute or so, then start dropping down to 13.2, 12.8, and after 15 minutes or so would hover around 12.4 or 12.3. After the upgrade, the system will run at 13.8 or 13.9, then it starts dropping down, 13.6, 13.4, however it has never in the 2 weeks I've been watching it gone below 13.3. I'll keep watching it and report any other changes.

3) Effect on gas mileage? - not enough data yet. But with the increased drag slowing the idle, I'm curious.

Any updates on this? Has the MPG decreased?
 
Any updates on this? Has the MPG decreased?

There was no noticeable difference on MPG after this install. I don't even notice the idle speed now, It worked it self out. or more likely I was over reacting since I just installed it at the time of the post.

I haven't checked in awhile, but I will....I still don't believe it ever runs below 13v. I will double check this though.
 
Last edited:
Oops, I think I misread your join date as your last post date. My mistake. Always like to follow other NWers!
 
Bulb Info

Shameless steal from rigtec - reposting in my own thread so I can find it when I want it.

Low Beam Head Light Bulb Size: H11
High Beam Head Light Bulb Size: 9005
Parking Light Bulb Size: 2825
Front Turn Signal Light Bulb Size: 4157NA
Rear Turn Signal Light Bulb Size: 992 (7440A)
Tail Light Bulb Size: 7443
Stop Light Bulb Size: 7443
High Mount Stop Light Bulb Size: 921
Fog/Driving Light Bulb Size: H11
License Plate Light Bulb Size: 168
Back Up Light Bulb Size: 921
Front Sidemarker Light Bulb Size: 2825
Rear Sidemarker Light Bulb Size: 7443
Map Light Bulb Size: 168
Dome Light Bulb Size: DE3175
Step/Courtesy Light Bulb Size: 168 or 175
Trunk/Cargo Area Light Bulb Size: DE3175
Daytime Running Light Bulb Size: 4157NA


H11 to H9 conversion
http://www.toyota-4runner.org/5th-g...version-h11-h9-9005-9011-a-4.html#post2836145
 
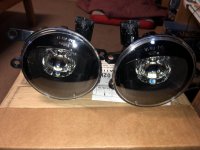
Toyota OEM LED fog lights

I'm installing these shortly - More Pics to come
 

Attachments

  • IMG_1917.jpg
    IMG_1917.jpg
    131.4 KB · Views: 1,070
  • IMG_1918.jpg
    IMG_1918.jpg
    133.7 KB · Views: 1,093
  • IMG_1919.jpg
    IMG_1919.jpg
    132.3 KB · Views: 1,085
Last edited:
Toyota OEM LED fog lights - Part 2

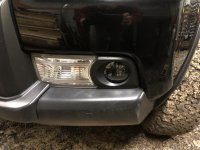
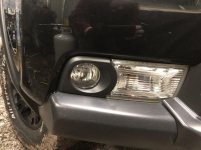
I can confirm that these will fit a 2011 Trail. (Not perfect fit but they fit close enough)
Probably the same for all 2010-2012 models before the snout change.

I can confirm that this can also be done WITHOUT removing any part of the fender liner, reaching up from underneath.
Probably the same for all 2010-2012 models before the snout change.

I can confirm total install time of 30 minutes or less which includes taking 12 before/after/comparison pictures.
Your mileage may very on this depending on your mad skillz...

Tools needed one (1) short Phillips Head screw driver. These are held in place with 1, yes ONE 3/4" long Phillips screw on the outside edge.
The 2 tabs on the inner edge tuck into the bumper plastics.
They are made very similar to the original fog housings, but just a tad different angle, so you might need to wedge them in a little bit to get them in place.
Front glass doesn't fit as close to bumper plastics due to the slightly different angle, but no one will notice but you.........
 
good stuff! please post some output and post-install pics, if you don’t mind. my painted OE lenses look like shit now so re-doing my fogs is on my to-do list. i’d planned to just strip them, Lamin-X, and upgrade the bulbs to Diode Dynamics SLF yellow LEDs (fantastic) but the OE option has me curious...

great thread!
 
good stuff! please post some output and post-install pics, if you don’t mind. my painted OE lenses look like shit now so re-doing my fogs is on my to-do list. i’d planned to just strip them, Lamin-X, and upgrade the bulbs to Diode Dynamics SLF yellow LEDs (fantastic) but the OE option has me curious...

great thread!

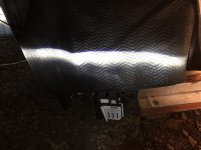
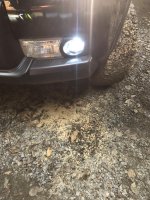
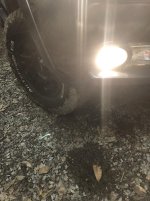
Here you go! First 2 pics are the drivers side with the new fog light installed. The black blanket is about 5 feet away.

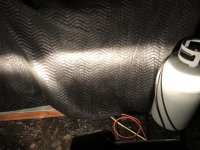
The second 2 pics are the original fogs on the passenger side.

You can see the difference in color and spread pattern for sure. The adjustment screw on the new fogs only moves the line up and down it does not spread the pattern. I left it as shipped but will change the angle if needed. It was pretty close to the same height as the passenger side so I might be good to go.
 

Attachments

  • IMG_1922.jpg
    IMG_1922.jpg
    132.1 KB · Views: 1,011
  • IMG_1924.jpg
    IMG_1924.jpg
    141.7 KB · Views: 965
  • IMG_1923.jpg
    IMG_1923.jpg
    135 KB · Views: 1,033
  • IMG_1929.jpg
    IMG_1929.jpg
    131.7 KB · Views: 1,000
Here's a couple of comparison shots. Drivers side installed, passenger is the original
 

Attachments

  • IMG_1930.jpg
    IMG_1930.jpg
    129.9 KB · Views: 998
  • IMG_1931.jpg
    IMG_1931.jpg
    124.2 KB · Views: 1,007

Members online

Forum statistics

Threads
278,306
Messages
3,554,045
Members
248,016
Latest member
Advally Service

Trending content

Back
Top