
You are using an out of date browser. It may not display this or other websites correctly.
You should upgrade or use an alternative browser.
You should upgrade or use an alternative browser.
Papabeach's Mod Thread
- Thread starter papabeach
- Start date


infamousRNR
Senior Member
Needed more spaces for some switches so followed [MENTION=102606]infamousRNR[/MENTION] lead and added 4 vertical switches to the bottom left of the radio bezel. I bought the switch holder and some abs plastic on amazon, some JB Weld Plastic Epoxy putty at Oreilly’s, had some sandpaper and flat black spray paint. It ended up good enough for me but could have been smoother with coat of bondo and some further sanding. Everything went pretty smooth…had to notch out the shifter bezel to fit around the new switch holder but otherwise pretty straight forward.


Looks tits dude! Good job.

anormalflame
New member
Awesome build! Curious to know what you have in mind for fishing rod storage. Avid fly fisherman here.

papabeach
Member
Awesome build! Curious to know what you have in mind for fishing rod storage. Avid fly fisherman here.
Thanks! As far as rod storage most of my spinning rods fit inside and I strap them to the grab handles on the passenger side. Not elegant but works for me. However, if I was going to be transporting rods frequently (especially expensive fly rods) my first thought would be to place the rod pieces in a rod sock then slide them into an appropriate sized pvc pipe, add some end caps and mount to my roof rack. This has been done by many and I think there are some off the shelf versions of this design. Hope this helps!

papabeach
Member
Finally got around to getting my Eimkeith panhard correction kit installed…Big thanks to [MENTION=98374]awthorn[/MENTION] at Generation Overland HQ for the assist. Axle is centered, bar is level and the back end certainly feels more stable. Also chopped my exhaust pipe…previously smashed it on a rock so we’ll see if I get any fumes with the current chop. While the paint was drying on the PCK I finally got around to pressing my new Jon Bond Performance supercharger snout parts in…pretty quick work with a press. Started by pressing in the nose bearing then pressed the rear bearing onto the shaft followed by pressing on the splined coupler fork (not sure what else to call it), then slid the spring on and pressed the shaft (with bearing and fork) into the snout and through the front bearing, hand pressed the front oil seal in, placed the retaining clip and done. Everything got a thin coat of supercharger oil, and packed up for future use…

Old

Post PCK install and exhaust pipe chop

Action shot of [MENTION=98374]awthorn[/MENTION] at Generation Ovlerand HQ getting it done…

TRD 2nd Gen supercharger snout rebuilt and ready to go
Old
Post PCK install and exhaust pipe chop
Action shot of [MENTION=98374]awthorn[/MENTION] at Generation Ovlerand HQ getting it done…
TRD 2nd Gen supercharger snout rebuilt and ready to go
Last edited:


papabeach
Member
Thanks for the love bud! Glad you are liking things and we could get a few other things done that night. Now to play with that compressor mount!
My busy Spring is now over and I have some time to get back to some of my plans for the 4Runner!
[MENTION=98374]awthorn[/MENTION] [MENTION=47879]tater[/MENTION] Fab Security Check Required
Custom battery box/compressor mount fits like a glove! I got it painted, mounted and all wired up.


papabeach
Member
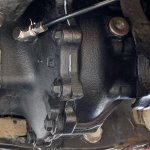
Front Locker Install
Front Locker Install Complete!
- ECGS 4.88 with ARB locker
- install went pretty smooth, found out you can’t remove CVs without removing my aftermarket bumpstops (on rear of front lower control arms) with my larger radflo co’s. There is simply not enough room. They were easy enough to remove once I figured out which Allen wrench to use.
-somehow the threads on my passenger CV were trashed and I couldn’t get the nut back on so new CV (lifetime warranty) from NAPA was a quick fix
-I switched the vacuum air lines on reinstall and had an air leak at the banjo bolt for the locker air line...easy fix for both and everything works
-time to break in diff then more fun can happen
Thanks to Tim [MENTION=120071]mtbtim[/MENTION] and Sean [MENTION=102606]infamousRNR[/MENTION] for the excellent video of how to do this and [MENTION=98374]awthorn[/MENTION] and [MENTION=173809]SHagood[/MENTION] for the help
Front Locker Install Complete!
- ECGS 4.88 with ARB locker
- install went pretty smooth, found out you can’t remove CVs without removing my aftermarket bumpstops (on rear of front lower control arms) with my larger radflo co’s. There is simply not enough room. They were easy enough to remove once I figured out which Allen wrench to use.
-somehow the threads on my passenger CV were trashed and I couldn’t get the nut back on so new CV (lifetime warranty) from NAPA was a quick fix
-I switched the vacuum air lines on reinstall and had an air leak at the banjo bolt for the locker air line...easy fix for both and everything works
-time to break in diff then more fun can happen
Thanks to Tim [MENTION=120071]mtbtim[/MENTION] and Sean [MENTION=102606]infamousRNR[/MENTION] for the excellent video of how to do this and [MENTION=98374]awthorn[/MENTION] and [MENTION=173809]SHagood[/MENTION] for the help
Attachments
Last edited:
papabeach
Member
Random updates…
Optima Yellowtop now 4 years old isn’t hold a charge anymore. I used a CTEK charger and ran it through two cycles of reconditioning and still no luck so…new Optima Yellowtop installed. If it weren’t for my custom battery tray that holds my ARB compressor I might have gone with something else but the choice was simple here. While I was at it I improved the tie down with a wider steel plate. And an extra 5hp for finally labeling my fuse block slot for my compressor. Now only 3 slots left...I am sure I need something else, was thinking some lights on my roof rack pointing out to the sides...but tbh haven't really "needed" this but so what with "need"...I think "want" seems to be the build plan lately...muahhah

Also upgrade to a NOCO GB40 1000amp jump starter. My old generic 600amp wouldn't hold a charge very well either...so now I have a new battery and a new jump starter.

Regarding my new front locker install (250mi into gear break-in) some may have seen my posts about a cracked front diff actuator and associated oil leak. No idea how this happened suffice to say I didn’t drop the diff/actuator when it was recently out.


I contacted ECGS and they were equally puzzeled but agreed to send me an actuator from their pile of old axles. To my surprise the actuator they sent me was cracked in almost the same location as mine…really odd right???

They were Johnny-on-the-spot with a 2nd actuator and checked to make sure it wasn’t cracked prior to shipping. Removal of the old actuator was pretty easy…4x 12mm bolts on the actuator…bottom two easily reached with a box end wrench…top 2 took a couple extensions and a 12mm socket. 1x12mm bolt holding the vacuum harness on, 1x electrical plug and done. A couple taps with a mallet/pry bar and it separated…drained some more gear oil (drained diff before I started) and then I was able to wiggle it out. Cleaned up the mating surfaces, dry fit the new (used) actuator, put the Toyota red FIPG on and put it back together, filled the diff with fresh Lucas 85W-140. I wouldn't hesitate to go with ECGS again in the future, they have great customer service!


Also time for an engine oil change so took care of that with Mobil 1 5W-30 high mileage and used their extended performance filter, new OEM air filter and dumped a can of BG44K in the gas tank and BG MOA in the crank case.
A quick test drive later…4WD engages, front and rear lockers are working and life is great again. Get home and what?!??! Oil dripping front the front again….silly me, I somehow knocked the breather hose off the front diff. Easy fix. Life is good again!
Also did some very important mods (not)….wire wheeled my hi-lift, primed and repainted…it was peeling and starting to get some surface rust. New silencer, cover and base locking pin from STEP 22 gear added. Cover is really nice I must say…much better than the crummy neoprene ones that fade after a week.

Also added a couple new D-Rings for the rear bumper and now happily prepped for Hurricane Dorian.

Found a sweet pic of my rig posted on Facebook on the Florida 4Runners page. Go Bucs!!! So very glad to see the Cowboys start their season right! Always fun watching them lose. Last but not least....something new showed up....the rest of the parts probably won't be here for 6 months but least I can prep and dream!

Optima Yellowtop now 4 years old isn’t hold a charge anymore. I used a CTEK charger and ran it through two cycles of reconditioning and still no luck so…new Optima Yellowtop installed. If it weren’t for my custom battery tray that holds my ARB compressor I might have gone with something else but the choice was simple here. While I was at it I improved the tie down with a wider steel plate. And an extra 5hp for finally labeling my fuse block slot for my compressor. Now only 3 slots left...I am sure I need something else, was thinking some lights on my roof rack pointing out to the sides...but tbh haven't really "needed" this but so what with "need"...I think "want" seems to be the build plan lately...muahhah
Also upgrade to a NOCO GB40 1000amp jump starter. My old generic 600amp wouldn't hold a charge very well either...so now I have a new battery and a new jump starter.
Regarding my new front locker install (250mi into gear break-in) some may have seen my posts about a cracked front diff actuator and associated oil leak. No idea how this happened suffice to say I didn’t drop the diff/actuator when it was recently out.
I contacted ECGS and they were equally puzzeled but agreed to send me an actuator from their pile of old axles. To my surprise the actuator they sent me was cracked in almost the same location as mine…really odd right???
They were Johnny-on-the-spot with a 2nd actuator and checked to make sure it wasn’t cracked prior to shipping. Removal of the old actuator was pretty easy…4x 12mm bolts on the actuator…bottom two easily reached with a box end wrench…top 2 took a couple extensions and a 12mm socket. 1x12mm bolt holding the vacuum harness on, 1x electrical plug and done. A couple taps with a mallet/pry bar and it separated…drained some more gear oil (drained diff before I started) and then I was able to wiggle it out. Cleaned up the mating surfaces, dry fit the new (used) actuator, put the Toyota red FIPG on and put it back together, filled the diff with fresh Lucas 85W-140. I wouldn't hesitate to go with ECGS again in the future, they have great customer service!
Also time for an engine oil change so took care of that with Mobil 1 5W-30 high mileage and used their extended performance filter, new OEM air filter and dumped a can of BG44K in the gas tank and BG MOA in the crank case.
A quick test drive later…4WD engages, front and rear lockers are working and life is great again. Get home and what?!??! Oil dripping front the front again….silly me, I somehow knocked the breather hose off the front diff. Easy fix. Life is good again!
Also did some very important mods (not)….wire wheeled my hi-lift, primed and repainted…it was peeling and starting to get some surface rust. New silencer, cover and base locking pin from STEP 22 gear added. Cover is really nice I must say…much better than the crummy neoprene ones that fade after a week.
Also added a couple new D-Rings for the rear bumper and now happily prepped for Hurricane Dorian.
Found a sweet pic of my rig posted on Facebook on the Florida 4Runners page. Go Bucs!!! So very glad to see the Cowboys start their season right! Always fun watching them lose. Last but not least....something new showed up....the rest of the parts probably won't be here for 6 months but least I can prep and dream!
papabeach
Member
Squeaky clutch pedal
Well, I finally decided to address the squeaky clutch pedal. As guessed, the bushings are shot (or not even there)! Rather than first just do the linear spring swap, I am going to replace the bushings and see how it goes.


Bushing replacement kit at Yotashop for $16.99....seems a bit much for some small pieces of plastic but if it stops the squeak it is worth it I suppose.
Toyota 4Runner/Tacoma/Tundra Clutch Pedal Bushing Kit KIT-1028
If anyone wants to read more about squeaky clutch pedals this thread has a lot of good content and links to a number of different sites/treads.
5-speed clutch pedal sticks on floor in morning (three days in a row)
Well, I finally decided to address the squeaky clutch pedal. As guessed, the bushings are shot (or not even there)! Rather than first just do the linear spring swap, I am going to replace the bushings and see how it goes.
Bushing replacement kit at Yotashop for $16.99....seems a bit much for some small pieces of plastic but if it stops the squeak it is worth it I suppose.
Toyota 4Runner/Tacoma/Tundra Clutch Pedal Bushing Kit KIT-1028
If anyone wants to read more about squeaky clutch pedals this thread has a lot of good content and links to a number of different sites/treads.
5-speed clutch pedal sticks on floor in morning (three days in a row)
papabeach
Member
Squeaky Clutch pedal fix
Ok, change of plans. I happened to drive by Ace Hardware today and figured I would pick up a #70lb linear extension spring as a temporary fix and this would also allow me to see the wear and tear from the spring rubbing through the bushings. Well...this took all of 10minutes to complete start to finish. And just like that the problem was solved. I used a pry bar to pop the spring out and a curved pick to pull the new spring down into position. I still have the new bushings coming but I don't see anyway to put those in place as well as the spring without removing the whole clutch pedal and tbh...I don't see the point now. The metal is worn pretty good on the far spring mounting hole and the fork and I don't know how long a new bushing would even last there. This was silly easy and something I should have done a long long time ago. Cost $2.89! Will see how long this lasts...from the other threads it sounds pretty good for a long long time. Clutch is a bit stiffer but I doubt I would notice after a day or two. Best part is the cruise control switch is fully depressed now and I don't have to lift the stupid pedal up to engage the cruise control and of course no more squeak!

Spring popped out with the use of a pry bar

Only found one of the side bushings and fragments of the saddle bushing


Near mounting hole looked fine but far mounting hole and central fork had some wear and tear for sure

New #70 spring at Ace Hardware...can't complaint about that price!

Installed! No squeak!! Why didn't I do this sooner!!!
Ok, change of plans. I happened to drive by Ace Hardware today and figured I would pick up a #70lb linear extension spring as a temporary fix and this would also allow me to see the wear and tear from the spring rubbing through the bushings. Well...this took all of 10minutes to complete start to finish. And just like that the problem was solved. I used a pry bar to pop the spring out and a curved pick to pull the new spring down into position. I still have the new bushings coming but I don't see anyway to put those in place as well as the spring without removing the whole clutch pedal and tbh...I don't see the point now. The metal is worn pretty good on the far spring mounting hole and the fork and I don't know how long a new bushing would even last there. This was silly easy and something I should have done a long long time ago. Cost $2.89! Will see how long this lasts...from the other threads it sounds pretty good for a long long time. Clutch is a bit stiffer but I doubt I would notice after a day or two. Best part is the cruise control switch is fully depressed now and I don't have to lift the stupid pedal up to engage the cruise control and of course no more squeak!
Spring popped out with the use of a pry bar
Only found one of the side bushings and fragments of the saddle bushing
Near mounting hole looked fine but far mounting hole and central fork had some wear and tear for sure
New #70 spring at Ace Hardware...can't complaint about that price!
Installed! No squeak!! Why didn't I do this sooner!!!

paddlenbike
Member
TRD 2nd Gen supercharger snout rebuilt and ready to go
Is there a write-up you used for the rebuild? The prices on those parts have tripled since I last checked.
papabeach
Member
Is there a write-up you used for the rebuild? The prices on those parts have tripled since I last checked.
These two videos made it pretty easy.
YouTube
YouTube
As far rebuild parts I went with Jon Bond, paid $138 back in January but I see the prices are up a little to $145
Extended drive snout rebuild kit MP45, MP62, MP90, MP112, MP122 Extended drive snout rebuild kit MP45, MP62, MP90, MP112, MP122 [m ext drive rebuild kit] - $145.98 : Jon Bond Performance, The Worlds Premier Supercharger Rebuilder and Parts Store
I had also looked at Rolling Performance's ceramic kit but it was more $$$. High Speed Lab was $119 but not sure on current prices. PSE superchargers didn't have a very good website but is an additional option. Hope this helps.
Last edited:
paddlenbike
Member
^^ Thank you, I appreciate the info.
papabeach
Member

Back to doing some general maintenance. 4Runner got a better than average cleaning and replaced my broken ARB fridge latch.

Hatch replaced…good as new
Changed fluids in f/r diff, t-case, transmission, engine, new wipers all the way around and spotted a couple new issues. Wire wheeled some superficial rust on frame/rear axle and painted as needed. Noticed my drivers side front axle seal is weeping ever so slightly, guessing I dinged it when I put my CV back in after my diff upgrade. I checked the front diff breather to make sure it was good and found a huge hole burnt through the side of the hose near my header….guessing it got to close at one point, no idea when. Needless to say it wasn’t clogged. My passenger rear axle seal is also weeping…diff breather was clogged so I cleared that, cleaned everything up and moved the breather by the gas cap like everyone else. I waited a week…weeping is coming back. Not crazy but it is there. I have yet to do rear axle seals/bearings so it seems like my opportunity has arrived. I don’t have a press so this is my opportunity to get one and buy some more tools. Some other small annoying stuff my drivers door hill stay is no longer attached. Needs replaced. All of my door lock actuators suck when they get hot so might as well do that at the same time (at least on the drivers door). Also just purchased a used set of front spindles for possible upgrade to manual hubs….haven’t decided, have to find a good deal on parts, otherwise they will just get rebuilt and have the TC spindle gussets welded on.

Before clearing diff breather and cleaning

1 week of mild driving after clearing diff breather and cleaning, still leaking
To Do’s
-front driver axle seal
-rear axles seals/bearings
-replace front diff breather hose
-driver door hill stay
-all the door lock actuators
-rebulid cargo storage drawers (time to upgrade to new design)
-wire rear seat USB port (back of armrest)
-power inverter wiring/install
-custom mounts for roof rack LEDs
-front spindle/bearing rebuild; weld on TC gussets
Mackalicious
New member
very nice!
papabeach
Member
Knocked a couple things off the to-do list today.
-Replaced front diff breather and ran it up a bit higher into the engine bay
-Put a hose on the the a/c drain off the firewall and routed to drain directly on the ground
-further looked into my leaking front driver axle seal and noticed I have quite a bit more play than on the passenger side. Passenger side has a new NAPA CV axle, driver side is OEM. Regardless, I ordered a new OEM seal and have a spare (new) NAPA CV axle to go in...curious if it will have the same amount of play
-Click on pic below to link to video:

-Replaced front diff breather and ran it up a bit higher into the engine bay
-Put a hose on the the a/c drain off the firewall and routed to drain directly on the ground
-further looked into my leaking front driver axle seal and noticed I have quite a bit more play than on the passenger side. Passenger side has a new NAPA CV axle, driver side is OEM. Regardless, I ordered a new OEM seal and have a spare (new) NAPA CV axle to go in...curious if it will have the same amount of play
-Click on pic below to link to video:
papabeach
Member
What started as a Total Chaos spindle gusset install has turned into an opportunity to buy a shop press, rehab an old set of spindles with new bearings/seals/(manual) hubs, por15, lotus axles and TBU. Just waiting on a few more parts...
What an addiction...not sure this is actually less expensive then drugs anymore. Shopping for parts late at night when I can't sleep is dangerous.


What an addiction...not sure this is actually less expensive then drugs anymore. Shopping for parts late at night when I can't sleep is dangerous.
Last edited:
Similar threads


- Replies
- 2
- Views
- 3K

- Replies
- 0
- Views
- 270
- Replies
- 2
- Views
- 10K


