Stealth LED light bar install

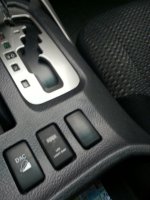
Just did this mod and it turned out great! Make sure you buy the low profile hex head bolts for the 3/4 inch ones. This gives you more room to adjust the light bar up and down. You can have the concentration of the spot light 25 feet ahead of you if you want. The roof really doesn't cut it off that early. These things are BRIGHT for being only ~200. Well worth it. I ordered a light bar rocker switch from OTRATTW and installed it in a blank from the center console. This switch is cool looking but is WAY too bright when driving at night - I don't recommend it. Just some thoughts

I have the same issue with one of my switches. My proposed fix (haven't done it yet) is to just pull the face off the switch and color the back with black sharpie to eliminate some of the light passing through. Thin layers at first and multiple coats if necessary until the light is similar to the other interior LEDs.

Anyway, just a quick and cheap thing to try. :couch2:
 
I have the same issue with one of my switches. My proposed fix (haven't done it yet) is to just pull the face off the switch and color the back with black sharpie to eliminate some of the light passing through. Thin layers at first and multiple coats if necessary until the light is similar to the other interior LEDs.

Anyway, just a quick and cheap thing to try. :couch2:

What about just wiring the switch light into the dash dimmer? I did that with my switches

http://www.toyota-4runner.org/4th-gen-t4rs/170580-overhead-6-switch-panel.html

You could also install an in line resistor to make it dimmer
 

Attachments

  • 20160201_102527.jpg
    20160201_102527.jpg
    122.7 KB · Views: 1,080
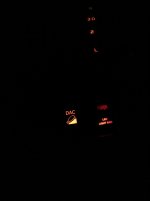
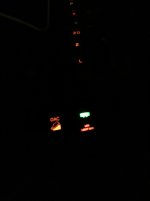
I remembered to take pics at night of the switch brightness. These are cell phone pictures, so they aren't the best, but you can see they are not over bearing with brightness. Here are two pics, one with the switch off and one with the switch on.
 

Attachments

  • light bar switch off.jpg
    light bar switch off.jpg
    27.6 KB · Views: 1,042
  • light bar switch on.jpg
    light bar switch on.jpg
    31.1 KB · Views: 1,036
I remembered to take pics at night of the switch brightness. These are cell phone pictures, so they aren't the best, but you can see they are not over bearing with brightness. Here are two pics, one with the switch off and one with the switch on.

Yeah, that's not so bad there.
 
As requested, here are some more pictures of the light bar I installed on the stock roof rack of my 2006 Limited. The hardest part of the install wasn't actually the mounting of the bar, but routing the wires in a way that they remained hidden. I got my 40" bar from Exploration Outfitters, although there are a multitude of other Totron dealers online as well.

1IMG_0800_zps68aeca3a.jpg~original


Next to a buddy at work:

79ec6752-d4b1-4b5e-9b08-9adc8b676c5a_zps620831fb.jpg~original


Sunroof and ski rack are still fully fuctional:

66593044-ffa4-45ee-b254-7a80aadb31bc_zps10109cfc.jpg~original


Needed for the install:

40” Totron Single Row spot/flood combo light bar with wiring harness

C0FFD646-0D17-48E2-B861-ED74DDFA79EF-2178-000000D5ABE8AB3B_zpsb46e79c4.jpg~original

2 – 6” angle brackets from Home Depot

f50d4b79-48b1-4ff1-a7b7-e16bde4eddf7_zps5dfd5c11.jpg~original

4 – 1/4”–20 x 1/2” bolts (I used a security-style head, similar to the hardware you see on bathroom stalls)

2 - 1/4"-20 x 3/4" bolts

2 – 1/4"–20 Nylocks

4 – 1/4"–20 ‘draw bolt’ kits (you will only need the threaded plates from these assemblies)

549acd56-d63d-4371-9bae-230c44f2d8e3_zps6f786b12.jpg~original

Installation -

This picture pretty much says it all.

08F9C3AD-9783-4EFF-96A5-293FA81984CE-2178-000000C69B51D0C8_zps67df5b14.jpg~original

I loosely pre-assembled the brackets onto the bar on the ground, and then lifted everything into place. The threaded plates from the draw bolts are pretty trick – they will fit through the slot on your roof rack rail, and when you start to tighten them down, they will spin about 45 degrees and then lock in place against the upper and lower sides of the slot.

Depending on the bracket, you may have to change the hole locations to raise or lower the height of your bar. I have mine set at about 1/8” above the surface of the roof.

Wiring –

The first thing I did was to strip the plastic sleeve off of the wires leading to the bar from the relay. I hid the large wiring connector under the roof rack rail cap, then pulled back the windshield trim slightly and stuffed the two wires underneath. I then routed the wires though the hood hinge hole and mounted my relay to an existing bolt next to the fuse box.

632f93f4-711b-4ee9-b5e8-c557eadc99f9_zps1a337e65.jpg~original

Here was the tedious part –

You have to disassemble the connector between the supplied switch and relay in order to route the wires through the firewall the way I did. Using an optics screwdriver, I was able to pop the contacts out of the connector housing. I then cut off the little rubber nipple on the large firewall grommet and stuffed the wires through from the inside.

5905d11c-bc87-4678-8d78-84b2a201df4d_zps5715f598.jpg~original

Reassemble the plug, mount your switch, and you should be ready to rock and roll!

Total install was less than an hour. For comparison, here are some pics of the side of a building from about 50 feet away.

Low beams and fogs:

F5FDC22A-8789-40C2-B13C-87707B35C52E-2178-000000C6E7880053_zps412ac5a6.jpg~original


High beams and fogs:

03164186-5631-4948-BC8D-CE765055BAA0-2178-000000C6E468D878_zpsc0fddba3.jpg~original


High beams, fogs, and LED bar:

CE52FB15-4742-4EE7-BA40-E213AC18FB1D-2178-000000C6E1281F11_zps14f66aa3.jpg~original


LED only:

05ACD3BD-11EF-41F0-886B-BA2F725471D4-2178-000000C6DD7D5183_zps569f1db8.jpg~original

The iPhone is not very good for pictures like this...and I didn't pick the best setting either. This bar is much brighter than it appears, and 'throws' light much farther than the stock headlights. Next time around though, I'd probably go with the flood pattern only, because I don't really need the ability to see a mile down the road.

I would have preferred the 40" Rigid SR series for this install due to its reduced height and higher output...but alas, Grover Clevelands don't grow on trees.

OP WILL DELIVER:

Here are some output pics from my drive home the other night:


Low Beams


Low Beams + 40" LED Light Bar


Good luck with your installs gang!

Hey sorry if I'm not following the posting protocol. First time poster, long time lurker. I was just wondering if you could give some insight about how well this mount and bar have held up. I'm considering doing something similar to this but with dual row LEDs. Thanks in advance.
 
I ran my LED bar the same way: with 6" shelf brackets and it's still holding up strong. I painted my brackets black.

As for the light, I bought it through a different vender than the OP. The bar still works and is just a bright!

I don't care, but others might, my light's case has shifted colors from black to a yellow/gold because of the sun. Doesn't affect function besides being stealth as it's no longer hidden black on black…


2005 SR5 closer on the stock end of the spectrum, but moving right…
 
Mine has held up well for about a year and a half now, the additional light output is amazing for winter driving up here in AK.

I have the same light bar as the OP and have also noticed the yellowing of the finish as sigepbiker (which doesn't bother me either). I installed some small stick-on bumpers on the roof underneath the center of the light bar because the brackets I used didn't allow for much clearance between the two, and the bar was vibrating against the roof over rough roads.
 
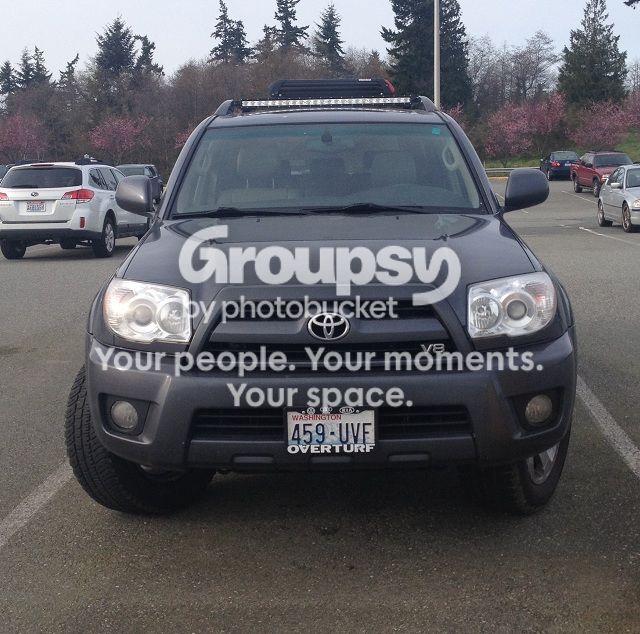
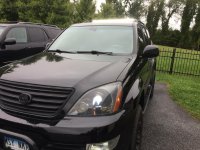
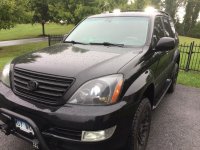
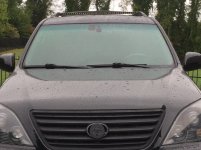
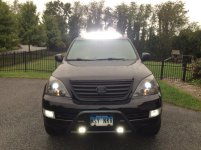
Here is my stealth bar. Thanks for the idea, I changed my two lights to s single strip.
 

Attachments

  • IMG_9240.jpg
    IMG_9240.jpg
    136.7 KB · Views: 6,569
  • IMG_9238.jpg
    IMG_9238.jpg
    135.9 KB · Views: 4,755
  • IMG_9242.jpg
    IMG_9242.jpg
    132.1 KB · Views: 4,178
  • IMG_9243.jpg
    IMG_9243.jpg
    136 KB · Views: 6,996
As requested, here are some more pictures of the light bar I installed on the stock roof rack of my 2006 Limited. The hardest part of the install wasn't actually the mounting of the bar, but routing the wires in a way that they remained hidden. I got my 40" bar from Exploration Outfitters, although there are a multitude of other Totron dealers online as well.

1IMG_0800_zps68aeca3a.jpg~original


Next to a buddy at work:

79ec6752-d4b1-4b5e-9b08-9adc8b676c5a_zps620831fb.jpg~original


Sunroof and ski rack are still fully fuctional:

66593044-ffa4-45ee-b254-7a80aadb31bc_zps10109cfc.jpg~original


Needed for the install:

40” Totron Single Row spot/flood combo light bar with wiring harness

C0FFD646-0D17-48E2-B861-ED74DDFA79EF-2178-000000D5ABE8AB3B_zpsb46e79c4.jpg~original

2 – 6” angle brackets from Home Depot

f50d4b79-48b1-4ff1-a7b7-e16bde4eddf7_zps5dfd5c11.jpg~original

4 – 1/4”–20 x 1/2” bolts (I used a security-style head, similar to the hardware you see on bathroom stalls)

2 - 1/4"-20 x 3/4" bolts

2 – 1/4"–20 Nylocks

4 – 1/4"–20 ‘draw bolt’ kits (you will only need the threaded plates from these assemblies)

549acd56-d63d-4371-9bae-230c44f2d8e3_zps6f786b12.jpg~original

Installation -

This picture pretty much says it all.

08F9C3AD-9783-4EFF-96A5-293FA81984CE-2178-000000C69B51D0C8_zps67df5b14.jpg~original

I loosely pre-assembled the brackets onto the bar on the ground, and then lifted everything into place. The threaded plates from the draw bolts are pretty trick – they will fit through the slot on your roof rack rail, and when you start to tighten them down, they will spin about 45 degrees and then lock in place against the upper and lower sides of the slot.

Depending on the bracket, you may have to change the hole locations to raise or lower the height of your bar. I have mine set at about 1/8” above the surface of the roof.

Wiring –

The first thing I did was to strip the plastic sleeve off of the wires leading to the bar from the relay. I hid the large wiring connector under the roof rack rail cap, then pulled back the windshield trim slightly and stuffed the two wires underneath. I then routed the wires though the hood hinge hole and mounted my relay to an existing bolt next to the fuse box.

632f93f4-711b-4ee9-b5e8-c557eadc99f9_zps1a337e65.jpg~original

Here was the tedious part –

You have to disassemble the connector between the supplied switch and relay in order to route the wires through the firewall the way I did. Using an optics screwdriver, I was able to pop the contacts out of the connector housing. I then cut off the little rubber nipple on the large firewall grommet and stuffed the wires through from the inside.

5905d11c-bc87-4678-8d78-84b2a201df4d_zps5715f598.jpg~original

Reassemble the plug, mount your switch, and you should be ready to rock and roll!

Total install was less than an hour. For comparison, here are some pics of the side of a building from about 50 feet away.

Low beams and fogs:

F5FDC22A-8789-40C2-B13C-87707B35C52E-2178-000000C6E7880053_zps412ac5a6.jpg~original


High beams and fogs:

03164186-5631-4948-BC8D-CE765055BAA0-2178-000000C6E468D878_zpsc0fddba3.jpg~original


High beams, fogs, and LED bar:

CE52FB15-4742-4EE7-BA40-E213AC18FB1D-2178-000000C6E1281F11_zps14f66aa3.jpg~original


LED only:

05ACD3BD-11EF-41F0-886B-BA2F725471D4-2178-000000C6DD7D5183_zps569f1db8.jpg~original

The iPhone is not very good for pictures like this...and I didn't pick the best setting either. This bar is much brighter than it appears, and 'throws' light much farther than the stock headlights. Next time around though, I'd probably go with the flood pattern only, because I don't really need the ability to see a mile down the road.

I would have preferred the 40" Rigid SR series for this install due to its reduced height and higher output...but alas, Grover Clevelands don't grow on trees.

OP WILL DELIVER:

Here are some output pics from my drive home the other night:


Low Beams


Low Beams + 40" LED Light Bar


Good luck with your installs gang!

Thank you for posting this, the install looks really good. Have you or anyone who has installed a light bar on top of the 4runner had any issues with glare off of the hood?
 
Thank you for posting this, the install looks really good. Have you or anyone who has installed a light bar on top of the 4runner had any issues with glare off of the hood?


I'm thinking about mounting mine above the windshield - visor type. Can't put on roof rack as it will blind me shinning through sunroof.
 
Except for those of us who don't have that cover

I've never been in any car, including a 4Runner, that didn't have a sliding cover for the sunroof. I've never even heard of that being a possibilty. Do you have an aftermarket sunroof? Can you post a picture of the lack of sliding cover?
 
Last edited:
I've never been in any car, including a 4Runner, that didn't have a sliding cover for the sunroof. I've never even heard of that being a possibilty. Do you have an aftermarket sunroof?


Nope. Mine is the stock sunroof. 2006 SR5. I've been told the cover was an option. But could be wrong and previous owner took it out.
 

Members online

Forum statistics

Threads
278,309
Messages
3,554,075
Members
248,016
Latest member
Advally Service

Trending content

Back
Top