I hope I'm still wrenching when I'm 50. Good job! You guys are putting out great material.
One advantage we retirees have over the potty-mouthed and last-word young'uns is that we've long-ago embraced incrementalism where we've never stopped learning and where we never stop trying to help everyone with every action we take.
In stark contrast, the annoying know-it-all childish trolls stopped learning in the 4th grade (judging from their clear lack of grasp of the English language and the lack of value added to this thread alone, in addition to their obvious inability to comprehend the importance of seemingly minor details such as a glaringly disproportionate 5mm slop on a 10mm bushing).
While they have already shot their load in this thread by posting the most they can possibly offer, we still have a lot of value left to add to help others (including the bushing suppliers and web-site operators) get to the point where we are now, with much less effort with each incremental improvement.
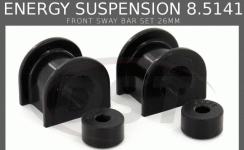
For example, we still need to ensure that Autozone and other lookup engines are corrected, and that Prothane fixes their kits and that Energy Suspension cleans up their two kits, and that Daystar is easier to find for noobs running their first search, etc., so there is still a lot to do to make it easier for others.
To that end, here's my incremental improvement of the original post's video transcript of just the DIY for the swaybar bushing, so others can start with the Mbttim's video and my text description and improve further from there.
Torque:
12mm Sway bar body bushing bracket nut & bolt 19 ft-lb
14mm Stabilizer bar links top nut 14 ft-lb
Preparation I followed:
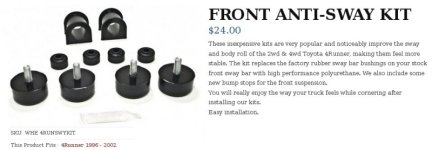
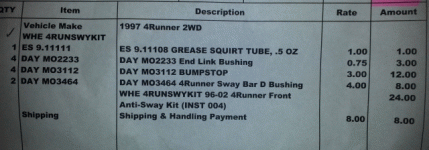
I bought the Daystar bushing kit for $24 + $8 shipping (in "my" situation, I would have been better served had they removed the $12 of unused bump stops and included, instead, $4 of concave endlink washers).
I set the emergency brake & chocked the wheels prior to jacking.
I loosened the front wheel lug nuts (the truck I worked on had 15-inch wheels with 13/16ths lug nuts).
I jacked up the truck from both ends and placed it on four 6 ton 15-inch jack stands.
I removed both front wheels and looked around.
Observations I made:
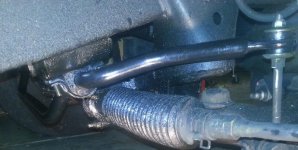
This is an OEM setup as the owner bought the truck new and never had the swaybars or endlinks worked on.
I noticed the OEM swaybar had red paint from the factory showing where the edges of the body bushings lie.
I noticed the remaining D bushing has the slit opening facing the rear of the truck.
I noticed the sway body brackets are clearly stamped L (left, driver) & R (right, passenger).
(In my hands they look absolutely identical though. Go figure.)
I noticed L & R stamped on the body bracket is only viewed correctly when lying parallel to the axle, feet at the driver side wheel and head toward the passenger wheel.
I noticed the body bracket had one welded on bolt (for a nut) and one hole (for a bolt), both of can only be accessed from above.
Both body brackets had the nut in the front and a bolt in the rear (because the brackets have a corresponding welded-on stud in the front and a threaded hole in the rear).
I made a note of the number of threads protruding above the endlink nut (useful for reinstall due to the fact that I tightened the endlink nuts after dropping the vehicle back to the ground).
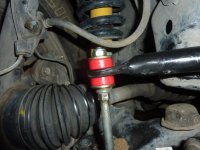
I noticed the top and bottom endlink washers are not flat, but concave (and, once removed, I noticed small oblong indents, indicating that the washers are what "centers" the endlink bushings - so be prepared to replace them when you do the job if they are likewise damaged).
I noticed that a
deep socket is most useful for the endlinks and that the shortest socket and
thinnest ratchet is necessary for the body bushing nuts (particularly under the exhaust system on the passenger side).
Procedure I followed:
After marking, I removed the top nut of each swaybar endlink with a 14mm deep socket.
I didn't have spare concave washers because none of the DIYs I read mentioned that they can easily be damaged, so I reused them - but if I were to do the job again, I'd buy new washers beforehand (or find a kit that comes with them instead of those bump stops).
After noting the orientation of the one-way bushings, I removed both upper swaybar endlink bushings.
After removing the upper bushing, I noticed the swaybar eyelet is much larger than the endlink so the only thing centering the endlinks are the metal plates and bushings.
I didn't bother with safety glasses, but certainly crud fell in my face and eyes.
I didn't bother to spray the body bushing bolts with PB Blaster as they didn't need it, this truck having essentially zero rust and never having been offroad.
From above, for each body bushing, I loosened the 12mm nut at the front of the sway bar body bushing bracket bolt using a shallow socket and the thinnest ratchet I owned.
From above, for each body bushing, I loosened the 12mm bolt at the back of the sway bar body bushing bracket bolt using a shallow socket.
Once thoroughly loosened, I removed the front nuts and rear bolts with one hand as I supported the sway bar with the other hand.
Once the sway bar was off, and after nothing their orientation, I removed the lower bushing from both endlinks.
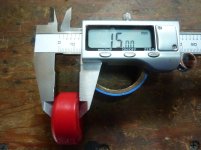
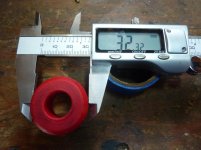
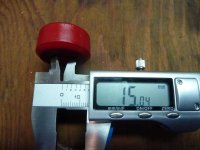
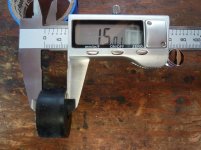
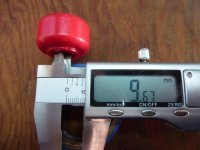
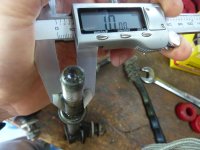
With calipers, I measured the midpoint on the swaybar and compared it to the bushing surface, where the bushing surface was only 20 thousandths of an inch smaller in diameter (probably due to the way the swaybar was heated, stretched, and bent when it was manufactured).
Likewise, I measured the midpoint and bushing surface on the endlinks, again, they measured favorably similar, although this was harder to measure accurately because the bare metal under the bushings had corroded a bit so it was roughly about 20 thousandths (0.5mm) larger.
Mtbtim has since verified that all the 3rd-generation 4Runners have the same measurements as the truck that I worked on, so if yours are different, then your sway bar or endlinks may not be stock.
After inspecting for oblong wear, I left the bottom washer in place on both endlinks.
Out of the truck, after cleaning and making measurements (to be posted separately) I greased both the ID and OD of the sway bar body bushings and just the ID of the endlink bushings with the 1/2 ounce of silicone (non petroleum) grease supplied, which was marked "Energy Suspension Formula 5 Prelube PN 9.11108".
I didn't bother, but some DIYs recommend removable locktite for the bolts and nuts upon reassembly.
Reassembly procedure I followed:
I replaced the D body bracket bushings with the opening facing backward (as per observation of the OEM bushing).
I replaced the now-greased bottom endlink bushings in the proper orientation.
I loosely installed the forward nuts and rearward bolts by hand into the two swaybar body brackets.
I realigned the swaybar red factory marks to the bushing inside edges & tightened the body bracket nuts and bolts.
Without the suspension weighted, I just put the nuts on the endlinks and tightened until the top of the nut was flush with the top of the endlink post.
I then reinstalled the wheels, tightened the lug nuts by hand, and dropped the truck on the wheels and torqued the lug nuts to spec.
Turning the steering wheel full stop to each side, I tightened the sway bar endlinks until the bushing slightly bulged out, and left it at that setting.
During my final inspection, I realized I was slightly off in aligning the swaybar perfectly centered on the two factory red lines painted clearly on the swaybar on the inside edge of the brackets. What must have happened is that the swaybar shifted an eighth of an inch while I was tightening the bolts and holding it up at the same time.
Probably as a result, I felt two quick shudders seemingly coming from the bowels of the body, which I, at first, being in an unfamiliar garage, thought I had hit something as I was backing the truck out into the pitch-black rainy night - but it seems to have been the swaybar sliding ever so slightly into perfect position with the initial movement of the truck.
When I went back down below into the now soaking-wet truck, I saw that the red marks had aligned themselves perfectly during the test drive.
Having said all of the above, if, when YOU do the job, you find mistakes, please post the incremental improvements, so that with every action, we all make it easier for everyone else to find the information we wished we had in the beginning.


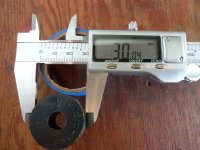
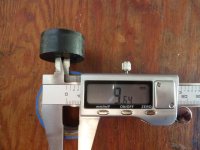
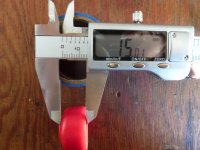
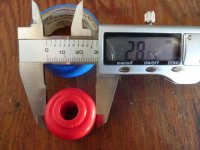
 End Link.jpg123.2 KB · Views: 1,089
 OEM #1.jpg131.1 KB · Views: 1,093
 OEM #2.jpg127.5 KB · Views: 1,143
 OEM #3.jpg123.3 KB · Views: 1,111
 New Bushings.jpg131.3 KB · Views: 2,060
 Energy Susp #1.jpg126.3 KB · Views: 1,064
 Energy Susp #2.jpg128.4 KB · Views: 1,053
 Energy Susp #3.jpg123.9 KB · Views: 1,071