the Rescue Runner build thread

so a little update on the ride-

its very nice, the rear is a bit more spongy than id like, but not bad, it drives very nice and very smooth. its also very stable, i am suprised at that. it soaks up the bumps in the road very very nicely and is not bouncy at all(kinda was afraid of that with the LC springs). yesterday after work i built myself a custom panhard bar drop bracket outta some scrap steel we had laying around the shop(1/4" wall 2x6 steel tubing), i had to cut it down the middle and widen it a little but that was easy enough. just as i was finishing up remounting the panhard, we got paged out(my boss is also in SAR) so we half-a*s pick up stuff, shut down the welder and tanks lock up the shop and jump in my runner(generally i wouldnt do this with out a shake down run to make sure all is good and not gonna come apart, nor do i recommend anyone else doing what i did) and race to my boss' house so he can change and grab his gear(mines always in my runner). then we race to my house(on the way to the search) so i can change.

anyhow we had to drive like 40min to get to this place up in the columbia river gorge. on the way i hit 90mph at least once and everything was super stable with the lift and tracking nicely. got into some corners and the lean wasnt as bad as i was expecting(yes i slowed down for the corners). my boss commented on how nicely my truck rides and how smooth everything is for being a lifted truck(he owns a big diesel dodge 4x4 with a lift), he expected to ride to be much rougher, and for how soft/nice it was he expected a lot more sway and body roll in the corners. so he was very impressed with how this set up rides.

i must say though it is a very different beast, i mean everything still looks the same from the drivers seat -dash and view out the windshield ect, but something is just weird about it, like is a new truck or something idk how to describe it... anyhow im so used to being stock height with all my armor and a much lower center of gravity so pushing the truck in the corners was never really a concern for me, and now i can tell this is something im going to need to be mind full of. i mean i know, and never thought of my 4runner as BMW M3 or honda S2000, but ive had over steer a time or two with it and not been too concerned about it... i dont really want to see how my 4runner will react to that kinda stuff now though. its not a crown vic or a charger, nor is it county owned either so, i guess i best start to simmer down lol.

i do wish the rear wasnt so high, or maybe i wish the front was higher(i think thats more like it) i definitely think the 3rd notch on the tundra 5100s is the minimum if you have armor and or a front bumper, other wise you will just be two low(just my thoughts) i might push up the the 4th notch and see how things go, because i dont think i gained a full 3" of lift from this in the front, in the rear i know im at least 4"
 
pics of my panhard drop bracket

IMAG2203.jpg~original

you can see where i split it down the middle to widen it

IMAG2204.jpg~original

IMAG2205.jpg~original

IMAG2207.jpg~original

IMAG2211.jpg~original

here it is welded to the upper factory panhard bar bracket

IMAG2213.jpg~original

i welded the inside of the drop bracket as well for added torsional rigidity and to resist flex or bending

IMAG2215.jpg~original

IMAG2217.jpg~original

i painted it right as soon as i was done welding it on, that way the paint only took like 10 maybe 15min to dry, so by the time i got all the stuff out and ready to drill the hole it was already dry.

IMAG2218.jpg~original

IMAG2220.jpg~original

IMAG2222.jpg~original

-dont mind all the spots, thats just mud from last nights search mission
 
I'd be really interested to see how it rides on the 4th perch. Also, I'm looking to buy the tundra set-up up front, but I wanna get everything separate and not buy from steve cause I'm on a bit of a budget. I just need to buy the coils (already found some) and the tundra 5100s correct? No extra adapters or anything?

Very sharp rig btw!
 
just buy them from a dealer it will be cheaper than from SS. i cant stand SS, they think they are so much better than anyone else and charge so much more for the same thing and try to tell you its different and something only they can get bla bla bla bla bla yeah no its not, you dont own a monopoly.

anyhow yeah you should just need the coils and the 5100s, you use your 4runner top hats and rubber pad(some guys buy the tundra rubber pad). i wont be doing the 4th notch for a while as i just got an alignment and so im gonna live with what i have for a while -unless i get super bored
 
Steve mentioned to me that on his diff drop kit, his is made where the skid plate actually raises up an inch and is an inch higher than the toytec. Which did you buy?

Also I've read about people buying tundra isolators. Did you purchase those? And I've read dust caps are optional for the 5100s. How hard is the coil/strut to assemble once you have everything? Sorry for all the questions, I just wanna get everything right before I purchase. Thanks
 
the isolator is that rubber pad im talking about, the tundra one is a little bit bigger in diameter than the 4runners, but the 4runners will work. i did not buy the dust boots or shields for my 5100s, they are not needed imo. i do not have a diff drop yet, but i will be buying toytec's. as far as doing it all yourself, no problem, just make sure you have a good quality spring compressor, i actually used 3 instead of just the 2, it was for me easier(didnt have air tools in my garage, so i had to use my cordless impact) -it just helped spread the load out so it wasnt so much stress on each compressor. just take your time and be careful if one of those clamps breaks or pops off because you didnt have it on all the way it could kill you or ruin you life
 
Looks alot like the one I made with Lee, only we bolted ours in the stock location, as well as welded it in place....

Did it make a difference with your axle alignment? Mine still sticks out more on the once side.....
 
Hey man, looks like you moved your pics, the link is bad for all your post lift pics. Can you report them somewhere, really want to see it.
 
so a little update...

took it out wheeling on the 4th of july and broke my first CV in this thing, it came apart hard and really tore some stuff up, i had pieces of cage jammed in between my wheel and caliper that shaved some aluminum off the wheel and took small chucks out of both the caliper and wheel... then right after that my rear end finally let go, had to put it into 4wd to force it home(only a block away) but it tore things up really bad, i was going to regear, but waiting on payments from the army and my civilian employer fired me so that wasnt an option any more, so i got a good used 3rd member from another 4runner and tossed in, every thing worked great until i test drove it and blew the other CV in my driveway WTF. so now i got two new CVs up front.
IMAG2516_zps03b3876d.jpg~original

IMAG2513_zpsec80484b.jpg~original

IMAG2512_zps7407ef34.jpg~original

IMAG2511_zpsb867ae4b.jpg~original

broken CV and the damage it made:
IMAG2341_zps0b5ac0ab.jpg~original

IMAG2332_zpsb2cf0219.jpg~original

IMAG2337_zpsa9ac53c5.jpg~original

IMAG2335_zps05aa8c02.jpg~original

IMAG2338_zpsad10b42e.jpg~original


i got some replacement lens/reflectors for my PIAA 940s from PIAA for no cost, because the old ones were starting to haze over and the reflectors were starting to get milky.
IMAG2601_zpsb9355134.jpg~original


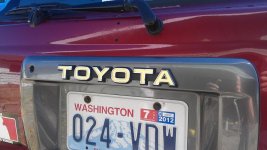
i put on a new toyota emblem on the back gate license plate frame, i think its from a new tacoma or fj crusier, not sure which though, my father inlaw gave it to me.
IMAG2588.jpg

IMAG2595.jpg

i snapped my front sway bar end link- it got damaged when the CV blew on the july 4th wheeling trip. and when the end link broke i was in mid corner with the family on a windy mountain road and it sounded and felt like i snapped an axle, it almost flipped us, fortunately no one was in the oncoming lane and i was able to swing wide out into their lane to keep from holding so tight in the corner and get things back under control.
bent end link, i dont yet have a pic of it broken...
IMAG2340_zps370fead6.jpg~original


i removed and repainted my snorkel -the previous owner had it on a silver 4runner and had had the snorkel painted to match. when he sold it to me he just shot a quick coat of black rattle can over it and did no prep work. it looked great when i picked it up but after installing it and driving around with it on for a week it was starting to flake and peal. so i took it off took a brillow pad to it and some acitone and took as much of the old silver paint off as i could.. then i sprayed it with some self etching primer x3 coats, let that dry and scuffed. then used a primer sealer x2 coats, let that dry and scuffed, then 3 coats of black bumper paint.
IMAG2677_zpsf8355fdb.jpg~original

IMAG2678_zpsfd79d738.jpg~original


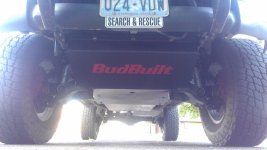
then today i repainted my front skid, as it was all scratched up and had some major paint pealing going on on the upper(engine) side, from a engine degreaser i used a couple of weeks ago when cleaning the motor off. again same painting procedure as above, after i let the paint try for 2 days i masked off the skid and cut out the "budbult" and rescuffed that and shot that with red caliper paint...
budbuilt.jpg
 

Attachments

  • IMAG2588.jpg
    IMAG2588.jpg
    74.7 KB · Views: 4,130
  • IMAG2595.jpg
    IMAG2595.jpg
    136.8 KB · Views: 4,489
  • budbuilt.jpg
    budbuilt.jpg
    60.1 KB · Views: 3,962
Last edited:
Damn man u have had some shiiitty luck! Bout like my luck, if it wasn't for bad luck I wouldn't have luck at all....I was in the army, what banch of service are u in? Hope everything works out. Great looking rig by the way! I want ur rims! LoL!
 
Great looking 4Runner. If you ever get tired of your snorkel I'll take it :D

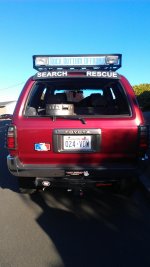
Btw, is that a keg in the back of your 4Runner? Are you Search and Rescue to alcoholics? lol
 
yeup thats a keg, and no i need that after some of the people i rescue... or after a long meeting and the politics get to me....:beer::beer::beer::beer::beer:
 
yeup!... infact a couple of months ago this new girl joined, and she got assigned to my team and on our first mission out, she asked me "...so uh do we all go out for drinks after this or what?" i about died laughing, it was great. i told her we could if she wanted too... :shrug:
 
finally installed a set of NGK plug wires, and got rid of the beldin wires... now lets hope for improved mpg. it was deff worth the $35 just in looks lol
 
this is just a copy and past of a wright up i did on this install over on rm4x4.org -im just to lazy to re-wright everything lol

ok so yesterday i picked up my new ARB bumper for a first gen tacoma -part number 3423020. i got it through a friends warehouse for a smoking deal, but still more than i wanted to pay for one... but at least i got it brand new and it came with everything i needed and then some to install. part of the reason i am doing this tutorial is that the installation instructions that come with the bumper are basically useless. i think youd have better luck teaching a pakistani child manors and english than you would reading the instructions and knowing just what to do and what goes where... that being said the instalations is pretty straight forward and is doable with one person(as i installed mine all by myself), but having a second set of hands could and would, not only make the installation process easier, but faster. really you should not need any instructions to do this as long as you have an idea of what your are doing and a basic understanding of DIY mechanics and basic sockets and wrenches. everything i did i used a 3/8 ratchet, and some wrenches. -all metric, and i did use a small cordless impact gun but it is not necessary to have -i only used it to speed up things.


so i started off by unwrapping everything taking all the nuts bolts and washers out of the bag and laying them out. this way i could easily see what i had and find what i needed (i also tried to put like sizes to of nuts and bolts ect together so that it would be easy to grab and find when i needed them). then i took all the big parts -bumper and brackets ect, and laid them out.
IMAG2831.jpg~original

IMAG2817.jpg~original


after this i started to undo my factory front bumper. -for me i also had a brush guard so this had to come off too. i want to sell this as a complete set up so i chose not to separate the brush guard from the factory bumper, instead i removed it all as one unit. this not only was in my mind easier, but it was faster and took less steps.
IMAG2818.jpg~original


i removed the 4 bolts that hold the brush guard to the frame rails -you will have to remove these anyways to slide your new bumper mounting brackets over the frame rails anyways later on so this is a must (these are the bolts that hold your tow hooks on as well).
IMAG2819.jpg~original


then i removed the four (two per side) bolts(either 12 or 14mm i dont remember) holding the factory bumper brackets to the frame (again i wanted to sell my factroy bumper and brush guard as a complete "ready to install" kit so this ways much easier than trying to remove the bumper from the brackets, and then remove the brackets...)
IMAG2820.jpg~original

IMAG2821.jpg~original


at this point it would be a good idea to unplug the turn signals and any other wires for fog/driving lights ect you may have, so you dont get hung up by the wires when you take the bumper off.
IMAG2822.jpg~original


then their are two (one per side) nuts that have to be undone on the "wings" of the factory bumper. these are accessed from inside the fender-well. there is a round hole in the front of the inner finder liner going straight forward. dont forget about these (i did and could not for the life of me figure out why the bumper would not come off lol)
IMAG2823.jpg~original

IMAG2824.jpg~original


now simple and carefully lift up on the bumper and remove.

once you have the bumper removed from the vehicle you will see two end caps/cones on the ends of your frame rails. their will be a hole in the nose/front of them, inside there is a 12mm bolt holding the nose cone on, with a short extension and a 12mm socket remove the bolt and nose cone.
IMAG2828.jpg~original


then you will take your sawzall or with a metal blade, or grinder and cut the "cap" or plate off of the frame rail. the cap/plate needs to be removed so that the ARB frame mounts will slide over and sleeve the frame rails.
IMAG2827.jpg~original

IMAG2826.jpg~original

IMAG2829.jpg~original

(i forgot to take the first cap off, thats why you see it on while im cutting -this is no big deal you will just cut through that bolt and it will take longer this way. but the bolt is not used or needed any longer so its inconsequential)

once the cap/plate is removed smooth any sharp or jagged edges on the frame. at this point you can chose to weld in a new plate to recap the frame. this will strengthen the frame rails and prevent them from crushing or colapsing under loads -say from winching or pulling. it is strongly recommended by myself and others that you not only do this, but that if you are not a good welder you have someone who knows what they are doing and how to weld do this, as making a mistake here could result in sever damage to your frame at the very least and possible personal injury to you or someone else later on when your bumper comes lose while winching or pulling -not to mention the damage that could be caused to your vehicle and bumper. (i did not do this at this time only because i wanted to get the bumper on and was trying to hurry. i will be removing my bumper in the next week or so to install my winch when it arrives, and at that time i will recap and sleeve the inside of the frame as well at that point) and while the frame is still warm from welding, now would be a great time to put some primer and paint on the fresh steel. -i recomend some self etching primer for a base coat x2, then a coat x2 of primer sealer, then some black(-if you want everything to look nice, other wise just leave it primer, no one will ever see it...) to prevent rust.
IMAG2830.jpg~original

(ill post up more pics when i weld in the cap and paint it)

once this is done and you have allowed the frame to cool, simply slide on the ARB bumper mounts over your frame rails. (this may take a bit of work as they are very tight tolerances, and may require some gental hammering to push them on, if you do need to hammer on them i recommend that you use a heavy short handled rubber mallet so you do not damage the poweder coated finish of the mounts. tap these pieces on until the holes on the bottom line up with the holes on the bottom of the frame rails (the same holes that your factory tow hooks attach to). then reinstall the four bolts and your tow hooks to hold the mounts in place.
IMAG2836.jpg~original

(ill post better pics of the mounting brackets when i install my winch)

then find the six(6) square nuts that are inside of the clips and install them into the six(three per side) square holes in the brackets. they should just clip in.
IMAG2835.jpg~original


now its time to pick up your bumper and set it on the mounting brackets. this is really where it would be nice to have another set of hands(and would be needed if your installing a winch, but the bumper by itself is do-able by yourself) align up the holes with the clipped nuts. once its in place insert the six(3 per side) bolts into the clipped nuts on the mounting brackets and just start the bolts, do not tighten them down all the way, just give them 3 or 4 turns each (make sure to use the supplied flat fender and lock washers with these bolts). as you can see in the pic their is a large gap between the body and the bumper, this can be adjusted by using a floor jack to raise the bumper(this is why you do not tighten them down all the way). once everything is where you want it and the gaps are equal on both sides you can tighten down the bolts(14mm)
IMAG2837.jpg~original

IMAG2838.jpg~original

(my helper and supervisor checking on things...)
IMAG2840.jpg~original

IMAG2842.jpg~original


now your bumper is installed and it is time to wire up any lights you may want to install on your new bumper, and your turn signals -for this you will need to cut the factory plug-in end off the wire harness for your turn signals. i simply just used a insulated female blade type plug and installed that onto my factory wires to allow the ARB blade connectors to fit right in. then i individually wrapped each connector in electrical tape and then tapped them together and up and out of the way.
 

Members online

Forum statistics

Threads
278,310
Messages
3,554,077
Members
248,016
Latest member
Advally Service

Trending content

Back
Top