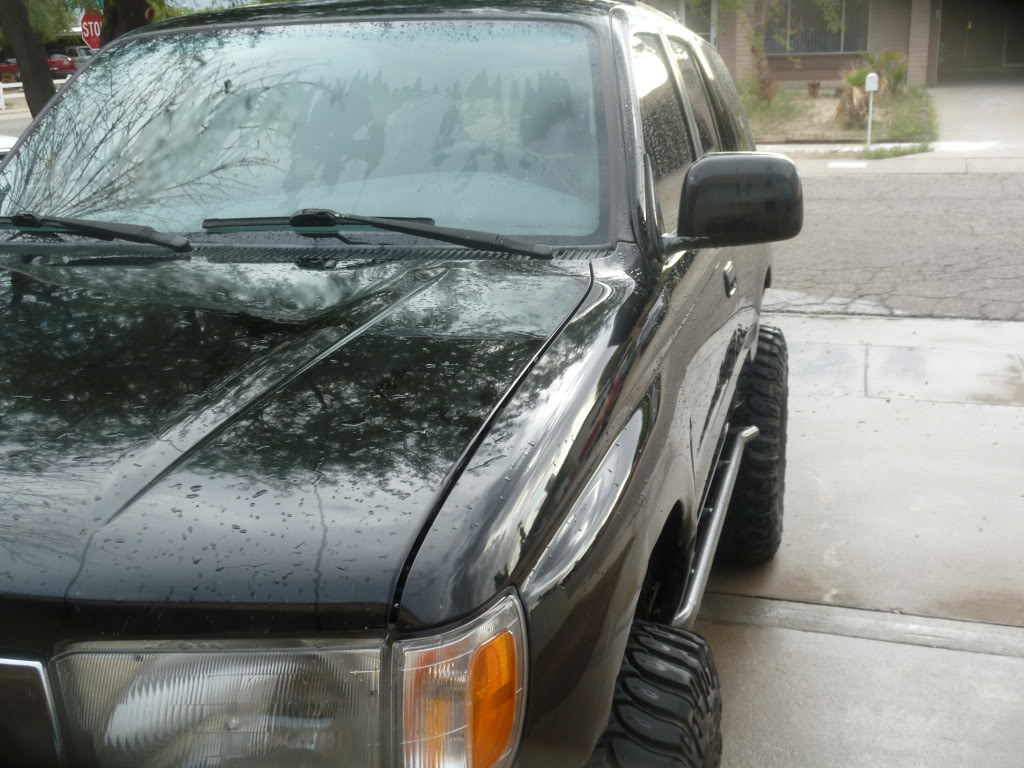
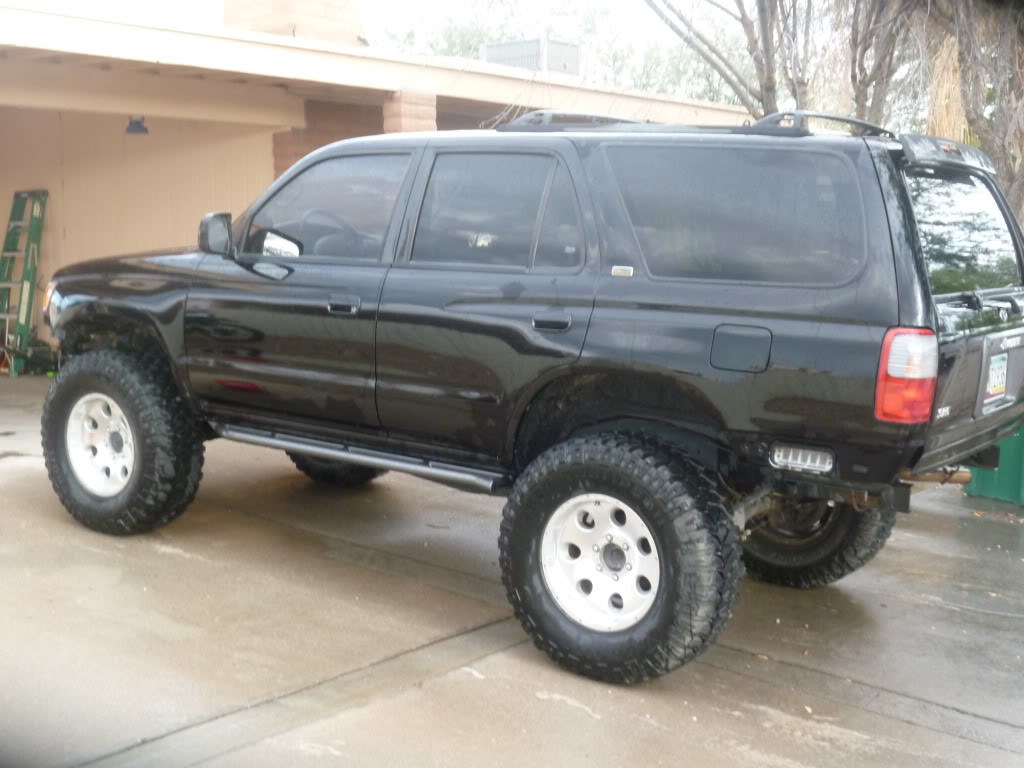
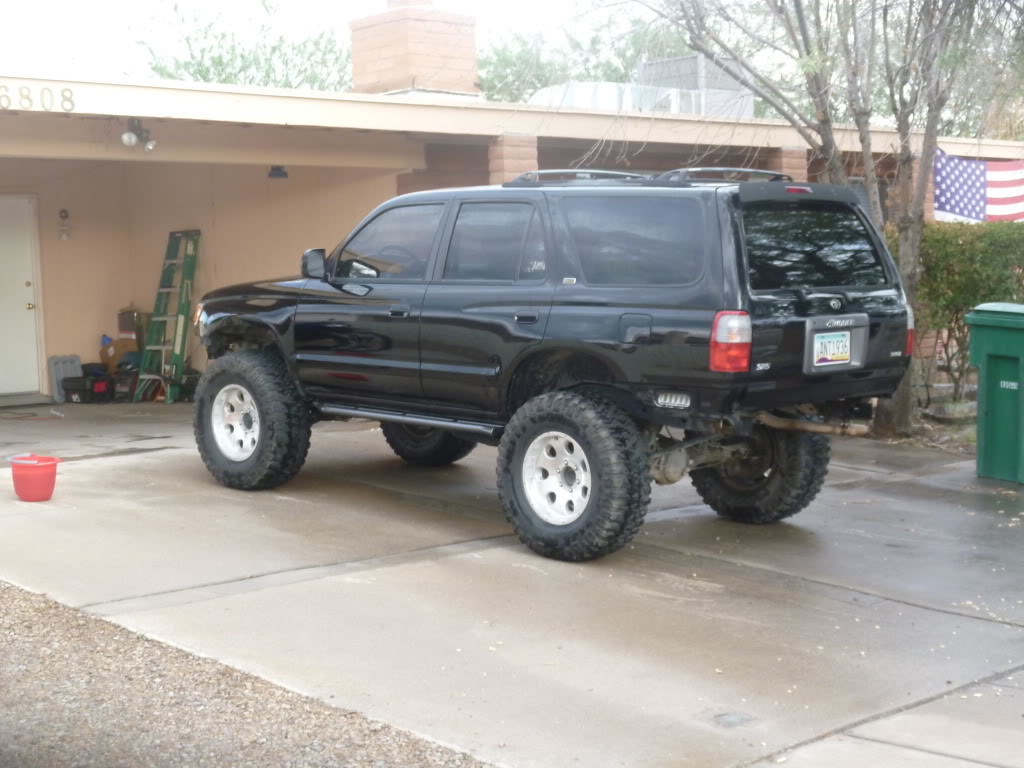
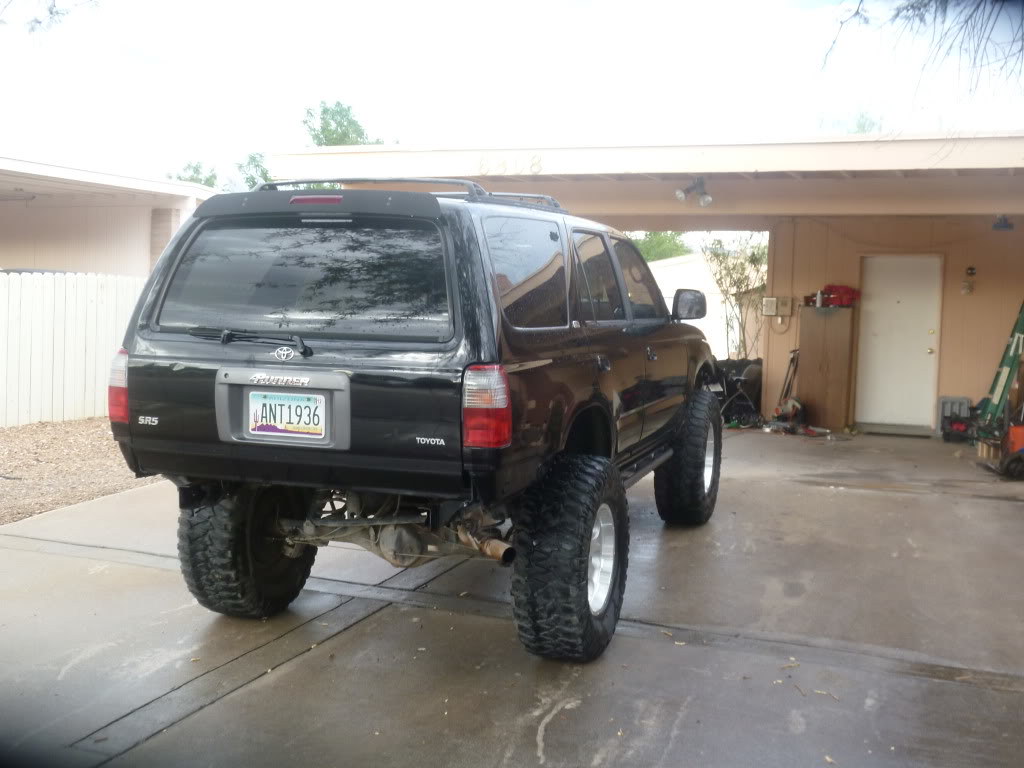
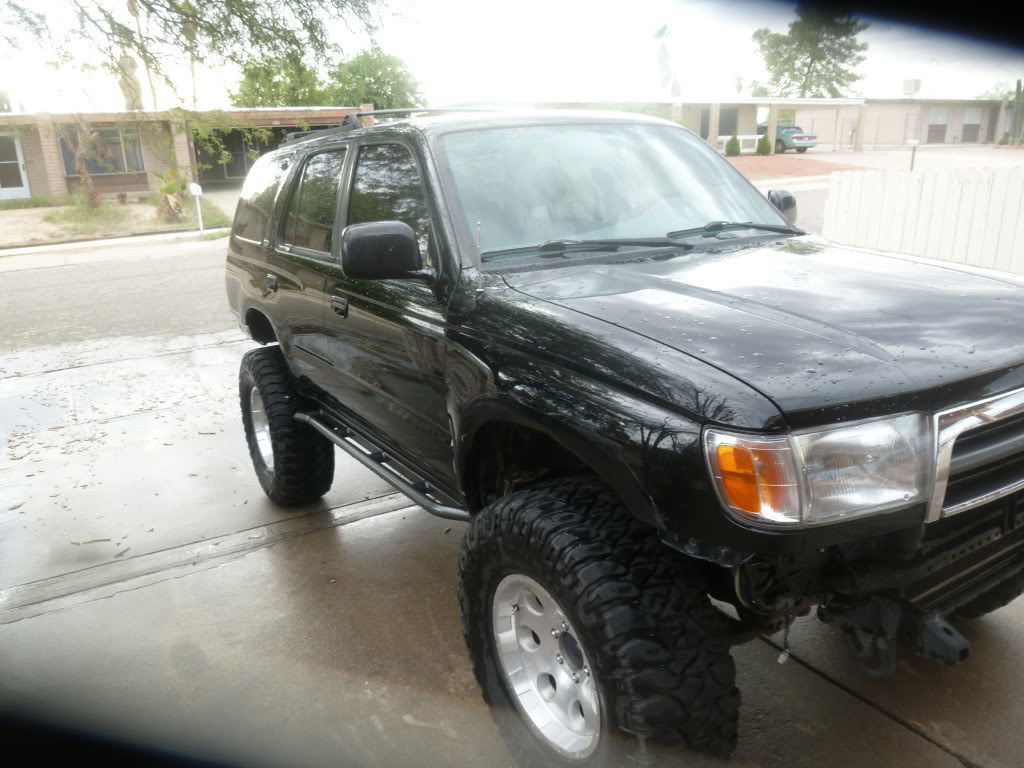
The Smokey Build

Nice work, it doesn't look too bad, but you should have gone with the NGK spark plug wires that come in blue. You get your lift on yet?

 
Thanks Guys it's gonna be a great ride

Nice work, it doesn't look too bad, but you should have gone with the NGK spark plug wires that come in blue. You get your lift on yet?

I never thought of the NGK's, Honestly Gadget told me there is really no advantage over the stock wires. Except now I know that Color is one. LOL. Front kings are on still need to get the rear coils and shocks in. then Panhard drop bracket.

Dang. That would be a hard 500 miles! Looks great and sounds like it drives great too!

It's gonna be super hard to be good but I really want this motor to last for a really long time so 500 medium easy miles and 150k + Wide open fun.:thumb3:

This rig has my wheeling pants going crazy over the possibilities of what you are going to do next. Good work.
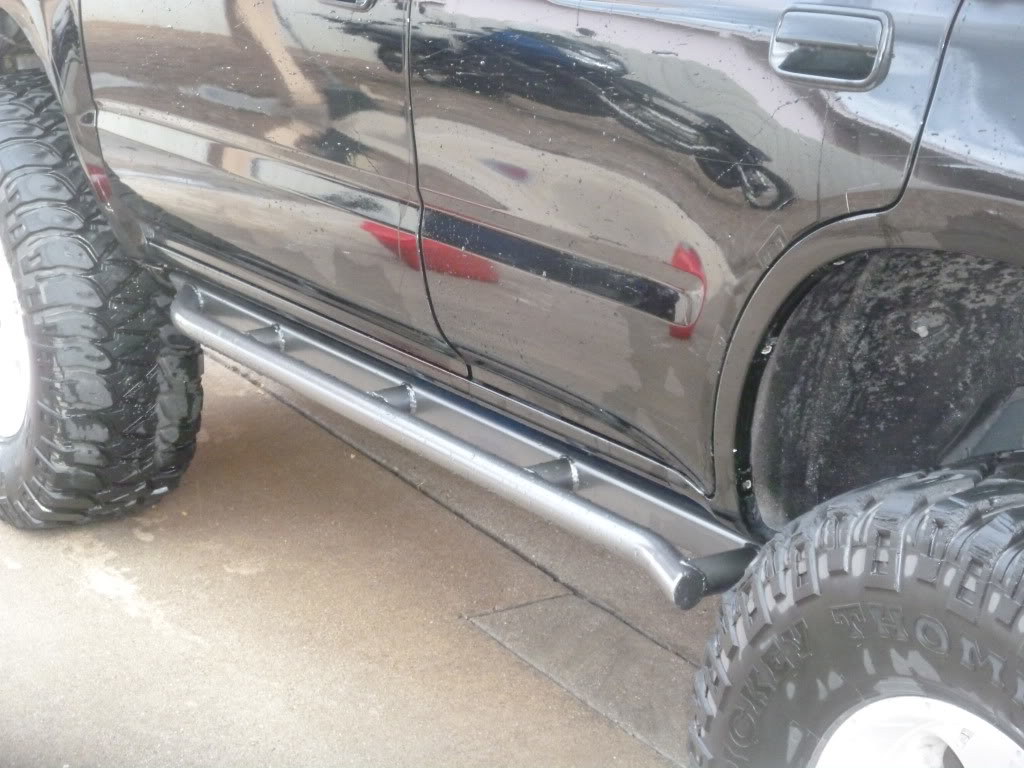
Sliders are next, sitting in the garage waiting to go on. My wife asked today how much the front bumper I want is going to cost because we should get it. I have the best wife ever.

then the list is basically:

Rear bumper
Gears and Lockers
Dual cases
and some day SAS

In the mean time its gonna get driven and enjoyed every day and wheeled every chance I get.
 
it's been a hard 500 miles but the first oil change has come and gone and all I can say is Wooooohooooo:jaw drop::jaw drop::jaw drop: Awesome. So in the mean time I had a chance to do a little work. Got the Rear suspension in and the stance and ride is way better. Also got my Addicted Off-Road Sliders welded on. They look marvelous and Stout. here are some pics
Smokey 21 by Sam Wright, on FlickrSmokey 22 by Sam Wright, on FlickrSmokey 20 by Sam Wright, on Flickr
 
Last edited:
And now some of the sliders. Thanks Scotty for building a great product. Because I don't have flares I cut down the legs to bring the square tube under the pinch weld. I used a thick washer as a spacer and it is just right for clearance to make sure the body doesn't hit the sliders. I have to say that I think they are the best sliders for our 3rd gen runners out there.

Smokey 26 by Sam Wright, on FlickrSmokey 25 by Sam Wright, on FlickrSmokey 23 by Sam Wright, on Flickr
 
Last edited:
Honestly I am at a loss about what I want to do next. I need to save up some money before I get to do anything. LOL right now every extra dollar have is going into an account to lift and tire my wife's 2003 runner.

things I would really like to do are obviously

front and rear bumpers -

For the front I want to duplicate Eric B's front bumper.
EricBfrontBumper1.jpg~original

EricBfrontbumper2.jpg~original

EricBfrontbumper3.jpg~original

EricBfrontbumper4.jpg~original


For the Rear I want to get Addicted Off-Roads Rear bumper.
RearBumper01.jpg~original

RearBumper02.jpg~original
 
Then I really want to do gears and lockers. I find myself going back and forth because with the supercharger and the 5speed it really runs great even on 35's and 4:10's. I have thought about leaving the 4:10's and going dual cases instead then I have gearing to crawl and still quick and fun around town and cruise 77mph at 2600 rmp in 5th. But I would still want lockers and because this is my daily I would want a selectable locker at which point I might as well regear since I would be replacing the carrier. Decisions, Decisions. :guitar3::guitar3:
 
Im going to 35's real soon and im going 5.29's if you get around to installing them before I do let me know how that gear install goes on the front diff. It is going to be great bolting the clam shell together to check the pattern and then the backlash through the fill/drain hole. If you want gears the cheapest i have found is Sierra expeditions with nitros (around $180 each). its only cheap because of free shipping and no sales tax. If not there is a vendor on PIRATE selling Yukon gears for $150 each f+r plus $25 for shipping and in my case sales tax. I just got a quote from him so these prices are still good.

The deal with the dual cases is going to be fitting them. You will need to move the gas tank and cut the rear cross member out for install. You could probably just drop the tank for the install. There is enough room once it is in. The x-member has to go though. And then you get the lovely drive shaft shortening and extending. The rear will have to be done at a shop. the front can be done cheap (depending on front locker) If you use and aussie or similar it will make the front drive shaft always turn with the drivers tire so it will have to be a balanced drive shaft.

Honestly i have debated the same thing. Its cheaper to do gears , even more so if you do it yourself, which i plan on. Plus the gears will be nice once you add some more weight and even if you dual case it. it will help get it to the trail. And you skip all the drive shaft and gas tank BS
 
There is the option of going with a marlin lefty and a 4.7 gearset and then no need to change the driveshafts or crossmembers. I will be setting up the gears myself. I've never done a front clamshell diff but prob have done a dozen rear 8's and they are pretty straight forward. But it is gonna be a while because if I want to do anything really challenging I use this :hungry:
<iframe src="http://www.youtube.com/embed/AOn7tFbXy4M" allowfullscreen="" frameborder="0" height="345" width="420"></iframe>

J love your build and if you ever get out toward AZ we will have to drive over some stuff together. LOL
 
Thanks :) I wish i had a crawler, but o well i have an ifs 4runner

Im not too far, once it cools down I would roll out there. Maybe Ill go out there if there is a ttora az thing. Az has some cool stuff. Or if you come out to cali we should wheel some hard stuff like the hammers. And that lefty is okay, but the price kills me. Its as much as an Atlas.
 
I only have both because I've drove the 84 till it was so dented up that I had to get something else and It is really hard not to mod the heck out of the 98. We are planing a Rubicon trip in 2012 and would love to meet up with some of the T4R guys as we go. Ive never done the Rubicon but my 84 has without me. A buddy blew his truck up right before a trip and borrowed mine. LOL he is a good friend and I knew he would fix anything he broke.

I agree that the marlin lefty is wicked pricey and that is why I really wouldn't do it. Prob will just regear and hopefully do ARB's front and Rear.
 
Ill let you know how the rubicon is when I get home on the 12th :) . I would be in for next year for sure. I need to go out to moab again when its not too hot. and i want to go to AZ rocks.

And as for the arb f+r if you can afford it thats all good, but if not try an aussie up front. I know some people that said they would have rather saved the money. I have blown up some cv's and im sure ill go through more, but im starting to figure out what it good with and isnt.
 
definitely let me know how it is. Take lots of pics. I got to do AZRocks this year and it was a blast. You should definitely plan for next year. As far as the hammers go I would love to go out there. We love moab. The Cruise Moab is a great Event. Totally fun and the FJ80 guys are always jealous of how light and nimble our runners are. I run an Detroit EZ in the front of my 85 and it works great. I think I will save up for the ARB's though and that reminds me I want to do a locking hub conversion. I just missed a set of Taco manual hubs at the junk yard this year. When I went back to get them they had crushed the Taco. :repuke: Also on the list is I would like to do a full float rear disk conversion at some point.
 
Well its been a while since I got to do anything to the runner but necessity is the mother of upgrade I always say. LOL I had a front drivers caliper freeze up and destroy the rotor. Darn guess I gotta do the tundra upgrade. Shopped around and found a set of 13WL's at Orilley Auto in stock and a good set of rotors and ceramic pads for 313 + tax and 150 core carges. 505 out the door and then a return of 164 in core and for about 340 I am done. I would do some pics but honestly we all have seen them (their brakes). A big thank you to ALBPM and BigFishAllDay for the bedding in process. I have never done this before but I was really surprised a what a difference it made. It was fun to get the front brakes smoking before a nice leisurely drive on the freeway to cool them down. The braking difference in amazing. A buddy of mine who owns a 2003 tacoma double cab and just redid his brakes with stock components went for a ride to compare the braking capability to his truck and is now kicking himself for not doing this upgrade. Also on a side note after putting my lift on I attached the rear sway bar and have been having some binding issues and rough riding in the rear suspension. I disconnected the rear swaybar and my great ride is back and I don't notice any extra body roll. Next has gotta be gears and I keep going back and forth but I have obtained an 8" Detroit true track and will prob put it in the rear. It is set up in a 3rd with 5.29's but I really hadn't planned on going deeper than 4.88's. I really don't want to pay to regear both front and rear if I can help it, so I will get a set of 5.29's for the front and hopefully can do so with an ARB. I just really don't want to be running down the freeway at 75-80 and running 3000+ rpms.

One last thing I've got the motor fully broke in and man it just runs like a bandit with Cletus hot on his tail. YEEE HAAA!!!!!!:driving::driving::driving:
 
Last edited:
Hey Smokey, this is the Bandit. I need to replace my brakes with the Tundras sometime. That sounds like a great mod. Do you mind sharing the bedding in process you used?

BTW: Cletus chased the Dukes. Sheriff Bufford T. Justice chases the Bandit. I should know. Haha.
 
Hey Smokey, this is the Bandit. I need to replace my brakes with the Tundras sometime. That sounds like a great mod. Do you mind sharing the bedding in process you used?

BTW: Cletus chased the Dukes. Sheriff Bufford T. Justice chases the Bandit. I should know. Haha.


LOL I got my shows mixed. Here is the procedure for bedding in

Originally Posted by ALBPM
Also a Bed-In process for the new Pads would be a good thing for this Thread...

This is what 4-Ripcord and I did after upgrading our Runners.

Bedding in Advantages:

1.Gradually heat treats the rotor and eliminates any thermal shock in the rotor.

2.Burn off volatiles and moisture from the resin that is near pad surface. This will eliminate “green fade.”

3.Establishes a layer of transfer film about a few microns thick on the rotor surface. Shearing of the film during friction is an effective source of friction force. Otherwise, when using a freshly ground rotor without the transfer film, the main friction force would come from cutting, plowing, or scoring the asperities on the rotor surface. This leads to inconsistent braking effectiveness.

4.Mate the two surfaces to a near perfect geometrical match, so that the contact area is high, and therefore the friction force is increased.

5.The performance of a fresh rotor/fresh pad system would be inconsistent. This is due to ever-changing structures and properties of the two mating materials. Bed-in of pads and rotor will form a stable transfer film.

6.If bedding in procedure is not applied, a stable transfer film may not be established for a long time. In other words, the rotor surface would have to be constantly regenerating a film that is not quite stable for a long time. This effect would reduce the performance and increase the wear.

Bed In Procedure:

From a speed of about 60mph, gently apply the brakes to slow the car down to about 45mph, then accelerate back up to 60mph and repeat. Do this about four or five times to bring the brakes up to operating temperature. This prevents you from thermally shocking the rotors and pads in the next steps.

Make a series of eight near-stops from 60 to about 10 mph. Do it HARD by pressing on the brakes firmly, just shy of locking the wheels or engaging ABS. At the end of each slowdown, immediately accelerate back to 60mph. DO NOT COME TO A COMPLETE STOP!

(Note: With less aggressive street pads and/or stock brake calipers, you may need to do this fewer times. If your pedal gets soft or you feel the brakes going away, then you've done enough. Proceed to the next step.)

During this process, you must not come to a complete stop because you will transfer (imprint) pad material onto the hot rotors, which can lead to vibration, uneven braking, and could even ruin the rotors.

Depending on the pads you are using, the brakes may begin to fade slightly after the 7th or 8th near-stop. This fade will stabilize, but not completely go away until the brakes have fully cooled. A bad smell from the brakes, and even some smoke, is normal.

After the 8th near-stop, accelerate back up to speed and drive around for as long as possible without using the brakes. The brakes will need at least 10 minutes to cool down.

Obviously, it's OK to use the brakes to avoid an accident, but try to minimize their use until they have cooled.

After the break-in cycle, there should be a blue tint and a light gray film on the rotor face. The blue tint tells you the rotor has reached break-in temperature and the gray film is pad material starting to transfer onto the rotor face. This is what you are looking for. The best braking occurs when there is an even layer of of pad material deposited across the face of the rotors. This minimizes squealing, increases braking torque, and maximizes pad and rotor life.

After the first break in cycle shown above, the brakes may still not be fully broken in.

A second bed-in cycle, AFTER the brakes have cooled down fully from the first cycle, may be necessary before the brakes really start to perform well. If you've just installed a big brake kit, the pedal travel may not feel as firm as you expected. After the second cycle, the pedal will become noticeably firmer.
 
So for the last couple of days I have been working on a project. I have really been going back and forth on what gear ratio to run I have two extra 3rd members one 4.88 and one 5.29 So I decided that I would throw one in and drive around for a while and see if I like it. I have needed to replace my rear axle seals for a while now and so this was a great chance. I also got a wild hair about doing a rear disk conversion. Based on a 1st gen pirate thread I began to do a lot of reading and research and I felt that I had enough info to tackle this on my own. I wish it was that easy but here I went.

First pull the axle shafts and do axle seals. Done :tongue:

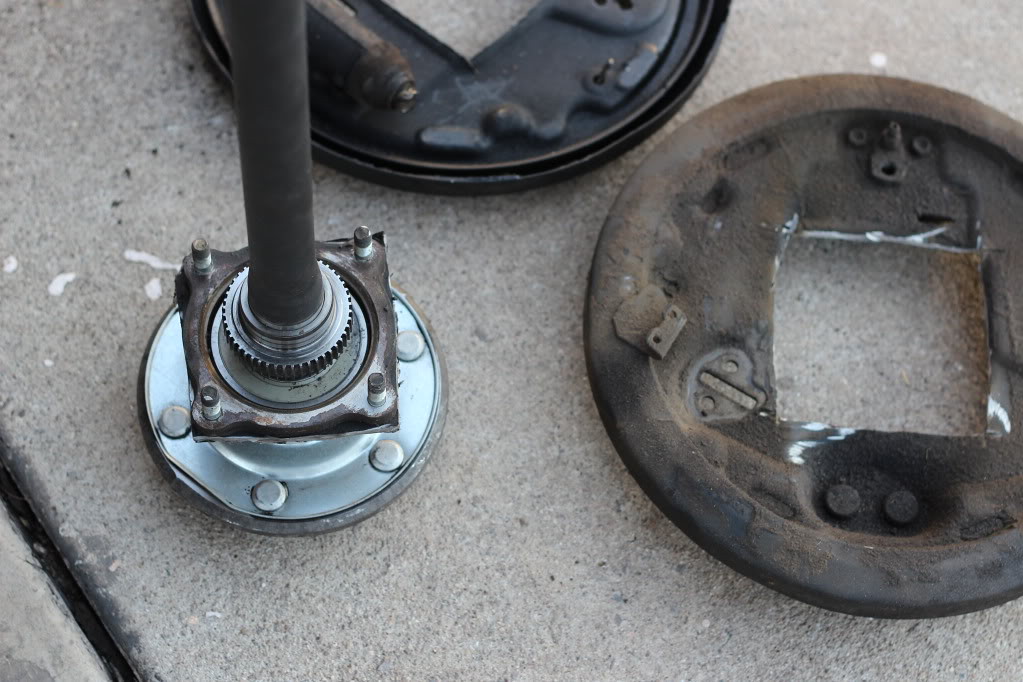
Next use a cutoff wheel or plasma cutter, or torch to cut around the mounting flange taking care not to put too much heat into the bearings and keep a fire extinguisher handy. rear axle oil is flammable.
Rear Disk Brake 1 by Sam Wright, on Flickr
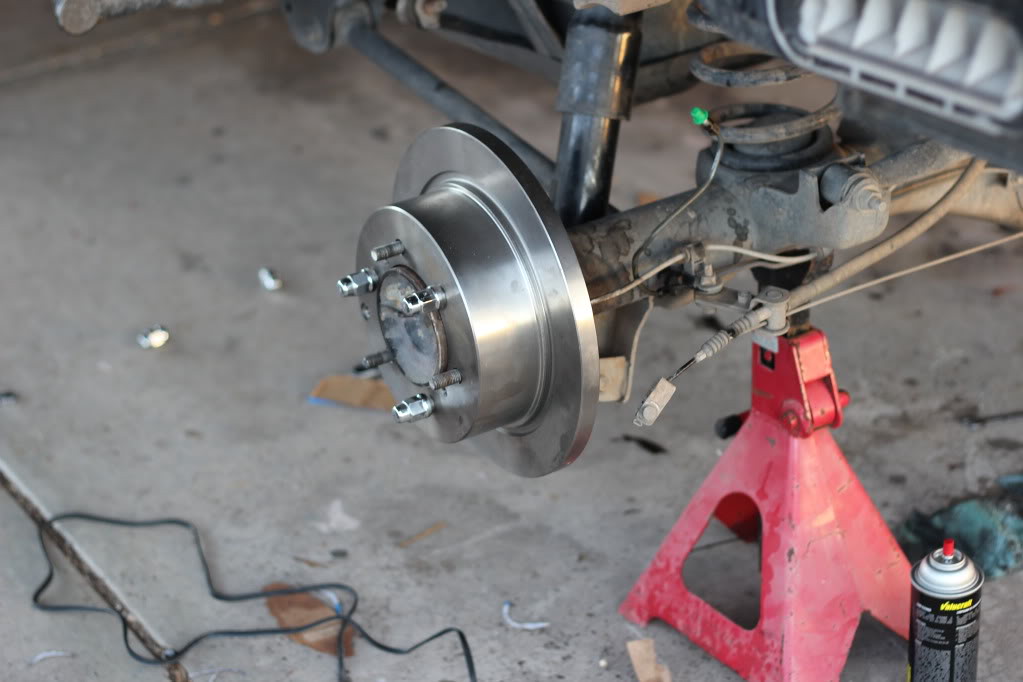
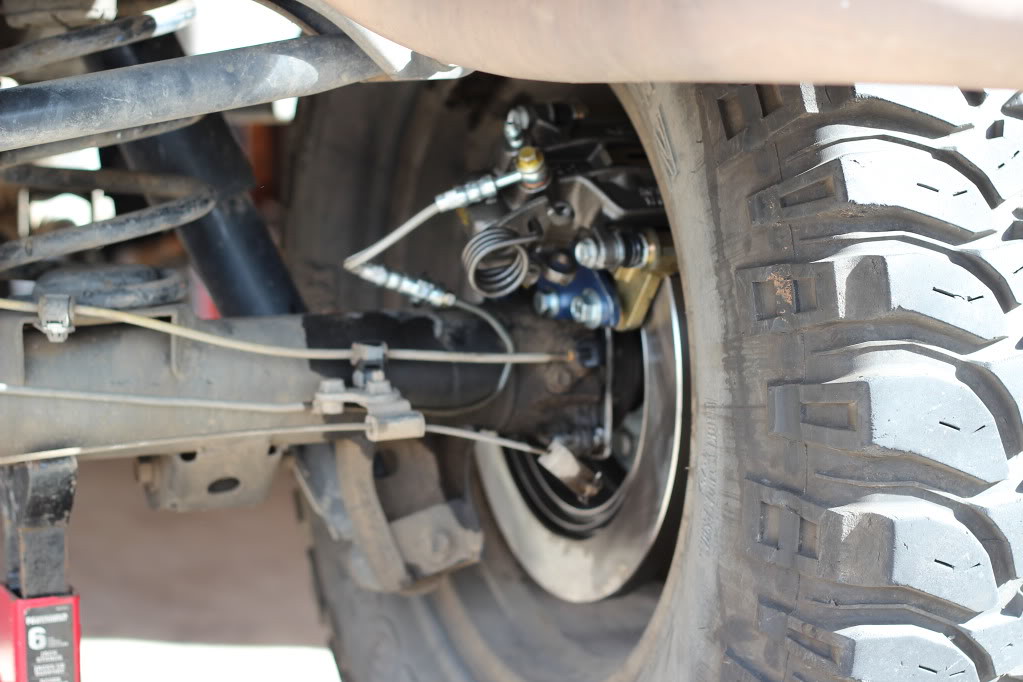
I used the following parts. brake rotor from the rear of a 94 Montero Sport. Rear Caliper from 94-04 Mustang Gt. Custom flex line with banjo connector.

Rear Disk Brake 3 by Sam Wright, on Flickr
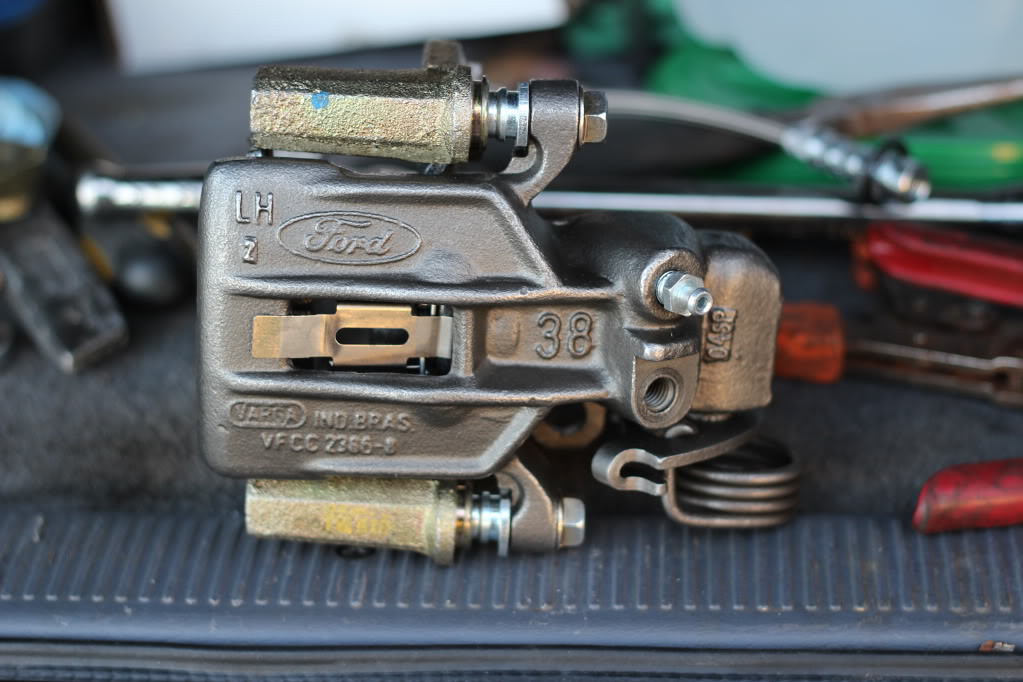
Rear Disk Brake 7 by Sam Wright, on Flickr
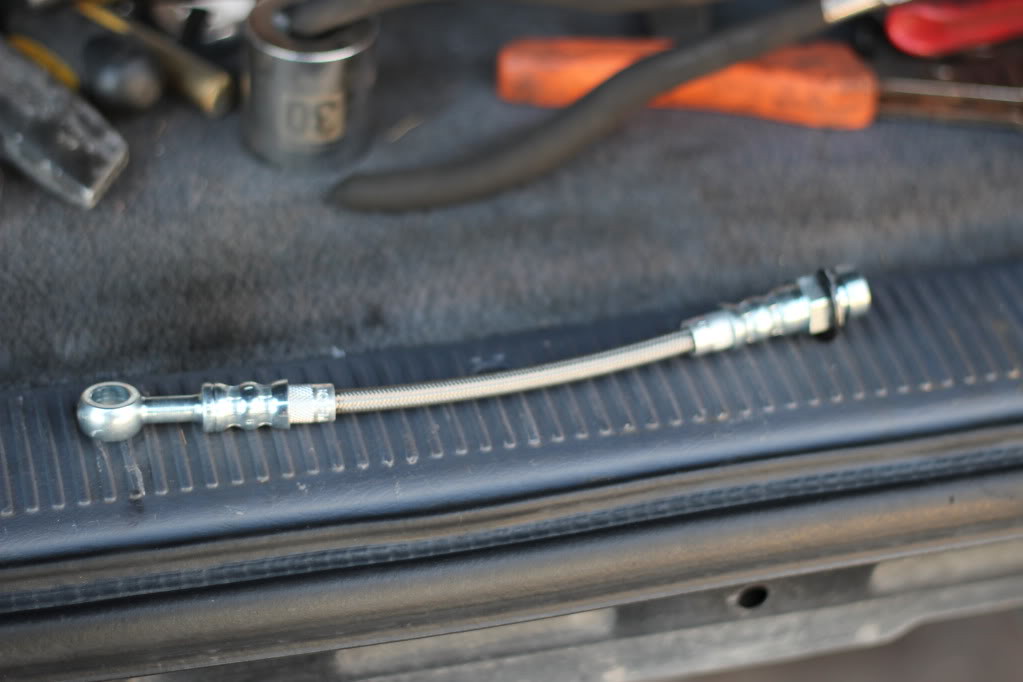
Rear Disk Brake 5 by Sam Wright, on Flickr
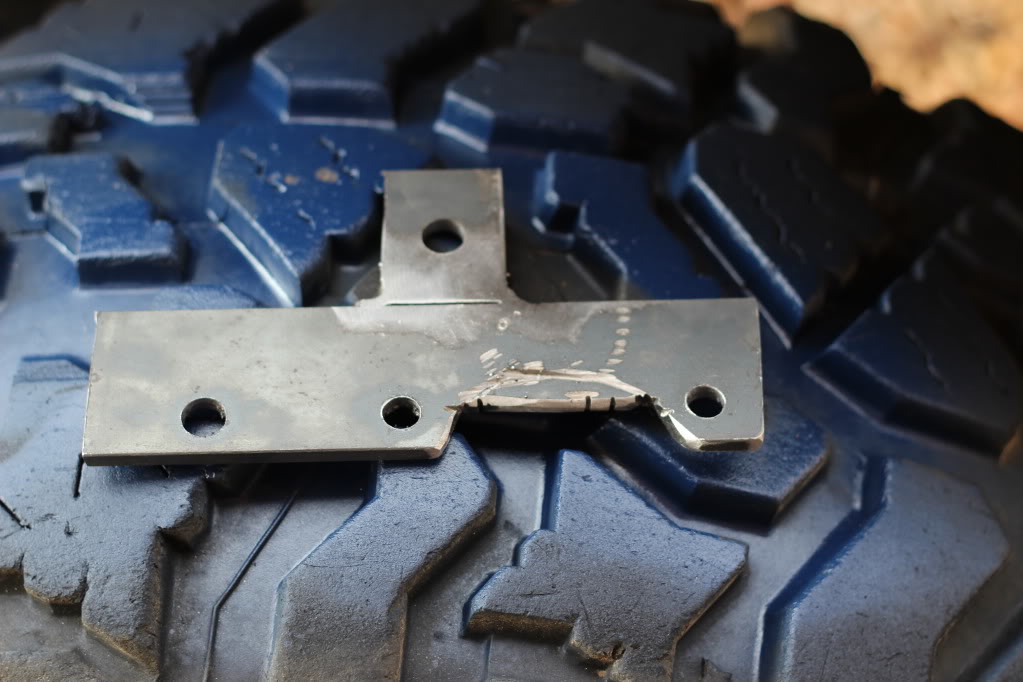

Next you have to remove 2 of the axle bolts. We used a air hammer, but it is possible to install the axle shafts and only bolt in the bottom 2 and then drive out the top 2. These will be replaced later.

Then you have to build a bracket to hold the caliper.

Here is my prototype

Rear Disk Brake 20 by Sam Wright, on Flickr
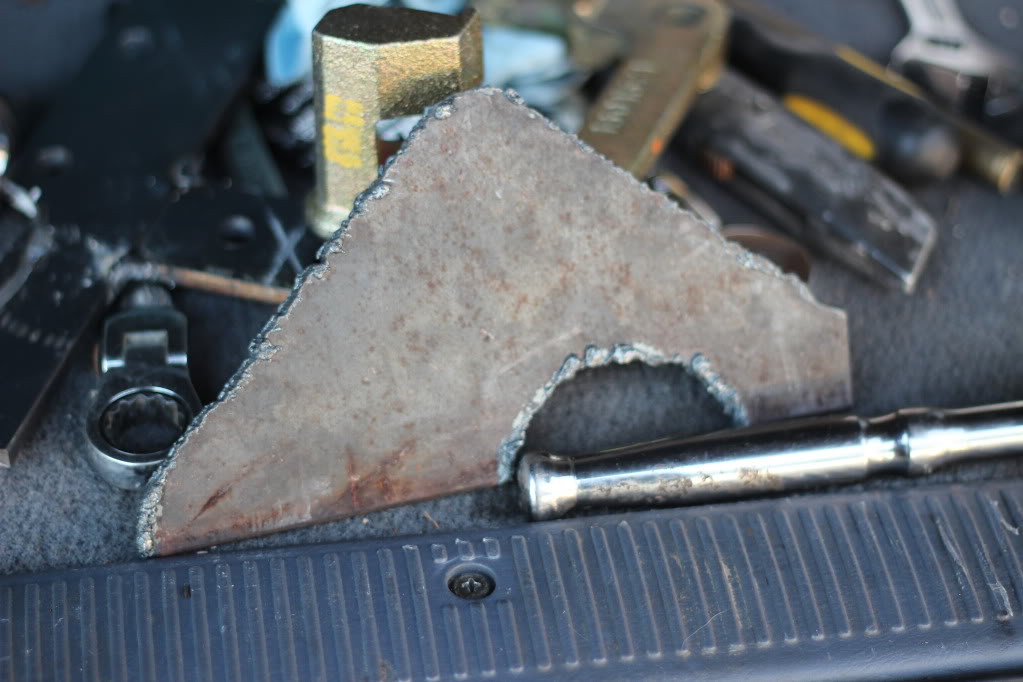
Here is the torched bracket made of 1/4" plate

Rear Disk Brake 4 by Sam Wright, on Flickr
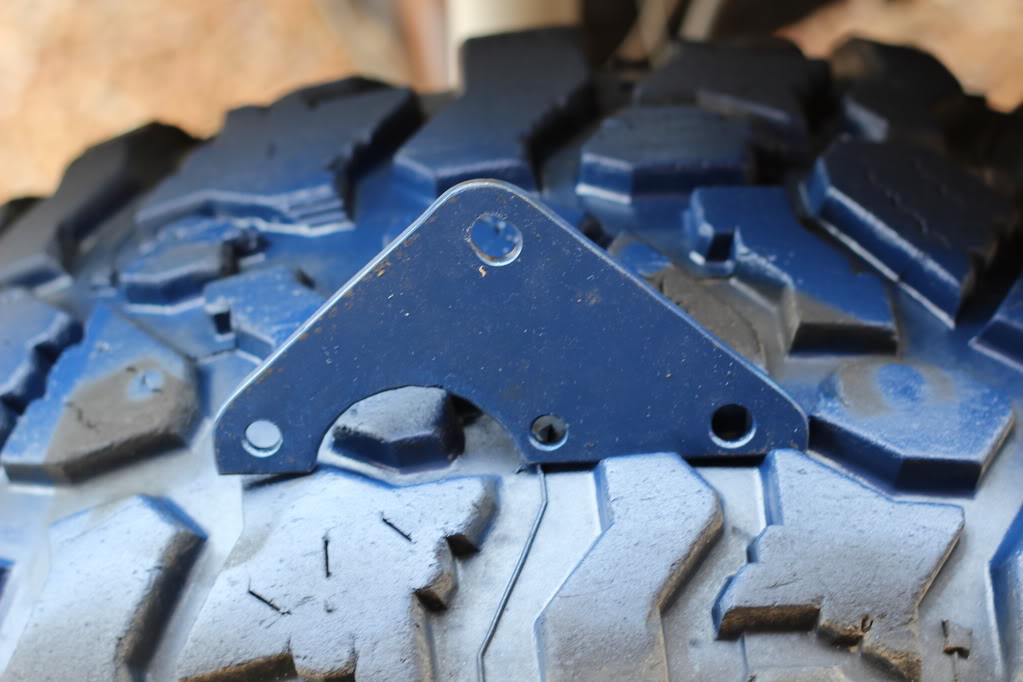
cleaned up and drilled and painted

Rear Disk Brake 11 by Sam Wright, on Flickr
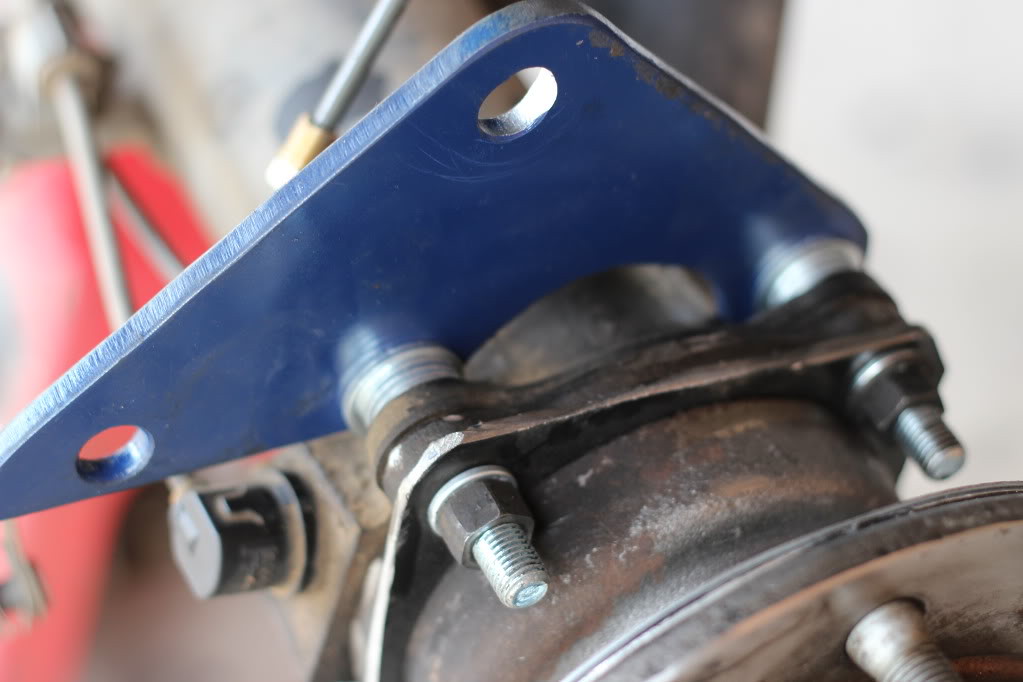
Now you have to shim the caliper bracket so the Caliper is centered on the rotor.
Rear Disk Brake 13 by Sam Wright, on Flickr
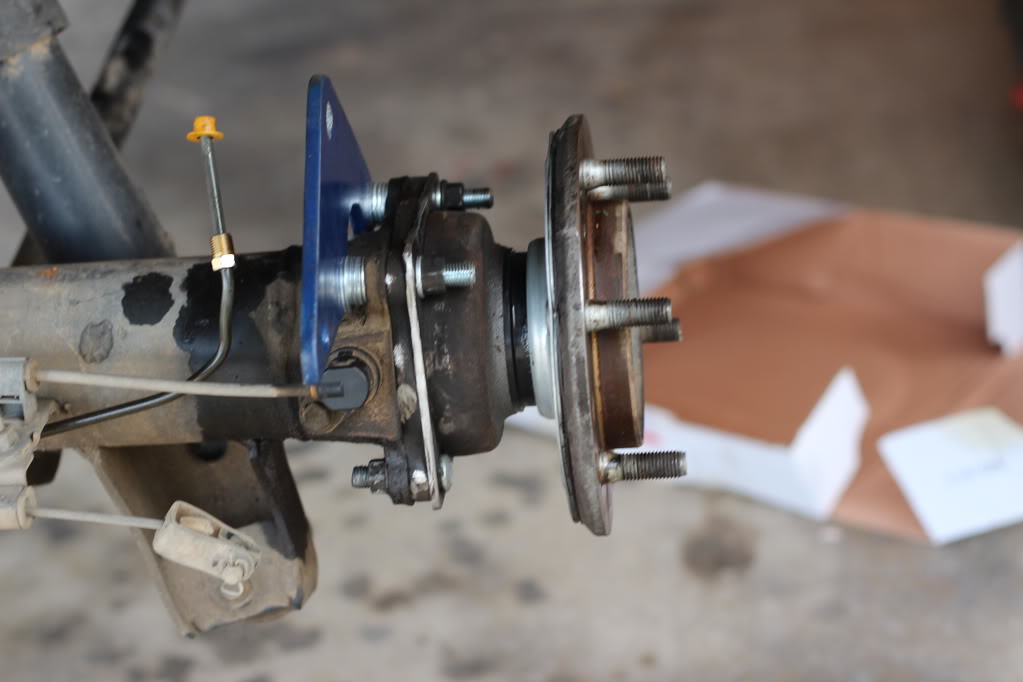
Rear Disk Brake 14 by Sam Wright, on Flickr
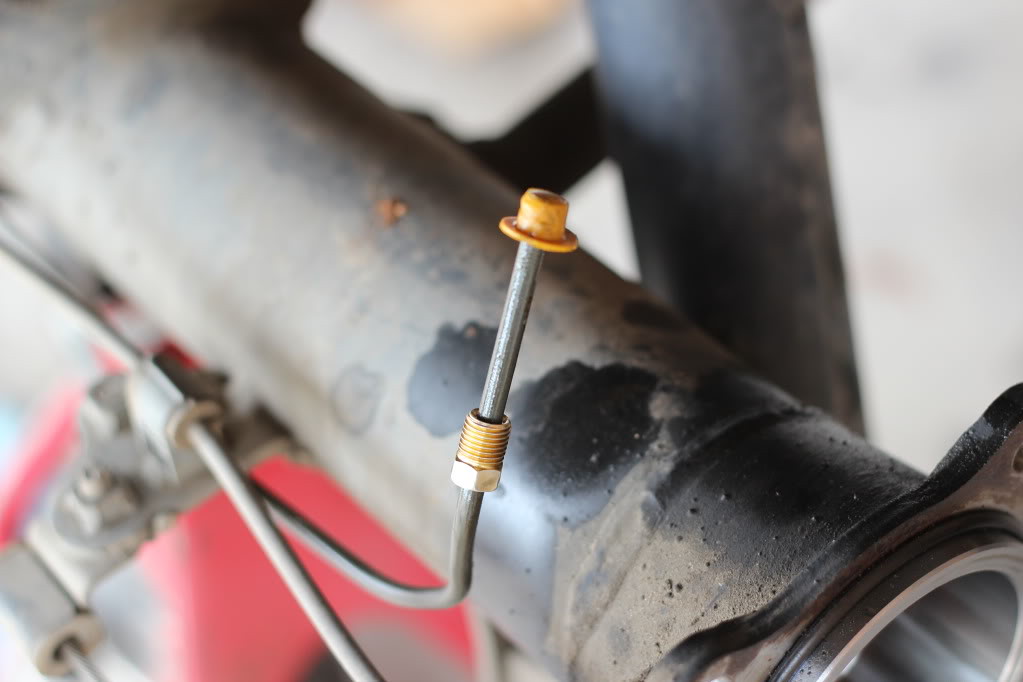
I cut and reflared the hard line to create a better angle for the flex line.
Rear Disk Brake 9 by Sam Wright, on Flickr
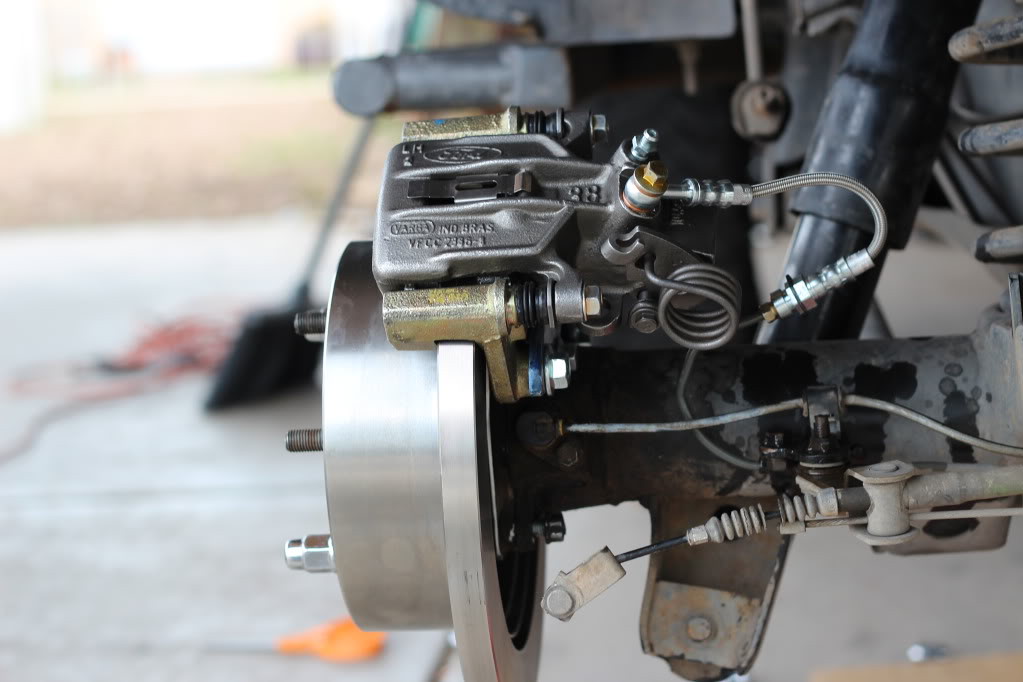
Bolt it all together, bleed the brakes and there you go.

Rear Disk Brake 10 by Sam Wright, on Flickr
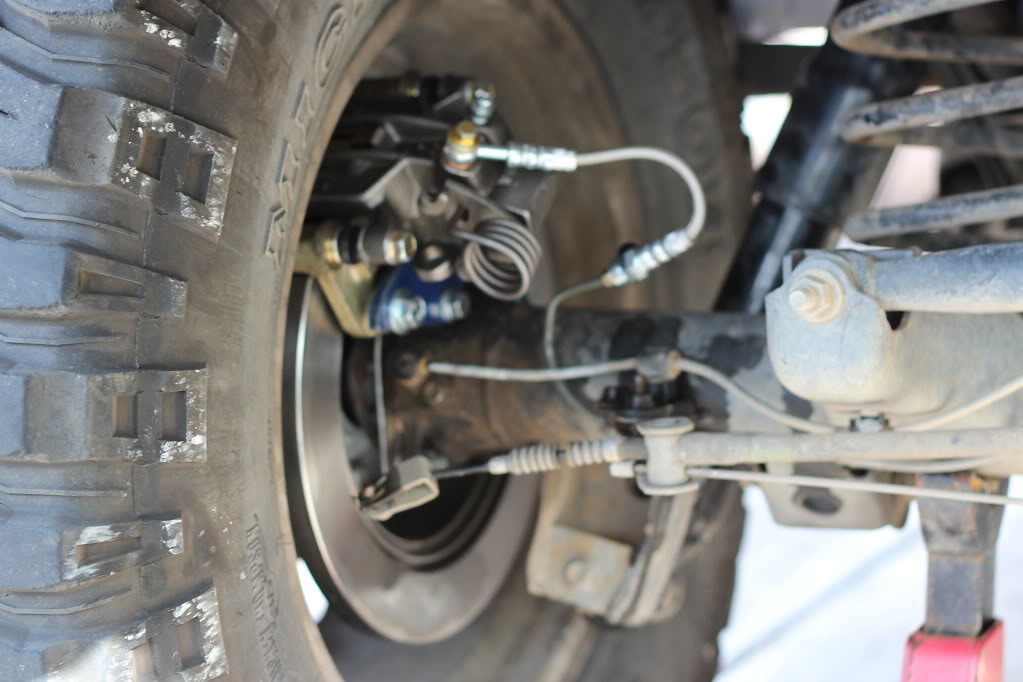
Reinstall the tire and enjoy extra stopping power, Brakes that don't cake up in mud and snow, and you can work on the rear end with out cracking open the brake system.
Rear Disk Brake 16 by Sam Wright, on FlickrRear Disk Brake 15 by Sam Wright, on Flickr
 
Last edited:
I specifically chose the calipers because they have been around forever and I should have easy access to parts. Also the mustang weighs a little over 3000 lbs and so I thought that they would be a good balance for the front 13WL's. And they have a mechanical parking brake.

So a few thoughts now that I'm all done. Except the ebrake.

Pro's
1. super clean setup and stops wicked nice.
2. easy rear pad changes.
3. I can get into the rear axle with out breaking open the brake system. I hate bleeding the brakes just to change a 3rd member.

Cons
1. expensive and a lot of work to get it done. About $560 since I bought everything new.
2. I may need to upgrade my master cylinder because the pedal is a little softer than I normally like. Maybe a 1-1/16 bore or 1-1/8. I think this is partly because I have already moved up to the 13wls and together with the rear calipers I could use the extra volume.
 

Members online

No members online now.

Forum statistics

Threads
278,312
Messages
3,554,083
Members
248,016
Latest member
Advally Service

Trending content

Back
Top