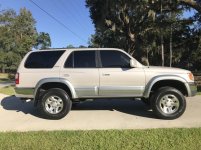
TonyB66's Ownership -> Build Thread (2000 Limited)

Brian and Mike, thanks for the feedback. I have a Pioneer here so I'm not going to hold my breath on this one...

I'll reach-out to a forum member who has the same unit and ask him before I wire-in a switch.

As it stands now, I'm going to source speaker wire connectors for the crossover and speakers at a local auto parts store. Not sure what I'll see there with respect to gold plating, but I'll likely go with the normal tin plating (over brass or copper). The negative on the speaker takes a pretty small female connector, what looks to be 0.11" wide, the smallest as seen here:

https://www.crutchfield.com/p_120FQS10PK/Metra-Female-Quick-Slides.html?tp=2610

Installed a couple green LEDs today for the rear defrost/ECT and what looks to be the rear window control...
 
As a matter of follow-up, the forum member with the same Pioneer HU uses a stubby antenna, so no certainty of stock antenna's operation with this HU. Hopefully I'll find-out soon enough. Seems easy enough to wire-in a toggle switch, the blue wire I had read and heard...

AutoZone had these:

tonyb66-albums-misc+photos-picture49500-img-4463.jpg


They are the correct widths for the speaker + and - blades. Also, gold-plated butt connectors from the amp out to speaker wires...

What I didn't find yet are the fork blade connectors for the cross-over. I might try a Best Buy or Fry's Electronics over the weekend. The standard tin-plated ones will just barely fit (tight) within the allotted space though.

tonyb66-albums-misc+photos-picture49501-img-4459.jpg


On the backside of the cross-overs I added some remnant pieces of butyl that will keep the box off the inside of the door's sheetmetal. Hardware I picked-up at THD. I will locate these today in each door and start the speaker wire routing through the door conduits...
 
Looks like you're making good progress on the connectors, but in a pinch I filed down Spades and Rings to fit in tight spaces. Hope you don't have to resort to that.

Sent from my Pixel XL using Tapatalk
 
Looks like you're making good progress on the connectors, but in a pinch I filed down Spades and Rings to fit in tight spaces. Hope you don't have to resort to that.

Sent from my Pixel XL using Tapatalk

I was pleasantly surprised at what I found at AutoZone and O'Reilly's... Shouldn't be so hard to find some quality connectors for the x-over. No tunes until I figure something-out. Given that I don't want to open the door up again, ideally, I'd prefer to not have to replace stuff later...

I've filed and Dremeled such connectors before too. Yup, hoping to not do so here...

Some good news:

tonyb66-albums-misc+photos-picture49502-img-4464.jpg


The white wire is a 12 gauge solid strand from a Romex. I should be good to pull the speaker wire through, hopefully.

Locating the dang crossover within the door cavity, finding a good location, not easy so far. I'll keep looking. The thought of running two speaker wires through the door has crossed-my-mind....
 
Last edited:
Booya

tonyb66-albums-misc+photos-picture49504-img-4466.jpg


Crossover will likely go under the side kick panel area or just above it...

Apparently the tweeter doesn't exactly mount in the factory spot with the included supplies. It will need to be glued. Checking on that later...
 
Can we please shift the focus back to the seats :hello: Lol

Believe me, it's especially hard for me as I trip over them, and the stock ones, daily!

I have audio-related parts coming today and tomorrow. Once the speakers are mounted, speaker wiring in place, power for the amp done, I'll then start working on those seats. I think this can happen next week.

With the seats in, then I'll work on the HU.
 
Booya

tonyb66-albums-misc+photos-picture49504-img-4466.jpg


Crossover will likely go under the side kick panel area or just above it...

Apparently the tweeter doesn't exactly mount in the factory spot with the included supplies. It will need to be glued. Checking on that later...


I spent close to 2 hours trying to find a place for the crossover inside the door panel. I finally found a place where the crossover wouldn't affect the door panel's ability to clip back into place without being pushed out by the crossover.

it was just below the arm rest ... right above the big gaping hole in the door that allows you to see inside the door to potentially adjust the window glass.. there is a small bolt that i removed that holds the window motor mechanism that controls the window going up and down...

it was a tight fit but i think it will be less of a headache if you just mount it inside the cabin in the kick panel... i wish they made these crossover's a little smaller.

I've seen some people mount it inside the panel itself but i can't imagine having to disconnect the crossover every time you take your door panel off.


Addressing your leak, i have found that my rear side glass windows have a small leak and i have also noticed water on the cargo cover at times... very little though, def not as much as yours. When Tim and Mark and I did the sunroof drain video we noticed maybe a fitting came loose on Marks truck that was allowing a crud-ton of water to not flow through the drains. not like the drains were clogged but most likely the fittings came off.... I also had a situation with removing my roof rack cross bars and water got in there, leaked down (didn't get the headliner) and left the carpet in the rear soaked.... so i would start with the roof rack first, then maybe pull your head liner down to address the route the sunroof drain takes making sure all drain connections are still in tack.
 
Last edited:
I spent close to 2 hours trying to find a place for the crossover inside the door panel. I finally found a place where the crossover wouldn't affect the door panel's ability to clip back into place without being pushed out by the crossover.

it was just below the arm rest ... right above the big gaping hole in the door that allows you to see inside the door to potentially adjust the window glass.. there is a small bolt that i removed that holds the window motor mechanism that controls the window going up and down...

it was a tight fit but i think it will be less of a headache if you just mount it inside the cabin in the kick panel... i wish they made these crossover's a little smaller.

I've seen some people mount it inside the panel itself but i can't imagine having to disconnect the crossover every time you take your door panel off.


Addressing your leak, i have found that my rear side glass windows have a small leak and i have also noticed water on the cargo cover at times... very little though, def not as much as yours. When Tim and Mark and I did the sunroof drain video we noticed maybe a fitting came loose on Marks truck that was allowing a crud-ton of water to not flow through the drains. not like the drains were clogged but most likely the fittings came off.... I also had a situation with removing my roof rack cross bars and water got in there, leaked down (didn't get the headliner) and left the carpet in the rear soaked.... so i would start with the roof rack first, then maybe pull your head liner down to address the route the sunroof drain takes making sure all drain connections are still in tack.

Sean, thanks much for the feedback.

This x-over is pretty large too, I feel. I found a place inside the door cavity, but quite near the bottom where the water accumulates and drains, so not ideal, IMO. I then noticed that I might be able to get two wires through that door conduit, and that was indeed the case. Actually, it was not all that difficult...

That leak has me not so happy for sure. I believe you might be correct, and was wondering the same. As I said earlier, it drained down the rear glass on both side, seemingly almost by design, super fast; like there was no blockage, but a disconnect. Damn.

My thoughts for the short-term: For the heck of it, try weed-trimmer line, but a thicker one which I have somewhere. Check my front drains. If those function properly, turn the Runner around, put the nose down, ass up. Oooh, that just got me a little excited!

Regardless, water is getting past the seal, way too much, which is baffling. I really don't think it was closed properly. I'll try some things later today. I will tape the perimeter by Sunday (rains start again Monday).

Long-term: I want this dang thing out. I should start a thread - "Un-limiting the Limited". Electric, leather seats, gone. If replacing the auto climate control is not too painful, I'd like to do that too. Would really like hand crank windows actually. Stuff that just always works. Oh well...

In place of the sunroof, sheet metal, with a hole for my ham radio antenna. And that radio would be mounted on the underside. The antenna run would be like 2 feet. I imagine other cool stuff up there...

Will check-out the roof rack rails. I snugged them down quite well. Not sure why removal of the cross-member would make for a leak though. Short of putting some silicone around around those bolt heads, I think Torx, not sure what more else to do there...

Thanks again.
 
Booya

tonyb66-albums-misc+photos-picture49504-img-4466.jpg


Crossover will likely go under the side kick panel area or just above it...

Apparently the tweeter doesn't exactly mount in the factory spot with the included supplies. It will need to be glued. Checking on that later...

Page 20 and your running boards are still on! ;):
 
Page 20 and your running boards are still on! ;):

In time my friend, in time... Just over two months at this point.

As indicated in the first post and throughout I have a major competing interest for my time with a house remodel that I'm aiming to get done in the spring or summer.

The 4Runner has it's first family trip in 6 weeks, Winter Break for out little ones. Maintenance and getting it ready for a safe and enjoyable journey is paramount for me at this stage. For my wife, a former singer, tunes is absolute must. A tape deck won't cut it, lol.
 
Congrats

Looks familiar. I bought mine a few months ago and have made some minor changes. Congrats. It's looks to be in a bit better shape than mine.
 

Attachments

  • IMG_2516.jpg
    IMG_2516.jpg
    138.1 KB · Views: 430
My Amazon Prime Membership has been extended one month, yet again.

I'm sure some here knows what that means... The RCA cables there supposed to arrive yesterday, then today, now next week. Hopefully that is the extent of what will be late.

Best Buy has squat for connectors. Will hit Fry's Electronics today though...

Got some work done on the rear speakers yesterday.

A dry fit of the adaptor for the 6.5" speakers, allowing me to make some cut marks on the sheet metal.

tonyb66-albums-misc+photos-picture49533-img-4477.jpg


After some work with the Dremel, a file to clean-up sharp edges, some spray paint on exposed metal, I securely attached both rear adaptors with a very strong silicone adhesive.

tonyb66-albums-misc+photos-picture49532-img-4478.jpg


This stuff is quite impressive and has been my favorite silicone adhesive:

https://www.homedepot.com/p/GE-Silicone-Iron-Grip-10-1-oz-Clear-Silicone-Adhesive-HD90058/206692092

I've heard of speaker adaptors rattling lose before. These won't...

Earlier, sticking to the use of adhesives, I used J-B Weld on those busted plastic pieces on each front door. Someone had commented on one of the photos that he had tried different adhesives, to no avail. I think this will do the trick.

tonyb66-albums-misc+photos-picture49508-img-4467.jpg


tonyb66-albums-misc+photos-picture49507-img-4468.jpg


Back to the GE Iron Grip silicone, I used a little bit of that stuff on this:

tonyb66-albums-misc+photos-picture49515-img-4474.jpg


When I went to remove the white wire connector in the back, the dang circuit board popped-off. As far as I can tell, the little tabs are what hold it in place inside that black strip. Pushing the rear defrost button dislodged the circuit board. After confirming that each green NEO LED works properly, I put a little tab of this adhesive on the back of the rubber base of these bulbs. This will keep them from rotating lose. I will do this on all NEO bulbs before final installation. If I ever never need to replace or remove them, an X-acto knife will free them up.

tonyb66-albums-misc+photos-picture49534-img-4476.jpg


That un-removable cigarette light bulb was snipped-off. I wired-in a 74 base and inserted a green 74 LED bulb. Between this and a green 74 LED bulb under the ashtray, lighting down there should be greatly improved, and hopefully in the cupholder area too...

tonyb66-albums-misc+photos-picture49531-img-4479.jpg


I will solder and shrink wrap that connection later...

Hoping to get those spade forks today for the cross-overs.
 
Last edited:
My Amazon Prime Membership has been extended one month, yet again.

I'm sure some here knows what that means...

Dude

I've maxed out on prime extensions (8 times extended) and they are now just throwing money at me. The missed a delivery yesterday and gave me $20 store credit against a $6 order. Okay

Bummer on your RCAs, but you know you can buy them at Frys or HD too, right?
 
I lost track of how many Prime extensions I've been provided... Has to be about a year's worth. I might be short something else this weekend too.

I'll just work on other things, including the house.

I have an "appointment" to recycle automotive fluids, like coolant. Made it before Christmas, so the morning is gone doing that and hitting Fry's...
 
Leon, that looks almost like the place I went-to... I suppose they are generally all set-up the same.

Ok, went to Fry's Electronics on Saturday and they don't have any "audio grade" fork spades for the cross-overs. So, i just got the typical tin-plated ones. I'll leave enough slack to snip them off in the future if I find such later and decide to go that route...

The RCA cables are still not here, possibly later today. Otherwise, I think I have everything I need, possibly except a switch for the antenna. I have a few around here, somewhere...

All door speaker wiring is done up to the front kick panels, where the cross-overs will be located. I might start crimping connections later today. I have several crimp tools and I need to see which one/s will work best with these terminations...

All four speaker housings are secured to the doors with that silicone too.

With interior panels off the doors and interior pieces, I spent quite a bit of time vacuuming and cleaning 17+ years of dirt and grime.

I got to the tweeters. I decided to make use of the factory tweeter bracket, which entails removing the tweeter, which is glued and screwed into place. Each one took about 15 minutes to break free. A before/after:

tonyb66-albums-misc+photos-picture49568-img-4485.jpg


Once cleaned-up with rubbing alcohol, the bracket was ready for the Infinity tweeters.

tonyb66-albums-misc+photos-picture49566-img-4487.jpg


They are currently sitting on the fireplace mantel to speed the cure time. They are rock-solid already. The same GE Iron Grip stuff...

"Daddy, do you see our baseball?"

tonyb66-albums-misc+photos-picture49567-img-4486.jpg


Works great to hold the doors open... I used a softball on another door.

Not sure how it happened, but I then spent nearly two hours cleaning and lubricating the door gaskets with petroleum jelly. I then did the moonroof and windshield too. Takes time to apply and clean-up, but I'd like to maximize the time I can get on these. What are folks using for replacements? Each door has it's own, full permitter, then there's an over-arching one that traverses both doors, to their mid-points...

I have a 9 volt battery that I was going to use for speaker phase testing, but since this is all new wiring, and the speaker wire is very eye-friendly (solid blue and solid brown), I see little the likelihood of crossing wires as quite minimal...

Those black plastic clips that go-over the top of the doors... Does anyone know their purpose (I can guess) and know how many should be on each door? Here is the photo Sean provided earlier:

280132d1514778172-tonyb66s-ownership-build-thread-2000-limited-df294a3c-cd21-4c5b-b737-0bbd3efd967d.jpg


On the rear door show above, it looks like two should be there, the same size. The front door, at least mine has a smaller one... Unless I'm missing it, I don't see these are order-able items. I'll be reluctant to install these door panels until I have these or something comparable...

Raining here. It leaked again. I had to throw a tarp over my moonroof. That stopped the leak. I was inside until 4:30 am...
 
Starting My 02 Tcloud

Hello Tony, can't thank you enough for these detailed posts and picts, I am getting ready to start my own this week, same way or format as you have been doing, Interior HU, Deadening BU camera, new leather seats, etc, your broken plastic panels and dash pieces have me somewhat concerned when I tackle mine , but with what you are providing..mistakes included really are helpful, thanks again this site is awesome ,
 
Hello Tony, can't thank you enough for these detailed posts and picts, I am getting ready to start my own this week, same way or format as you have been doing, Interior HU, Deadening BU camera, new leather seats, etc, your broken plastic panels and dash pieces have me somewhat concerned when I tackle mine , but with what you are providing..mistakes included really are helpful, thanks again this site is awesome ,

Glad to hear that this thread is of some help. It has been slow going as of late, but I should have the sound system installed this weekend. And, with Monday being a holiday, the seats will hopefully happen at that time... Best to you on your build AR.

With some pretty good rain the past couple of days, and more water in my Runner, until a tarp put a stop to that, not much has happened. Little things while sitting in front of the fireplace...

I did get the 1.5' male/male RCA cables today, finally. They look to be the perfect length, not to make for excessive clutter back there... I crimped those gold-plated butt connectors onto the amp speaker out wires (8) and connected the short 14 gauge front speaker wires to those which each will go about 3 feet to their respective cross-over boxes in the kick panel areas. I already slid heat shrink tubing to cover those butt connectors...

Began working on the wiring harness. Confusing stuff at times. Mike was quite helpful, so that made it easier...

Here is the harness provided by Pioneer for the HU. Those wires bunched-together to the left are the eight speaker wires, which will remain unused. I'm using the HU's RCA outs to the amp instead. So, I taped those unused wires together and put a little liquid tape on the ends of each. What remains are seven wires...

tonyb66-albums-misc+photos-picture49608-pioneer-harness.jpg


Green = parking brake, per the label. As I understand it, that is for the display, so that it should only operate when the parking brake is engaged (the truck not be driven). Since I plan to eventually output to the rear seats, I will attempt to defeat this well-intentioned safety feature. Apparently, grounding this green wire does the trick. Would appreciate confirmation...

Yellow/Black = mute, per the label. I need to read-up on what exactly that means...

Red = switch power, as stated by both Metra and Scosche.

Yellow = constant power, for memory, per Metra and Scosche.

Blue/White = system remote control, per the label. This seems to not be a wire for connection purposes, but to receive signals from the remote control. Again, need to read...

Orange/White = illumination and/or dimmer, per Metra and Scosche. Do we have factory dimming on the HU?

Purple/White = reverse gear signal input, per the label. I imagine this must be for the back-up camera.

Black = ground, per Metra and Scosche.

Now, the Metra adaptors. Two are included as two are or were connected to our factory amp. The smaller adaptor on the right has four wires, for the rear speakers (a green pair, and purple pair). Those also are taped and have liquid tape applied to the ends. Basically, I won't even use this adaptor as there are no wires being used in this application; unless I did something wrong...

On the larger Metra adaptor, similarly, the four wires grouped together to the right are for the front speakers (white and grey pairs). So, from the Metra adaptors I a left with five wires.

tonyb66-albums-misc+photos-picture49607-metra-harness-adaptors.jpg


Orange/White

Yellow

Red

Black

Blue = power antenna, per Metra and Scosche.

******

Hmmm... Some of these wires seemingly don't have dance partners. Those with more experience on such matters, I welcome your input.

 
Last edited:

Members online

Forum statistics

Threads
278,316
Messages
3,554,120
Members
248,016
Latest member
Advally Service

Trending content

Back
Top