What Did You Do To Your 3rd Gen Today?

Status
Not open for further replies.
Nice! How did you do it? Any tips?

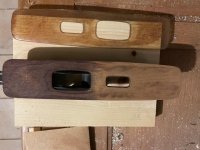
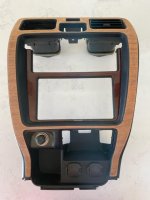
I got the idea from an old post by TheDurk. There is thick plastic covering the wood veneer. You can see it was already peeling away from the upper right in the original picture. I was able to just peel off the rest, pretty much in one piece, from the center trim. The trim around the shifter and the door trim pieces weren't peeling as much, but I was able to get a corner started and used a putty knife to pry it off the rest of the way. I tried to be patient and go slowly, and most of it came off fairly easily.

Once off, I just sanded down the veneer until most of the color was gone (picture 1 partially sanded, picture 2 complete). I then applied a couple coats of stain. I was trying to get a color close to the original and ended up using American walnut. It turned out a little lighter, but still looked good. Lastly, I added a couple coats of semi-gloss spar urethane. I went with spar urethane over polyurethane because it's supposed to hold up to moisture and UV better and my 4runner lives outside.

The worst part was trying to get a smooth layer of the urethane. I tried wiping it on with cloth and foam brush, but neither of those worked great. Ended up using a regular paint brush. You can see some brush marks/thicker spots at certain angles and lighting, but overall not too bad. At some point, I may try lightly sanding with very fine grit sandpaper/steel wool to smooth it out a bit. I didn't do the trim under the gauge cluster because it still looked okay. Also, be prepared to drive around without trim for a couple days while it dries between coats.
 

Attachments

  • door trim.jpg
    door trim.jpg
    36.2 KB · Views: 259
  • center sanded.jpg
    center sanded.jpg
    33.8 KB · Views: 254
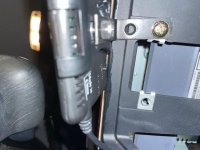
What mount did you use for that Ultragauge?

I just used a black L bracket/corner brace. I took out the ash tray and used the same screw to attach the bracket, then just bent it slightly to angle it up a little. I attached the gauge mount using a bolt with the thinnest head and washer I could find. It was cheap and has worked well.
 

Attachments

  • gauge mount.jpg
    gauge mount.jpg
    48.6 KB · Views: 281
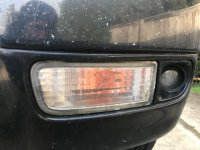
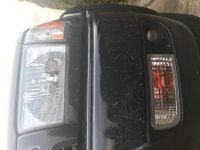
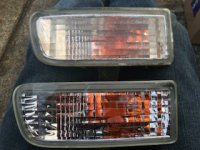
Went ahead and swapped out my turn signal lights with some aftermarket ones from carlights360. I ordered the same kit that someone earlier in this thread posted about. They seem to be of fine quality, about the same weight as the OEM lights. We'll see how they last but they look great as of install time!
 

Attachments

  • IMG_7724.jpg
    IMG_7724.jpg
    89.9 KB · Views: 224
  • IMG_7728.jpg
    IMG_7728.jpg
    69.4 KB · Views: 228
  • IMG_7726.jpg
    IMG_7726.jpg
    63.3 KB · Views: 222
I hope I found the source of my oil leak today.

After discovering the guy who did my timing belt job didn't torque the crank bolt nearly to spec I found part of the left cam seal protruding on the underside: (yes, I went overboard on the Aisin FIPG when I did the valve cover gaskets!)

UaNWzwz.jpg


Here's what it looked like after I removed it:

5O4JvOw.jpg


And here's the right cam seal. Is it possible that happened when I removed it?
I used the Lisle Shaft Type seal puller, for what it's worth.

DKTsPs1.jpg


The crank and both cam seals went it without trouble so I got that going for me, which is nice.

I'll spend the day tomorrow degreasing before reinstalling everything else with Aircabinman parts.
 
It’s possible, but the only way I see that being possible is if you rolled it with the seal puller.

I absolutely did not roll it with the seal puller. I didn't want to be posting on here about how to repair a scratch in that cam shaft. That thread gave nightmares! I was meticulously careful and they both came out without issue. I just didn't want to blame the guy for horrid work only to find out it was my own doing.
 
I absolutely did not roll it with the seal puller. I didn't want to be posting on here about how to repair a scratch in that cam shaft. That thread gave nightmares! I was meticulously careful and they both came out without issue. I just didn't want to blame the guy for horrid work only to find out it was my own doing.

It looks like when it was installed it just went on cockeyed and the mechanic didn't notice. Here's hoping the shaft isn't scored from that mistreatment. There's probably a speedi-sleeve available if that turns out to be the case and it keeps leaking after you've installed a new seal properly.
 
It looks like when it was installed it just went on cockeyed and the mechanic didn't notice. Here's hoping the shaft isn't scored from that mistreatment. There's probably a speedi-sleeve available if that turns out to be the case and it keeps leaking after you've installed a new seal properly.

Great, that possibility hadn't occurred to me. Here's hoping!
 
Today I went back to standard halogen headlight bulbs in my 01 after running LEDs for the last two years. I was using the Beamtech 6K bulbs, and they’re nice and bright, but they’re cheap garbage and I’ve had to file AT LEAST five warranty claims over the last two years for bulbs that would burn out halfway or stop operating properly. I said enough is enough. Plus, by state code, they aren’t legal to be used in my 3rd gen, given that my housings were built for and intended to have a halogen bulb. So a good buddy of mine recommended some Hella H4P50TB +50 Performance Bulb, 12V, 60/55W (purchased from Amazon) and they turned out great. They’re nice & bright, but maintain that OEM look. Can’t wait to drive with them when it’s dark out!

 
Replaced air filter.

Changed engine oil and filter.

Greased SPC UBJs.

Adjusted kickdown cable slightly.

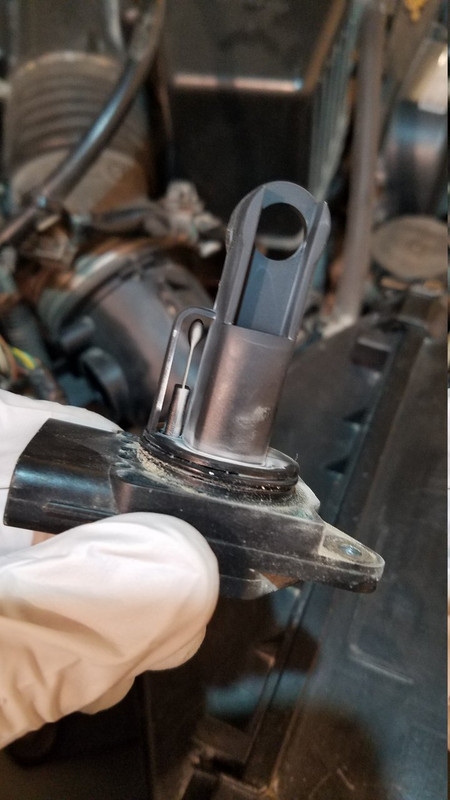
Cleaned MAF. This may explain why I've been getting 13 MPG lately. This is with the standard Toyota air filter that was about 6 months old and had been cleaned twice already. Going to try to avoid dirt roads (dust roads) as much as possible until I get a snorkel.

maf.jpg


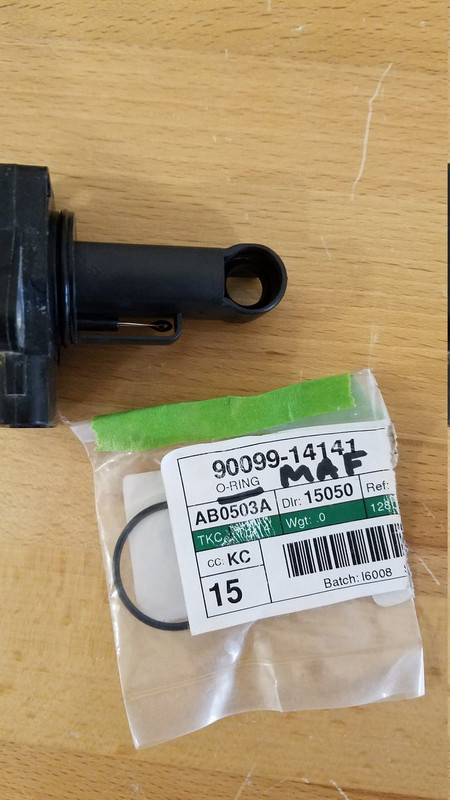
Replaced MAF o-ring

maf2.jpg
 
Last edited:
Finished the timing belt job and she fired right up.

I already redid the valve cover gasket job somebody else did while chasing down an oil leak. This was the next step.

Went with aircabinman, new crank bolt and new tb cover gaskets. Bought a new fan clutch since I thought mine felt too tight but it turns out I didn't need it. $85 I can spend on something else for this nameless 4Runner.

The only part I lost was one of the 4 retaining clips that the fan shroud bolts to. Funny how I can now remember hearing it hit the ground.

The only trouble I had was the alternator lock nut seemed stripped. Just spins, never gets tight. It must have been that way when the last guy put it back together. Not sure what to do about that. Guess I'll have to keep an eye on it.

I hadn't thought to check the entire cam shafts for scratches - only where I used the puller. It seems like such an obvious oversight now. Guess I'll keep hoping that the previously mangled cam seals did not scratch the shafts. I'd really prefer to not have to learn about speedi-sleeves! Time will tell.

This place is a real treasure. Reading all the old posts about what went wrong, what went right, what to watch out for... I almost felt like I knew what I was doing! Thanks Tim (& Sean) for your videos. And thanks to everyone here for putting up with my stupid questions.

Based on my annual mileage I'll be doing this again in October of 2043.
 
Yeah LED seem like more hassle than they are worth other than interior lighting. The whole point if these trucks is reliability the IMO. The 23 year old factory Koto bulbs still work fine on mine, it's crazy. I switched to Sylvania Silverstar or something like that which are slightly brighter and keep the originals as spares. Will be interesting to see how long those Hellas last and how much improvement over stock in the dark. Taking the time to aim them properly after a lift makes a big difference too.


Today I went back to standard halogen headlight bulbs in my 01 after running LEDs for the last two years. I was using the Beamtech 6K bulbs, and they’re nice and bright, but they’re cheap garbage and I’ve had to file AT LEAST five warranty claims over the last two years for bulbs that would burn out halfway or stop operating properly. I said enough is enough. Plus, by state code, they aren’t legal to be used in my 3rd gen, given that my housings were built for and intended to have a halogen bulb. So a good buddy of mine recommended some Hella H4P50TB +50 Performance Bulb, 12V, 60/55W (purchased from Amazon) and they turned out great. They’re nice & bright, but maintain that OEM look. Can’t wait to drive with them when it’s dark out!
 
Probably ADD actuator defeat switch. When in 4WD the disco’ed stub shaft up front spins so you’re effectively still in 2WD. Then you can access Low range while on pavement.

Yep. Although I don't really foresee using it much on pavement. I went on a trip to Mojave a while back and the person I was following was going slightly too slow for me to just sit in first gear, but putting it in 4 low would've eaten into the gas. 2 low is the solution. Took like 10 minutes to do.
 
Yep. Although I don't really foresee using it much on pavement. I went on a trip to Mojave a while back and the person I was following was going slightly too slow for me to just sit in first gear, but putting it in 4 low would've eaten into the gas. 2 low is the solution. Took like 10 minutes to do.
Do you have a write up on this mod?

I like options...

Sent from my Pixel 4 XL using Tapatalk
 
Status
Not open for further replies.

Members online

Forum statistics

Threads
278,316
Messages
3,554,120
Members
248,016
Latest member
Advally Service

Trending content

Back
Top