What Did You Do To Your 3rd Gen Today?

Status
Not open for further replies.
Too cold to do much outside today so...

Changed the cb mic connector to an 'L' to avoid occasionally brushing my knuckles on the straight connector, which occasionally happens since modifying my shifter to play nice with all the other shifters...
hOnNiDf.jpg


Swapped out my lighter socket for a usb charger rather than having a usb charger plugged in (see above pic for a before) because that's all I use it for anyway. I still have a socket in the right rear panel if I need one.
bxjBSUg.jpg

And yes, I know my start battery is uncomfortable in cold weather, but it starts with a wee bit of help from the house battery and it'll be warm soon so I'm putting off the inevitable.

Modified my new to me left rear cargo panel to add ventilation for the oba compressor that sits behind it
9BW8gam.jpg


and added usb fans that will be powered by a usb connected to the bus bar that is only powered when using either the oba or the rear anderson.
IhhemA2.jpg
 
Last edited:
Got half(?) of the bench work done on my Northwest Fab eco-crawler. Took one of the donor transfer cases all apart, and assembled the reduction gears into the new case. And installed the new shift fork.

Up next - disassembling the other donor transfer case and installing the replacement input shaft. Then sticking the two boxes together.

I'm out of the loop here, are you using an eco-crawler to swap in a geared/reduced t-case (presumably 4:1)? If so I'd be interested in reading more. I would love to get rid of this chain driven case for some extra reduction
 
I'm out of the loop here, are you using an eco-crawler to swap in a geared/reduced t-case (presumably 4:1)? If so I'd be interested in reading more. I would love to get rid of this chain driven case for some extra reduction
The northwest fab eco crawler is an alternative to the marlin crawler crawl box. It’s a little shorter overall and you use the planetary gear set from another chain drive t case so the parts are easier to source.

Toyota EcoCrawler - The Easiest & Strongest Gear Box For Your Toyota 4x4
 
The northwest fab eco crawler is an alternative to the marlin crawler crawl box. It’s a little shorter overall and you use the planetary gear set from another chain drive t case so the parts are easier to source.

Toyota EcoCrawler - The Easiest & Strongest Gear Box For Your Toyota 4x4

Yeah, instead of finding a incresingly hard to find gear driven case, and then swapping some lower gearing into it and using that as the middle of a double case, this kit uses a much more common planetary reduction gearset found on 3rd gens/1st gen tacos, and some Tundra/Sequoia as well.

So the end result isn't quite as nice as the Marlin Taco-box. Since that (with the gear reduction box-regeared to 4.7-ish) has 4 speeds, 1:1 (H/H), 2.57:1 (H/L), 4.7 (L/H) and the party trick double low of 12.something:1 (L/L). Since the Eco-crawler kit is using two identical stock planetary gear sets, it will just have 3 speeds, and 2 ways to get to one of them. 1:1 (H/H, 2.57:1 (H/L or L/H) and roughly 6.6:1 (L/L).

With a manual trans, some lower gearing will REALLY be nice to have. But since it's not a trailered rig and we take it on long cross country trips with the hard wheeling in the middle of them, keeping it streetable is important too. SO I didn't want to regear it lower at the axles.
 
And after all that, for some reason now I'm struck with doubt that I may have left one part out - the tiny detent ball bearing - 36213A in the list above. I remember fishing it out with a magnet, then I got distracted with the weird finicky little oil seal rings (36216A) and I can't recall putting it back in place. It wasn't 'left over' on the bench after getting everything back together, but it may have fallen off? Or I may have put it in and just can't recall? And I'm not even entirely sure what it does, it's not spring loaded, it just sits in a drilled 'pit' in the shaft, and a component with a short slot keys in on it. So it prevents it from turning, but not with any real torque.

Soooo... no better time than the present to make sure it's in there. So I think I get to do it all again. I had finished buttoning it up - sealing on the last bearing housing, completely done when the thought that I'd skipped putting that piece popped into my head. Argh. Better safe than sorry, though. Even if I don't think it actually does much of any importance.

Took it all back apart again, and I was right, that ball was missing. it prevents a spacer from turning on the shaft, and a circlip holds it in place. I guess without the ball bearing it might be possible for it to turn relative to the clip and eventually work itself loose? Anyhow, lots of work to do something that would have taken 10 seconds the first time.

Anyhow, it's all back together again, and I test fitted the two cases together, everything slid together nicely and seems to work great.

It's all clean inside, but still grungy on the outside - the 'back' donor case with the new input shaft on it - and the shift collar that the front case locks onto when its in high range:
JF1iJIYh.jpg


And a look inside the front case at the reduction gearset from the other donor case sitting in there. The stock transfer case has an oil pump which actively pumps oil into the center of this cluster, but it's in the drop section, and this setup certainly doesn't have an oil pump. But I guess without the drop section holding the oil, this sits more fully in a bath of oil?
2AQb8I6h.jpg


And with the two test fit together. I didn't use sealant, there's some chance it might still need to come apart again(?) for the triple stick kit that still hasn't arrived yet. I used the combination of holes and studs between the two halves of the new NWF case to raise the transfer case drop a minimal amount (4 degrees IIRC?) - just to make slightly more clearance between the transfer case drop and my skid plates.
QpbhcNEh.jpg


With two 2.57:1 stock reduction gears working together, it's roughly 6.6:1. Which will be MUCH nicer with my manual trans when we're crawling up big rocks and ledges.
 
Swapped out my lighter socket for a usb charger rather than having a usb charger plugged in (see above pic for a before) because that's all I use it for anyway. I still have a socket in the right rear panel if I need one.
bxjBSUg.jpg

I just did that too, but I used one of the lower 12v outlets because for some reason I like the idea of having the cigarette lighter as an option if I ever needed to start a fire or something. I know the upper one is a slightly different size, so was it a direct fit for the usb outlet, or did you have to dremel it out like I did with the lower ones?

b36842f8a562866ca5e8d26be9162c33.jpg


3d7b388c4c5d56ded0a9fcf92a5cc5b3.jpg
 
Washed the 5 pounds of salt off the 4 Runner after lower westchester county ny salted the roads for the snow we didn’t get yesterday
 
I just did that too, but I used one of the lower 12v outlets because for some reason I like the idea of having the cigarette lighter as an option if I ever needed to start a fire or something. I know the upper one is a slightly different size, so was it a direct fit for the usb outlet, or did you have to dremel it out like I did with the lower ones?

I have a 96, only one socket in the dash, and I did have to dremel it out some. Mine has the metal surround like your lighter socket does. Yours looks good.

Sometime back I added an oe lower right cargo panel socket out of an 01 junkyard truck. There's also one tucked behind a panel in the front passenger floor area, powering my camera. Lastly I added one to the upper right rear cargo panel to power the fan for the dog. I still have a socket or 3 available. :)
 
Last edited:
Removed the sad worn out clutch torsion spring and installed a linear spring in its place. Now my son doesn't have to lift the clutch with his toes while driving.

Great mod found here on the forum
 
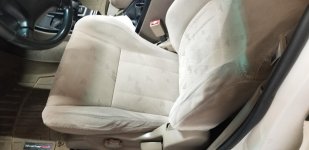
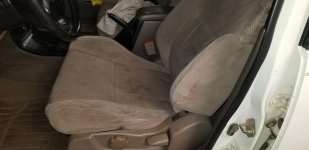
Replaced the seat back and seat cushion in the driver's seat.

The seat back bolster was really crumbling and deteriorating and the seat cushion bolster was almost as bad.

I went with OE foam. Pricey for sure but amortized over 10+ years, it's nothing.

Much different ride while in the seat and should be good for as long as I'll be driving. I do think I'm going to have to rise up a bit more when entering and exiting the vehicle as I notice the foam sticks out and up more and years of hitting it cannot be good for its longevity.

Job was not too bad just time consuming since it was my first time. There is a very helpful video on youtube on Andy Loechler's channel.

I suggest buying a hog ring kit (mine had angled pliers & 300 rings) on amazon for about $16 before you begin the job. Zip ties can be used in a pinch but I did not think they'd stand the test of time and I have no desire to do this all over again because zip ties break after a few years due to age and the stress/pressure the rings are subject to.

Here's a before and after pic. Happy to answer any questions.


Eddie

P.S. I bought my T4R in late 2018 and the seat was shot then and it has been bugging me for that long. Next up is replacing the door stop check on the driver's door. That has been non-functional for just as long.
 

Attachments

  • SEAT-BEFORE.jpg
    SEAT-BEFORE.jpg
    128 KB · Views: 403
  • SEAT-AFTER.jpg
    SEAT-AFTER.jpg
    132.7 KB · Views: 392
Last edited:
got up to 65mph in 2wd.....yahoo spring is coming....can see the pavement again...first time over 50mph in months.
first day of not being in 4wd since late October...well for city flat land roads, back in 4wd to get home.
roads can still be tricky....as our nights are still well below zero and day time today was a high of 13. sure beats day time highs of minus 30 about a month ago
but yahoo....2wd again and less fuel consupmption.....cant wait to get back to 16mpg :)
 
I disconnected the HID system the previous owner installed & installed Osram Night Breaker Laser halogen bulbs. They work awesomely, and light up the road better than the HID Xenon bulbs did.
 
I tightened the throttle cable and kickdown cable a while ago while replacing the TPS and doing some other stuff. Set it with the ferrule thingy peeping out 1mm. The mileage went down to 12 mpg and drove like crap. I wasn't sure if it was the new TPS or what. Well I loosened that kickdown back to were it was before and it drives way better and gained mpg back. If it aint broke dont fix it.
 
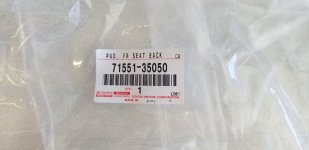
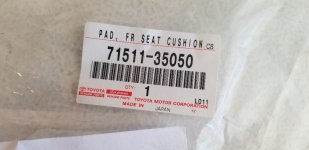
I was looking in to this earlier and there were different kinds and couldn't figure out if I have "sport" seats or not. My seat looks like yours do you have the part numbers you used?


Replaced the seat back and seat cushion in the driver's seat.

The seat back bolster was really crumbling and deteriorating and the seat cushion bolster was almost as bad.

I went with OE foam. Pricey for sure but amortized over 10+ years, it's nothing.

Much different ride while in the seat and should be good for as long as I'll be driving. I do think I'm going to have to rise up a bit more when entering and exiting the vehicle as I notice the foam sticks out and up more and years of hitting it cannot be good for its longevity.

Job was not too bad just time consuming since it was my first time. There is a very helpful video on youtube on Andy Loechler's channel.

I suggest buying a hog ring kit (mine had angled pliers & 300 rings) on amazon for about $16 before you begin the job. Zip ties can be used in a pinch but I did not think they'd stand the test of time and I have no desire to do this all over again because zip ties break after a few years due to age and the stress/pressure the rings are subject to.

Here's a before and after pic. Happy to answer any questions.


Eddie

P.S. I bought my T4R in late 2018 and the seat was shot then and it has been bugging me for that long. Next up is replacing the door stop check on the driver's door. That has been non-functional for just as long.
 
See attached.


Eddie

I was looking in to this earlier and there were different kinds and couldn't figure out if I have "sport" seats or not. My seat looks like yours do you have the part numbers you used?
 

Attachments

  • SBPARTNUM.jpg
    SBPARTNUM.jpg
    108.5 KB · Views: 304
  • SCPARTNUM.jpg
    SCPARTNUM.jpg
    127.9 KB · Views: 306
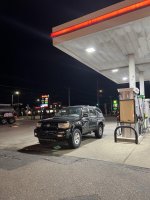
Drove it back home from its first road trip under my ownership. Milwaukee to Minneapolis back to Milwaukee.
 

Attachments

  • IMG_0440 copy.jpg
    IMG_0440 copy.jpg
    135.7 KB · Views: 300
Last edited:
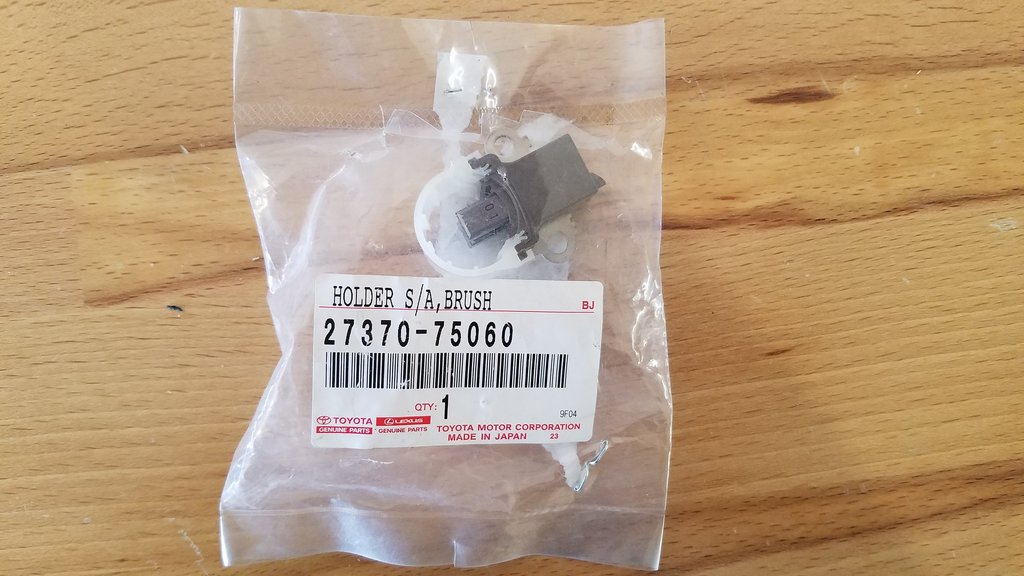
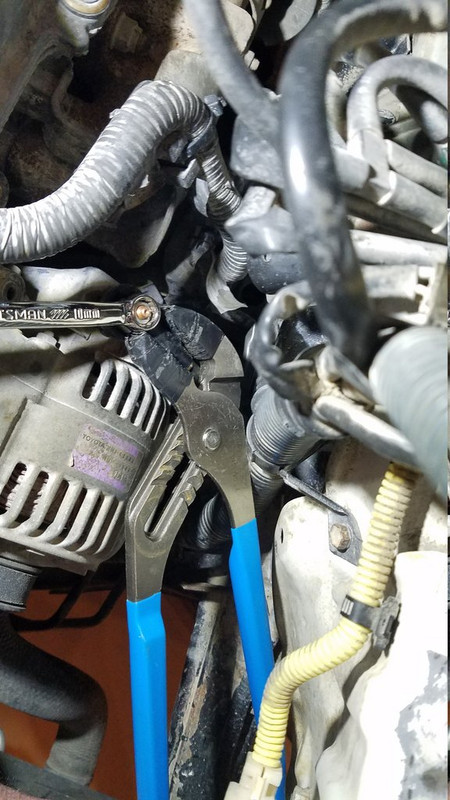
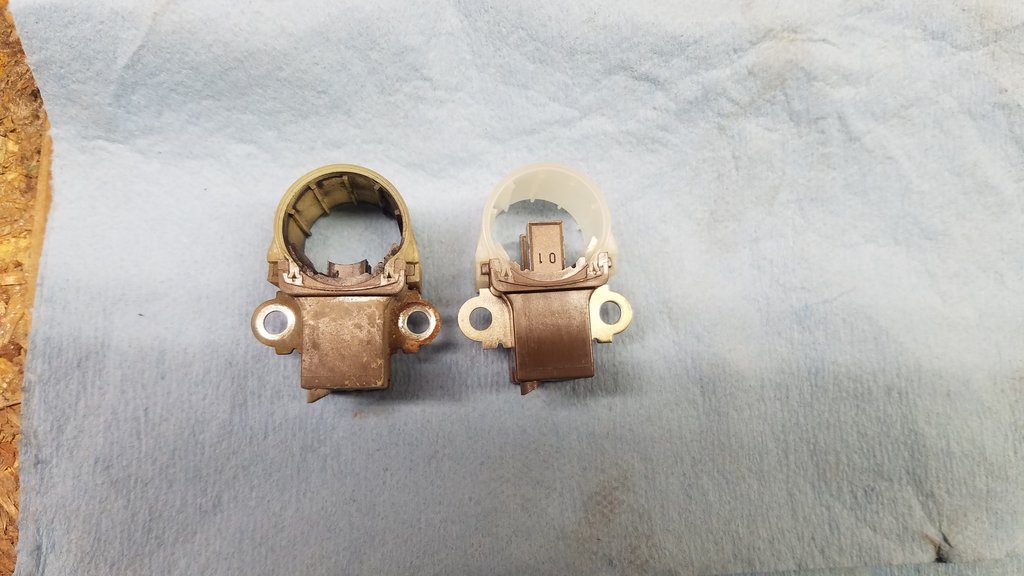
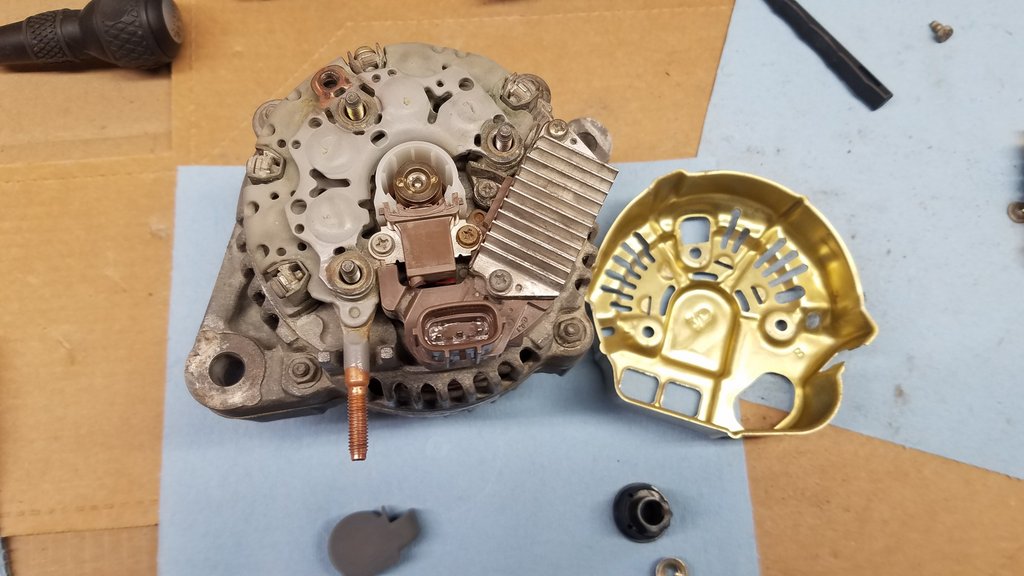
Replaced the alternator brushes which had been on the to do list for quite a while. I used a c-clamp to push that pivot bolt sleeve flush with the pivot mount so the alternator went back in super easy. What I had a problem with was getting the terminal nut off it felt like it was going to snap. It took some patience and trying a bunch of different pliers to get a decent grip on the sides of the crimp connector where it wouldn't damage anything so I could stop it twisting. The insulator nut wasn't tight enough and the terminal nut was too tight. Tightened both to fsm spec when putting it back together.

Pretty easy job overall.

1.jpg


2.jpg


4.jpg


5.jpg
 
Status
Not open for further replies.

Members online

Forum statistics

Threads
278,316
Messages
3,554,120
Members
248,016
Latest member
Advally Service

Trending content

Back
Top