Barry White Build Thread

swapmeet

New member
Hello... and welcome to the:

600874_10150951885614605_195112307_n_zps9d8d2d0e.jpg~original


My name is Swapmeet, but you can call me Swap, Swappy, Swappy-do, or El Swap-a-rino...

After months of searching I stumbled upon the foundation of what will be... The Great White Barry...

The foundation is a lowly 07 SR5 4WD V8 4Runner. Bone Stock when purchased, lovingly owned by one person before being traded in for a Subaru.

While I was chomping at the preverbial bit to start modding... I tried implement something that has lacked in many of my previous projects.


A plan.


You see I have a history of going bat-guano crazy, and to be honest... this forum isn't making it easy.
I considered doing a temporary spacer lift and maybe go coil-overs later... but why? If i'm going to rise to the occasion by way of Coil-Overs... why not wait? Get the good parts to start with, not double spend... also an old habit that relates to not having a plan.

Ok... enough Jibba Jabba...
jibbajabba-thumb-01.jpg


When I got it home....
4Runner1_zps94c4f970.jpeg~original


One day later... Yanked the running Boards, pealed off the weather beaten pin-stripes...

4Runner_zps8863f17c.jpeg~original


Also did the Carbon Filter delete and added a Flowmaster 50 Series SUV Muffler, removed the resonator.


I know I know... everyone's like...

tumblr_m7j6mtgDSu1rbwngoo1_400.gif


More updates on the way... I just wanted to kick this party off right.
 
Register to hide this ad
I opted for a Toytec "Boss" Coilover setup. Received notification that its shipping today...

Pretty impressed.
 
My lift should be here tomorrow. Hopefully I'll have it on before the weekend is out.

I've been working on the map light mod. While messing with it I found some led modules from superbrightleds.com.

It looked like they would fit, so I took a stab. Pulled the factory bulb, the reflector, and halfassed the wires.

Led


Notice the clipped pin bottom left, and you can see how I slid the wires in. You have to mess with this a little, I'm sure there is a better way.


I clipped the extra wire to about 3/8", and tucked it into the slot the lens locks into. There seemed to be enough room for both, the push buttons worked.


Now, I didn't take any after pics, because.... Well.... That led was stupid bright.
I know everyone is doing the led interior swaps, but sweet baby Jesus I don't know how y'all can think that's 'good'. I mean my little module had 4 LEDs, the ones y'all use have a dozen....

When I turned them on this is pretty much my reaction....

tumblr_ly8lkcv0XF1qaxm50o1_500.gif~original


I pretty sure if he was here... Stevie Wonder could see my map lights.... And he'd say 'ya'll crazy', and then he would definitely say 'Barry White is a genius build thread name, keep it up my brotha.'


But I digress....


So yeah, This is where/ how I tapped in to the circuit. Not pretty but it works.


I swapped the bulbs back in with the reflectors, and as many have said, the map light mod is genius. I'll have to do it to my wife's 4runner.

I'm playing around with adding some other LED's in strategic locations. But no pics to share or post right now.
 
Last edited:
Well folks, the Barry White build has been progressing right along... but alas, I have neglected to update the thread.

So welcome back. Barry White has made an amazing transformation over the past 2-3 weeks! It's a very exciting time.

First order of business was my lift. I'm a fairly particular person in terms of customer service, product quality etc. And Toytec really impressed me with how quickly they sent my order and communicated updates as far as 'order received' 'order shipped' etc...

It was like Christmas morning when it arrived, which happened to be a Saturday, which was also pretty cool.

Everything was packed very well and the quality appeared to be very high. (Although this is my first lift, so take it with a grain of salt I guess.)


My only complaint is the instructions. There arn't any. Well... there arn't any printed instructions. Just a piece of paper that tells you to go to the website for instructions... (WTF???) So thankfully I have decent wifi at my house, go inside, grab my ipad, and install off of that. But once I got to their site, found the instructions etc... they didn't have anything designated for the "BOSS" lift, only the "Ultimate." I assumed it was the same (and it was) but being that this was my first lift install, I was a little concerned that nothing specific was available.

All that being said... installing the coilovers was WAY easier than installing the spacer level kit on the front of my wifes 2wd with XREAS. Now that I know what to do, I could probably do it in 30-45 min without air tools.


I cut apart one of the front struts... for fun... and yeah, those had to be the original struts. They were shot.


The back was a pain, and I don't think there is any way to get the springs in without spring compressors and someone pressing down on the axle.


I replaced the zip ties that held on the shock boots with what essentially is an stainless ziptie. You can see it in the picture above.


If someone else is reading this, when installing the rear springs on a Toytec Boss kit, the printing must go towards the back of the truck. (learned that the hard way..... )

Little before/ after action:


I didn't take measurements from the spindle to the fender well, only from the ground up. So I can't say exactly how much lift i got, but I think the front is over 3.5". I had it aligned yesterday and the tech was really impressed with the lift and the alignment. All it needed was the toe adjusted back in a little. To me it looks like it has positive camber but it must be an optical illusion.

I'm going to do a full write up on how the lift rides, but the front struts on the Toytec BOSS ride amazing. Nice and soft, it eats up speed bumps etc with no issue. To me it feels like the 5100's are valved much firmer, because the rear responds very sharply to speed bumps. I wonder if I should have opted for Bilstiens with resi's.

To make it sit level, I lowered the passenger side .75" I think, which helped out some because the CV boots were touching a little on that side.

I ordered my wheels, which the -10 offset that I wanted was back ordered, so I had to wait. I hate waiting.

While I waited, I mounted the LED driving lights from ebay. I bought two pairs, and already put them on my wife's t4R.

With mine having the beefier hitch, I had to get creative. I used stainless hose clamps to mount the brackets to the round member of the hitch. It seems to be working great, keeps the lights above the scrub line, an they help out a lot when backing up at night.

 
Last edited:
Still waiting... I decide to knock out the VSA/ ATRAC yada yada yada switch.

Attempting to keep it clean, while still cutting the white wire, here are my results.
I used "18/2" wire from Home Depot, which had romex around the two shielded strands. Helps keep it a little cleaner without using lamp wire.


I used a lock on/ off push button which I decided to mount near the fuel door release.


Under the hood, I wrapped the 18/2 in a coil type loom that I use when restoring cars. Has a OEM feel without the feel of split loom, which I hate, even if its OEM.


And through the empty nipple on this firewall grommet.


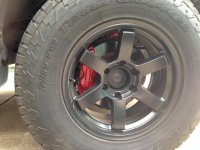
So two nights ago, I get my wheels and tires. I picked up some Nitto Terra Grapplers in 265/70/17 for a song. Practically new. Yesterday morning, I take a little time off work and had them installed (I have zero patience.)

The wheels are 17x8 -10 offset Level 8 MK6, satin black.


To give my truck a little contrast, I bought some red aluminum lugs from ebay. After installing them (and realizing I had a set for a 5 lug, and was one short on every wheel)
I was not sure if I liked it. That coupled with the fact that one of them totally grenaded while trying to install on a sketchy stud... I decided it wasn't the best way to go.

Feel free to chime in on the look. I'm honestly on the fence.


So yesterday afternoon I was off to the store to get black lugs which I put on a 9:45 last night after my kids went to bed.

09582400-1139-4909-92DD-64D9DAE34E76_zpstcueaijb.jpg~original


^^^ Thats how it sits right now. I took that this morning.

I am proud of the fact that I was able to get it lifted with wheels and tires before I got my plates from the dealer. Which should arrive today.... just in the nick of time.

One option i'm mulling over is leaving the black lugs, and painting the calipers red. I really like the red springs peeking out up front, and obviously the rears are black (not that they would show much anyway.

Not sure what i'll do next. I think now that i've got a little ground clearance and some capable tires, i'll hit some trails and see if that helps guide me on my next upgrade/ purchase.

My future plans include debadging the SR5, 4x4, and Toyota 4Runner script. I'd really like to find a black limited grille, and door handles. I may talk to a painter about scuffing and painting what I have to match.

I'm considering buying the ditch light brackets and plunking down some scratch for a set of Rigid D2's.
 
Last edited:
Had a little time to spare yesterday evening after doing some yard work.

Decided the chrome letters on the side of my truck were screwing up my Chi...

39FF1944-2E6E-4AFA-8FB0-45D41A10C1C2_zpsgwbjoo9h.jpg~original


Alphabet Soup!
 
It's a day of celebration here at casa de Barry.... As it is my birthday.

The boss man let me go home a little early, so I stopped by the parts store to pick up a few things.

Caliper paint, and lens tint.

The tail lights are not finished. There is nothing that annoys me more than 'tinted' tail lights and the finish is flat and dull. For that reason, I will be adding two coats of clear, then wet sanding and polishing them to a brilliant shine.

Photos shortly.

I only had time to paint the front calipers, but since they're pretty beefy/sexy calipers, (like Barry...) I think the results were great.

I really want to black out my grille. But I can't decide if I want to do the satoshi thing.
 

Attachments

  • image.jpg
    image.jpg
    131.3 KB · Views: 1,416
Strange to me how other people don't post much in peoples build threads. I guess were all doing the same mods over and over anyway.

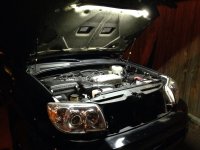
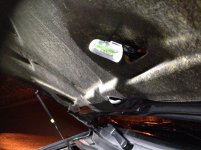
No pics, so it's a useless update, but I installed the led strip under the hood with a mercury switch. I dig it a lot.

I have a bunch of Red LEDs that up I have slated for a project but my house has been keeping me busy.

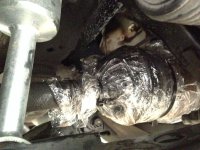
I tore a CV boot. That sucks. I wrapped it in the skin of unborn unicorns. No problems so far.

Anyone used a 2pc boot replacement?
 

Attachments

  • image.jpg
    image.jpg
    136.2 KB · Views: 1,320
I love this thread lol

Strange to me how other people don't post much in peoples build threads. I guess were all doing the same mods over and over anyway.

I've noticed it, too. There's a lot of good info but this is easily the least-active forum I've been on.
 
I'm here for the GIFs and goofy commentary.

Seriously though, looks nice. I laughed a lot scrolling through. I have a 3rd gen though so I'm going back to my own neighborhood now :hiding:
 
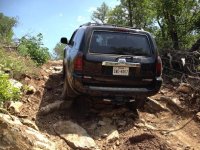
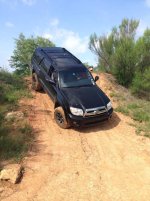
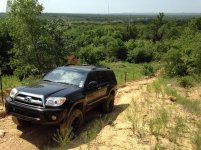
Couple of buddies with Jeeps took me out to a local off road park to pop my cherry.

Had a pretty good time. Kinda wish I had rockers and undercarriage armor though. Looks like that might be my next purchase.

Overall though I'm really impressed with what this thing will do with just a lift and some all terrain Nittos.
I have a line on some BFG MT's, so I may keep those around for playing.

Here are some pics!
 

Attachments

  • image.jpg
    image.jpg
    139.8 KB · Views: 700

Members online

Forum statistics

Threads
278,305
Messages
3,554,042
Members
248,016
Latest member
Advally Service

Trending content

Back
Top