Ducmonsta's Build Thread-very pic heavy!

LMAO!! I laughed out loud when i saw these pics! I love me some Goonies! "Rocky Rooad!"....lol

Glad to see you are getting settled in. Looks like you are going to have a warm little mancave in your garage, so i can't wait to see what you brew up next.

I am really jealous of the views you guys have out there. That is some beautiful country.

Take care!

I've already done some "mods" to the garage. I just can't seem to leave anything alone.

Your rack turned out awesome by the way. I really used to hate the plastic clad 4rs, but yours is by far the nicest and cleanest one done up right.
 
Your rack turned out awesome by the way. I really used to hate the plastic clad 4rs, but yours is by far the nicest and cleanest one done up right.

Thanks man. Josh aka [MENTION=77764]Whitson Metalworks[/MENTION] did a great job on the fab work. We have been trying to find a 5th gen in his area that would let him borrow it for a couple of days to create a template/jig. Hopefully somebody will step up soon. They are great racks.

I have always gone back and forth on the cladding. Sometimes i wish it was all black but sometimes i like it being a little different.
 
I did a ton of research in garage cabinetry. I needed to find something that looked good but was really functional. I ended up joining another forum called, "the garage journal". There are some pretty insightful guys over there. And just like this one, it will give you all kinds of ideas to steal from others.

Anyway, I really liked the look of the all metal stuff from Kobalt, Gladiator, and even some of the ones from Geneva. The ones from Geneva were on the top of my list at this point. You guys know my fetish for black and red things and they had a set up that looked good to me. It was very similar to this.
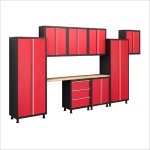
GO-108176-PRD-0.jpg

But after looking at some of these in person, they did not have that "sturdy" feel to them. The doors felt kind of flimsy and were very loud when you closed them. Almost like our doors, LOL.

Then there's the stuff from Ulti-MATE. This stuff is really nice, but so is the price tag. I never got to see one in person but the quality seems to be there from the reviews.
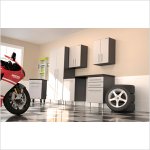
ulti.jpg

Surprisingly, the best option I found was from IKEA. Who would have thought? IKEA has a cabinet system intended for indoors. It's called the Besta. What I really liked about it is all the configurations you have to choose from. You can choose what size, color, finish are on the doors. You can add drawer systems, shelves, lights, etc. And since I had a set for our library, I was already familiar with the construction. The only challenge was to be able to mount everything on the wall and still be able to support the weight of what is in them.

So, I went to our local IKEA and spoke to one of the salesman in the dept. He was extremely helpful in how to mount them and gave me some great ideas. I originally wanted some taller cabinets but he said that I should just use a bunch of smaller ones and install them on top of each other. Effectively, making it look like one tall cabinet. That way, each cabinet is supporting itself versus only having one mount for a taller cabinet. He seemed to be just as excited about my garage as I was.

So this is what I ended up with...
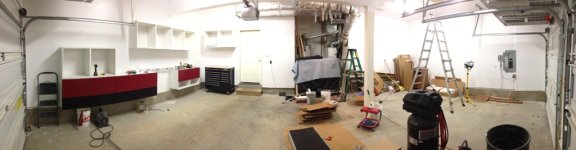
102513 089.jpg

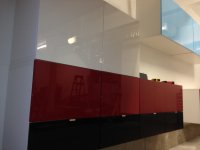
Those are 7 separate units all the same size. They are about 48x25x16. You can already see the combinations you can choose from. The red doors are cabinets and the black are fully extended drawers with a soft close option. You guys know how I am about red and black. What's neat about the system is the red and black combination is the same size as the upper doors that will ultimately be white. And being able to choose your door color was the kicker. I went with all gloss so that they could easily be wiped down.
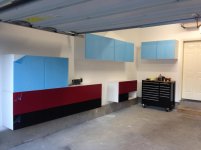
102513 090.jpg

102513 091.jpg

But it also looks like I'll be waxing them too!

 

Attachments

  • GO-108176-PRD-0.jpg
    GO-108176-PRD-0.jpg
    19.3 KB · Views: 3,494
  • ulti.jpg
    ulti.jpg
    24.9 KB · Views: 3,509
  • 102513 089.jpg
    102513 089.jpg
    99.1 KB · Views: 3,487
  • 102513 090.jpg
    102513 090.jpg
    57 KB · Views: 3,575
  • 102513 091.jpg
    102513 091.jpg
    135.4 KB · Views: 3,564
That is going to look awesome! I always wanted to do a cabinet arrangement in my garage but never could decide on them....lol
 
My father in law came to visit us that weekend to help out with some odds and ends around the house. And of course, to visit the grand kids.

So we took a day trip out to Astoria, OR. If you're old like me, you'll remember the...
View attachment 101237

View attachment 101238

Of course I did the "Truffle Shuffle", found no "booty traps", and definitely said, "this is our time, it's our time down here..."

Haha Bobby! We could have been twins the other day! I was wearing the same shirt and same shoes... twinsies! :frog:

Glad you're getting settled out there, and totally jealous of the Goonies trip. One of my all-time favorite movies.
 
Haha Bobby! We could have been twins the other day! I was wearing the same shirt and same shoes... twinsies! :frog:

Glad you're getting settled out there, and totally jealous of the Goonies trip. One of my all-time favorite movies.

I love this post because
1) Goonies is also one of my fav all time movies
and
2) I love imagining you say twinsies.
 
Looks great Bobby! :thumb3: One can never have too much cabinet space...


What are your plans for the floor and O/H lighting?

I like it bright! You could wear sunglasses in my garage at night, LOL.
 
Looks great Bobby! :thumb3: One can never have too much cabinet space...


What are your plans for the floor and O/H lighting?

I like it bright! You could wear sunglasses in my garage at night, LOL.

I'm going with four 48" T-8s in 4000k without diffusers. I believe diffusers take away from the light. I think that should be enough light for now. I'll probably run something underneath the cabinets when the time comes.

I've already purchased the epoxy for the flooring. I got the solvent based pro stuff from Rustoleum. They have a water based epoxy and I've heard nothing but bad things about it. The solvent based stuff however, is supposed to be the sh!t. Well, for DIYers, anyway.
 
I'm going with four 48" T-8s in 4000k without diffusers. I believe diffusers take away from the light. I think that should be enough light for now. I'll probably run something underneath the cabinets when the time comes.

I've already purchased the epoxy for the flooring. I got the solvent based pro stuff from Rustoleum. They have a water based epoxy and I've heard nothing but bad things about it. The solvent based stuff however, is supposed to be the sh!t. Well, for DIYers, anyway.

I'm pretty sure that is what I put on my floor. It has held up extremely well!
 
Another great find at IKEA is the "as is" section. You'll find all kinds of doors, panels, table tops, etc. Mostly from just being in their display or returns. There might me a couple of small scratches here and there but overall most of the things there are brand new.

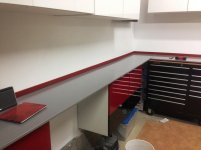
I found two 3x8 gray panels there for $60 ea. They're pretty sturdy and I can only guess they're some sort of MDF. Easy to work with and the finish on them seems durable. I got these with the intention of making counter tops. I got them home and cut 'em all up. I used the tops of some of the cabinets to support it along with some braces on the studs. Got some cheap crown moulding, painted them red and made cheap counter tops.
102813 039.jpg

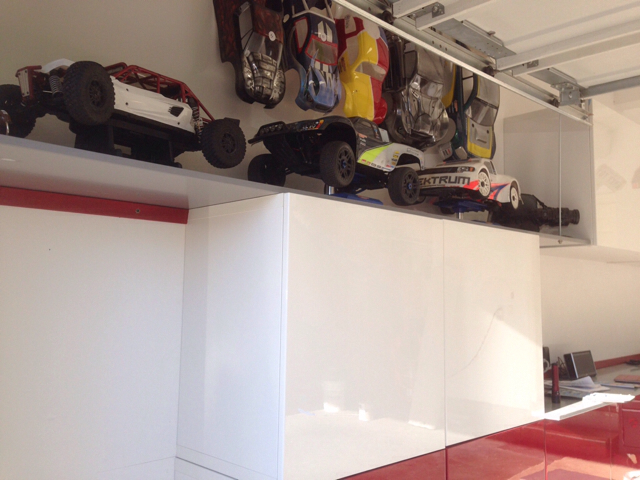
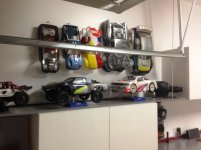
After all of the counters were done, I still had some random scraps left over. I decided to make another "shelf" above the cabinets. Used a wall bracket on one side and all thread on the other for support. I didn't want all of the weight to be on top of the cabinets. There's also some left over red trim so I used that as the rear support of the shelf.
102813.jpg
 

Attachments

  • 102813 039.jpg
    102813 039.jpg
    56.6 KB · Views: 2,631
  • 102813.jpg
    102813.jpg
    74 KB · Views: 2,622
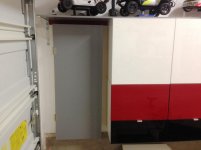
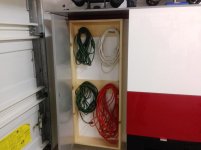
There was one more piece of counter top left. I decided to make this one a door. I fabricated a cabinet out of some plain 3/4 x 6 white wood boards. Cut them to match the size of what was left over. This cabinet is going to specifically hold my extension cords.
102813 037.jpg

102813 038.jpg

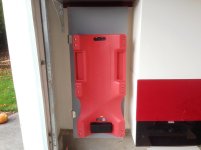
Then I thought, what about the front of this board? I can hang my creeper there for easy access and still open the door for the ext. cords.
102813 040.jpg
 

Attachments

  • 102813 037.jpg
    102813 037.jpg
    54.9 KB · Views: 2,587
  • 102813 038.jpg
    102813 038.jpg
    66.8 KB · Views: 2,574
  • 102813 040.jpg
    102813 040.jpg
    55.8 KB · Views: 2,571
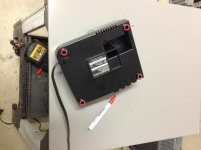
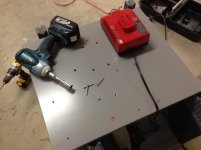
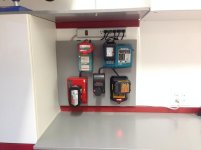
One last thing with the piece of scrap counter top left. I needed a charging station. I didn't want to use any counter space. I thought about making one of the cabinets a charging station but I was a little skeptical about the heat. So, I came up with a little charging wall.

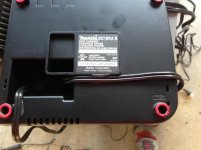
I wanted to mount all of my chargers to a specific area. I needed to mark where the "feet" of all the bases were so that I could route the wires and mount the chargers. I used a red paint pen to mark the feel and carefully "stamped" them onto the counter top. This allowed me to mark where I needed to drill.
102513 096.jpg

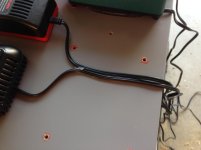
Get them all layed out and start drilling some holes.
102513 097.jpg

Or course I'm going to get a little anal about the wiring, so I hot glued them into place. I didn't want them flopping all over the place.
102513 098.jpg

102513 099.jpg

Find a stud and mount the wall up. Still have some room if I need to add another charger.
102513 101.jpg
 

Attachments

  • 102513 096.jpg
    102513 096.jpg
    67.6 KB · Views: 2,563
  • 102513 097.jpg
    102513 097.jpg
    66.3 KB · Views: 2,566
  • 102513 098.jpg
    102513 098.jpg
    47.7 KB · Views: 2,603
  • 102513 099.jpg
    102513 099.jpg
    71.6 KB · Views: 2,581
  • 102513 101.jpg
    102513 101.jpg
    57.1 KB · Views: 4,869
Damn dude, your garage looks freaking awesome! I'm totally building a charging wall tomorrow. The only difference will be that mine will look like sh!t instead of awesome.
 
Damn dude, your garage looks freaking awesome! I'm totally building a charging wall tomorrow. The only difference will be that mine will look like sh!t instead of awesome.

It's not that hard or complicated. You CAN do it!

What if you need to take any of your cordless tools somewhere, and charge them there?

I've got at least 2 of each battery. If I'm going to be out of my garage to use my tools for that long, I just have to unbolt 2 screws and the whole thing can come with me. I can't really imagine a scenario that would require me to use that much battery time.

The main reason for building this charge wall are for the NiMh and still some NiCd batteries that I have. It doesn't matter so much with the Lipo and LiFe batteries. But you really have to keep the NiMh and NiCds on a charger to prevent them from retaining a "memory".
 
The counter looks great, I would add outlets into the trim like the strip in the back of my tool box. You can never have enough outlets. However you can easily overload them if you use them all at once
 
Find a stud and mount the wall up. Still have some room if I need to add another charger.
101412-ducmonstas-build-thread-very-pic-heavy-102513-101.jpg

You could've avoided all this if you were more brand loyal with your cordless tools :hiding:


:jk: by far my favorite mod in your garage build up! May I ask you, how did you screw into the feet? Did you basically get a longer screw and removed the factory screw, and screwed directly it into that?
 

Members online

Forum statistics

Threads
278,316
Messages
3,554,105
Members
248,016
Latest member
Advally Service

Trending content

Back
Top