Ducmonsta's Build Thread-very pic heavy!

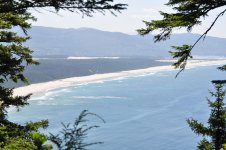
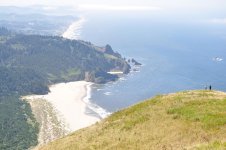
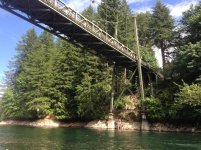
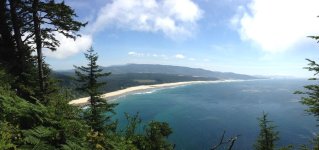
Just a small update of what's happened this past summer while hosting multiple family and friends. Multiple hikes, dozens of waterfalls, several beaches, plenty of camping, and tons of boating, etc. Here's just a few of what I caught on camera.
Portland Japanese Gardens
DSC_1363.jpg
DSC_1378.jpg
DSC_1387.jpg
DSC_1429.jpg

Neskowin Beach, tide pools, and some hikes
DSC_1431.jpg
DSC_1439.jpg
DSC_1441.jpg
DSC_1477.jpg
 

Attachments

  • DSC_1363.jpg
    DSC_1363.jpg
    93.8 KB · Views: 3,810
  • DSC_1378.jpg
    DSC_1378.jpg
    74.3 KB · Views: 3,782
  • DSC_1387.jpg
    DSC_1387.jpg
    138.7 KB · Views: 3,775
  • DSC_1429.jpg
    DSC_1429.jpg
    140.1 KB · Views: 3,775
  • DSC_1431.jpg
    DSC_1431.jpg
    29.5 KB · Views: 3,755
  • DSC_1439.jpg
    DSC_1439.jpg
    117.2 KB · Views: 3,750
  • DSC_1441.jpg
    DSC_1441.jpg
    81 KB · Views: 3,758
  • DSC_1477.jpg
    DSC_1477.jpg
    143.3 KB · Views: 3,771
Sandunes at Pacific City, sunset on Neskowin, and a little bubbly on the sand.

DSC_1500.jpg
DSC_1526.jpg
DSC_1538.jpg

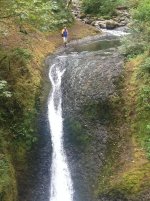
Rope swinging under a bridge and another waterfall.
IMG_2532.jpg
IMG_4355.jpg
IMG_4421.jpg
 

Attachments

  • DSC_1500.jpg
    DSC_1500.jpg
    70.7 KB · Views: 3,736
  • DSC_1526.jpg
    DSC_1526.jpg
    103.1 KB · Views: 3,739
  • DSC_1538.jpg
    DSC_1538.jpg
    61 KB · Views: 3,755
  • IMG_2532.jpg
    IMG_2532.jpg
    145.5 KB · Views: 3,739
  • IMG_4355.jpg
    IMG_4355.jpg
    73.7 KB · Views: 3,735
  • IMG_4421.jpg
    IMG_4421.jpg
    107.5 KB · Views: 3,778
A little visit to Crater Lake and a couple of strenuous hikes. The best part, my wife and I got to snorkel the lake for 20mins or so before the park ranger said that it was a no-no. Who knew?
DSC_1624.jpg

DSC_1623.jpg
 

Attachments

  • DSC_1623.jpg
    DSC_1623.jpg
    130.2 KB · Views: 3,937
  • DSC_1624.jpg
    DSC_1624.jpg
    63 KB · Views: 3,952
And for some stuff you guys might actually care about.

The interior of my truck has been apart for the past couple of weeks. Now that the kids are in school full time, I've got some mod time to myself.

Disclaimer: All of these are done in a 2011 LE with 3rd row. Some of the mods are geared towards that. I really use the 3rd row especially with visitors. The kids are small enough and comfortable in the back back.

Time to rip it apart!
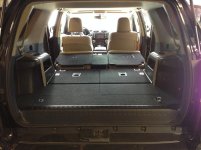
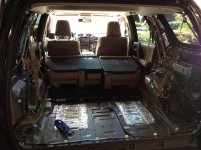
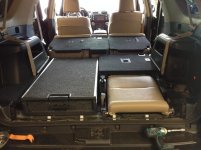
This is what an LE with 3rd row looks like with everything folded down.
IMG_0008.jpg

Remove a couple of trim pieces
IMG_0009.jpg

3rd row seats exposed
IMG_0010.jpg

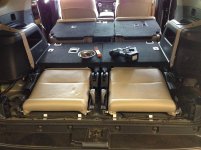
Ultimately, I will have only one seat in the back and I'll finally bolt down my ARB fridge slide and drawer. Its almost as if it was designed that way. The floor is fairly even with the ARB drawer and the other 3rd row seat.
IMG_0011.jpg

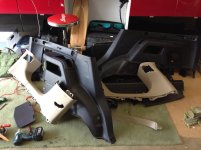
And let's rip apart the rest of the rear interior.
IMG_0012.jpg
IMG_0013.jpg

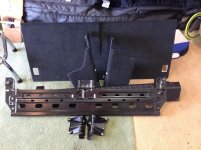
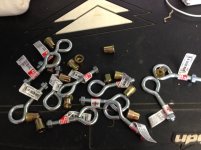
Here's some hardware for my "cargo system" I'll be going over a little later. Still waiting on some parts.
IMG_0014.jpg
 

Attachments

  • IMG_0008.jpg
    IMG_0008.jpg
    92.1 KB · Views: 3,973
  • IMG_0009.jpg
    IMG_0009.jpg
    122.8 KB · Views: 3,879
  • IMG_0010.jpg
    IMG_0010.jpg
    110 KB · Views: 4,185
  • IMG_0011.jpg
    IMG_0011.jpg
    101.4 KB · Views: 19,995
  • IMG_0012.jpg
    IMG_0012.jpg
    92 KB · Views: 3,877
  • IMG_0013.jpg
    IMG_0013.jpg
    107 KB · Views: 3,904
  • IMG_0014.jpg
    IMG_0014.jpg
    95.9 KB · Views: 3,892
Looks like a great time, man. Crater lake is definitely on my to do list. I like how the drawer turned out. Nice addition and having that fridge will make packing your own food far easier. For us humble peasants, the 70QT Coleman Xtreme or whatever it's called will have to do ;) looks great. Will let you know next time I'm passing through.
 
A couple of mods needed to be done at the same time. I was tired of my 40" not lighting up completely with the truck off. So I needed to run a decent size gauge wire to the light. This brought up a couple of things.

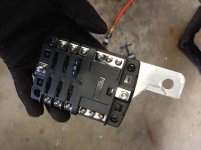
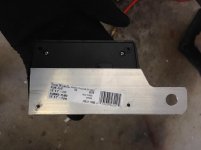
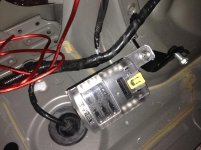
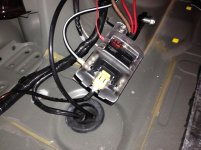
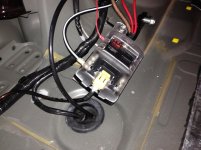
I need to run 4ga to the back of the truck so I can run a fridge (when I get one), 12v outlet that is on constant, and power and relays for the lights on the rack. I used a typical Blue Sea fuse box and fabricated a bracket as seen here. The funky shape allows me to use it on an existing 3rd row seat belt mount. I also wanted to be able to access it with the 3rd row still assembled, up or down.
IMG_0043.jpg
IMG_0044.jpg
IMG_0046.jpg

Getting some of the wiring attached.
IMG_0057.jpg

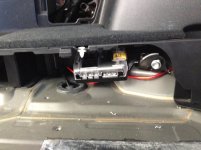
Mocked up to check clearances with the interior panels. This is where you can also see how I have it "floating". The panel that covers it is a pop on piece so replacing fuses, if needed, will be simple.
IMG_0054.jpg
 

Attachments

  • IMG_0043.jpg
    IMG_0043.jpg
    70.6 KB · Views: 3,780
  • IMG_0044.jpg
    IMG_0044.jpg
    53.4 KB · Views: 3,757
  • IMG_0046.jpg
    IMG_0046.jpg
    104.6 KB · Views: 3,770
  • IMG_0057.jpg
    IMG_0057.jpg
    98.4 KB · Views: 3,764
  • IMG_0054.jpg
    IMG_0054.jpg
    104.1 KB · Views: 3,739
Last edited:
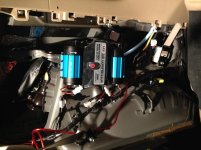
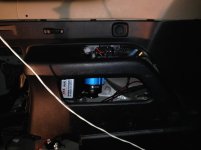
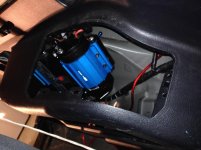
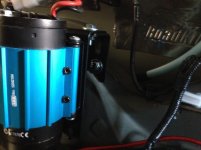
I'm finally going to get to install my ARB compressor! It's been sitting in my toolbox for over a year now. I was originally going to install it in the engine bay but since I was wiring up another fuse box and running 4ga wire to the back, why not find a way to mount it in the interior.

Again, I'm sure the rear quarter panels are similar between 4R trims but I can only show you what I did with an LE and 3rd row.

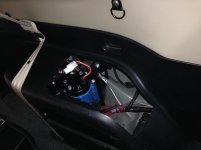
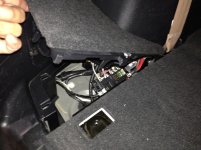
Found a place with a ton of room. I needed to temporarily hang it to check clearances again with the interior panels. There's a wheel well "lip" that I bolted it to temporarily. I'll have to make some brackets to make the mount solid.
IMG_0056.jpg
IMG_0029.jpg

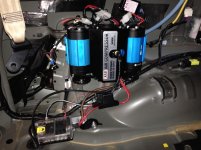
Yes, they are mounted two different ways. I was experimenting with the air outlet and wiring orientation. Ultimately, the air filter will be installed towards the bottom.
 

Attachments

  • IMG_0056.jpg
    IMG_0056.jpg
    106.8 KB · Views: 3,792
  • IMG_0029.jpg
    IMG_0029.jpg
    98.5 KB · Views: 3,756
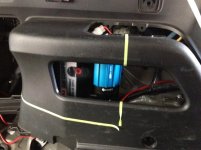
Aaaaannnnd, reinstall the interior again! This is probably the most annoying part of modding. Having to check clearances for anything you're installing. Honestly, it wouldn't be so bad if I didn't have to reinstall half of the truck check to check one thing. But, as they say, "measure once....".

Ignore the old wiring that's still hanging for the roof lights. That will be removed and replaced with 10ga later.

IMG_0030.jpg
IMG_0031.jpg

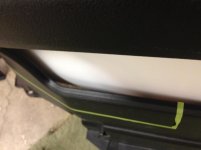
I put some masking tape to create my imaginary line that will guide me for when I modify the pockets for the 3rd row.
IMG_0051.jpg
 

Attachments

  • IMG_0030.jpg
    IMG_0030.jpg
    60.7 KB · Views: 3,730
  • IMG_0031.jpg
    IMG_0031.jpg
    91.6 KB · Views: 3,721
  • IMG_0051.jpg
    IMG_0051.jpg
    98.9 KB · Views: 3,747
Now to mount this sucker. I can't tell you how much I miss having a shop to work in. Don't get me wrong, it's great to have a garage now, but I definitely miss the equipment and hardware that was made available to me. Not to mention the guys I worked with.

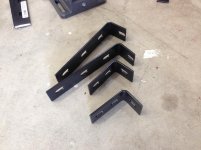
Anyway, I went to a local hardware store and picked up some angle. I think it was in the fencing section. Cut and slightly modified.
IMG_0042.jpg

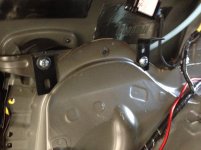
Mounted the smaller of the L brackets to the wheel well and cut to fit again.
IMG_0047.jpg

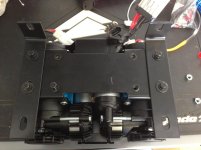
Mount the longer ones to the compressor.
IMG_0048.jpg

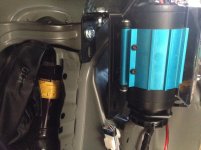
And then bolt the 2 brackets together. This ended up being an extremely solid mount. I cut the longer bracket so that it would sit on the "shelf" as seen here just above the white plug. I'm going to also use more sound deadening to hopefully quiet down the interior.
IMG_0049.jpg

And the front mount.
IMG_0050.jpg
 

Attachments

  • IMG_0042.jpg
    IMG_0042.jpg
    96.9 KB · Views: 3,702
  • IMG_0047.jpg
    IMG_0047.jpg
    95.5 KB · Views: 3,712
  • IMG_0048.jpg
    IMG_0048.jpg
    84.9 KB · Views: 3,730
  • IMG_0049.jpg
    IMG_0049.jpg
    104.3 KB · Views: 3,688
  • IMG_0050.jpg
    IMG_0050.jpg
    81.7 KB · Views: 3,679
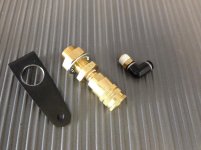
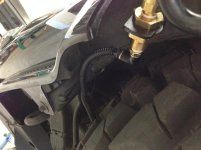
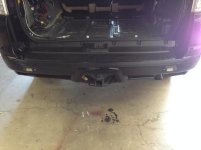
Reduce, reuse, and recycle, right? Here's some hardware courtesy of a Rigid Industries light bar. Drill a hole and mount the air fitting. I wanted to put it somewhere where it would be protected and inconspicuous. I think I accomplished that.

IMG_0055.jpg

Routed the air hose through the grommet in the floor on the drivers side.
IMG_0057.jpg

Cut the end of the light bracket and mounted it underneath near the hitch.
IMG_0060.jpg

And what it looks like from behind.
IMG_0058.jpg
 

Attachments

  • IMG_0055.jpg
    IMG_0055.jpg
    91.9 KB · Views: 3,667
  • IMG_0057.jpg
    IMG_0057.jpg
    98.4 KB · Views: 3,680
  • IMG_0060.jpg
    IMG_0060.jpg
    89.7 KB · Views: 3,682
  • IMG_0058.jpg
    IMG_0058.jpg
    63.7 KB · Views: 3,668
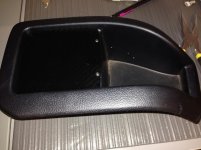
Now to deal with the interior pockets of the 3rd row. The top pockets were easy to deal with. 2 screws and it pops off. The bottom one, however was plastic welded to the panel.

Here's the back of the panel.
IMG_0027.jpg

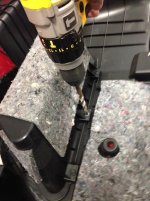
Where you have to drill 6 plastic rivets off. Don't get crazy and go to far here. Or that's gonna be an expensive mistake.
IMG_0028.jpg

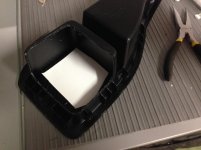
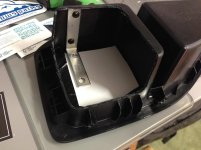
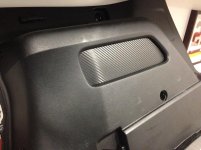
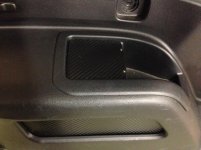
Cut out the rear pocket of the top. I left as much of the corners as possible to help keep the pocket itself sturdy. This is 1/8 plex with di noc wrapped. Of course, you didn't think I'd do something without some Di Noc! Actually, I just have a ton of it left over.
IMG_0063.jpg

There are 2 screws holding the front of the plex. They are drilled through and bolted down.
IMG_0062.jpg

IMG_0061.jpg

I put a piece of angle to support the back of the panel. Now there's no flex from the plex. This still makes this cubby useable by the 3rd row. Not that anyone is going to put anything in there but if you're gonna do it, might as well do it right.
IMG_0064.jpg
 

Attachments

  • IMG_0027.jpg
    IMG_0027.jpg
    137.7 KB · Views: 3,726
  • IMG_0028.jpg
    IMG_0028.jpg
    70.4 KB · Views: 3,662
  • IMG_0063.jpg
    IMG_0063.jpg
    72.4 KB · Views: 3,735
  • IMG_0062.jpg
    IMG_0062.jpg
    120 KB · Views: 3,676
  • IMG_0061.jpg
    IMG_0061.jpg
    101.5 KB · Views: 3,710
  • IMG_0064.jpg
    IMG_0064.jpg
    84.4 KB · Views: 3,707
Last edited:
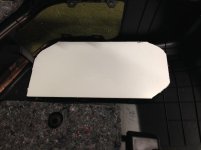
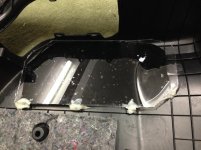
The bottom pocket proved to be a little more challenging. There is a slight curve in the panel. It didn't matter when there was a pocket there but I've got to build a plate. So I used 1/4 plex so it could withstand some heat and mold to the shape I needed it to.

Cut it out to mimic the shape as best as possible.
IMG_0065.jpg

Heat it up to try and conform the shape.
IMG_0066.jpg

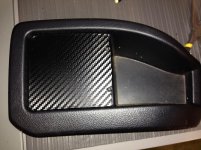
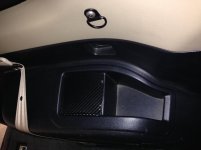
Wrapped in Di Noc :yo: and epoxied into place. I used a specific plastic epoxy from Loc-tite. Cures in 20mins but smells like holy hell!
IMG_0068.jpg

I was able to follow the flow of the panel pretty well. And it's definitely not going anywhere.
IMG_0080.jpg

IMG_0081.jpg
 

Attachments

  • IMG_0066.jpg
    IMG_0066.jpg
    56 KB · Views: 3,635
  • IMG_0068.jpg
    IMG_0068.jpg
    65.3 KB · Views: 3,639
  • IMG_0065.jpg
    IMG_0065.jpg
    39.8 KB · Views: 3,647
  • IMG_0080.jpg
    IMG_0080.jpg
    115.6 KB · Views: 3,634
  • IMG_0081.jpg
    IMG_0081.jpg
    102.5 KB · Views: 3,626
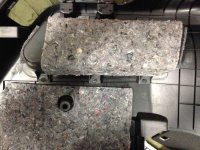
Functionality. I was originally going to use some sort of mesh for the top pocket for ventilation. But I didn't want any compressor noise to travel into the cab if it wasn't necessary. So the nice thing is, I can pop off the top pocket if I feel the compressor is getting too hot.
IMG_0093.jpg
IMG_0090.jpg

The fuse panel is very accessible. Pop the side panel off and you're golden.
IMG_0086.jpg
 

Attachments

  • IMG_0093.jpg
    IMG_0093.jpg
    62.3 KB · Views: 3,632
  • IMG_0090.jpg
    IMG_0090.jpg
    59.1 KB · Views: 3,630
  • IMG_0086.jpg
    IMG_0086.jpg
    103.5 KB · Views: 3,624
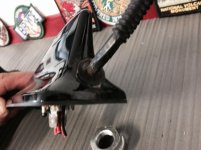
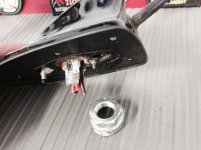
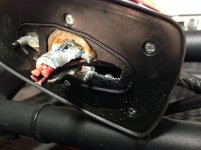
Alright, so part of the reason for running the 4ga to the back of the truck is so that I can run 10ga to the 40" light bar. But in order to get 10ga to the light bar, I needed a different way to seal the roof. As some of you may know, I gutted the innards of the shark fin antenna. There is no room for 10ga to run through the bolt of the shark fin.
For those that are curious as to what's under the shark fin...

Here's how it exited the shark fin. These are 4 12ga wires coming out of the grommet
IMG_0099.jpg
A better look
IMG_0098.jpg

And here's a good shot of the "through bolt" that the wires have to pass through to get into the cab.
IMG_0072.jpg

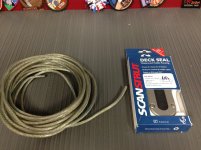
I bought 25ft of 10ga and a Scanstrut bulk head.
IMG_0069.jpg

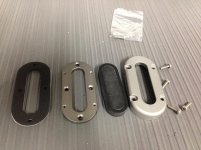
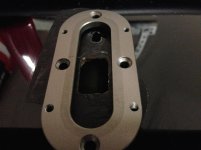
The Scanstrut is a marine deck seal. Its components from left to right are the seal, base plate, rubberish poly type pass through, and the top plate. You basically drill a hole into the grommet and push the wire through. Once the top plate goes on, it sandwiches the grommet and "compresses" the grommet around the wire for a completely 100% waterproof seal.
IMG_0070.jpg
 

Attachments

  • IMG_0099.jpg
    IMG_0099.jpg
    90.2 KB · Views: 3,998
  • IMG_0098.jpg
    IMG_0098.jpg
    95.7 KB · Views: 4,040
  • IMG_0072.jpg
    IMG_0072.jpg
    95.5 KB · Views: 3,966
  • IMG_0069.jpg
    IMG_0069.jpg
    110.7 KB · Views: 3,941
  • IMG_0070.jpg
    IMG_0070.jpg
    96.7 KB · Views: 4,260
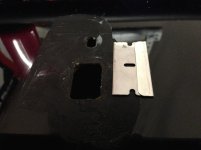
Here's what you're left with on the roof. Please ignore the silicone. I was being overly cautious with the shark fin. I put the razor I used to remove the silicone next to the 2 holes in the roof for size reference. Scanstrut makes a smaller deck seal but I wasn't confident that it would cover both holes. And the added benefit of the larger deck seal is there is plenty of room for additional wires for antennas or more electrical.
IMG_0076.jpg

Find a good place to center your base plate and drill through.
IMG_0077.jpg

Drill the required holes for how ever many wires you're passing through and run your wires.
IMG_0078.jpg


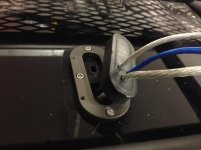
Sandwich the grommet in between and bolt down your top plate.
IMG_0079.jpg

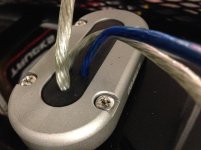
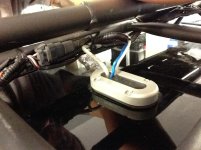
Clean up your wiring and you're done.
IMG_0095.jpg
 

Attachments

  • IMG_0076.jpg
    IMG_0076.jpg
    59.8 KB · Views: 3,921
  • IMG_0077.jpg
    IMG_0077.jpg
    72.3 KB · Views: 3,913
  • IMG_0078.jpg
    IMG_0078.jpg
    88.4 KB · Views: 3,984
  • IMG_0079.jpg
    IMG_0079.jpg
    86.9 KB · Views: 3,912
  • IMG_0095.jpg
    IMG_0095.jpg
    100.3 KB · Views: 4,238
Just a small update of what's happened this past summer while hosting multiple family and friends. Multiple hikes, dozens of waterfalls, several beaches, plenty of camping, and tons of boating, etc. Here's just a few of what I caught on camera.
Portland Japanese Gardens

Neskowin Beach, tide pools, and some hikes
]

Sandunes at Pacific City, sunset on Neskowin, and a little bubbly on the sand.


Rope swinging under a bridge and another waterfall.

A little visit to Crater Lake and a couple of strenuous hikes. The best part, my wife and I got to snorkel the lake for 20mins or so before the park ranger said that it was a no-no. Who knew?

looking at these pics makes me think you're really missing the east coast.

looks beautiful Bobby, nice to see your relocation isn't bothering you too much haha
 
The Wired HDH system is really nice. It's very self explanatory when it comes to wiring. I hid the main module under the driver's seat. Pre-wired eight wires to go into the engine bay. They will connect to two of the Wired Wagon relay boxes. Each relay box has 5 circuits, each with its own power lead. So I needed two of them for a total of 10. The Wired HDH system has switches for 8.
If you recall, I already have 6 switches on my dash next to the head unit.
View attachment 66778

I guess you could say I've got a thing for switches. Maybe not has bad as Jango does, but I'll take the close second!

So far, switches will be for:
DASH
40" SR Rigid
2x6" SR Rigid for back up
Train horn
and a couple surprises now that Rigid has come up with the flush mount series


Wired HDH
LED scanner (I know, it's gay)
LED halos in headlights
Siren/PA system
LED rock light strips (inspired by Lima, SoCal)
LED engine bay
On board air compressor
and whatever else strikes my fancy, I guess.

Hey Bobby, is your dash just a generic dash that you wrapped with carbon tape?
Or did you get it somewhere specific? I would like to mount OEM switches in the dash area, do you think it will fit a few?
 
Hey Bobby, is your dash just a generic dash that you wrapped with carbon tape?
Or did you get it somewhere specific? I would like to mount OEM switches in the dash area, do you think it will fit a few?

It's just a Metra kit wrapped in Di-Noc. There is some space behind for the switches but you're limited. Since I have no experience with those OEM switches you have coming from the group buy, I can't tell you if there's enough space. The tamper proof switches that I used have a depth of 5/8".

I'm also concerned with how they mount. I don't believe they are a simple push through design like most universal switches. They may only work in a predetermined factory location. If I remember correctly, the factory style switch requires a "bucket" for the switch to sit in. That's where the retaining clips sit. But, I could be wrong.
 

Members online

No members online now.

Forum statistics

Threads
278,315
Messages
3,554,104
Members
248,016
Latest member
Advally Service

Trending content

Back
Top