Factory (style) Fog Light Switch- Fits knock-out!

Hey [MENTION=81322]barryhiram[/MENTION],

That's just what I was hoping! Not only do these 'Prefabs' save you the 'time and material' it would take to 'Custom-build' your own lighting harnesses, but at those prices, it might make sense to keep a few (just for spare parts) on my work bench wall! :nerd:

You are a :nerd:..............lol, just kiddin


One suggestion/tip for everyone............although harnesses listed above have waterproof connectors at lights, the relay and relay socket are not. Where do we typically mounted them, under the hood.......not exactly a dry environment eh?

What I do is take a tube of RTV Silicone (black, which can be purchased at any auto part store) and squirt into each wire opening at bottom of relay socket, then apply a coating to top of socket, plug into relay, then run a bead around bottom of relay and socket. May be a little messy, but a little spit will allow you to mold Silicone so it's neat (similar to running a bead in a tube). Once the Silicone sets, it's waterproof!
 
Ok, now that we’ve all done a WICKED AWESOME job wiring our WICKED AWESOME lights, it’s time for one final touch……………….light adjustment! What good are poorly aimed lights?

This has been covered in multiple threads, but I thought I’d throw it out there anyways (let the bashing begin)……………………..

Vehicle parked on level surface 25 feet from vertical wall/garage door, measure from center of light bulb to ground at vehicle, mark measurement at wall/door. Turn on head lights (low beam), light (cutoff) should not exceed wall/door measurement. Usually you would block one headlight, adjust other light up or down, then switch and repeat. If light exceeds measurement you will be blinding oncoming traffic which is annoying and downright dangerous. Follow same procedure to adjust fog lights.

For auxiliary lighting (DOT approved) that will be used on a regular basis with other drivers on the road, follow the procedure above for adjustment.

For auxiliary OFFROAD lighting (not fog lights), might I suggest following the beginning process above, but instead of not exceeding wall/door measurement, now center of light pattern equals wall/door measurement……in essence the light is adjust straight out or level. This will allow for the greatest lighting distance of your new WICKED AWESOME light bar!
 

Attachments

"...You know I have to say it..........pix or it didn't happen..." :popcorn:

Ya know [MENTION=46530]4Funnr[/MENTION], as much as I hate to admit it... Mr. Hiram (aka 'B-Slick' :pimp: ) is right... "w/o At Least ten pgs of pics, what was the point"(?)!

:peep: Hahaha!
 
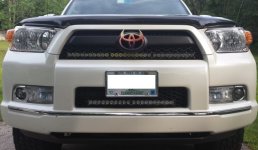
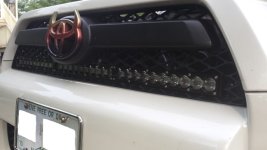
Here are some awful photos of my dirty rig. California drought has kept me from washing it for a while.

I'll probably get it cleaned up this weekend and take some better photos of the truck, grill, and switch installed.

4funnr-albums-rigid+led+light+bar++grill-picture33947-rigid-led-light-bar-grill.jpg


4funnr-albums-rigid+led+light+bar++grill-picture33946-rigid-led-light-bar-grill-closeup.jpg
 
Last edited:
"Here are some awful photos of my dirty rig. California drought has kept me from washing it for a while..."

NO EXCUSES! "Open a door and let's see the "Factory (style) Fog Light Switch-fits knock-out! just like it says in the title!!!" :dancin:

Cheers!
 
Here are some awful photos of my dirty rig. California drought has kept me from washing it for a while.

I'll probably get it cleaned up this weekend and take some better photos of the truck, grill, and switch installed.

4funnr-albums-rigid+led+light+bar++grill-picture33947-rigid-led-light-bar-grill.jpg


4funnr-albums-rigid+led+light+bar++grill-picture33946-rigid-led-light-bar-grill-closeup.jpg

Looks great [MENTION=46530]4Funnr[/MENTION]! Like how you used black hardware instead of the bling-bling Rigid provides.
 
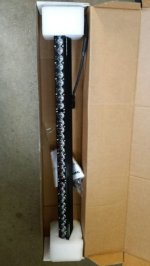
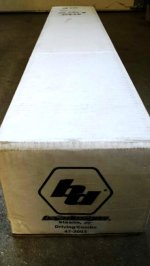
Guess what arrived yesterday :whoo:
Baja 30.jpgBaja 30(2).jpg

Big thanks to Chas and Mike at [MENTION=120150]TotalAutomotiveLV[/MENTION] for the smokin' deal and great customer service!


You know you have a problem when you're on a first name basis with FedEx & UPS drivers :loco:
 

Attachments

  • Baja 30.jpg
    Baja 30.jpg
    43.2 KB · Views: 941
  • Baja 30(2).jpg
    Baja 30(2).jpg
    38.9 KB · Views: 961
Yeah [MENTION=120150]TotalAutomotiveLV[/MENTION] hooked me up for the Rigid Grill and 20" LED bar. Awesome pricing and pretty fast shipping!

Thanks!
 
Who said a 30" light bar won't fit in the upper grille of a 2012 SR5? :flipoff:

20150702_175834.jpg
20150702_174900.jpg

Had the day off today, took about 4 hours start to finish.
 

Attachments

  • 20150702_175834.jpg
    20150702_175834.jpg
    54.5 KB · Views: 945
  • 20150702_174900.jpg
    20150702_174900.jpg
    38 KB · Views: 934
Last edited:
Yeah [MENTION=120150]TotalAutomotiveLV[/MENTION] hooked me up for the Rigid Grill and 20" LED bar. Awesome pricing and pretty fast shipping!

Thanks!

Yup, they were excellent to deal with. Even called me to confirm harness I ordered was the correct one, now that's attention to detail.
 
Great thread. Lots of great info.

I have this on my to do list. I have the brackets on order as well as the LED light bar.

My question...I've read through the post and I like the idea of having the relay tied into my HB. My 16 has DRL's that gives continuous power (albeit at a lower voltage) to the HB's. I can't use the HB + to tap the relay into it because won't it always be on?

I know i can disable the DRL's, but I have LED's in there now and they look great during the day. They aren't that great as a HB, but my HID's give me enough light most of the time. Thus the light bar...

Easy way would be an independent switch, but after reading the thread I like the HB option (if the DRL's will allow it).

thanks in advance,
 
Great thread. Lots of great info.

I have this on my to do list. I have the brackets on order as well as the LED light bar.

My question...I've read through the post and I like the idea of having the relay tied into my HB. My 16 has DRL's that gives continuous power (albeit at a lower voltage) to the HB's. I can't use the HB + to tap the relay into it because won't it always be on?

I know i can disable the DRL's, but I have LED's in there now and they look great during the day. They aren't that great as a HB, but my HID's give me enough light most of the time. Thus the light bar...

Easy way would be an independent switch, but after reading the thread I like the HB option (if the DRL's will allow it).

thanks in advance,

Thanks bowhun2r.

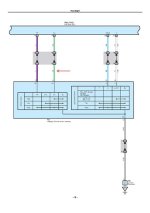
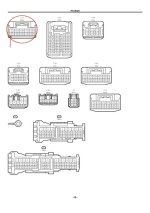
Think it is possible, you could possibly tie into the high beam wire at the headlight switch. Attached is a Techstream wiring diagram for a 2016 Runner for your review. Caution - Before making any connections, test with a meter to verify proper operation!!!!

HL2_Page_1.jpg
HL2_Page_2.jpg

Light Green wire (pin #11) should send a ground signal to ECU when stock is moved to high beam or flash to pass position, ECU then triggers high beams. Adding a second relay using LG wire as ground trigger should accomplish what you're trying to achieve without affecting DRL's. Also, make sure relay has an internal diode to prevent back feeding OEM wire, if it doesn't, you will need to add one.

Possible second relay terminal wiring;
30 & 86 - 12 volt battery or ignition (+ positive) fused.
87 - Run to AOB Red wire, this is a + positive output that will trigger LED light relay (main relay).
85 - Light green wire from high beam circuit (- ground trigger).

Please post back with what you find and/or do. Good Luck!
 

Attachments

  • HL.pdf
    HL.pdf
    99 KB · Views: 227
  • HL2_Page_1.jpg
    HL2_Page_1.jpg
    28.4 KB · Views: 843
  • HL2_Page_2.jpg
    HL2_Page_2.jpg
    42.8 KB · Views: 777
Last edited:

Members online

Forum statistics

Threads
278,316
Messages
3,554,120
Members
248,016
Latest member
Advally Service

Trending content

Back
Top