Hi-desert Cheapskate build thread

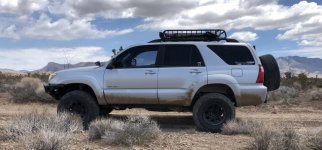
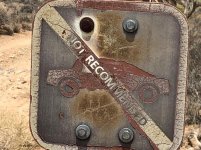
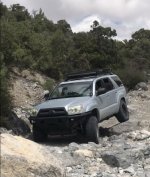
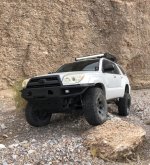
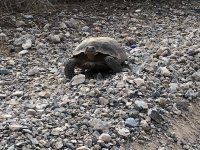
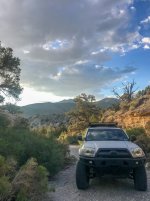
Recent trail pics.
 

Attachments

  • 161F2788-A730-42C5-8415-EE52BF8AF6A1.jpg
    161F2788-A730-42C5-8415-EE52BF8AF6A1.jpg
    109.3 KB · Views: 280
  • C0276501-C8E2-4BE5-A3AB-FACCAB0E6B0C.jpg
    C0276501-C8E2-4BE5-A3AB-FACCAB0E6B0C.jpg
    142.3 KB · Views: 281
  • 82606E66-0BD1-40BC-8FAE-16D9546879BB.jpg
    82606E66-0BD1-40BC-8FAE-16D9546879BB.jpg
    72.7 KB · Views: 282
  • DBAE3C79-3063-4FA0-AB25-A46E1E9E8B8D.jpg
    DBAE3C79-3063-4FA0-AB25-A46E1E9E8B8D.jpg
    143.1 KB · Views: 275
  • 25AEA9A1-F0DC-4033-A399-D17C2B56B131.jpg
    25AEA9A1-F0DC-4033-A399-D17C2B56B131.jpg
    156.3 KB · Views: 270
Last edited:
eimkeith PCK

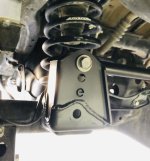
Installed the eimkeith PCK and swapped the Toytec panhard bar for the stock one.
 

Attachments

  • 5F084107-217F-447E-BAE5-680CB59465D8.jpg
    5F084107-217F-447E-BAE5-680CB59465D8.jpg
    117.3 KB · Views: 250
How's the handling now?

Sent from my Pixel 3 XL using Tapatalk

Maybe not night and day difference but I have my front sway bar removed and my tires were at 15 psi for the short drive on pavement to the trails. I’ll be able to tell once I have my tires at a normal pressure and run highway speeds.

On the trail it felt phenomenal.
No more squeaky heims in the rear too.
 
Maybe not night and day difference but I have my front sway bar removed and my tires were at 15 psi for the short drive on pavement to the trails. I’ll be able to tell once I have my tires at a normal pressure and run highway speeds.

On the trail it felt phenomenal.
No more squeaky heims in the rear too.

yeah wait till you hit a big round turn on the highway. You're going to feel the difference right away.
 
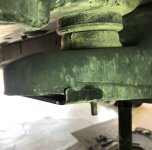
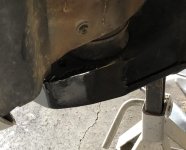
Right side body mount chop. Never had much of an issue hitting that side but on the last two trail rides it hit several times. Glad it’s done.
 

Attachments

  • 181CA873-744F-4D6F-AED0-EA79C7ABEAC7.jpg
    181CA873-744F-4D6F-AED0-EA79C7ABEAC7.jpg
    115.6 KB · Views: 223
  • B1EB4096-7B3D-4A83-A94D-CAEE21DB7061.jpg
    B1EB4096-7B3D-4A83-A94D-CAEE21DB7061.jpg
    128.2 KB · Views: 224
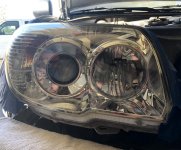
Headlight restore using the Mothers restoration kit. These haven’t looked this good for years. I wet sanded the lenses using 2000 grit then 3000 grit and only used the foam polishing pad and compound in my drill instead of the 800 grit, 1500 grit and 3000 grit pads the kit came with.
 

Attachments

  • 8B7153E6-8920-4EF0-8782-BFA9FF06FBFC.jpg
    8B7153E6-8920-4EF0-8782-BFA9FF06FBFC.jpg
    130.6 KB · Views: 204
Last edited:
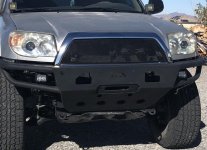
My 1st attempt at a flush grill mod. Kinda turned out lame but oh well. The plastic grille was starting to fall apart. The mesh is used is 1/8” diamond mesh used for security doors I think. Idk it was in my dads shop. Also peeled the plasti-dip off the chrome surround.
 

Attachments

  • A399392E-A899-48E6-AB8A-779C6E81E773.jpg
    A399392E-A899-48E6-AB8A-779C6E81E773.jpg
    133.3 KB · Views: 366
Headlight restore using the Meguiars restoration kit. These haven’t looked this good for years. I wet sanded the lenses using 2000 grit then 3000 grit and only used the foam polishing pad and compound in my drill instead of the 800 grit, 1500 grit and 3000 grit pads the kit came with.

Clean! Next time try this method.

The BEST Guide to Restore Headlights PERMANENTLY! - YouTube

I did mine this way and I haven't touched them for a couple years now. 2K clear is the shit!
 
Welcome to my thread. My name is Matt. I’m originally from Salt Lake City, UT. I have lived in Southern Nevada since 2005. I’m an Environmental Compliance Technician for a hazardous waste landfill. I’m a member of the site’s Emergency Response Team and am a licensed EMR in Nevada. I love the outdoors and spend as much time as possible.

My 2007 SR5 4WD V6 was purchased new from Findlay Toyota in Henderson, NV in Feb. 2007. It is titanium metallic with stone gray interior. Sunroof, Homelink, compass and cargo net…pretty basic.

The 4Runner stayed mostly stock until 2015 when I finally lifted it. This forum was a huge influence in my rigs progression. I appreciate all the members who have taken the time to post maintenance and mods for all our benefit.

The dealership did all the routine maintenance for the first two years and replaced one inner cv boot. Except for a couple alignments I’ve done all my own maintenance and modifications.

I lost most pictures of it still bone stock.
Earliest pics I have from around 2015 after installing a Toytec 3” lift. Bilstein 5100 fronts set at 0”. 265/75r17 Firestone Destination a/t.
And current as of 8/5/22


Love this build!
 
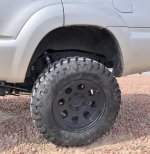
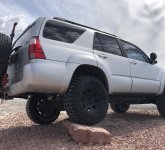
New shoes and alignment today.
285/70r17 Ironman All Country M/T

I told my wife I’m parking on these ugly pink landscape rocks from now on lol:der:
 

Attachments

  • 61B3CC86-1383-45DD-B42C-21FBFFEE621C.jpg
    61B3CC86-1383-45DD-B42C-21FBFFEE621C.jpg
    127.7 KB · Views: 325
  • 4939F754-D68C-44E1-A2A5-0B61007E058C.jpg
    4939F754-D68C-44E1-A2A5-0B61007E058C.jpg
    126.6 KB · Views: 321
Last edited:
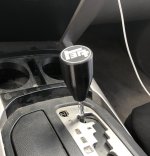
3D printed shift knob. Thanks [MENTION=83833]thegame7[/MENTION]
 

Attachments

  • FCE338A5-9BFC-4654-86B8-99BA3F7B37B6.jpg
    FCE338A5-9BFC-4654-86B8-99BA3F7B37B6.jpg
    121.8 KB · Views: 278
Last edited:
Yeah dude it turned out killer. Thanks again. Wasn’t sure if you wanted me advertising where I got it or not.
I like the cup holder. Since you can print your own you might want to play with the cup opening sizing. I got mine with equal size openings. It’s definitely better than the lame stock one.
 
Yeah dude it turned out killer. Thanks again. Wasn’t sure if you wanted me advertising where I got it or not.
I like the cup holder. Since you can print your own you might want to play with the cup opening sizing. I got mine with equal size openings. It’s definitely better than the lame stock one.

Yea I don't mind, put it on blast! Good to know on the cup holder. I'll have to see if they also posted up the CAD file so I can manipulate it.
 

Members online

Forum statistics

Threads
278,309
Messages
3,554,075
Members
248,016
Latest member
Advally Service

Trending content

Back
Top