InfamousRNR's 2002 Limited BU!LD THREAD

Congrats! Cooper sure makes some great looking shoes. I don't see that many running those Coppers, mostly ST MAXX, or ST Pros. I will be interested to hear your impressions of the new tires for sure.
 
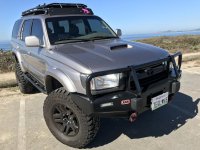
So pumped to finally get some new shoes especially since I've had these for over a year. They were purchased when Discount Tire was doing their eBay special.

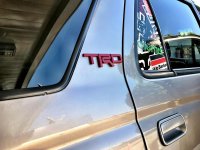
I'm stoked to have some new rubber, so stoked that I made a video. Also finally got my TEQ emblem done.


.
<iframe width="560" height="315" src="https://www.youtube.com/embed/LHcGSuDIdvA" frameborder="0" allowfullscreen></iframe>

Nice rubber and video. Speaking of I haven't seen Tim on the forum lately....
 
I love your rig man, and these new tires look great! They remind me of my Dick Cepek Fun Country.

I'll watch your video tonight.

thanks my dude! I've always wanted the color you have on your rig. I love the millennium silver. Now its time to get to work & update your build thread!


Sik mods bruh
I'm digging the red accents

I painted the inside of the rims red, for extra HP. SICK MODS !!!


Congrats! Cooper sure makes some great looking shoes. I don't see that many running those Coppers, mostly ST MAXX, or ST Pros. I will be interested to hear your impressions of the new tires for sure.

so after calling around i finally settled on palace to mount & balance them & first impressions are good... but it seems like they weren't balanced right because i still have vibrations at speed & a weird droning noise like there is a flat spot in one of the rear tires....

I'm thinking it might be the drive shaft or something in the rear axle because it was a similar noise with the swampers.


Nice rubber and video. Speaking of I haven't seen Tim on the forum lately....

He went one a 3 week adventure in Oregon with some buddies mountain biking for the better part of July & then got home & went to fight fires near santa barbara for a good while...

but don't worry, we have a front diff video, A/C recharge video & a trans mount & engine mount video coming out soon. so stay tuned!
 
Legit Build

Just spent the last few hours going through your thread. Awesome information and upgrades. Just getting started on our new to us '02. Ordering suspension parts this week. Follow all of your maintenance videos with Tim as well. Videos were cool as my wife grew up near San Jose. We still get out there once a year to visit. Keep up the mods and how to vids.
 
Just watched the Toyota Time video where you rebooted your CV's. How have your new OEM boots w/ boot slide held up (how many miles since the service)?

I can't decide if I should just buy the reboot kit from Toyota or get the extended travel boots.

Thanks!
 
Gained 2HP.
 

Attachments

  • IMG_1901.jpg
    IMG_1901.jpg
    133.2 KB · Views: 404
hey [MENTION=115590]StreetCreeper[/MENTION] i thought you would appreciate this...look at the "likes"
Screen Shot 2017-09-27 at 9.47.36 PM.png


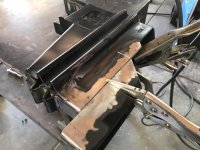
Visited [MENTION=83666]renosauce[/MENTION] & we addressed my bumper gap. cut the ARB bumper mount & welded it 1.5" higher. I "borrowed" this idea from [MENTION=46329]blcktpgsr[/MENTION] . He has a rad build thread

IMG_2141.jpg


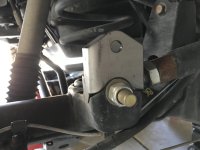
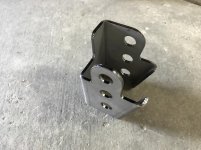
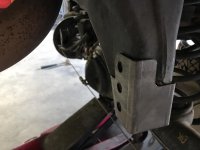
he also welded on these awesome lateral control rod lift & drop brackets made by [MENTION=28464]eimkeith[/MENTION]

IMG_2069.jpg


IMG_2070.jpg


IMG_2076.jpg
 

Attachments

  • IMG_2141.jpg
    IMG_2141.jpg
    134 KB · Views: 687
  • IMG_2069.jpg
    IMG_2069.jpg
    120.3 KB · Views: 695
  • IMG_2070.jpg
    IMG_2070.jpg
    122 KB · Views: 645
  • Screen Shot 2017-09-27 at 9.47.36 PM.png
    Screen Shot 2017-09-27 at 9.47.36 PM.png
    81 KB · Views: 711
  • IMG_2076.jpg
    IMG_2076.jpg
    127.8 KB · Views: 632
Last edited:
Now i'm One Toke Over The Line sweet Jesus.:hippie:

Well done! The runner is looking good man.
 
Last edited:
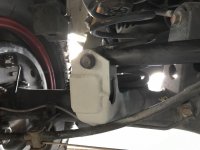
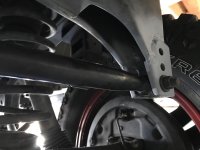
A couple more pictures of the Pan Hard Drop & Lift bracket. [MENTION=83666]renosauce[/MENTION] had a good idea to give the the lift bracket on the axle a little extra support.

IMG_2124.jpg


IMG_2125.jpg


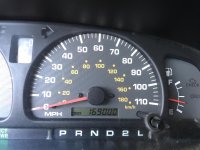
Hit a cool mileage on the way home from all the sick mods in Santa Cruz, CA.

IMG_2130.jpg


The ARB bumper body lift "MOD", where we cut the mount & welded it 1.5" higher than it was before


IMG_2122.jpg
 

Attachments

  • IMG_2124.jpg
    IMG_2124.jpg
    119.8 KB · Views: 600
  • IMG_2125.jpg
    IMG_2125.jpg
    120.3 KB · Views: 626
  • IMG_2130.jpg
    IMG_2130.jpg
    133.6 KB · Views: 590
  • IMG_2122.jpg
    IMG_2122.jpg
    130.6 KB · Views: 577
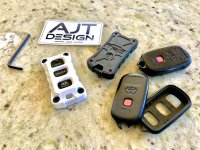
Fixed some broken fobs with AJT Design'd injection molded plastic replacements.

Bought a BROKEN USED one off eBay for $10 & programmed it. I just referenced the FCC ID on the back of the FOB For a search word.

My locks were acting up too... the drivers side wasn't always cooperating with a fast lock and unlock so I had to help it manually with my hand when I was cycling the lock/unlock button on the door.

Programming worked first time!

IMG_2194.jpg


1. Start with the following conditions: you are in the vehicle

a. Key is out of the ignition
b. Drive door is open ( all other doors are closed)
c. Driver door is unlocked (other door locks don't matter)

2. Insert the key into the ignition (don't turn it) and pull it out.

3. Perform these steps within 40 seconds:

a. Cycle the power locks 5 times. Use an even pace and try
to go relatively fast.

b. Close, then open the drivers door.

4. Perform these steps within 40 seconds:

a. Cycle the power locks 5 times (same as before).
b. Turn the ignition to ON then back to OFF.
c. Turn the ignition to ON then back to OFF.
d. Remove the key from the ignition.

5. Within 3 seconds, the power door locks should cycle (automatically)
indicating successful entry into programming mode. Return to step 1
if the locks do not cycle at this point.

6. Perform these steps within 40 seconds:

a. Press the LOCK and UNLOCK buttons on the transmitter
simultaneously for 1 second.

b. Immediately after letting go of the lock and unlock buttons,
press the lock button by itself and hold for 2 seconds.
Within 3 seconds, the door locks should cycle ( LOCK then
UNLOCK) once-- indicating successful programming. If
the door locks don't cycle, or cycle twice. Repeat steps
6a and 6b--this remote has not been accepted.

c. Repeat steps 6a and 6b for EACH transmitter that will
operate the vehicle. Including any old transmitters.

7. Close the driver door.

 

Attachments

  • IMG_2194.jpg
    IMG_2194.jpg
    138.2 KB · Views: 552
Last edited:
You got me really excited with that new key fob as mine is broken too, sadly I must have the old style they don't make one for. Ended up just buying a new shell for $15 :violin:

Anyway, I went through your entire thread last night. Great 4runner and read!
 
This is a great build thread. Especially appreciate the videos. Lots of inspiration here. Between this and Unner's build I pretty much have my wish list locked down. Subscribed!
 
So...whats next on the mod/adventure list? I am seriously debating planning a trip out West...ironically everything is West of Tampa! Maybe Colorado/Moab...you up for a trip?
 

Members online

Forum statistics

Threads
278,312
Messages
3,554,086
Members
248,016
Latest member
Advally Service

Trending content

Back
Top