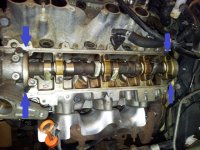
My 3 point slow rebuild

what didn't go right about it? ive ported heads before so I'm just curious.

its too bad you couldn't do the mod now. I'd like to do mine when I pull my heads and put the ported ones on.

on the bright side, we know these things inside and out now. lol.

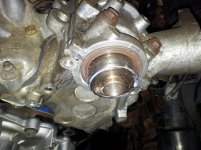
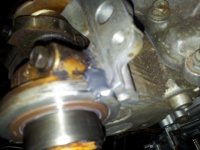
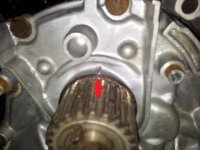
oh and make sure you know which timing mark on the crank is actually the timing mark. I ended up 180 out.

According to both my chilton and haynes manuals, it's the little notch on the rear lip of the timing belt gear. I set it at TDC before I put the heads on.
 
It also doesn't help that the manifolds and cross over are ridiculously small. If they would have went with 2-2 1/2" pipe all the way, It probably wouldn't have been a problem.

Given the placement, the heat build-up that causes the gasket problem is pretty much non-negotiable. Also, the design of the driver-side manifold is SO restrictive, the heat is held in the pipes much longer while the gases fight to make it down the line. At the very least, you would think they would've brought the two sides together in a down-turned Y, instead of making the passenger side slam halfway up the other manifold before having to turn against itself to go downward. It's no wonder why headers are the #1 suggested mod for engine performance with the 3.0--without that, any other mods don't have a chance to reach their true potential.
 
yup that's the mark. on my crank gear there was a nice machined dot on the front exactly 180* off.

did you by chance get new injector seals? I thought mine would be OK until I went to fire it up and gas came out of everything. I had to tear the manifold down. then once more to fix the timing.
 
Last edited:
yup that's the mark. on my crank gear there was a nice machined dot on the front exactly 180* off.

did you by chance get new injector seals? I thought mine would be OK until I went to fire it up and gas came out of everything. I had to tear the manifold down. then once more to fix the timing.

I'll pick some up if they are not in my gasket set. Thanks for the advice!
 
Anyone have a link to their favorite header for the 3.0? I picked up my first 3.0 last friday so it will be my winter project
 
Anyone have a link to their favorite header for the 3.0? I picked up my first 3.0 last friday so it will be my winter project

Two that I know of are NorthwestOffroad.com (their own design) and Rocky-Road.com (Doug Thorley headers). The guy that runs NWOR is a grouchy old fart, and his shop's hours are extremely limited, but they do seem to have some good custom products (I have their V8 headers and some other items). Haven't tried the Thorleys, but those guys have been building headers for decades. Expect high prices for any you find (limited demand, I guess).
 
LCEperformance has a header also. But its like $600

the only ones I've been able to find lately are the Doug thorleys for $600.

it is seriously a ridiculous amount considering the engine. this is why I insist on using passenger manifolds and cutting the crossover apart.

not sure where the best place is for the y-pipe... not famiar with the travel of the front driveshaft and if it actually changes angle or if it just slides.
 
20121103_074805.jpg
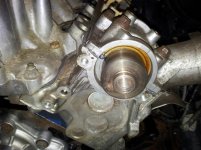
Time to install the front camshaft seals.
20121103_074935.jpg
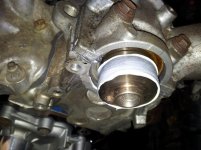
Be sure to lube up the lobe generously. Also slather some assembly lube on the seal itself. The goal is to make sure the seal seats properly and the seal lip doesn't roll over while you are installing it.
20121103_075440.jpg
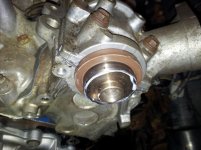
Slide the seal on by hand first. If it does not go on by hand, something is wrong or you have the wrong seal.
20121103_075554.jpg
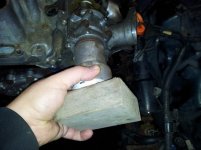
Using a seal seat tool, a large socket, or (in my case) a piece of exhaust pipe, seat the seal. Place a block of wood on the end and hit around the surface of the wood with a hammer being sure to seat the seal evenly.
20121103_075902.jpg
The seal won't seal perfectly flush, but it should be even all the way around. If one side is sitting higher than the other, the seal is not fully seated.
 

Attachments

  • 20121103_074805.jpg
    20121103_074805.jpg
    48.5 KB · Views: 1,287
  • 20121103_074935.jpg
    20121103_074935.jpg
    45.1 KB · Views: 1,629
  • 20121103_075440.jpg
    20121103_075440.jpg
    44.5 KB · Views: 1,106
  • 20121103_075554.jpg
    20121103_075554.jpg
    36.5 KB · Views: 1,085
  • 20121103_075902.jpg
    20121103_075902.jpg
    54.2 KB · Views: 1,166
20121103_083644.jpg

20121103_082034.jpg

20121103_082045.jpg
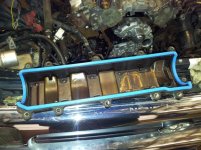
Apply gasket sealer to all four corners of the head where the cam bearing cap meets the head. This will ensure no oil leaks.
20121103_082218.jpg
Install the new valve cover gasket on the valve cover. Pay attention to the orientation of the gasket. The gasket will not seat perfectly until you bolt the cover on, but all four corners and the long sides should be pressed into place before installation.
20121103_083413.jpg

20121103_084248.jpg
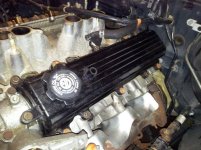
The valve covers installed. The cover with the oil cap goes on the driver side.
 

Attachments

  • 20121103_083644.jpg
    20121103_083644.jpg
    119.4 KB · Views: 1,142
  • 20121103_082034.jpg
    20121103_082034.jpg
    53.7 KB · Views: 1,101
  • 20121103_082045.jpg
    20121103_082045.jpg
    125.2 KB · Views: 1,396
  • 20121103_082218.jpg
    20121103_082218.jpg
    62.4 KB · Views: 1,875
  • 20121103_083413.jpg
    20121103_083413.jpg
    55.3 KB · Views: 1,074
  • 20121103_084248.jpg
    20121103_084248.jpg
    59.7 KB · Views: 4,310
20121103_084348.jpg
This was the timing mark that was discussed earlier. There is a small notch in the rear flange. Use THIS MARK, NOT THE ONE ON THE FRONT OF THE GEAR.
 

Attachments

  • 20121103_084348.jpg
    20121103_084348.jpg
    76.2 KB · Views: 2,206
20121103_084930.jpg
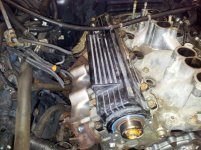
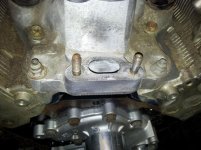
Cleaned up the cooling outlet flange on the intake.
20121103_085116.jpg
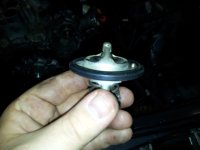
NOTE: The gasket that attaches to the thermostat goes AROUND the lip on the thermostat. If you look closely at your gasket, you'll see the groove that it sits in.
20121103_085132.jpg
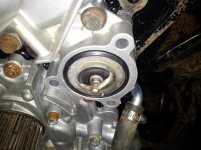
The thermostat installed in the water pump.
 

Attachments

  • 20121103_084930.jpg
    20121103_084930.jpg
    49 KB · Views: 1,067
  • 20121103_085116.jpg
    20121103_085116.jpg
    89 KB · Views: 1,061
  • 20121103_085132.jpg
    20121103_085132.jpg
    49.3 KB · Views: 1,040
Oh sh*&!

So...I'm in the back of the truck going through my parts and I come across this...

20121103_090749.jpg

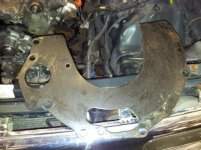
Do you see the problem here? This is the plate that goes between the engine and the transmission. After several choice vulgarities, I opened up the books to see how to handle this. Needless to say, unless I feel like ripping the heads off again, I have the unhook and unbolt the tranny, unbolt the motor mounts, slide the whole **** forward, unbolt the engine, and put the plate in... I am not a happy camper right now. I crawled underneath by the tranny and its not pretty under there. Not only is there not much space to work with, everything is rusted to hell. At this point, I gave up for the day and decided to go drink. I'll start fresh this coming weekend...

NOTE: IF ANYONE has not installed this plate and had no problems what so ever, LET ME KNOW!!! It would save me a hell of a lot of time right now. I would put it back in eventually, but I'm trying to get the truck running for winter.
 

Attachments

  • 20121103_090749.jpg
    20121103_090749.jpg
    55.6 KB · Views: 1,002
Well don't THAT just suck! Been there many times myself, friend--just about done, and then notice the part that got left out. My best friend and I had this little joke--if a project went too well, we would always say "tear it apart", figuring that something important HAD to have been missed. I can't imagine that plate being expendable--I would put it in.

EDIT: Alright Bill, stop stealing my lines! Same time, same comments (LOL).
 
Last edited:
Well, I had an epiphany this weekend while working on the truck. I was able to get the 3VZE out without the transmission. Here's how I did it...

- Remove the IFS "axle" from under the truck.
- Disconnect the steering bar from the pitman arm on the driver's side.
- Unbolt the sway bar from the frame (crosses under the transmission pan.)
- Make sure the radiator is out, the fan bracket is removed, and the engine has been disconnected from the truck. By this, I mean make sure all the wires, connecters, lines, hoses, etc. are disconnected and the engine is ready to lift out.
- Hook an engine hoist to the engine.
- Unbolt the motor mounts from the frame (2 bolts).
- Lift the engine slightly so that the motor mounts are loose, and then unbolt them from the engine and remove them from the engine bay.
- Now, slowly lower the engine until it stops. If you did it correctly, the transmission bell housing should be resting on the rear IFS frame mount.
- At this point, there is enough room behind the engine to unbolt and remove the exhaust crossover pipe.
- Unbolt and remove the crossover pipe. It does take a bit of weaseling to get it out. You may have to remove the coolant sensor block on the back of the intake.
- Once the crossover pipe is out, raise the engine and transmission slightly and place a jack under the transmission to support it. Be sure to use a wood block if you lift on the transmission pan.
- Unbolt the transmission to engine bolts and lift the engine out.

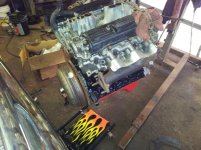
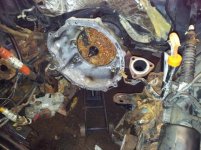
and VOILA!

20121117_102807.jpg

As you can see, the transmission is still in the truck. Never disconnected anything on it.
20121117_102836.jpg
 

Attachments

  • 20121117_102807.jpg
    20121117_102807.jpg
    56.5 KB · Views: 997
  • 20121117_102836.jpg
    20121117_102836.jpg
    59.9 KB · Views: 1,006

Members online

Forum statistics

Threads
278,316
Messages
3,554,109
Members
248,016
Latest member
Advally Service

Trending content

Back
Top