Ducmonsta's Build Thread-very pic heavy!

I have enjoyed reading through your build thread. Nice looking truck.

$(KGrHqZHJC4E91tvFvk8BPv2qHBVD!~~60_35.jpg


just saying....ducati comeback?:roll:
 
This past weekend, the family and I couldn't decide whether we wanted to go on a hike or pack the bikes up and do a ride. So we decided to go camping instead.:confused:
At any rate, it was a great time to get to the coast again and enjoy the ocean.
IMG_0048 2.jpg

I'm impressed with the camera the new iPhone 6 takes. Untouched. Saw this on one of our hikes.
IMG_0062 2.jpg

Our night sky that evening. Just extended exposure and unfiltered.
DSC_1722.jpg

Anyway, it was a great time. As promised, I'm going to go over my window cargo molle system.
 

Attachments

  • IMG_0048 2.jpg
    IMG_0048 2.jpg
    73.7 KB · Views: 3,559
  • IMG_0062 2.jpg
    IMG_0062 2.jpg
    112.5 KB · Views: 3,545
  • DSC_1722.jpg
    DSC_1722.jpg
    139.7 KB · Views: 3,477
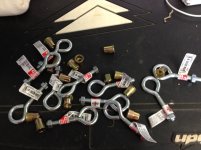
Here's that pile of hardware I started out with. I say "started out with" because as all projects go, you end up thinking of better ways to go about something. The brass nuts are called blind rivnuts. Its a way to put a threaded nut in something that you can't reach behind. You basically drill a hole, insert the rivnut, use the tool, and it compresses on the opposite side of the wall you're working on.
IMG_0014.jpg

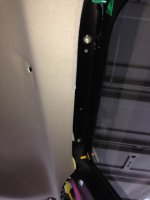
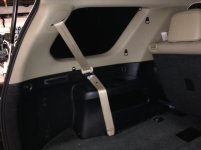
Here are two of them installed above the side rear cargo window.
IMG_0016.jpg

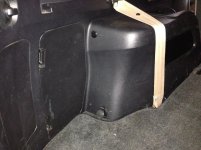
Here are two in the c pillar.
IMG_0018.jpg

And here's one below the side rear cargo window.
IMG_0019.jpg

The ultimate plan is to have a place to attach things such as a molle panel, bungees, etc.
 

Attachments

  • IMG_0014.jpg
    IMG_0014.jpg
    95.9 KB · Views: 3,548
  • IMG_0016.jpg
    IMG_0016.jpg
    130.4 KB · Views: 3,493
  • IMG_0018.jpg
    IMG_0018.jpg
    82.5 KB · Views: 3,537
  • IMG_0019.jpg
    IMG_0019.jpg
    88.3 KB · Views: 3,669
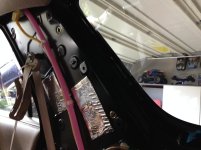
Here comes the fun part. After taking a ton of measurements, putting the interior together, taking it apart, putting it back together again, then take it apart one more time, you can mark where you'll need to drill holes. This was a painstaking part of the job. I didn't want to ruin the interior of the truck with a bunch of incorrectly marked holes.

Upper panel of window area.
IMG_0021.jpg

IMG_0022.jpg

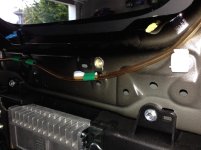
And after attaching the interior AGAIN, test the new nuts!
IMG_0024.jpg

I know, I know.....it looks HORRIBLE! That's exactly what my wife said, anyway. So, at least I had the rivnuts installed and I can basically use any type of hardware I wanted. The hard part was done.
 

Attachments

  • IMG_0021.jpg
    IMG_0021.jpg
    84.4 KB · Views: 3,527
  • IMG_0022.jpg
    IMG_0022.jpg
    76.5 KB · Views: 3,519
  • IMG_0024.jpg
    IMG_0024.jpg
    80.8 KB · Views: 3,520
I ended up going with a 3/4" d-ring with button head hardware. Much cleaner if you ask me. Yes, that's the cargo windows Di-noc'd. Since we don't really use the window for everyday driving, I blacked it out from the inside and I wanted another barrier to protect the tint. I know it doesn't make sense, but it will soon.

Passenger side
IMG_0085.jpg

Driver's side
IMG_0088.jpg

And my ARB compressor switch and 12v always on outlet on the driver's side cargo panel.
IMG_0089.jpg
 

Attachments

  • IMG_0085.jpg
    IMG_0085.jpg
    88.7 KB · Views: 3,507
  • IMG_0088.jpg
    IMG_0088.jpg
    56.7 KB · Views: 3,522
  • IMG_0089.jpg
    IMG_0089.jpg
    107.9 KB · Views: 3,470
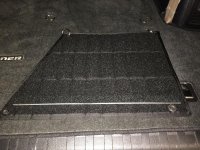
Here's where the molle panels come into play. I contacted John Wilde of San Diego Gun Store | Custom AR15 | Gunsmithing | Wilde Built Tactical Gun Shop. He owns a company that custom fabricates molle panels for gun safe doors. I mentioned to him what I wanted to get done and he took on the job. I used some paper and made a stencil of the particular shape panel I wanted. I also had him place grommets where I needed them. I also had him line the backside of the panels with velcro. Since they will be mirror images of each other, I could use the reverse side as a velcro attachment if necessary. His turn around for my particular project was about a week and a half. The craftsmanship is top notch. I would highly recommend him for any molle panel projects you guys need.

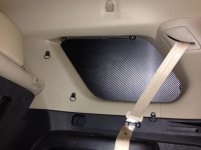
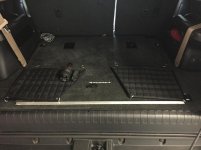
Here's what they ended up looking like. The 1/8" aluminum flat bar is to create some rigidity. There is a foam panel sewn into the molle but it wasn't stiff enough for what I wanted to accomplish. I basically measured out how much I would need and then cut it out.
IMG_0065.jpg

I installed velcro on both sides of the flat bar.
IMG_0066.jpg

So when I attached the bar to the back of the panel, it creates a firm backing. Here you can see the back side of the molle panel lined with velcro.
IMG_0067.jpg
 

Attachments

  • IMG_0065.jpg
    IMG_0065.jpg
    76.5 KB · Views: 4,119
  • IMG_0066.jpg
    IMG_0066.jpg
    103.3 KB · Views: 3,517
  • IMG_0067.jpg
    IMG_0067.jpg
    140.7 KB · Views: 3,941
Some of you may be thinking, this is a ton of work for such minimal storage space. And it is. I realize that it's probably not cost effective if you have to pay someone to do the work. But here was my decision making process.
 
Our family uses the 3rd row quite often. Whether its family or friends visiting, transporting other people's children, or just trying to go out with some friends without having to drive 2 different cars. I felt that the window "area" could be used better than a lookout hole for the people(kids) in the 3rd row.

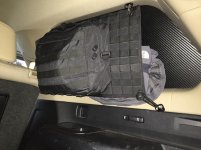
The molle bag contains flat tire repair kit, first aid kit, motorola talkabouts, air hose for the newly installed ARB compressor:bravo:, air chuck, MVUM (motor vehicle use map) for the Gifford Pinchot NF, and a Warn winch controller. There's plenty of room to spare too.
IMG_0074.jpg

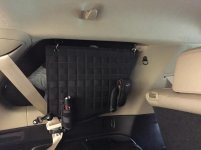
Haven't figured out what I'll need for the other side quite yet. But a Leatherman, Stinger flashlight and my Benchmade rest here for now.
IMG_0075.jpg

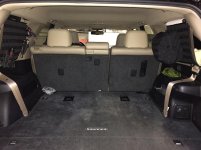
It really gave me a lot of options to carry stuff and still have full use of the cargo area or 3rd row. This is how she sits now. I'm sure I'll be adding a bunch of other things as I figure out what I want to keep with the truck.
IMG_0082 2.jpg

Oh, and only the bottom corner is attached with a bungee. The other areas are attached with a clip ring and/or a small carabiner. This allows me to pull the panel out and stuff whatever I need behind it much easier. Also allows me to pull the entire panel off within seconds.
 

Attachments

  • IMG_0074.jpg
    IMG_0074.jpg
    117.7 KB · Views: 4,104
  • IMG_0075.jpg
    IMG_0075.jpg
    71.6 KB · Views: 3,688
  • IMG_0082 2.jpg
    IMG_0082 2.jpg
    95.4 KB · Views: 3,346
Last edited:
I like those tiedown hoops better too. And I bet the spousal unit says they look better also. As she walks away shaking her head about you blocking the rear quarter windows...... Lol

Looks really nice.
 
Cool idea, but I would be worried about issues with curtain air bags in an emergency. Did you disable them? Or do they not exist on your model 4Runner?
 
Cool idea, but I would be worried about issues with curtain air bags in an emergency. Did you disable them? Or do they not exist on your model 4Runner?

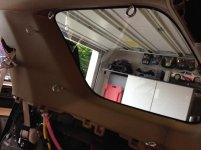
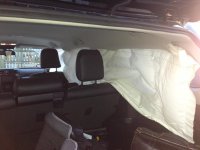
Good question. I actually thought about this when I was drilling into the truck. The air bags are located towards the inside of the truck window. Looking at some google images of blown up air bags, I determined that the headliner is where there needs to be no obstruction.
photo3.jpg

Granted the molle bag would be in the way if there were actually a 3rd row passenger. If there were someone in that seat, I may consider removing the bag or just going with a smaller one. This is one that I had laying around already.
 

Attachments

  • photo3.jpg
    photo3.jpg
    78.4 KB · Views: 3,515
A quick scroll through the pictures made me think you accidently deployed your curtain airbags!

This looks awesome Bobby. Taking your time to get it done right and make it look factory really paid off. I wish I had the same level of patience when I am slapping things on the truck! Excellent write-ups!
 
And to continue with sound. I decided to go with a Magnaflow 12556 (I think). 18" body, offset center 2.5". Yes, there is some drone. Bothersome? I don't think so.
Thought I'd go with some beefier hangers than the spindly ones the factory fatass muffler came with. I wanted a more solid mount. You'll see the welded plates on the "new" pipes coming from the muffler.

Kept the factory flanges and clamped the ends on. Just in case it gets too loud for me.
you wouldn't happen to have a sound clip of the muffler?
 
I spend last hour going through your thread. Excellent work and great pictures. My feb 2015 vote is for you.
 

Forum statistics

Threads
278,312
Messages
3,554,089
Members
248,016
Latest member
Advally Service

Trending content

Back
Top