Ducmonsta's Build Thread-very pic heavy!

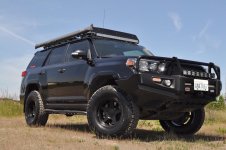
And one last thing, a 34 BFG definitely fits in the factory location.
8f1ddba96302da2f650a4b997e5fc0eb.jpg

Awesome I appreciate it, I will prob have the BMC done by the time I get new tires, plus I have a great Discount Tire place kind of like yours that is willing to mount one up free of charge to make sure it works. I appreciate the help brother.
 
One thing to note. It seems like these are closer to 33s than 34s, right? I've read they measure 33.5 (not sure what rim size that was), which should put them about an inch taller than a typical 285/65 18, but they may stretch out more on a 8" rim.

Seems like a great overall tires choice for the 5th gen. Should work fine without a body mount chop.

Agree that it would look awkward with stock backspacing.

Do you know the weight? Might yield a little better MPG.
 
I guess this means the Cessna 210 engine noise mod in the cabin is now gone...

Now you're going to be stealthy. Popping through the Couv 26 May on the way CA, I'll text you if you want to grab a quick coffee, it's only 2 hours into my 12.5 hour drive so I may or may not stop.
 
I guess this means the Cessna 210 engine noise mod in the cabin is now gone...

Now you're going to be stealthy. Popping through the Couv 26 May on the way CA, I'll text you if you want to grab a quick coffee, it's only 2 hours into my 12.5 hour drive so I may or may not stop.

The tire noise from the TGs was tolerable. Although I didn't realize how loud they really were until I installed the BFGs.

Definitely let me know if you wanna stop by. Although, I'm working m-f these days so I may not be able to sneak out of the office when you come out.
 
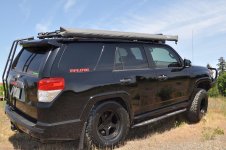
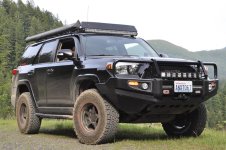
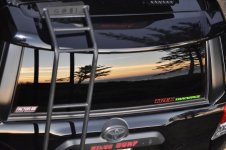
I got all her all cleaned up this weekend for a photo shoot to show off the Five Stars.

DSC_1896.jpg

They tuck in nicely. I could probably run the wheel spacers and still get them to tuck.
DSC_1894.jpg

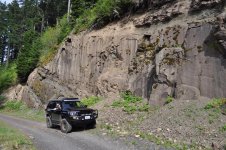
Then today, I took the fam out for our annual Mother's Day hike!

DSC_1921.jpg

DSC_1922.jpg

DSC_1925.jpg

Of course I had to get all dirty to get there.
DSC_1936.jpg

DSC_1940.jpg
 

Attachments

  • DSC_1896.jpg
    DSC_1896.jpg
    91.7 KB · Views: 1,502
  • DSC_1894.jpg
    DSC_1894.jpg
    106.8 KB · Views: 1,542
  • DSC_1936.jpg
    DSC_1936.jpg
    141.6 KB · Views: 1,496
  • DSC_1940.jpg
    DSC_1940.jpg
    140.9 KB · Views: 1,711
  • DSC_1921.jpg
    DSC_1921.jpg
    131.3 KB · Views: 1,474
  • DSC_1922.jpg
    DSC_1922.jpg
    93.1 KB · Views: 1,493
  • DSC_1925.jpg
    DSC_1925.jpg
    109.9 KB · Views: 1,481
Looking good, Bobby! Where did you go hiking? You should check out Silver Star if you haven't already.

We will have to do a meetup when I get back from Moab. Hopefully the 4Runner does not get too badly bruised.
 
Looking good, Bobby! Where did you go hiking? You should check out Silver Star if you haven't already.

We will have to do a meetup when I get back from Moab. Hopefully the 4Runner does not get too badly bruised.

We went to the "Grassy Knoll" trail 146 off of NF6808 or 6806. It was a moderate 4.4 mile hike. With kids in tow, we don't push much farther unless it's an "easy" hike. Even then we try to stay under ten miles. My 5 and 7 year old have shorter legs, you know.

Hold on a sec... The 4R is going?! What's up with the Taco?
 
We went to the "Grassy Knoll" trail 146 off of NF6808 or 6806. It was a moderate 4.4 mile hike. With kids in tow, we don't push much farther unless it's an "easy" hike. Even then we try to stay under ten miles. My 5 and 7 year old have shorter legs, you know.

Hold on a sec... The 4R is going?! What's up with the Taco?

That's still a decent tromp for the young ones. Good for them!

I still have not re-geared the front end on the Taco. Late last year, when I was planning the Moab trip, I figured it would be much nicer to take the 4R on the 2500+ mile road trip over the cramped truck. I dumped the money into a full set of skids rather than re-gearing/locking the front of the truck. Now, the 4R is ready for some slick rock action.

We are heading down to Page, AZ for a couple days to check out Antelope Canyon and Horseshoe Bend. From there, we will head to Moab for 4 days. I will not be doing any crazy trails. I will probably start with Fins N Things and Hells Revenge. Not sure what else after that. It will be my first time wheeling the 4R, so it will be fun to try out all the TE goodies and compare it to my dinosaur Taco.

You will have to head down with us one of these days.
 
By the way, momo...great job on the shirts. I'm sorry I haven't placed my order yet/in time.

So, the grill upper and lower came in and so did the FJ40 emblem. I went with the grill craft because a) I didn't want to make my own stuff (even after watching the DIY mods and b) I'm lazy.
I really like the original FJ40 emblem. Maybe it's me, but I thought the ones of off the FJ Cruiser were too big.
View attachment 51840
Of course, in red fashion...
View attachment 51841
Again, that pink thing is catching me everywhere I turn. I haven't found a way to paint it red without ruining the little bit of chrome that surrounds the emblem. One guy mentioned red nail polish...I might try that out....on the truck!

What grill is this?
 
Really enjoyed following your build, lot's of great ideas to play with. Let me know if you come back down to Pacific City, I'll buy ya a beer at the Pelican.
 
Brief recap of the Summer of '15...
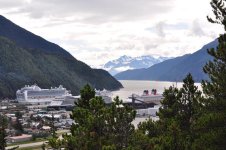
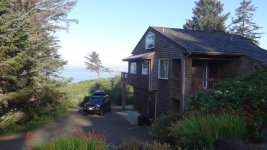
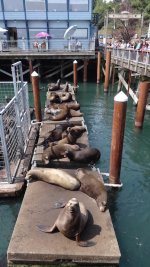
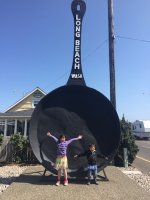
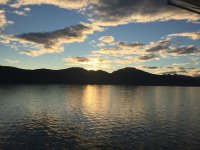
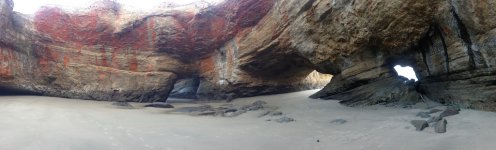
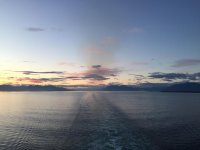
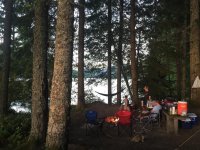
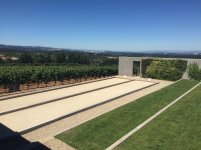
Spent a lot of time with family, inlaws, friends visiting, cruising Alaska, clam digging, monster truckin', bocce ballin' at wineries, visiting Victoria BC, and generally enjoying the PNW. I won't bore anyone with specific details of sites and areas. PM me if you really want to know where some of these places are. But I thought I'd share the beauty of this part of our country as some of you already know.

Checking out whale vertebrae up close
DSC_2021.jpg

DSC_2014.jpg

DSC_2083.jpg

DSC_2089.jpg

DSC_2124.jpg

DSC_2361.jpg

DSC00941.jpg

IMG_1049.jpg
 

Attachments

  • DSC_2021.jpg
    DSC_2021.jpg
    116.3 KB · Views: 1,823
  • DSC_2014.jpg
    DSC_2014.jpg
    68.3 KB · Views: 1,794
  • DSC_2083.jpg
    DSC_2083.jpg
    82.6 KB · Views: 1,779
  • DSC_2089.jpg
    DSC_2089.jpg
    101.8 KB · Views: 1,774
  • DSC_2124.jpg
    DSC_2124.jpg
    74.5 KB · Views: 1,767
  • DSC_2361.jpg
    DSC_2361.jpg
    122.5 KB · Views: 1,782
  • DSC00941.jpg
    DSC00941.jpg
    116.7 KB · Views: 1,775
  • IMG_1049.jpg
    IMG_1049.jpg
    123.9 KB · Views: 1,787
Last edited:
DSC00962.jpg

IMG_0658.jpg

IMG_0808.jpg

IMG_1072.jpg

IMG_1245.jpg

IMG_6179.jpg

IMG_6068.jpg
 

Attachments

  • DSC00962.jpg
    DSC00962.jpg
    78.1 KB · Views: 1,772
  • IMG_0658.jpg
    IMG_0658.jpg
    123.7 KB · Views: 1,775
  • IMG_0808.jpg
    IMG_0808.jpg
    119.8 KB · Views: 1,782
  • IMG_1072.jpg
    IMG_1072.jpg
    80.5 KB · Views: 1,768
  • IMG_1245.jpg
    IMG_1245.jpg
    135.7 KB · Views: 1,760
  • IMG_6179.jpg
    IMG_6179.jpg
    121.9 KB · Views: 1,755
  • IMG_6068.jpg
    IMG_6068.jpg
    128.1 KB · Views: 1,760
DSC_1846.jpg

DSC_2111.jpg

IMG_1251.jpg

IMG_0937.jpg

IMG_6342.jpg

IMG_6490.jpg

IMG_1267.jpg
 

Attachments

  • DSC_1846.jpg
    DSC_1846.jpg
    145.7 KB · Views: 1,757
  • DSC_2111.jpg
    DSC_2111.jpg
    143.6 KB · Views: 1,775
  • IMG_0937.jpg
    IMG_0937.jpg
    143.4 KB · Views: 1,750
  • IMG_6342.jpg
    IMG_6342.jpg
    93 KB · Views: 1,764
  • IMG_6490.jpg
    IMG_6490.jpg
    133.5 KB · Views: 1,759
  • IMG_1267.jpg
    IMG_1267.jpg
    130.6 KB · Views: 1,768
  • IMG_1251.jpg
    IMG_1251.jpg
    129.3 KB · Views: 1,761
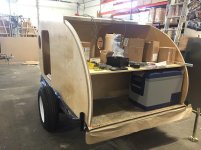
As some of you already know, my family decided to finally get ourselves a custom teardrop trailer. I won't bore you with the infinite details of my research of teardrop trailers, designs, styles, and manufacturers.

When it comes to US manufacturers, I would consider the MOBY1 XTR one of the top fabricators of off road teardrops. So-Cal Teardrops are also well built and have a great dealer network that fabricates them throughout the US. I further understood the, "you get what you pay for" mentality during my research phase. However, the minor details in quality between top manufacturers become more gray as you compare them. Materials and equipment begin to make the differences in price. It also brought a great appreciation for what some of you create on your own [MENTION=47340]Titanpat57[/MENTION] [MENTION=67615]Dirtco[/MENTION].

After seeing different TDs in person, I eventually came across a "local" teardrop builder. There are actually quite a few within 5-6hr drives from Portland. I happened to come across one of them at the Portland RV show and was really impressed at the level of detail they put into their builds. After a hour or so of conversation with Ben, their GM, I knew who I wanted to build our teardrop. Especially after I found out Ben was a huge Toyota guy too. He's got a pretty sweet pristine FJ60.

Teardrop Trailers - Oregon Showroom | Tear Drops NW, Salem Oregon ? is owned by Bill Coberly and his wife, Linda. Absolutely fantastic people to deal with. I scheduled an appointment with Bill one Saturday and we spent 4 hours going over the detail of the build. They had never done an "off-road" teardrop before. But because of their custom frame builder and the fact that they use 2x3 box for the frame and 3x3 for the tongue, I was confident in the durability of the frame.

Ben has always wanted to build a custom off road version of their teardrops but never had the customer or the time to invest in a showroom trailer. Almost everyone of their "showroom" trailers they build is sold before they can even put it in their showroom. Even Bill and Linda's personal teardrop lasted a couple of weeks before it was picked up by another teardrop family.

Throughout the build Ben maintained contact with me in detail about everything that was being installed and where. There was some equipment they had never incorporated in a build before. He discussed almost every move during the build and even sent update pics as the build proceeded. Overall, the complete build beginning to end only took 6 weeks. That is an unbelievable amount of turn around considering what other teardrop fabricators are quoting (and I asked A LOT of them). It was important to me and my family to have our teardrop by my 40th birthday and not only did TeardropsNW accomplish that goal, they beat the deadline by 5 days!

So, on to the build...

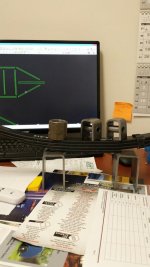
Ben was teasing me with some CAD work.
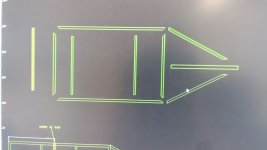
IMG_1040.jpg

More parts laying in front of him.
IMG_1041.jpg

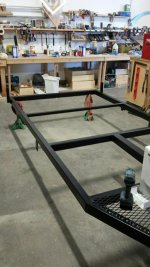
Powder coated black frame.
IMG_1042.jpg

IMG_1044.jpg

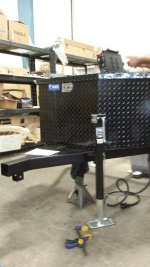
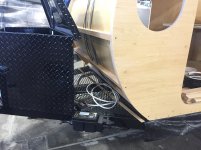
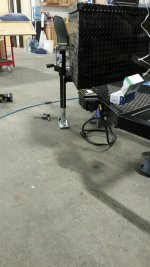
Mocking clearance for the tongue box and wireless trailer brake controller.
IMG_1045.jpg

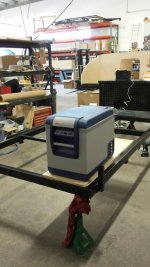
Very beginning stages of fridge fitment.
IMG_1046.jpg
 

Attachments

  • IMG_1040.jpg
    IMG_1040.jpg
    98.8 KB · Views: 1,784
  • IMG_1041.jpg
    IMG_1041.jpg
    70.7 KB · Views: 1,763
  • IMG_1042.jpg
    IMG_1042.jpg
    86.8 KB · Views: 1,759
  • IMG_1044.jpg
    IMG_1044.jpg
    75.9 KB · Views: 1,780
  • IMG_1045.jpg
    IMG_1045.jpg
    82.6 KB · Views: 1,741
  • IMG_1046.jpg
    IMG_1046.jpg
    82.5 KB · Views: 1,749
Insulation and walls go up fast!
IMG_1077.jpg

Wiring for lighting, solar, inverter, etc being run.
IMG_1078.jpg

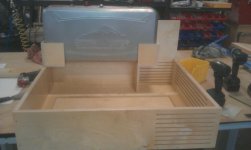
Bunch o' parts and laying out the galley for ideas.
IMG_1079.jpg

IMG_1080.jpg

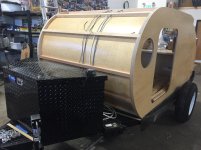
The expanded steel mesh isn't a standard option for any of their trailers. Most of the time, they just have tongue boxes butt up against the TD. I opted to have it installed so that we could move the tongue box forward and I could store things like camp chairs, awnings, outdoor carpet, and/or wood.
IMG_1081.jpg

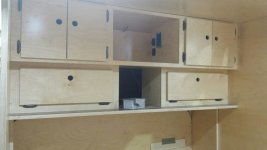
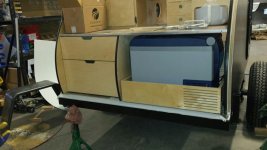
Baltic birch interior and galley. I have found that most higher quality TD makers use baltic birch for their cabinetry. Baltic birch is known for its strength and stability. It also allows for very clean joints and its superior capability to hold screws.
IMG_1085.jpg

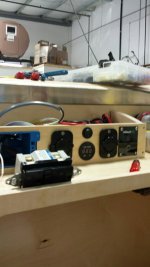
Electronics bay in the galley.
IMG_1088.jpg

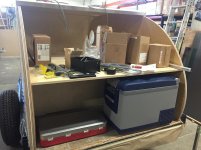
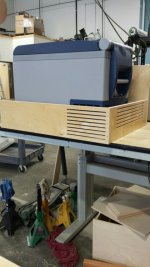
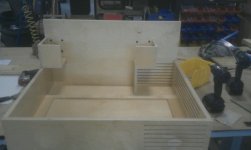
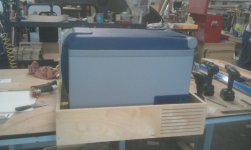
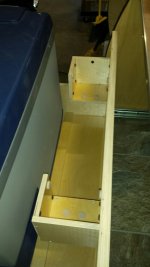
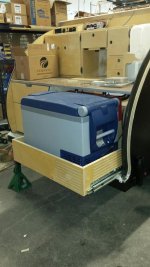
Custom ARB fridge slide made with consideration to venting.
IMG_1092.jpg
 

Attachments

  • IMG_1077.jpg
    IMG_1077.jpg
    107.8 KB · Views: 1,721
  • IMG_1078.jpg
    IMG_1078.jpg
    112.9 KB · Views: 1,767
  • IMG_1079.jpg
    IMG_1079.jpg
    109.8 KB · Views: 1,751
  • IMG_1080.jpg
    IMG_1080.jpg
    70.7 KB · Views: 1,730
  • IMG_1081.jpg
    IMG_1081.jpg
    117.2 KB · Views: 1,741
  • IMG_1085.jpg
    IMG_1085.jpg
    105.4 KB · Views: 1,725
  • IMG_1088.jpg
    IMG_1088.jpg
    115.7 KB · Views: 1,718
  • IMG_1092.jpg
    IMG_1092.jpg
    135.7 KB · Views: 1,694
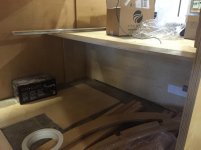
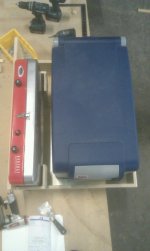
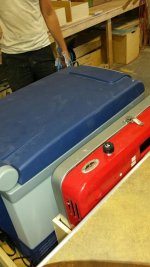
After a lot of consideration, my family decided we did not want to have a stove permanently mounted to the TD. We still go camping without the teardrop and we liked the capability to cook outside of the TD. You loose some valuable counter real estate if you're cooking on one side and have to go in and out of the fridge on the other. So they devised a shelf specifically for the stove and propane canisters. There's also room for the fire extinguisher I'll be mounting soon.
IMG_1099.jpg

IMG_1100.jpg

IMG_1101.jpg

IMG_1102.jpg

IMG_1186.jpg

IMG_1187.jpg

IMG_1188.jpg

IMG_1189.jpg
 

Attachments

  • IMG_1099.jpg
    IMG_1099.jpg
    67.1 KB · Views: 1,686
  • IMG_1100.jpg
    IMG_1100.jpg
    72 KB · Views: 1,682
  • IMG_1101.jpg
    IMG_1101.jpg
    88.2 KB · Views: 1,694
  • IMG_1102.jpg
    IMG_1102.jpg
    75.9 KB · Views: 1,687
  • IMG_1186.jpg
    IMG_1186.jpg
    73.1 KB · Views: 1,687
  • IMG_1187.jpg
    IMG_1187.jpg
    102.1 KB · Views: 1,696
  • IMG_1188.jpg
    IMG_1188.jpg
    79.8 KB · Views: 1,693
  • IMG_1189.jpg
    IMG_1189.jpg
    72.4 KB · Views: 1,700
I know you been thinking about this for a while so good on you guys for finally doing it! Looks awesome.

Btw, I just sold mine to a Cali Expo guy who is picking up this weekend. We just don't use it as much as I thought we would and are spending more time on sand than in the woods. You on the other had will use the hell out of it!
 

Members online

Forum statistics

Threads
278,316
Messages
3,554,105
Members
248,016
Latest member
Advally Service

Trending content

Back
Top