My 4gunner restore, refurb and re-work

Looks good man! This in my mind is a better more affordable lift over the 99tall springs. Now I just need to find me some FJ front springs. got some LC8s for rear coming Sunday. I liked my 2015 4Runner rear springs but I want more.
 
Not fair. I want two 4Runners!

Great attention to detail and good taste of mods. This thread will be added to my favorites for when I start upgrading my 4Runner.

Looking forward to the rest of the builds.
 
New project I did not have planned... Started to smell fuel on the 01 SR5 after a fill up and sometimes after but we could not find a leak. Wife said the ultra gauge was throwing a potential P0442 today with the gas cap tight (common symptom it seems of the check valve) Seems like the fuel tank check valve is having problems. With the mileage, just going to replace both on both 4runners. While I am in there, I will do the fuel pumps on both as well since the tanks will be dropped. Per Azbub, I will also be checking both charcoal canisters for cracks or issues.
For the 01-02 gunners:
- Check valve P/N: 77390-35010
- Check valve gasket P/N: 77177-33010
- Fuel Pump / Assembly gasket P/N: 7716960010
- Fuel pump, direct denso factory replacement P/N: DENSO 950-0100


Quoting myself. I installed the parts last night (with a year correction, my silver gunner is an 02). Took about an hour. I did not get photos as light was fading fast and had to move quick. But will get photos when I do my 01 as general maintenance. I have been asked, why change the fuel pump if it is working? With all of my cars, when they hit around 200K, I change the fuel pump. Cheap insurance vs having a bad day. Notes:
- It was in fact the check valve causing the fuel smell at the back of the car after a fill up. After install, I filled up and NO gas smell! So far so good
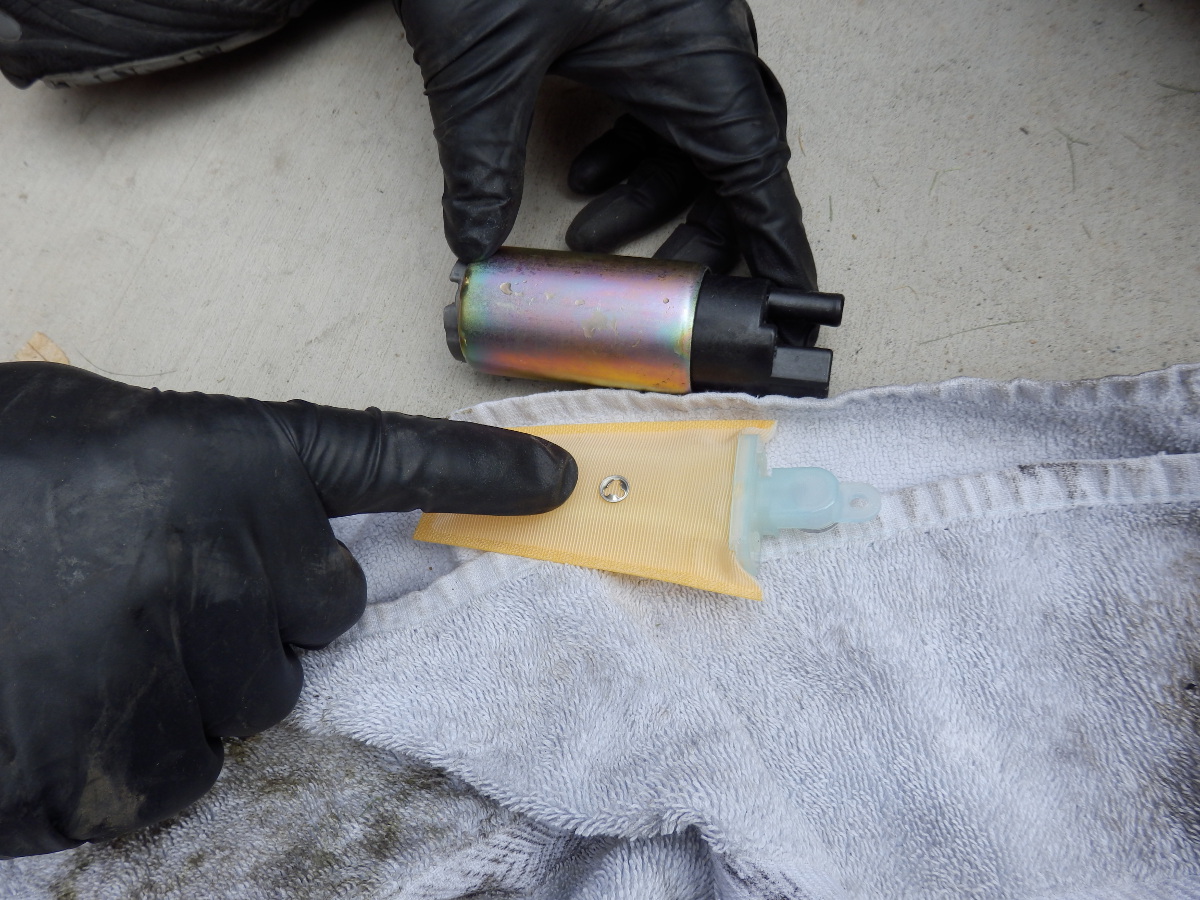
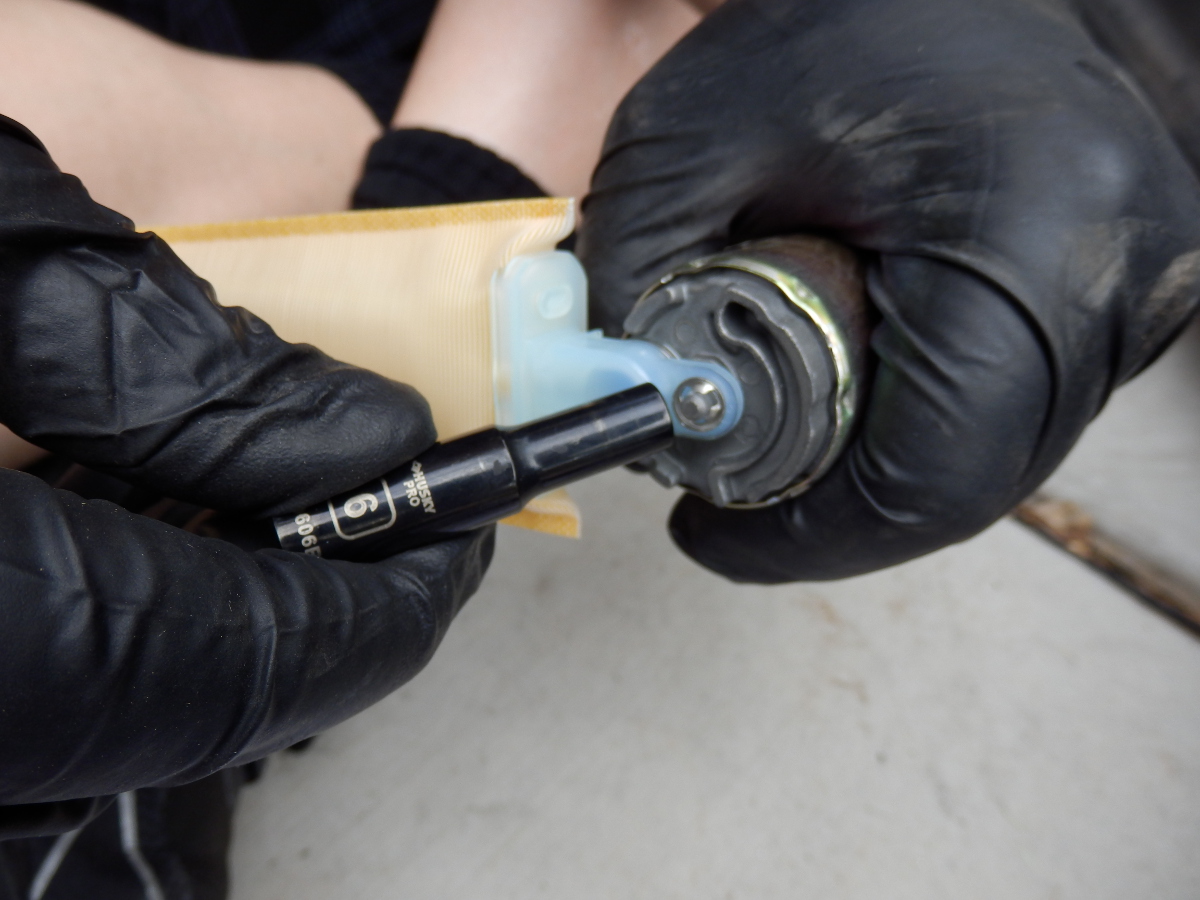
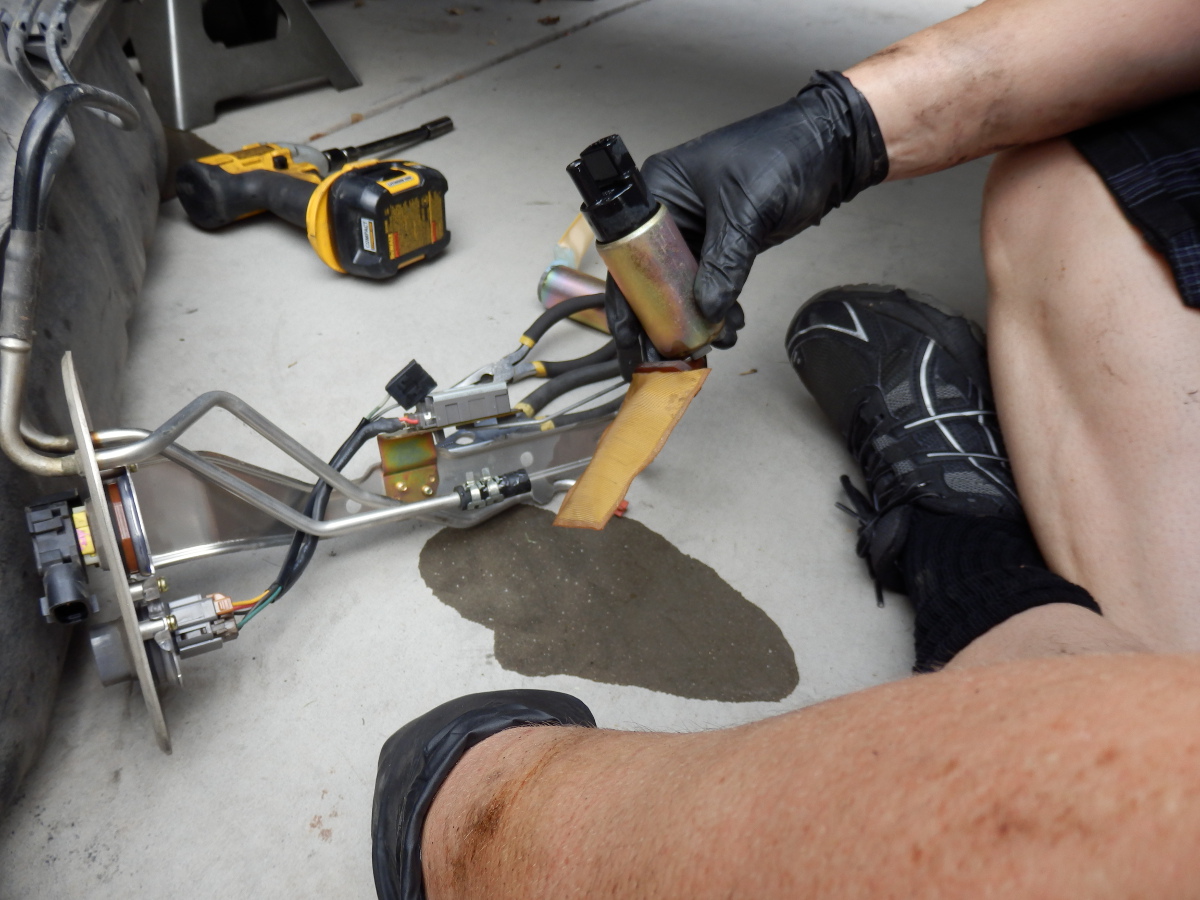
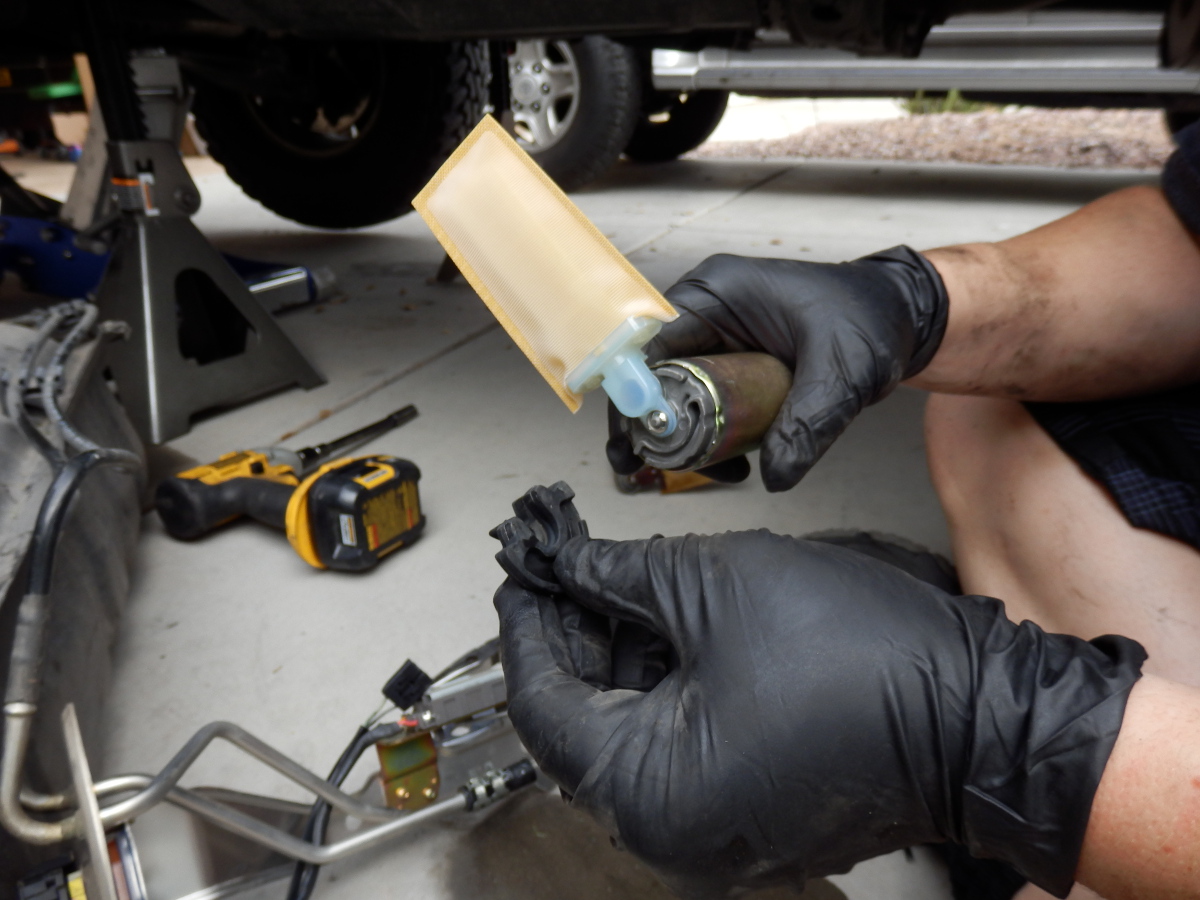
- Installed the denso fuel pump, it was 100% plug and play affair. Exact OEM replacement. All you need to do is install the fuel sock and sock retaining ring (press it on with a 6mm socket)
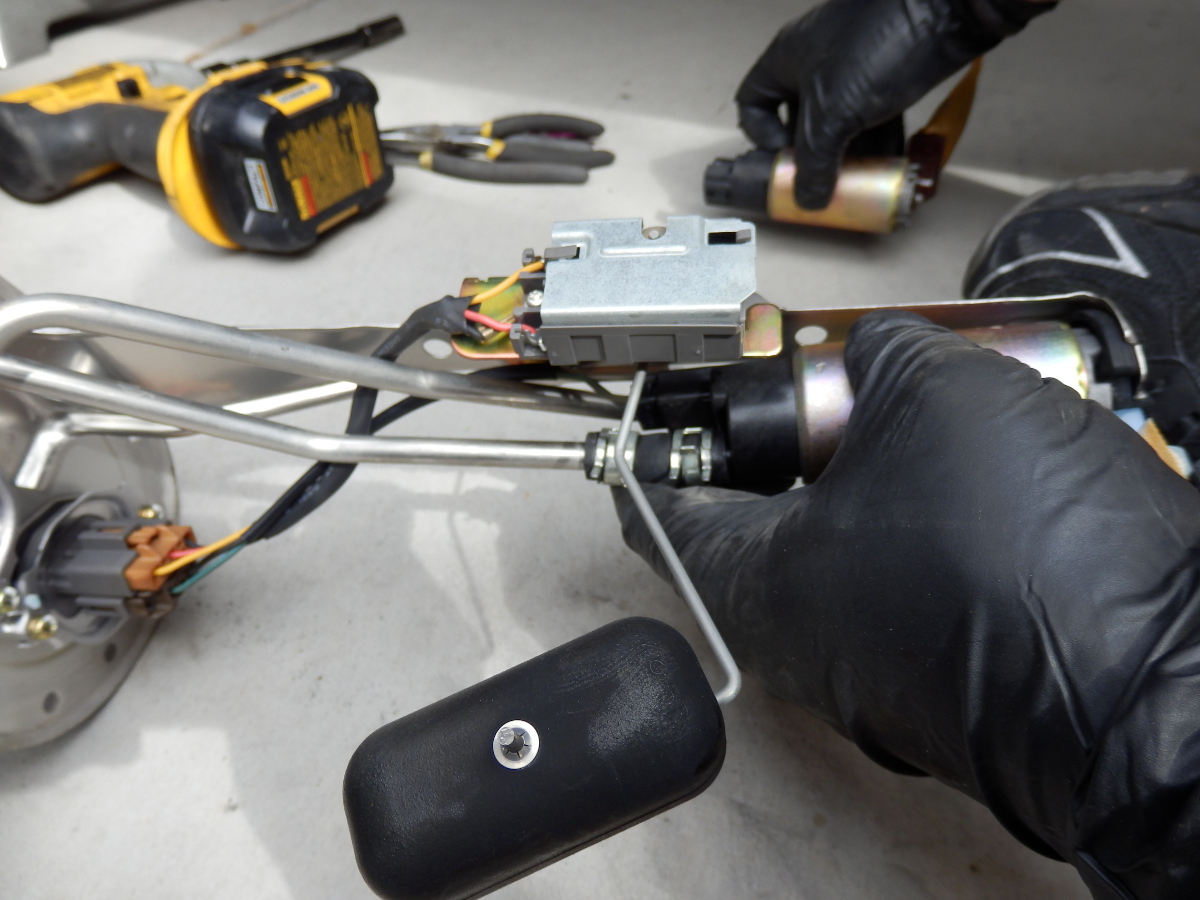
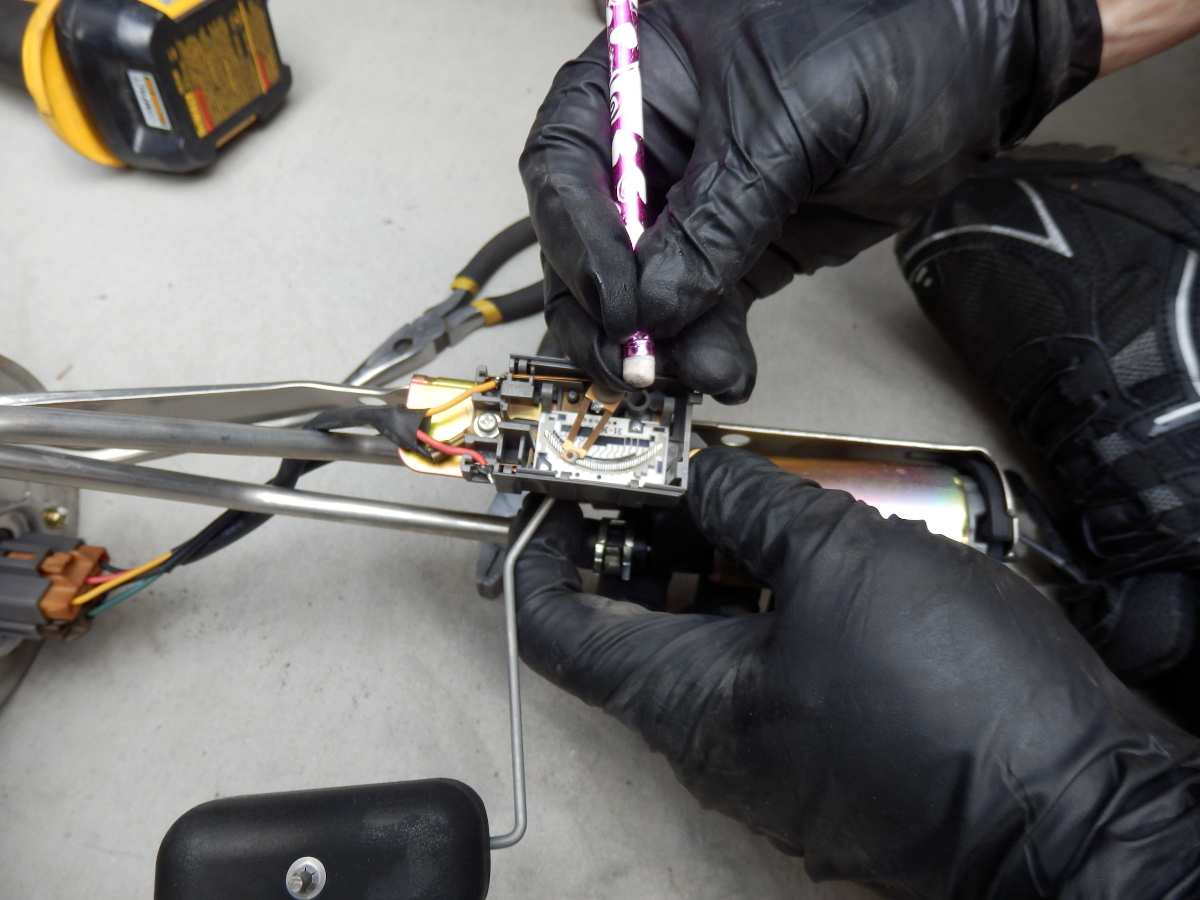
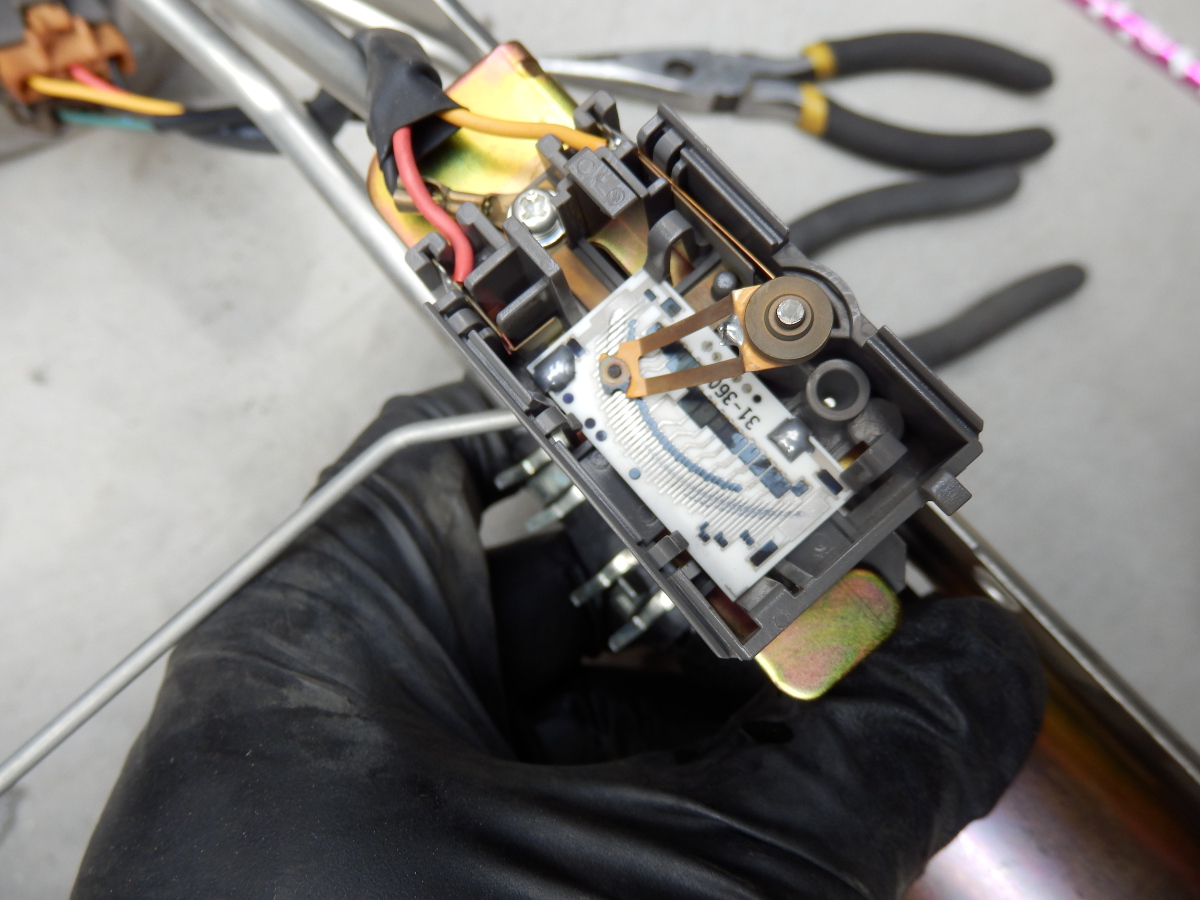
- Cleaned the sender contacts with a pencil eraser and some rubbing alcohol. Figured why I am in there, make sure it stays working. I also very lightly bent the contact arm to ensure it makes a good contact


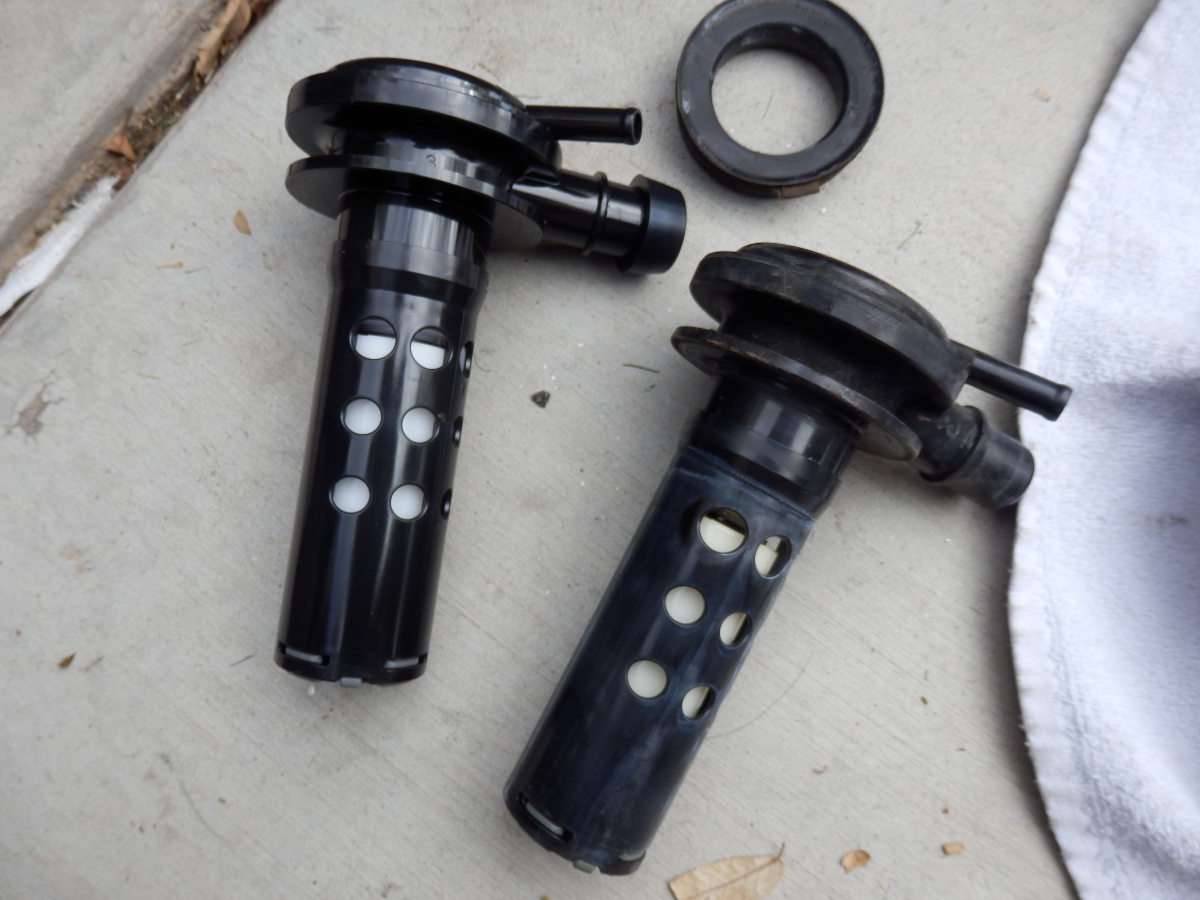
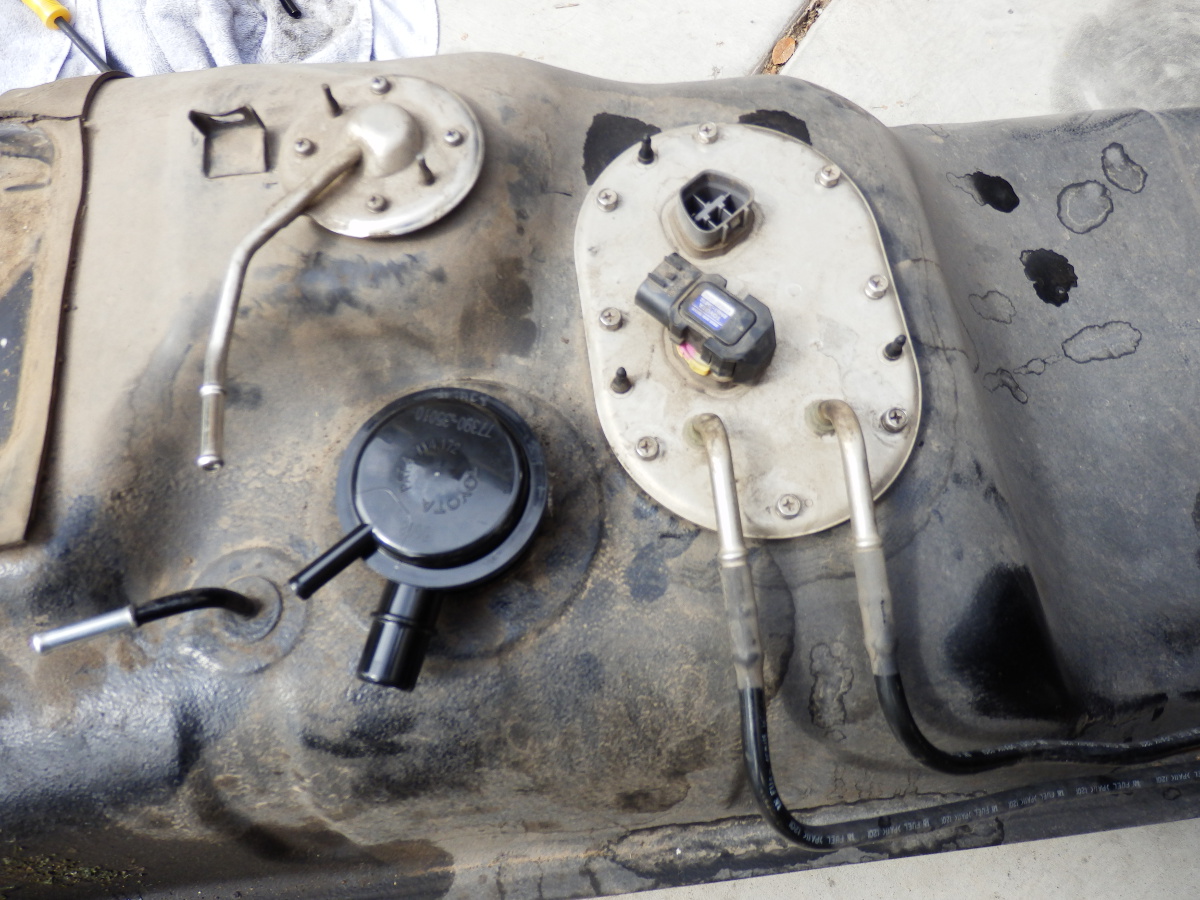
Edit again... Adding in photos of the fuel items changed out in the silver gunner. Will do the white one tomorrow. You can see the check valve that causes the fuel smell when filling up or slightly overfilling on the 01-02 (I do not think pre 01 had this valve??)
FUEL%20PUMP%20AND%20CHECK%20VALVE.jpg


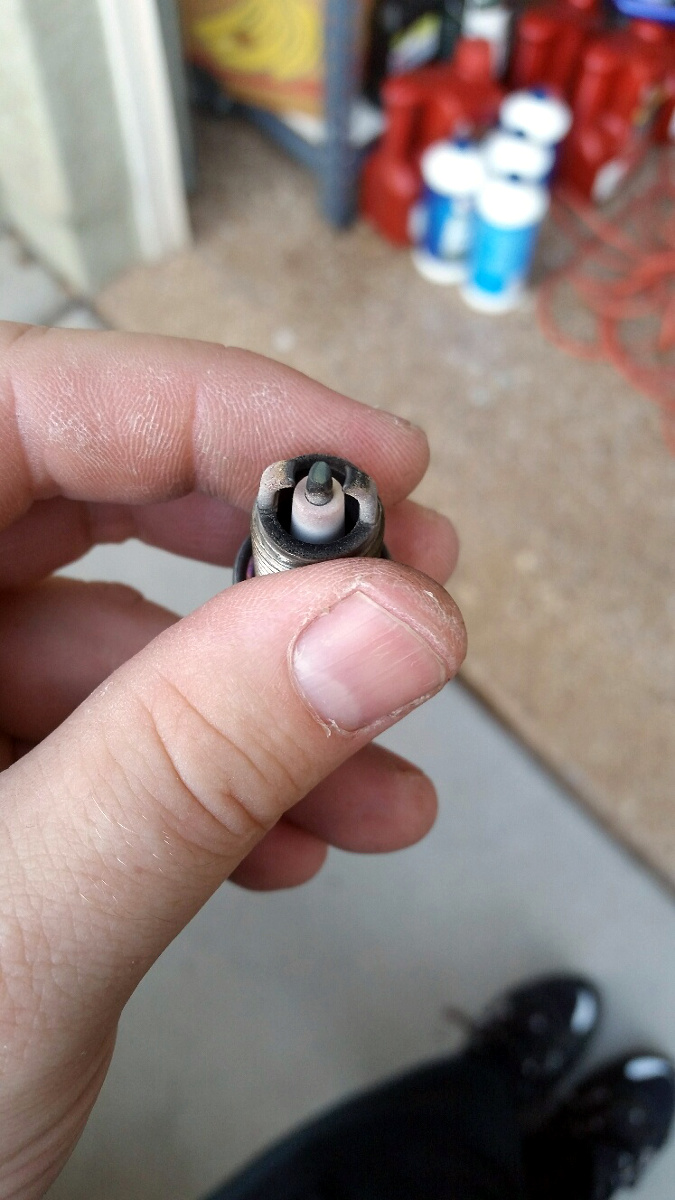
Changed the stock plugs and PCV on the silver gunner today. The stock plugs were shot at under 50K miles and also look to be running a little hot but just barely. Not bad at all actually. Changed them out for 1 step colder BKR6EIX-11 AND TE66 plug wires. Purrs like a kitten now :) Sorry friends, I am NOT a fan of stock dual ground plugs. They function fine, but I like to change my plugs every 100K miles - not at twice that rate. Even on a wasted spark system like our 5vzfe that eats plugs (reason for dual grounds / plug fires double the amount in wasted spark), iridium LASTS. And yes, it has been proven on the 5vzfe. Anyone that says different is just spilling what they have read over and over and does not have the facts. Had countless customers running a fine wire in these motors and also put a LOAD of miles on my own 98 limited running iridium / fine wire.
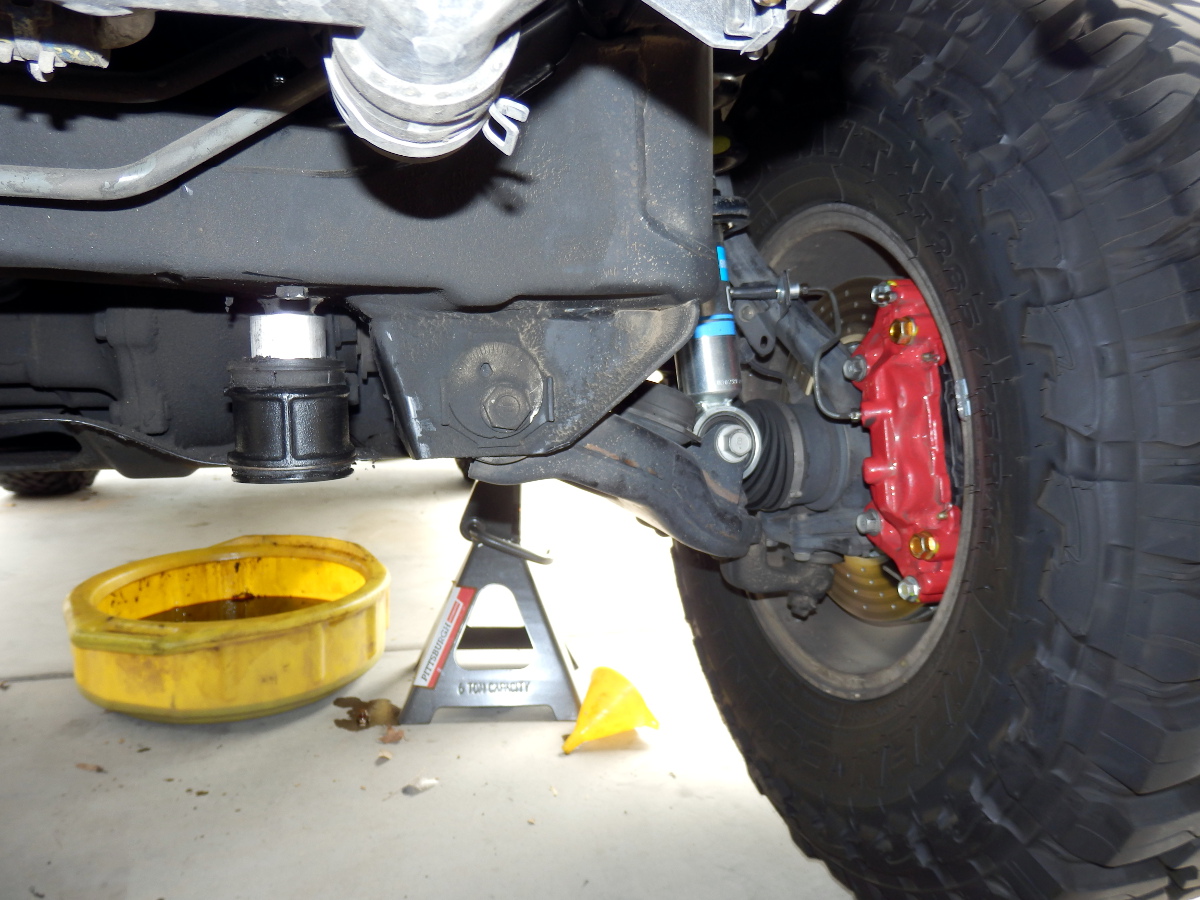
On another note, some tard face installed a generic PCV valve in the silver gunner and mixed up a vac line / pcv line that goes to the throttle body. Ran just fine but glad I caught it.

Old dead plug:
PLUGS.jpg
 
Last edited:
Installed the Revtek RTDD1-KB diff drops
- The kit has issues
- The aluminum spacers are OK
- The large 8" bolts are OK, but they did not include proper washers which SHOULD be used on the nylock side and the bolt side! DO IT RIGHT PEOPLE
- The extended skid plate bolts were the wrong thread pitch / SAE, not metric. Really?


Anyways it is installed. Instructions are easy...

1. Take off the front skid plate
2. Loosen the right side diff mount bolt and nut totally. Then re-assembly and thread it only 4-5 threads so the diff can lower when you loosen the left side
3. Loosen the left side and remove the stock nut and bolt assembly. The diff will drop and you can install the spacer. Insert and tighten only a few threads, the new nut / bolt assembly
4. Remove the right side bolt and nut assembly. Insert the diff drop spacer and put in the new longer nut / bolt assembly
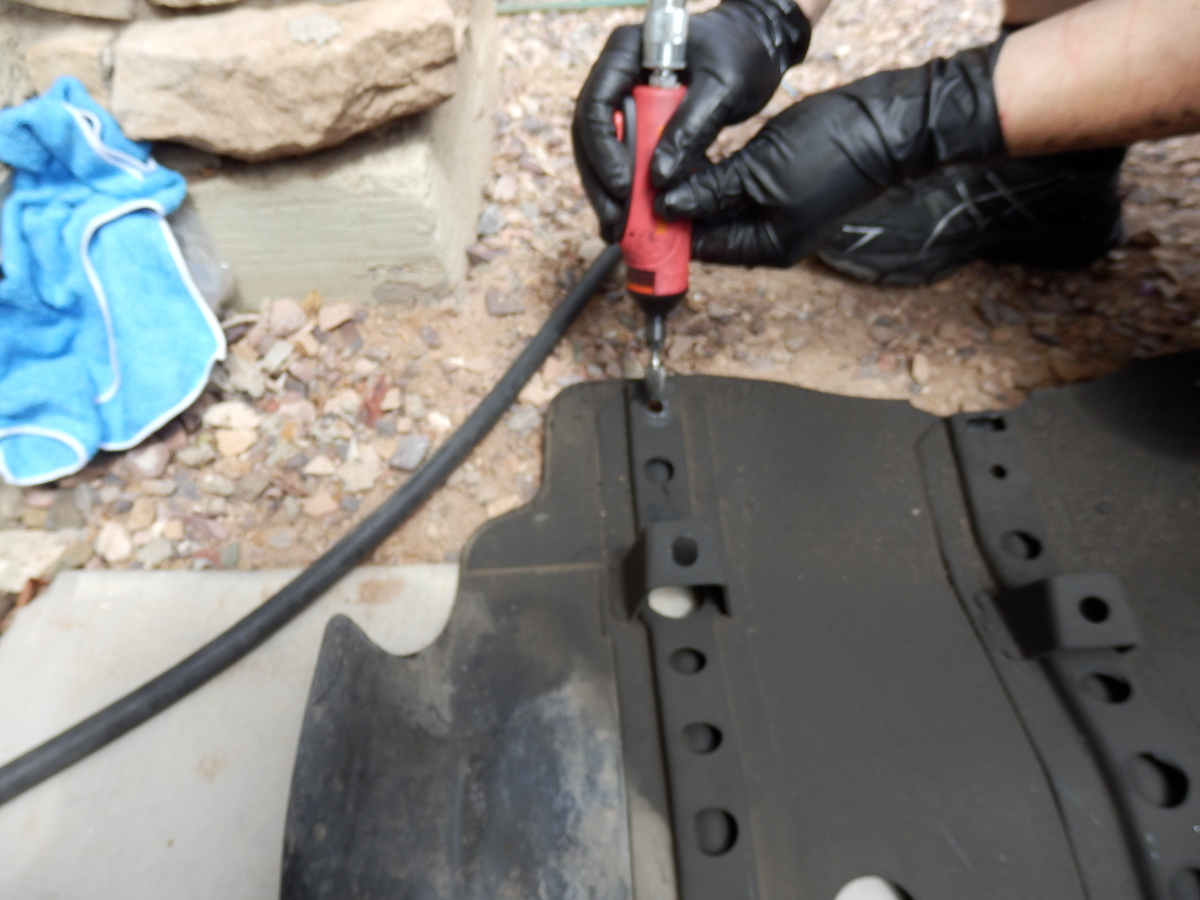
5. Use a carbide bur or file to elongate the bolt holes on the rear of the front skid plate
6. Install proper METRIC bolt / washer combo. My stock bolts went in fine and I did not need extended ones.

You can see the shiny aluminum 1" spacer here...
DD1.JPG


Blurry pic - youngest boy was my camera man today. Using a bur, I elongated the holes quick and easy.
DD2.JPG


DD3.JPG


Done - Diff dropped :)
 
Last edited:
How to replace the fuel pump and pesky check valve that can give a stinky leaking fuel smell when you overfill your tank or just fill it up. Write-up is not the best but gets the job done. This is on my 01 gunner. Same as the 02. Not sure if it is the same process for previous years.

Before you attempt this, Your tank needs to be EMPTY as possible. I mean bone dry as possible. Fuel light on and gauge showing under the lowest bar! Will save you headache later when trying to remove and re-install the tank!

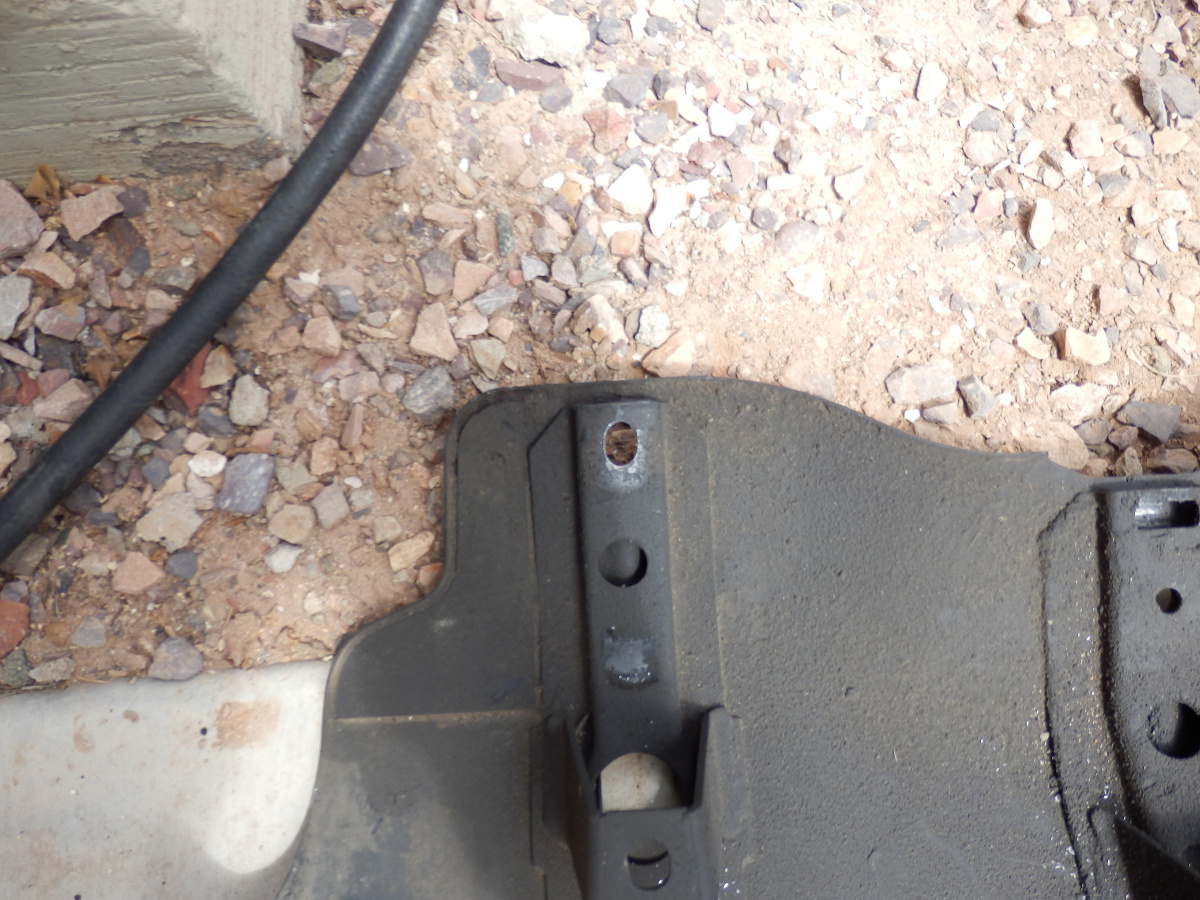
1. You need to get the gas tank skid plate off At the front of the gas tank, closest to the front of the car, you will see three 12mm bolts. Take out the outside two bolts only at this time. DO NOT TAKE OUT THE CENTER BOLT. Gas tank will likely smack ya in the face :)
FP1.JPG


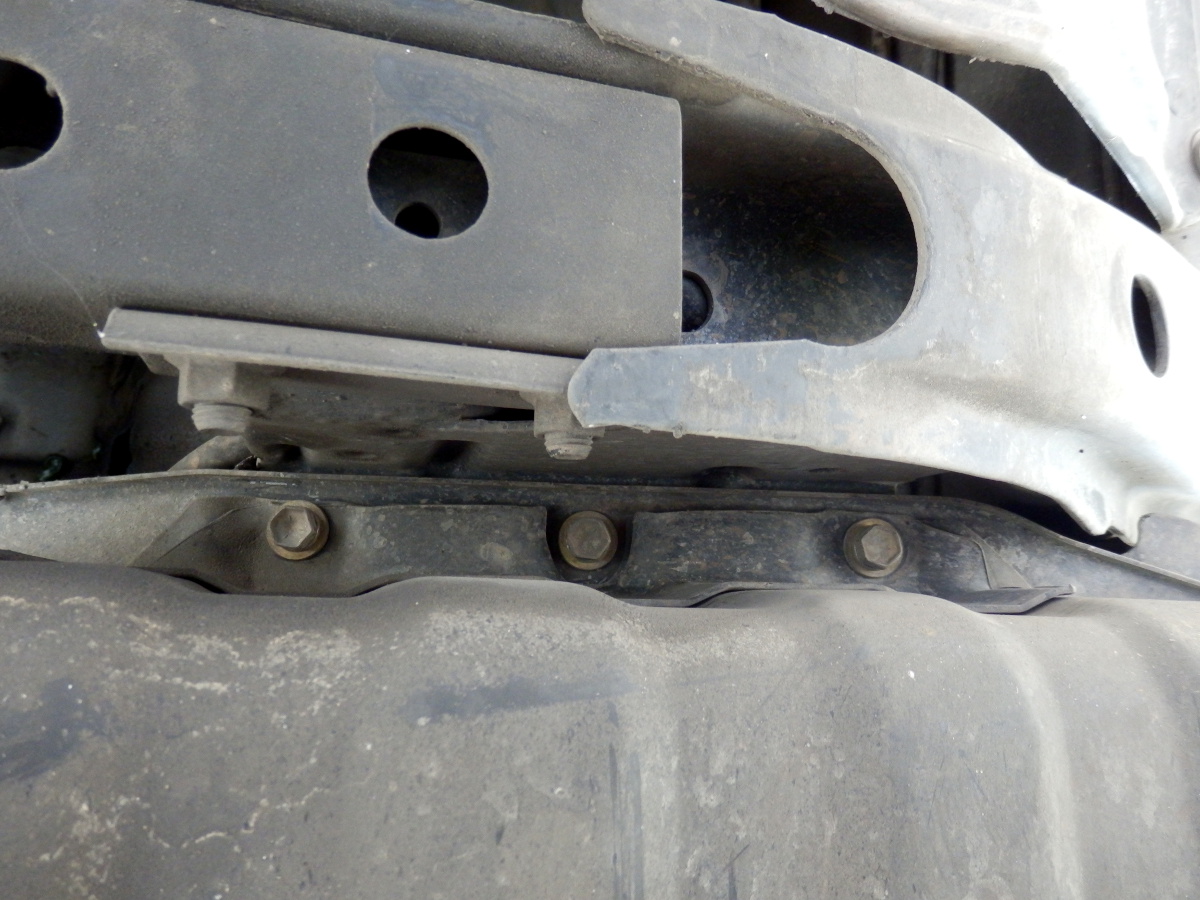
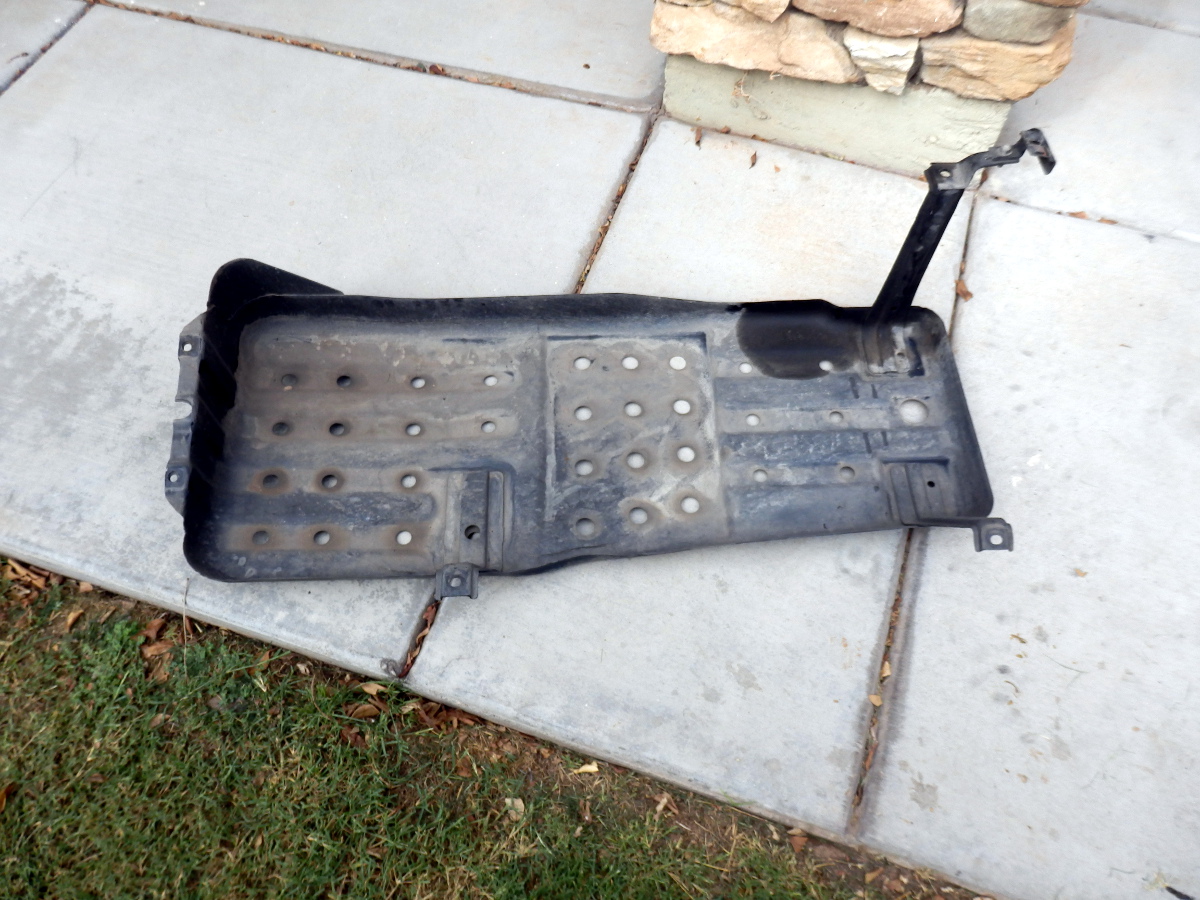
2. Located all of the other bolts holding on the skid plate. Should be 3 more in total. The tall arm sticking up in the air, also holds a bunch of fuel lines and wires with a little clip. Yes it is a pain in the rear to get out and lower it.
FP2.JPG


3. Locate the filler tube and use a 10mm nut driver to disconnect it
FP3.JPG


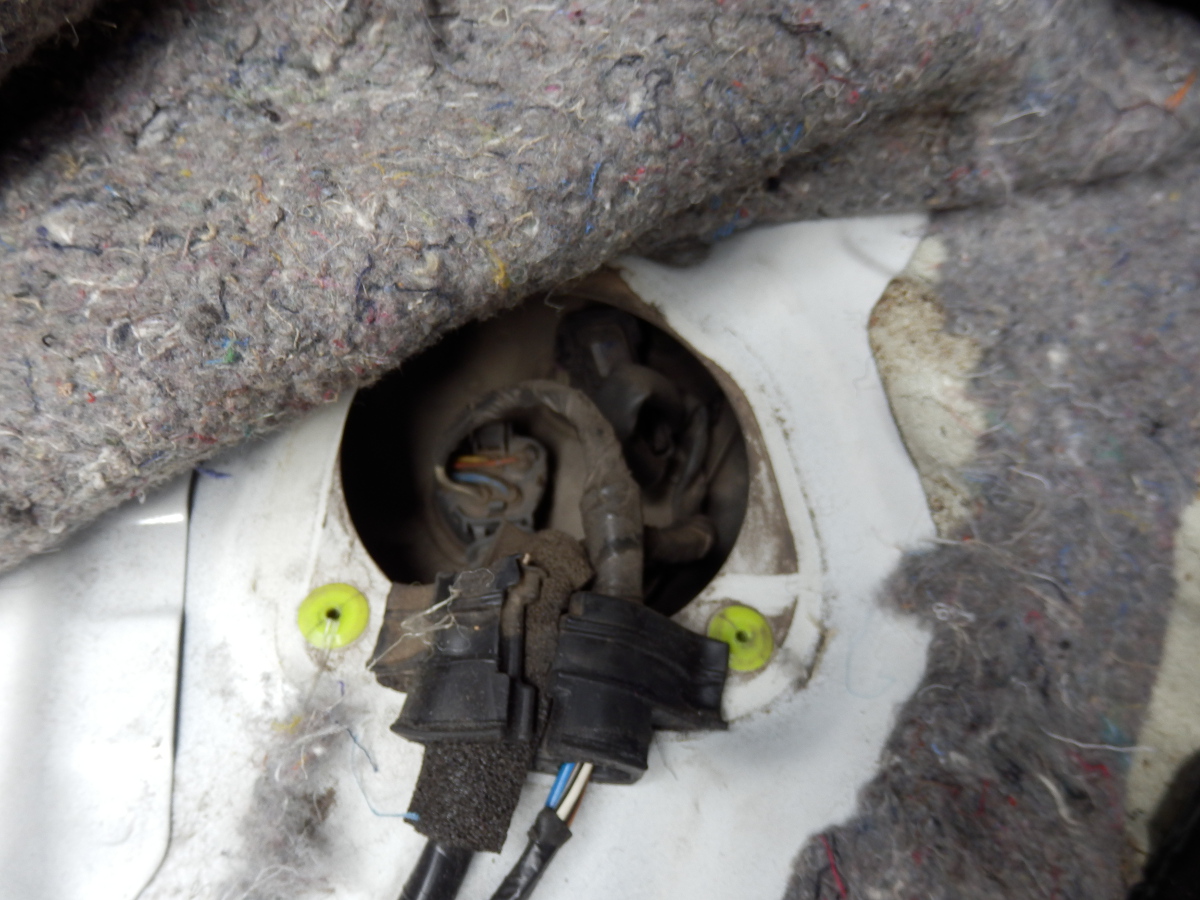
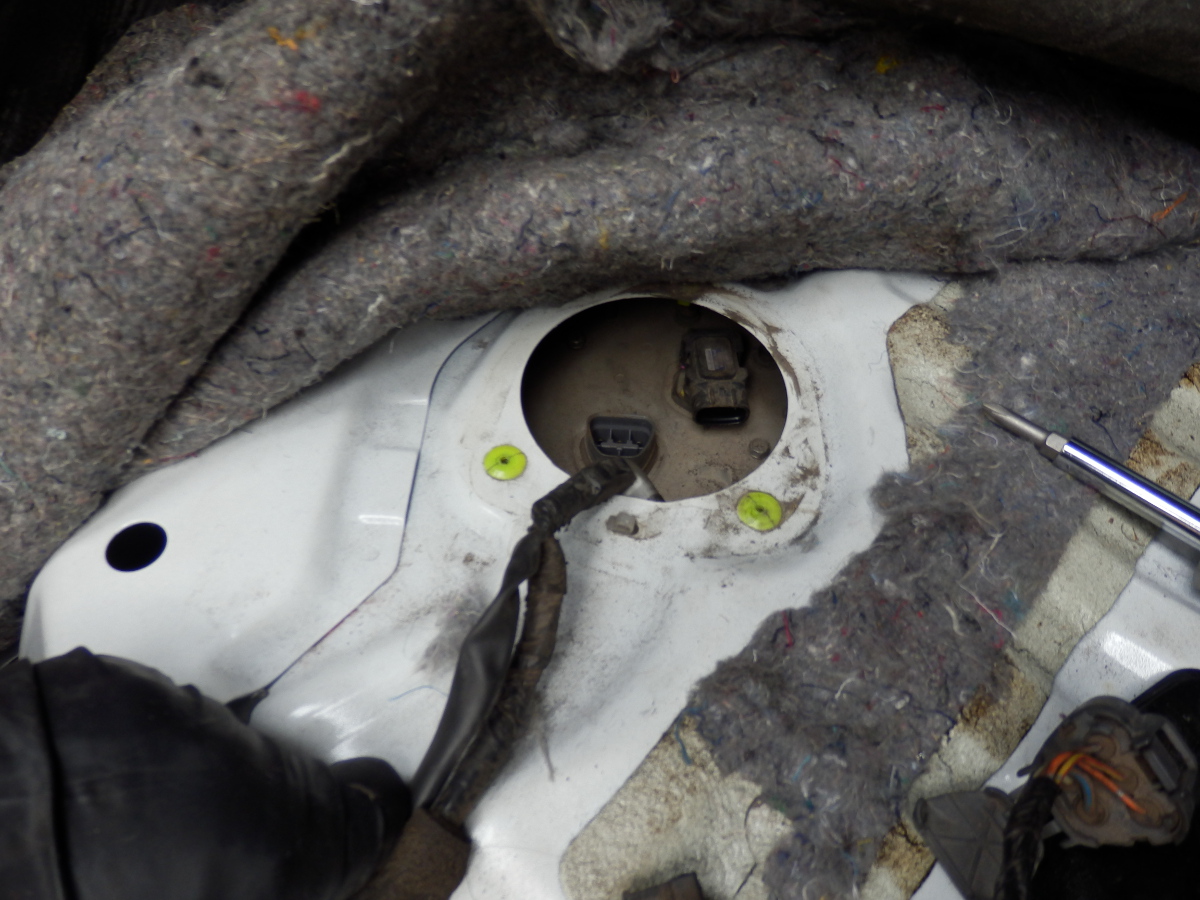
4. Under the drivers side, back seat... there will be a black cover with three phillips screws. Take them out and take the cover off to expose the fuel pump connections.

IMPORTANT: Once you take off the connections, set them aside and try to start the car. Let it keep cranking for a while if it does not start to relieve fuel pressure in the lines
FP4.JPG

FP5.JPG


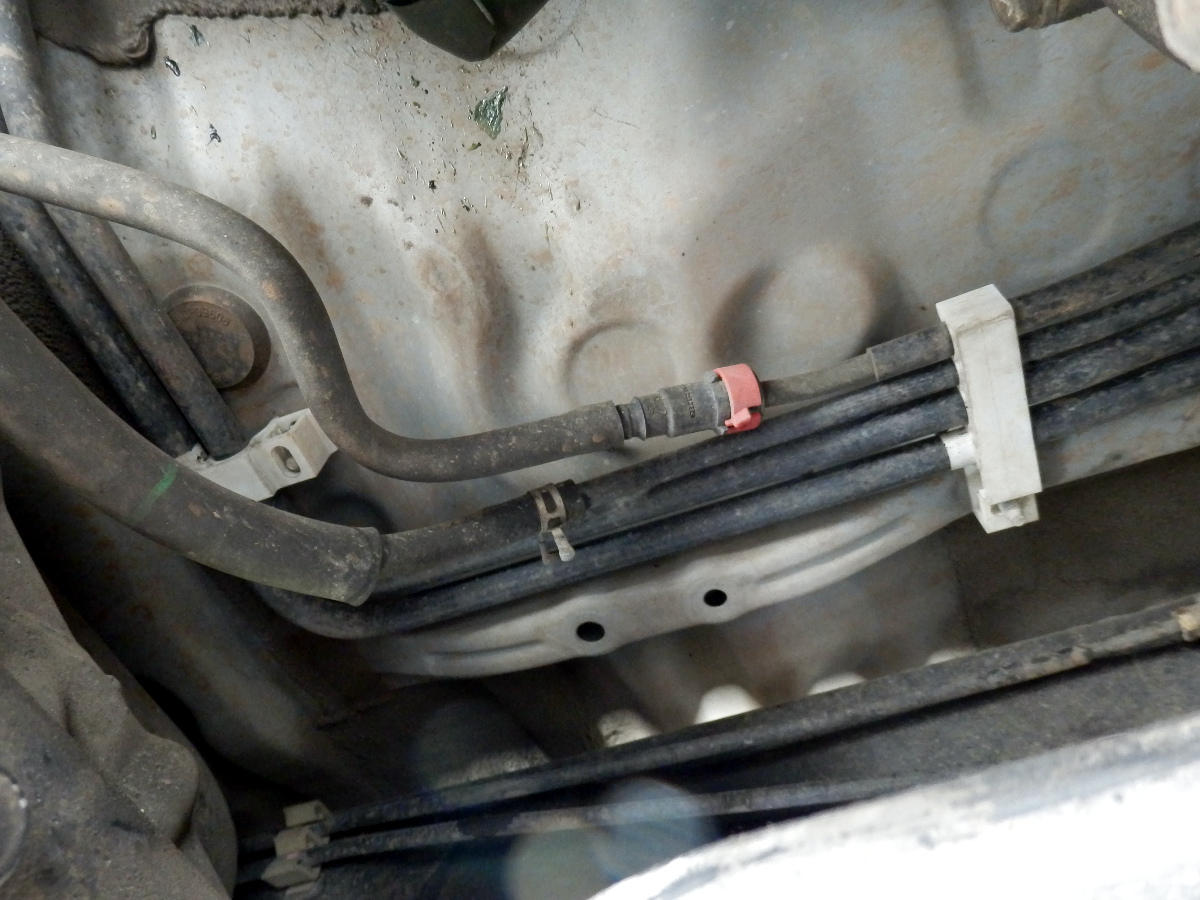
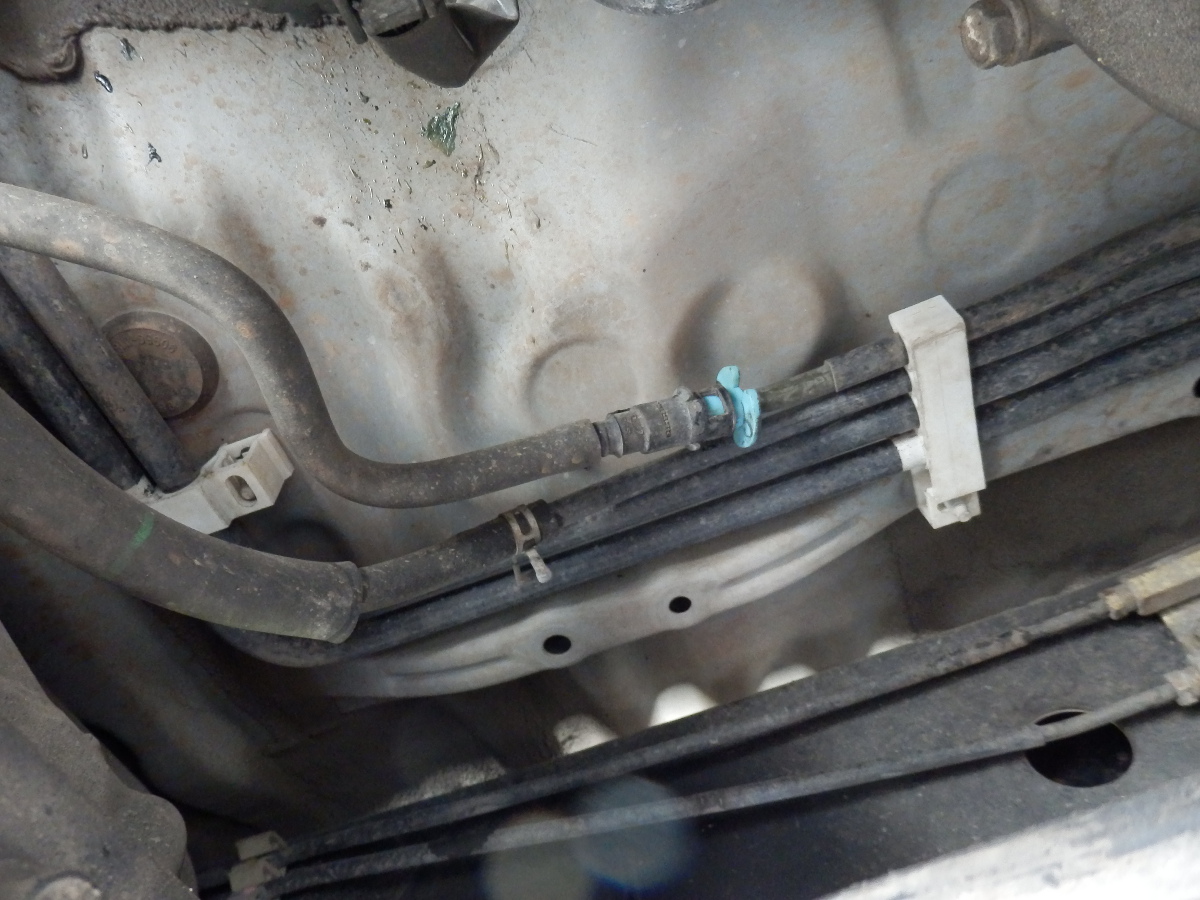
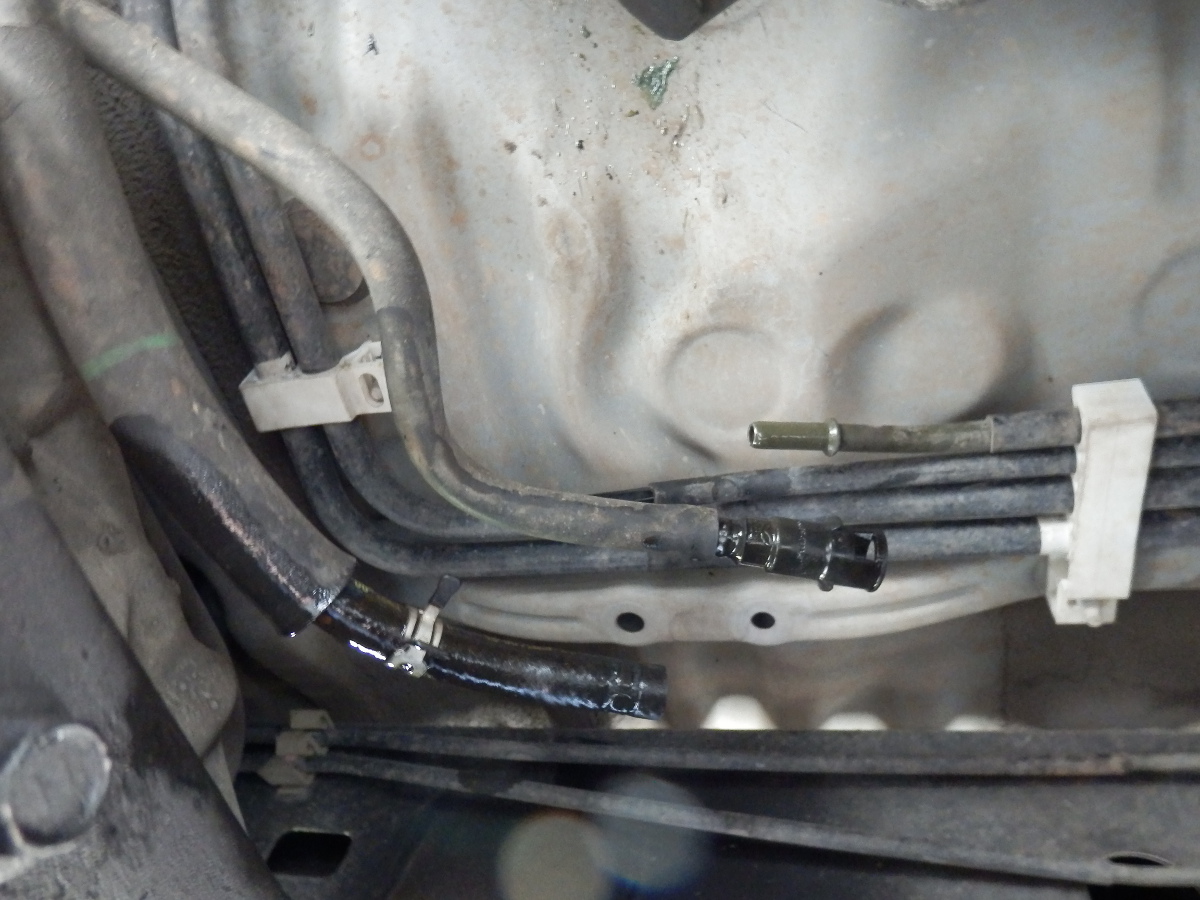
5. At the front of the tank (towards front of car) Locate the feed and return line going to the fuel rail. The line with the red clip is the feel, the other with the clip is the return. Remove the red clip (it is split in the middle and with force, you can pry it off). Then insert a fuel line disconnect tool to remove the line. On the return line, simply pull it off after compressing and sliding the clip back. Fuel WILL pour out of these lines for a little bit. Make sure your face is not under them. Have a towel ready.
FP6.JPG

You can see the fuel line disconnect inserted
FP7.JPG

What you end up with
FP8.JPG


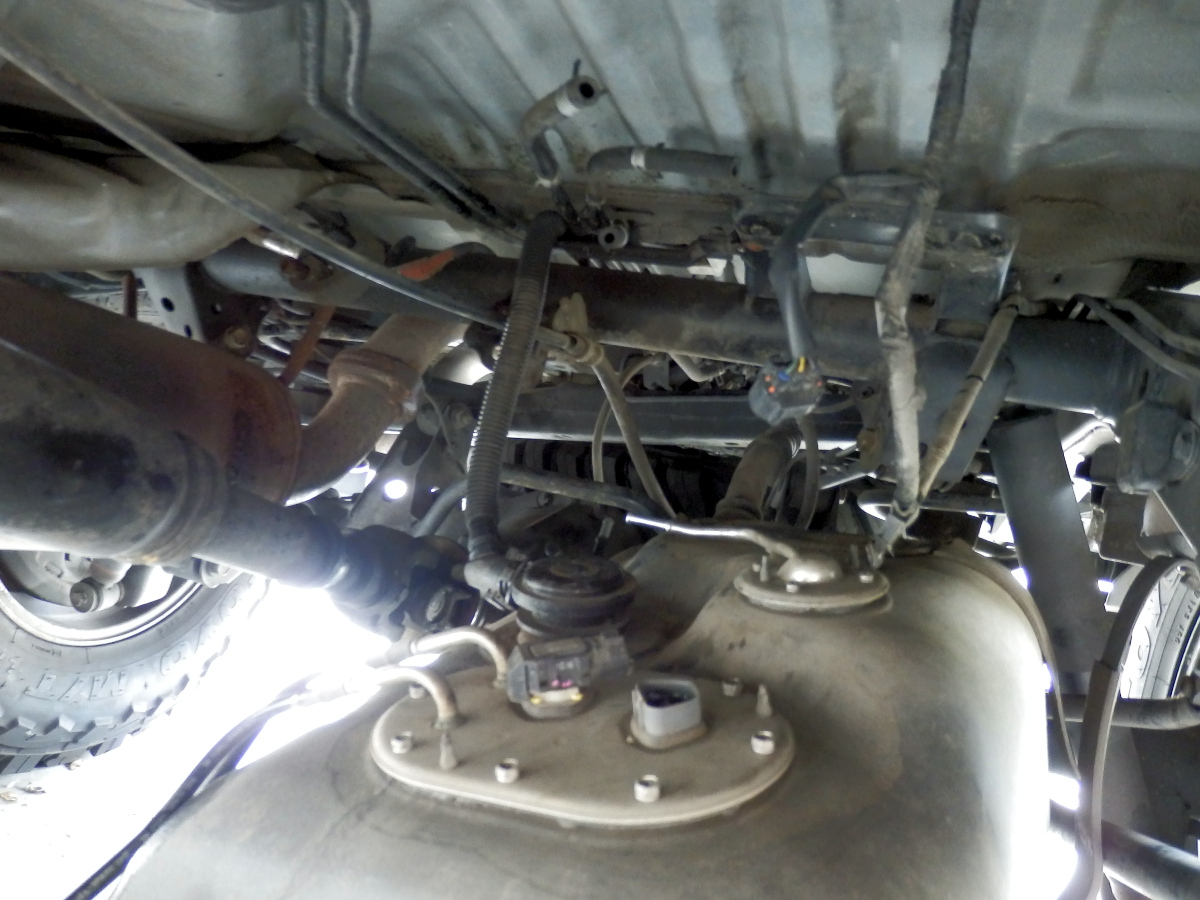
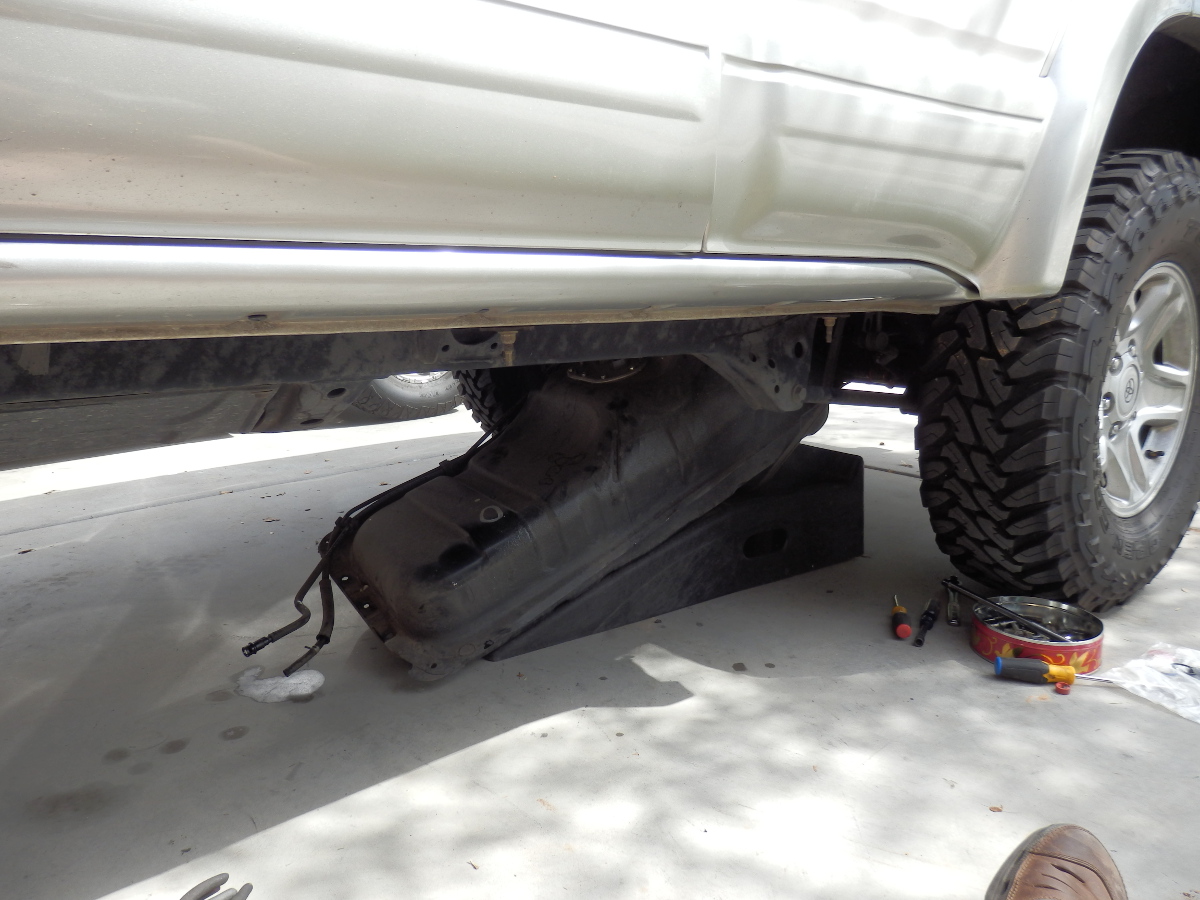
6. Go ahead and take out that front bolt. I use a car ramp to support the tank as it starts to come down. At this time, remove the cotter pin and strap pin on the rear gas tank strap to let the tank down further, letting it sit on the car ramp (pics of the ramp later - I do not have pics of the pin... somehow forgot to take a pic of it) Disconnect all the fuel lines and pry the stupid weird connector off the check valve thing. Have to use a flat head and it is a pain.
FP9.JPG


Part 2 in a moment :)
 
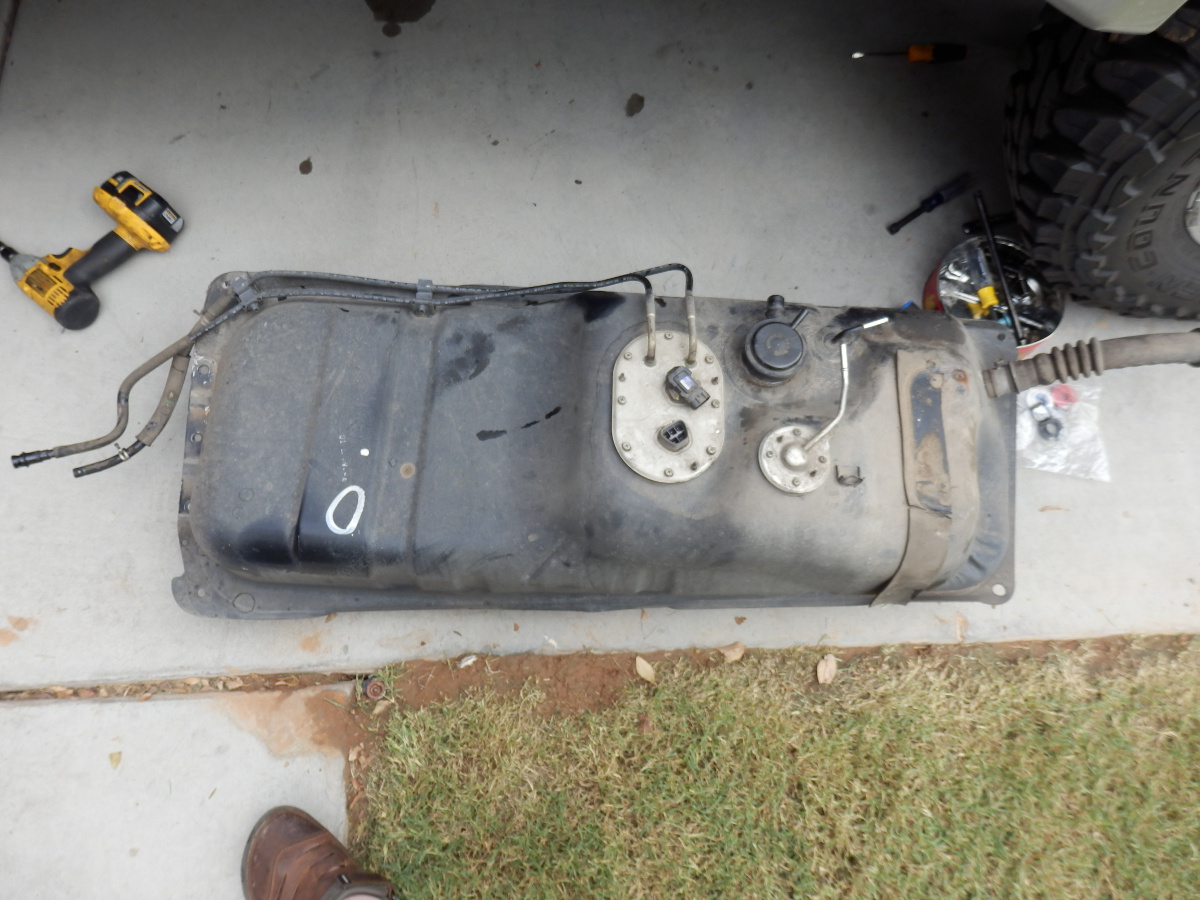
7. SWEET, slide the tank out from under the rig
FP10.JPG


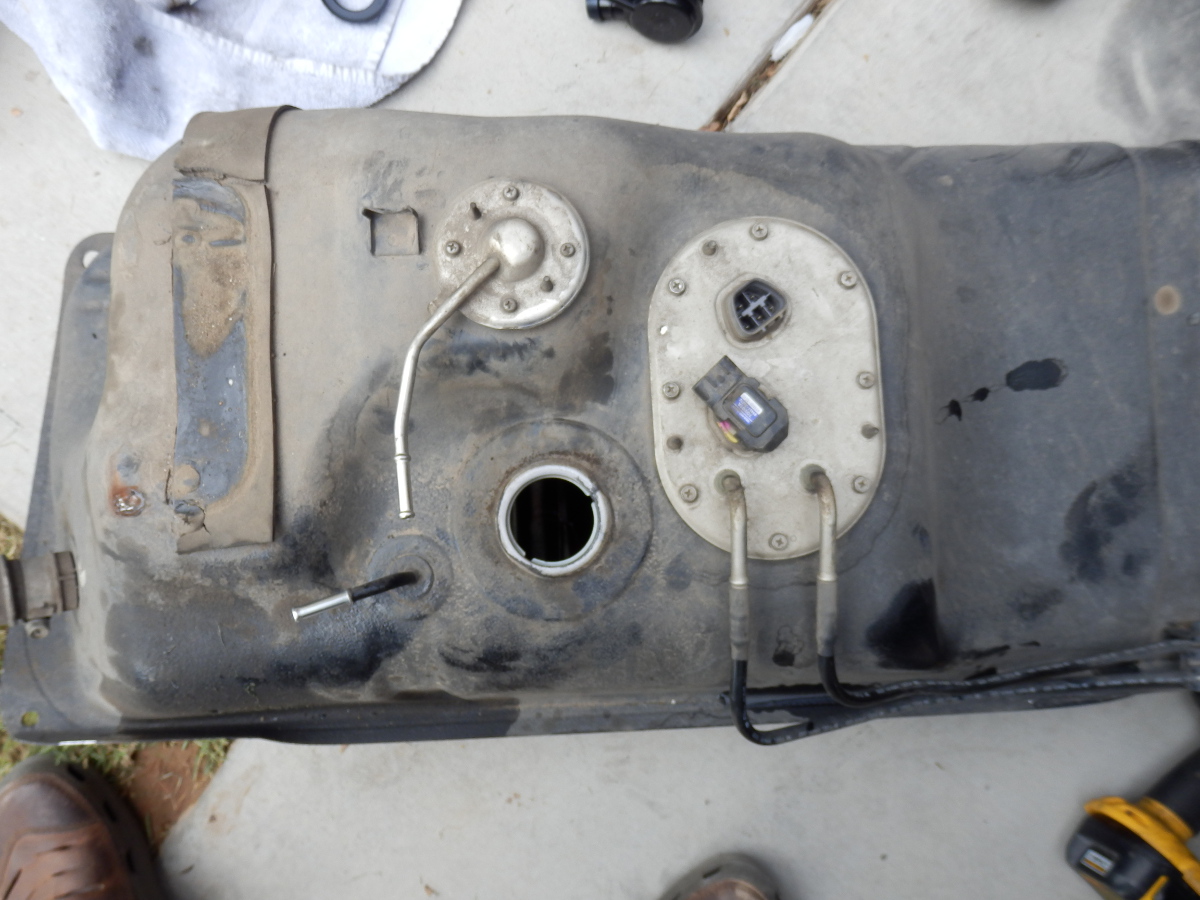
8. Photo of the new check valve vs the old.
FP11.JPG


9. Pull straight up while twisting and you can get the old check valve out. Remove the check valve grommet at this time. Put in the new grommet and check valve in reverse order.
FP12.JPG


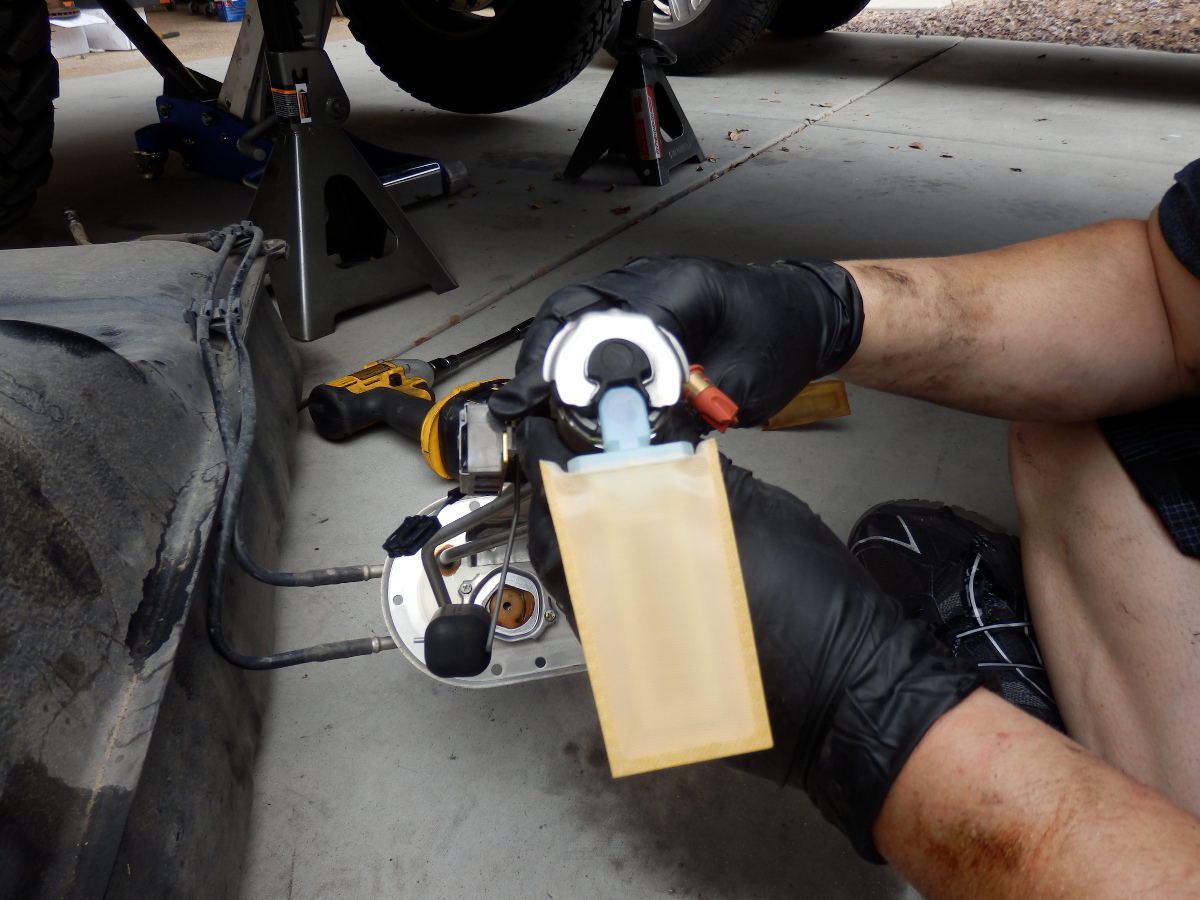
10. Assemble your new fuel pump. All you need out of the denso package is the sock, round press on clip and the pump. Use a 6mm socket to press the clip on the pump which secures the sock to the pump.
FP13.JPG

FP14.JPG


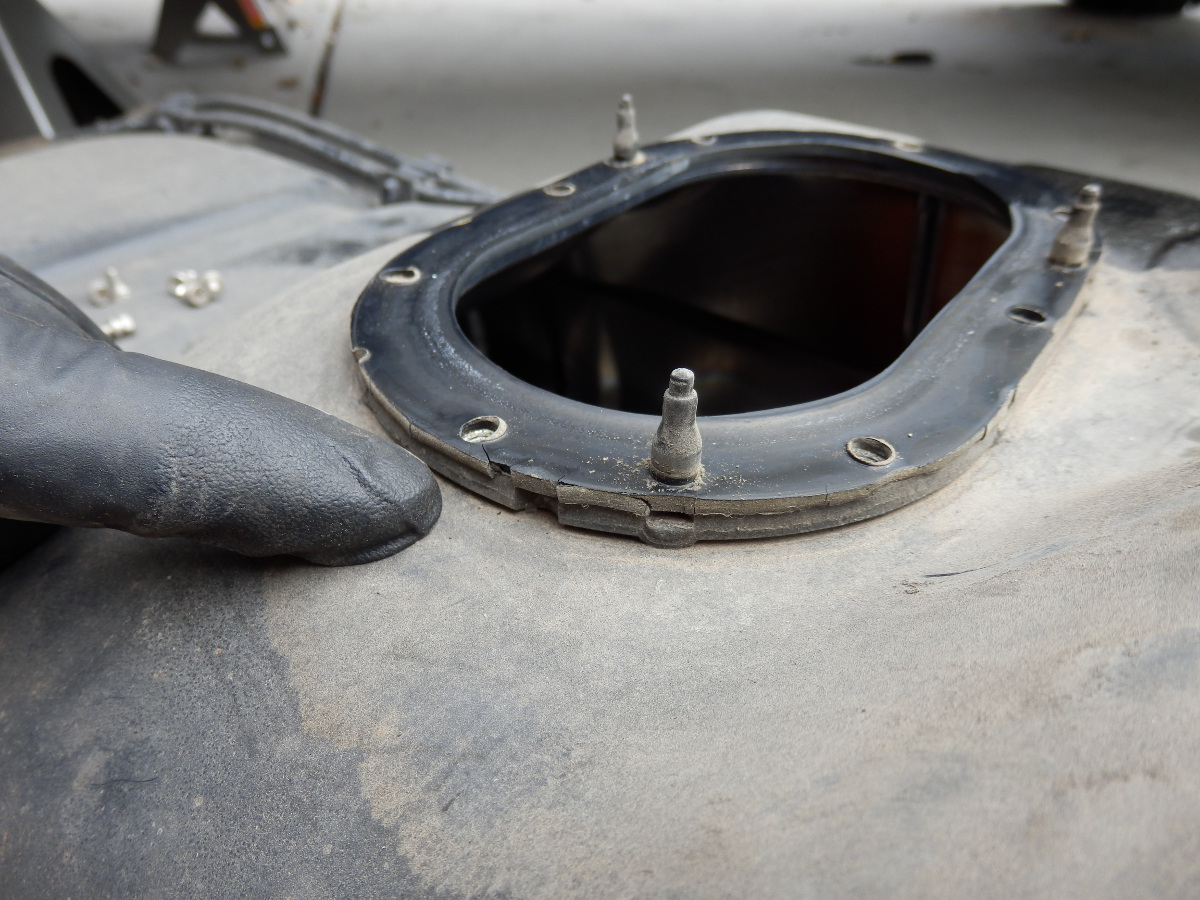
11. Remove the 8qty of 8mm bolts securing the fuel pump assembly and the level sender unit. Takes a little twisting and angling to gently remove the assembly. You should have also bought a new gasket as your old one will be weathered and cracked. (parts numbers in previous posts)
FP15.JPG


12. Once you have the sender out. Remove the old fuel pump by unplugging it, and sliding the clip up the fuel hose. The bottom of the pump will slide out from the metal bracket and you can pull the pump free.
FP16.JPG


13. Re-use the rubber cushion that goes under the pump. At 230K miles, this one was in excellent shape so no need to replace. Fuel hose was also excellent shape.
FP17.JPG


Slide the new pump into the fuel hose and with the rubber cushion on the bottom, slide it back into its bracket.
FP18.JPG


Part 3... coming up!
 
14. Now take a look at the sender. It is the silver box with the float attached to it. Slide the cover downwards and it will expose the contacts internally.
FP19.JPG


15. Take a pencil eraser and clean all of the silver contacts so they look new again. Make sure the little sender arm is making good contact with the traces on the pcb you just cleaned.
FP20.JPG


Once clean, she will look good as new.
FP21.JPG


16. Put the sender and fuel pump assembly back together. Now the PITA part...
FP22.JPG


17. Ah the photo of the car ramp. Use the ramp so that you can slide the tank back up into the car at angle. The ramp makes it easy. Connect up the big hose going to the check valve first (if the tank is close to empty, the hose will help support the weight of the tank which does not weigh much at all without fuel)

Next, get the rear strap under the tank and re-connected. It is a tight fit but you now need to connect up all the fuel lines back to their proper places. Forgot which goes to what location? No worries, they will line back up to the right ports and are all the right length to plug back into the right ports.

Once everything is plugged in and good to go. Secure the front bolt, re-attach the filler hose with the 10mm socket and re-install the skid plate.
FP23.JPG


Fuel pump and check valve COMPLETE!

Next little addition.. change your darn fuel filter...
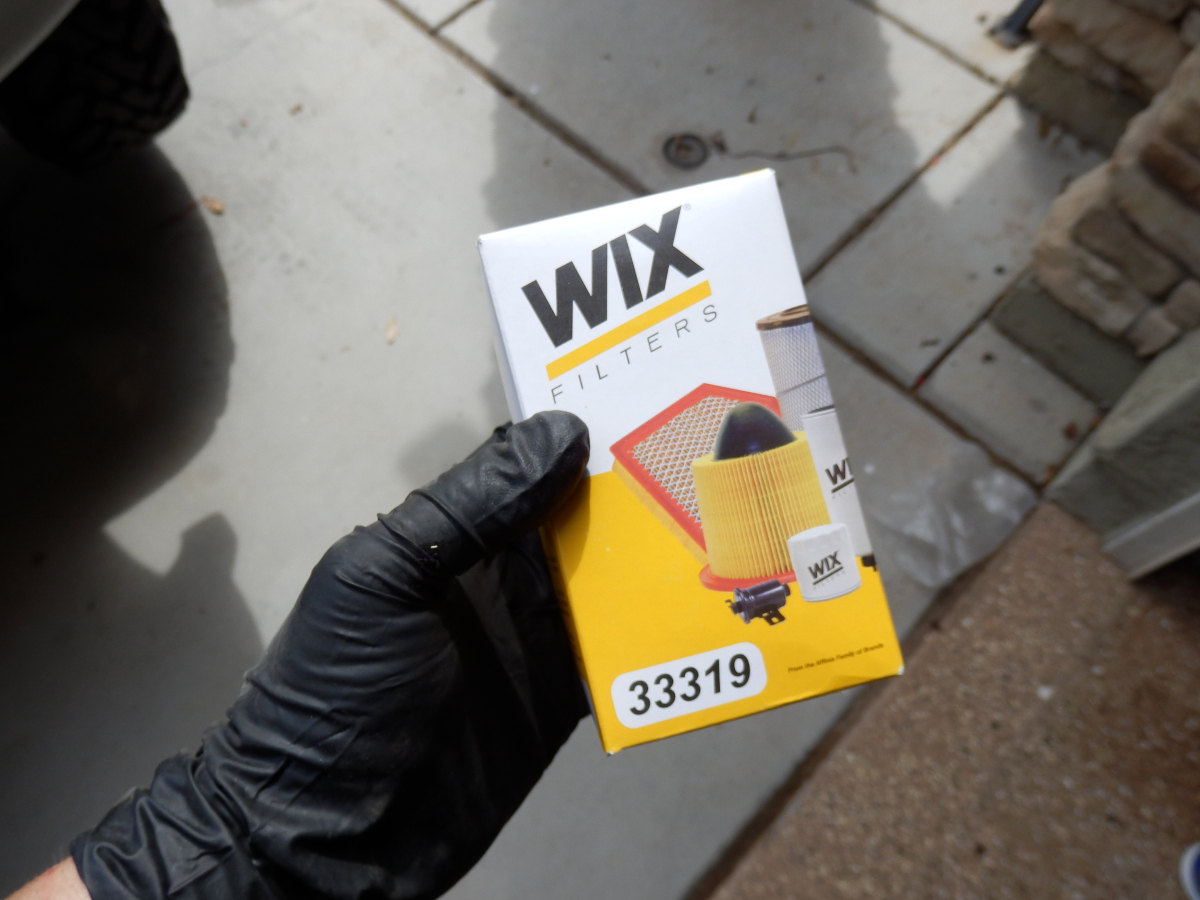
1. Get a quality filter.
FP24.JPG


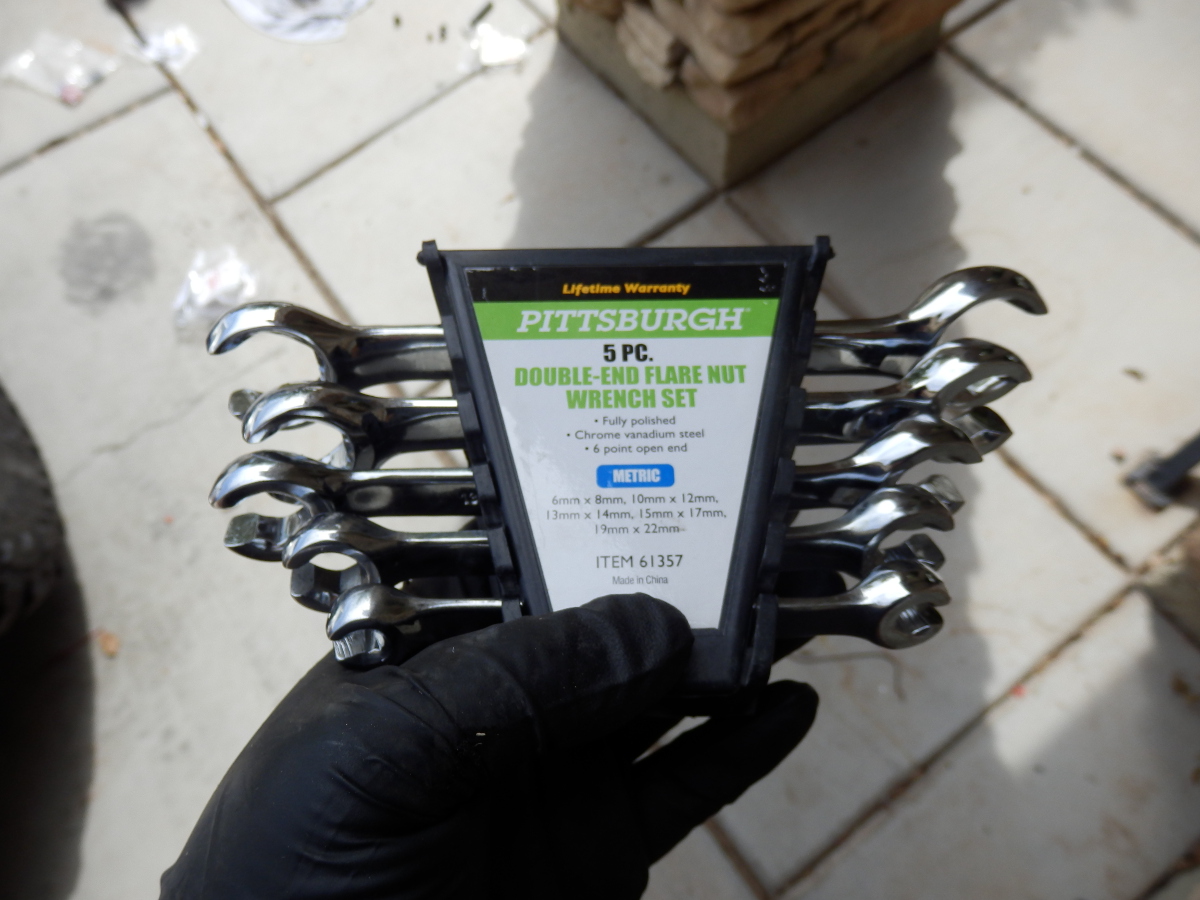
2. Use ONLY flair end wrenches to disconnect the fittings from the fuel filter. Do not be a tard and use a box end. You will likely just round off the hex ends. I use these cheapy ghetto freight flair end wrenches and they have been great! FUEL WILL POUR OUT OF THE FILTER FOR A BIT! Have a towel ready to go as it makes quite a mess.
FP25.JPG


3. Just a photo of where the fuel filter is, under the drivers side of the car. There is a 10mm bolt that clamps the fuel filter in place and it is facing the wrong way. It can be a pain, but loosen the bolt so the old filter slides out.
FP26.JPG
 
That black carpet looks surprisingly good! New carpet is on my to-do list as well. What company did you buy from?
66.gif
23.gif
82.gif
 
Last edited:
Last adventure for the day. Drop the transmission pan, replace or clean the strainer, magnets and pan.. then re-seal.

Prior to this job, let the car sit overnight so most of the fluid that can drip, will go down into the pan. Do NOT start the car prior to doing the below as that defeats the purpose of letting the car sit overnight.

I advise you have new front swaybar bushings ready to go. You will need to take off the swaybar mounts (not the end links) so the bar will drop out of position to drop the pan


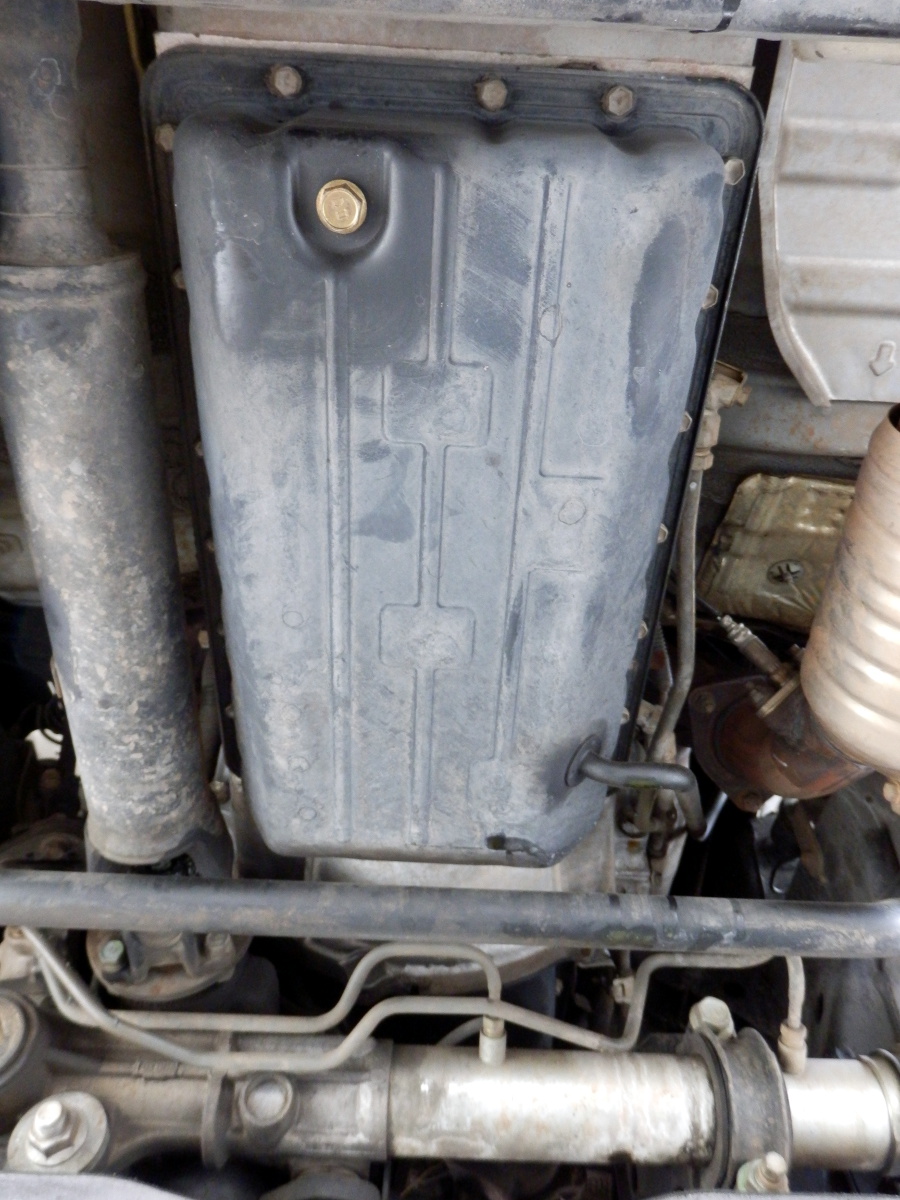
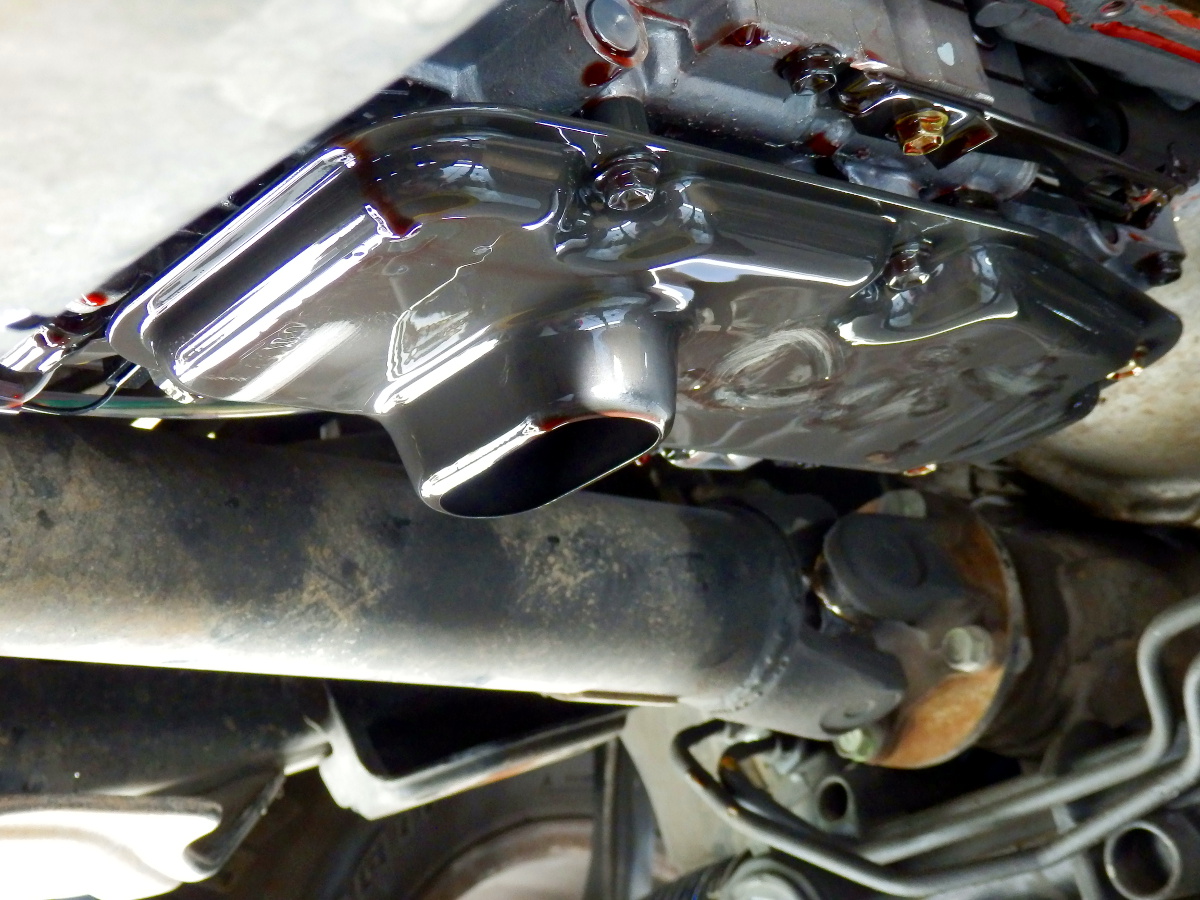
This is your tranny pan in the below photo which is held on by what seems like 40K 10mm bolts. Take all the bolts out and then take out the tranny dip-stick. Next, remove the 12mm bolt holding the dip-stick tube to the engine.

At this point, your pan will be stuck fast to the bottom of the transmission by the silicone gasket material that seals the pan to the bottom of the transmission. Use a small flat blade screwdriver at the back of the pan and use a rubber mallet to force it between the pan and the transmission. You will hear the silicone tearing and the pan coming loose. DO NOT twist the screwdriver or pry with it, as it will damage the mating surfaces. Just tap it in and no damage will occur.
TP1.JPG


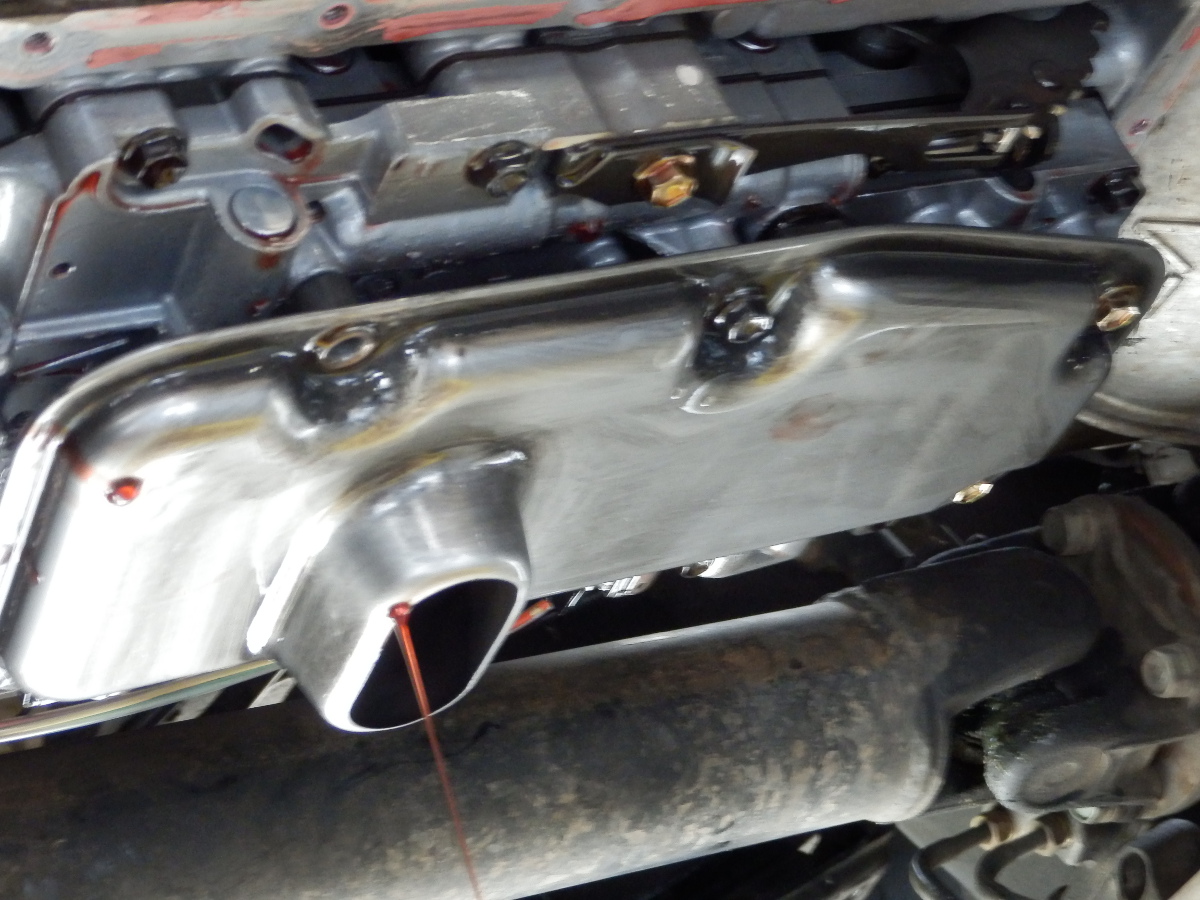
Once you get the pan off, you will see the strainer assembly attached to the bottom of the transmission. I recommend you have a new one ready to go. However some bone head shipped me the wrong one so I have to re-use this one. I will show you how to clean it later. As you loosen the bolts, transmission fluid will keep pouring out. Make sure you have your drip pan under the transmission to catch the remaining fluid.

Two black bolts are different lengths. Make sure the longer bolt goes to the hole towards the back of the car. The two gold bolts are the same length and go up front.
TP3.JPG


Take a look at your strainer. You will see a lot of particulates and even some metallic glitter on the screen. This is NORMAL unless it is super thick and caked on the screen... There will also be a lot of blackish sludge type goo on the metal of the strainer. If you re-use it, clean it all off back to new.
TP4.JPG


If you clean your strainer, hose it down good both inside and out with engine de-greaser. Let it sit for a bit and then heavily flush it out with a garden hose. Yes a hose. Put that sucker on full flow and flush / reverse flush the filter through all holes over and over. If done right, the screen will look clean as new. Just shake out the strainer and all water will come out. Let it sit in the sun for a bit while you do other things so that all drys out.
All clean
TP7.JPG


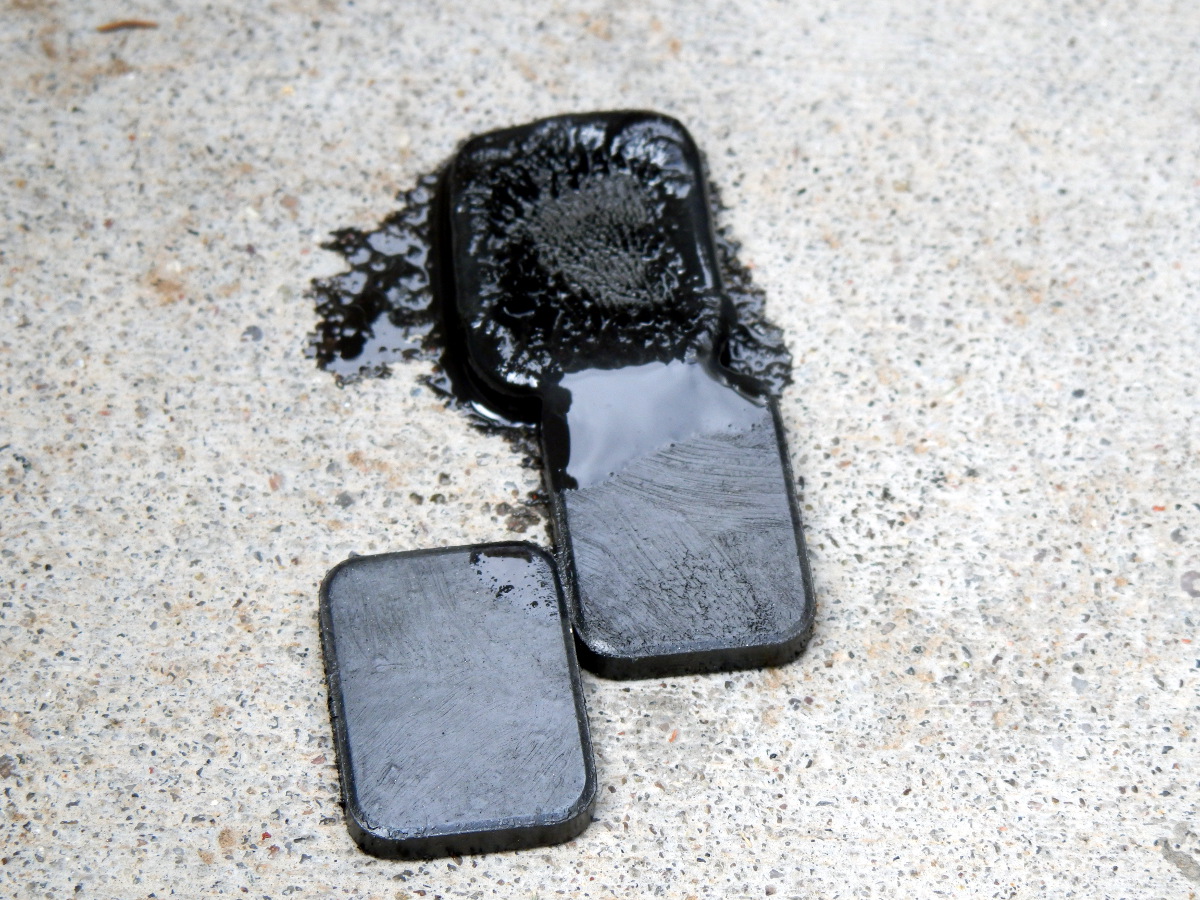
Now, have a look inside the pan of your transmission. It will not be super clean and some nastyness may have settled in the bottom, Especially around the 4 small magnets that just sit in the bottom. Remove all 4 magnets and clean then off. The two lower ones in this photo have been cleaned and the top one has not been cleaned. This is pretty normal for 230K miles. Not bad at all actually. See the 4 rectangle indents in the pan? Your magnets need to go back in these positions to be effective.
TP5.JPG


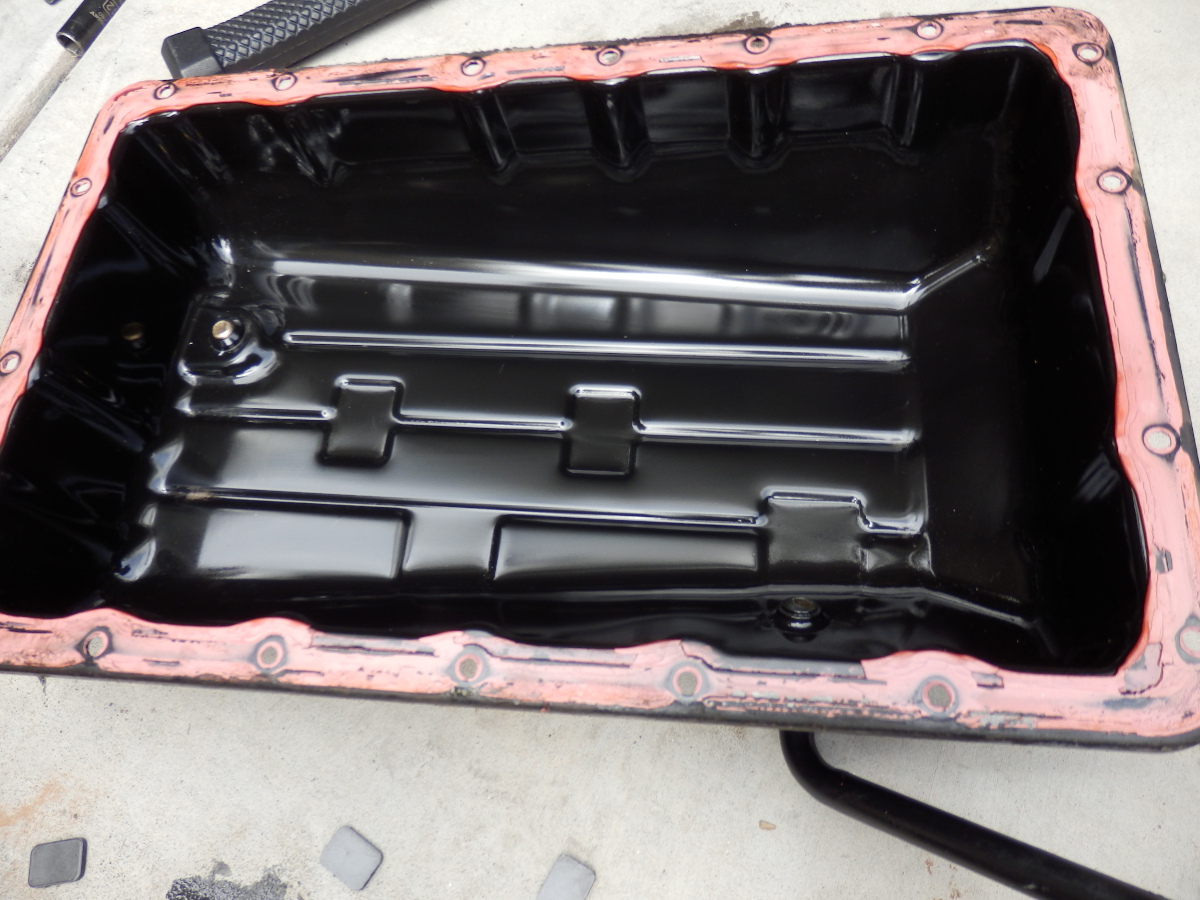
Also, wipe out your pan until it is spotless. See all that pink sealant? Now the sucky part, you have to use a razor blade to remove every single bit you can. Then take a steel wire brush and clean even further. The actual mating surface should be totally silicone free.
TP6.JPG


Did not get pics of the next steps as I was worn out and hands covered in yuk so did not want to ruin the camera... But it is simple.
- Once the pan is as clean as it gets - silicone / sealant free, use a clean rag and 91%+ rubbing alcohol to take off all fluid or oils off the mating surface of the pan
- Clean the mating surface of the transmission with a flat razor. The 4wd drive shaft gets in the way but it can be done. Once all the silicone is gone, use another clean rag and scrub the mating surfaces so they are dry and free of fluid.
- Use either a rubber gasket or a my choice, transmission pan sealant. I use specifically 81180 permatex auto transmission gasket maker. Stuff works great! Have used it for years when servicing autos and never an issue.
- Smooth the bead of silicone around the mating surface of the pan using clean gloves. It should be a mm thick or so and focused on the center ridge that goes around the pan. Once all looks good, put the pan back in place being careful to push it straight on / as lined up as possible so it does not slide around on the mating surface
- Put in a few bolts by hand to secure the pan. Then install them all and torque them to spec.
- Re-install the transmission pan tube to the engine block and put the 12mm bolt back that braces the tranny dip-stick tube
- Re-install the front swaybar bushings or replace them at this time
- Let the pan sit overnight so the sealant cures. In the morning, add back about 5-6 quarts depending on what you took out.
 
Last edited:
All that makes me want to buy my mechanic a pack of beer when I see him with my list Tuesday. I have a hunch I may need to replace the rollover valve....
 
Does the 00 have it? If so and you get a fuel stink at the back of the car when filling her up or if overfilling to get the last drop... then bingo... check valve / rollover valve.

And yeah... the day kicked my arse but not that bad compared to the suspension work / lift on both the other day + other work done. Enjoyed wrenching with the youngest boy (12 years old) and teaching him. Took our time. So YES. Buy him beer, a sammich or something. Techs are under-appreciated and over-worked. Glad I am not one :) Just a shade tree wrench that does not do work for free :D

I did not post that I also did a drain and fill on coolant / ran the heater before and after to flush the stagnant / acidic coolant. This is a MUST DO maintenance item that pretty much no one does. Especially in hot climates when we almost never use the heater. DO THIS if you do not want coolant on your floorboard one day and a LOT of work tearing out the dash.
 
Last edited:
Quality write up. I'll have to save this one and re-name it and drop it in my fuel folder. I just replaced the fuel filter in my sons 2002 camry today. I thought having to remove the back seat and going into the fuel tank just to change a filter was a PITA. What you did takes the cake. Not looking forward to that job. So far...knock on wood...so good.

Thanks again for the great contribution. BTW both runners looking great.
 
Last edited:
I did not post that I also did a drain and fill on coolant / ran the heater before and after to flush the stagnant / acidic coolant. This is a MUST DO maintenance item that pretty much no one does. Especially in hot climates when we almost never use the heater. DO THIS if you do not want coolant on your floorboard one day and a LOT of work tearing out the dash.

Well, a lot of people drain and fill coolant here I'm sure... but running the heater if already in a hot climate/season.... probably not.

I run it plenty in Colorado winters; but not really outside of that.
 
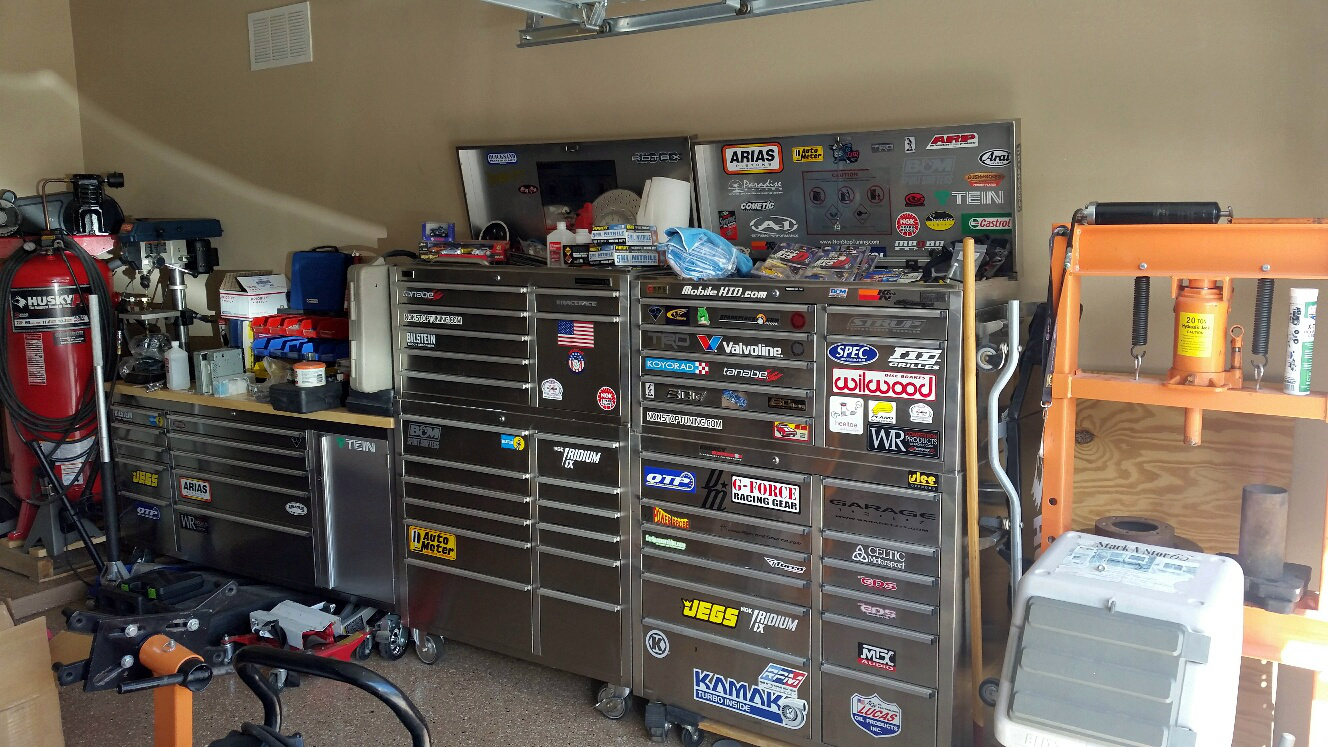
Took a photo of my wall of GET-R-DONE. The boxes may not have much depth as my old snap on boxes, however that is the point. Maximize usable floor space. Overall the bench and two boxes measure more than 13 feet. Will be purchasing at least two more of the benches and one more of the boxes for the next shop.

My old shop was multiple times more awesome... but she will rise again mid next year when I buy a new place :) Lots more gear than I am showing off here - cannot wait to get the new place rolling.
TOOLBOXES.jpg
 
Last edited:
Took a photo of my wall of GET-R-DONE. The boxes may not have much depth as my old snap on boxes, however that is the point. Maximize usable floor space. Overall the bench and two boxes measure more than 13 feet. Will be purchasing at least two more of the benches and one more of the boxes for the next shop.

My old shop was multiple times more awesome... but she will rise again mid next year when I buy a new place :) Lots more gear than I am showing off here - cannot wait to get the new place rolling.

TOOLBOXES.jpg

Woo. Nice tool boxes. :) I'll be looking for a place in the next 6-months or so, hope to start building a more robust garage. Will probably start with large toolbox, air compressor, bench.
 
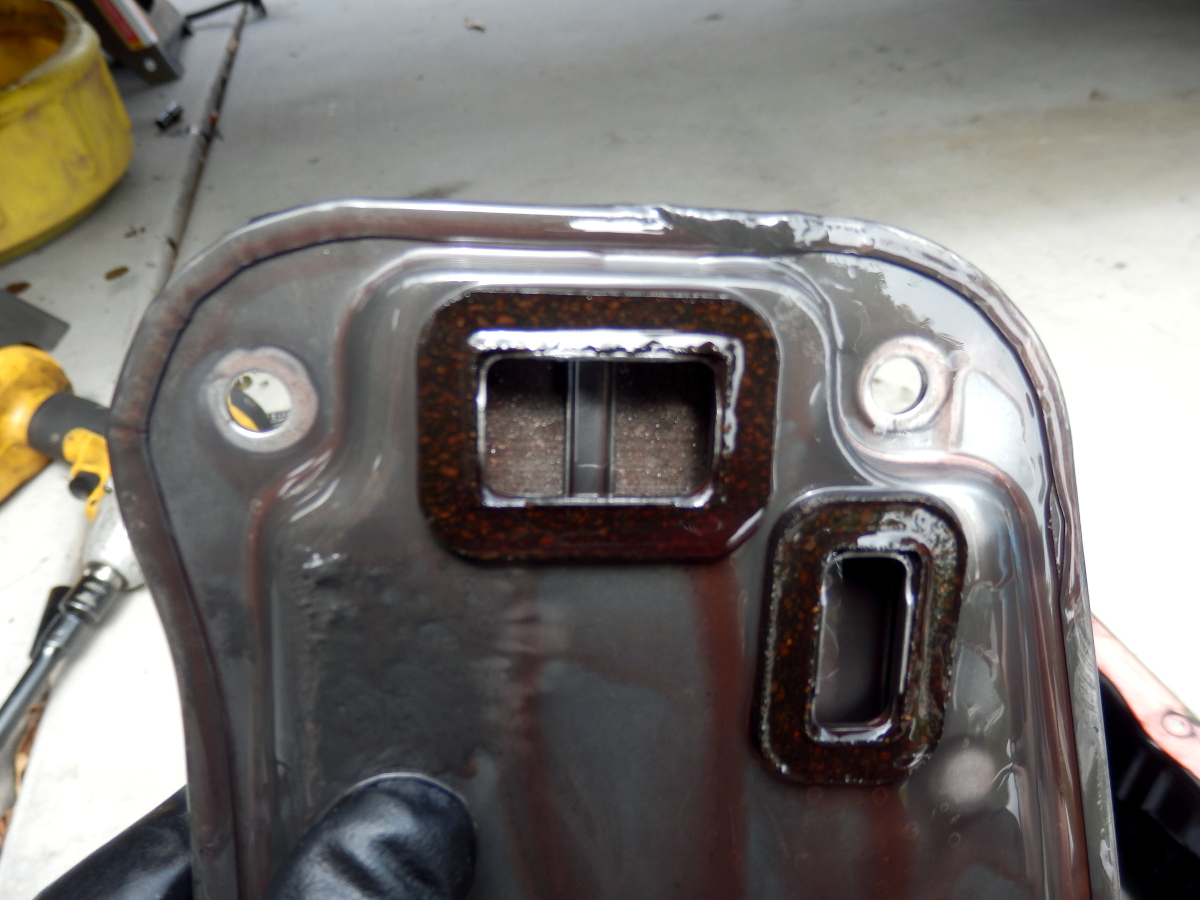
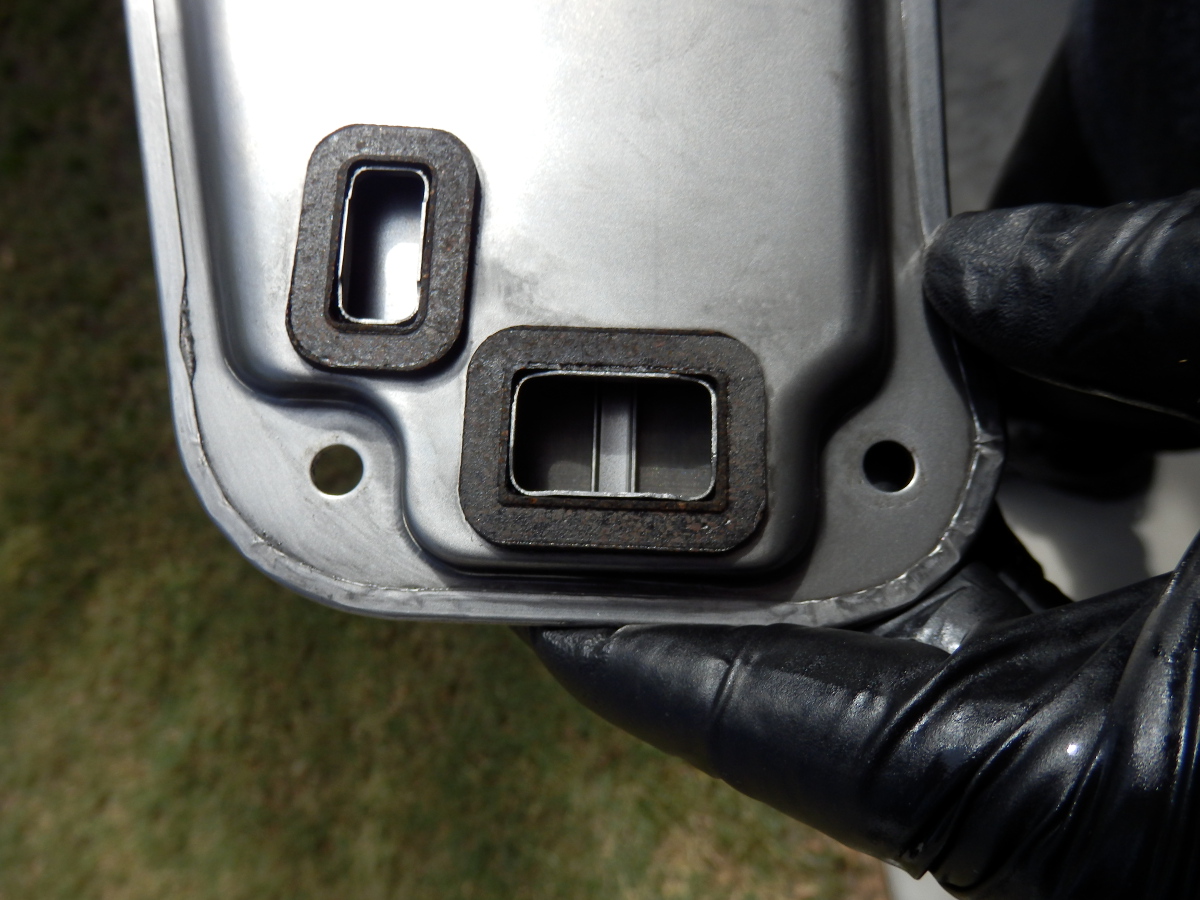
Some more transmission cleaning photos. Did the silver gunner this weekend. This time, I took photos before wiping off the strainer.

This is all perfectly normal for a car with 200K+ miles that has never had the pan dropped and that uses a strainer for a so called filter.

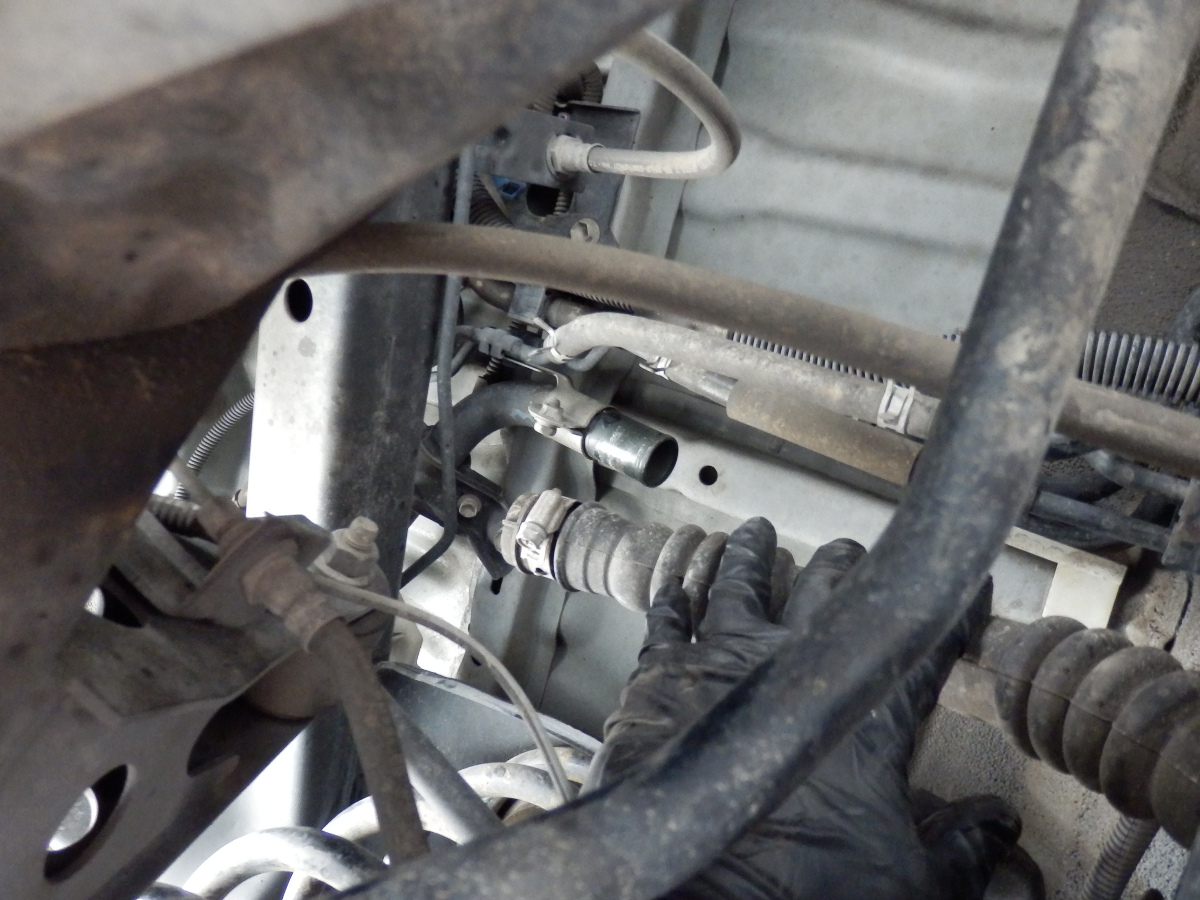
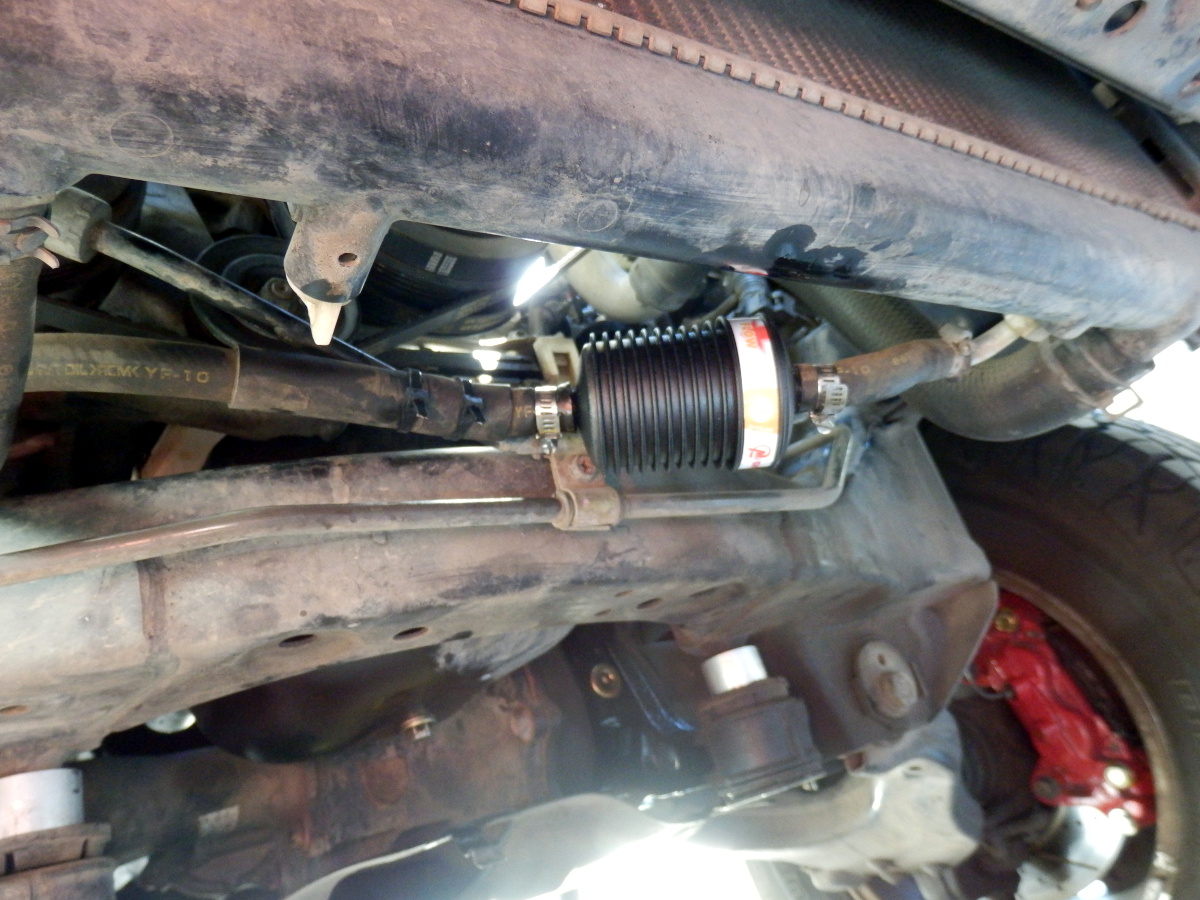
After a thorough cleaning and re-seal, I installed the magnefine filters in both 4runners which should help keep the strainer screen clean in the long term. Should help with buildup in the pans too. Found a convenient, easy to access spot for the filters just off the radiator barb, under the skid plate on the return line. If done right, the filter will not rub on anything and you can easily zip tie the line to a close by hard-line.
FILTER.JPG


Strainer sitting in the pan. You can see how nasty it is. The strainer body normally does not look like this. This is the result of years and years of buildup in the pan without proper filtration. Tranny flushes or drain and fills DO NOT clean this stuff out. At this stage, only manual removal will clean it. Once clean, proper filtration will help keep it clean.

On the flip side, if more buildup occurs and some of the buildup is dis-lodged, your transmission will suffer in numerous ways or a failure may occur.

T5.JPG


You can see the buildup on the strainer and where I rubbed the filth around
T1.JPG


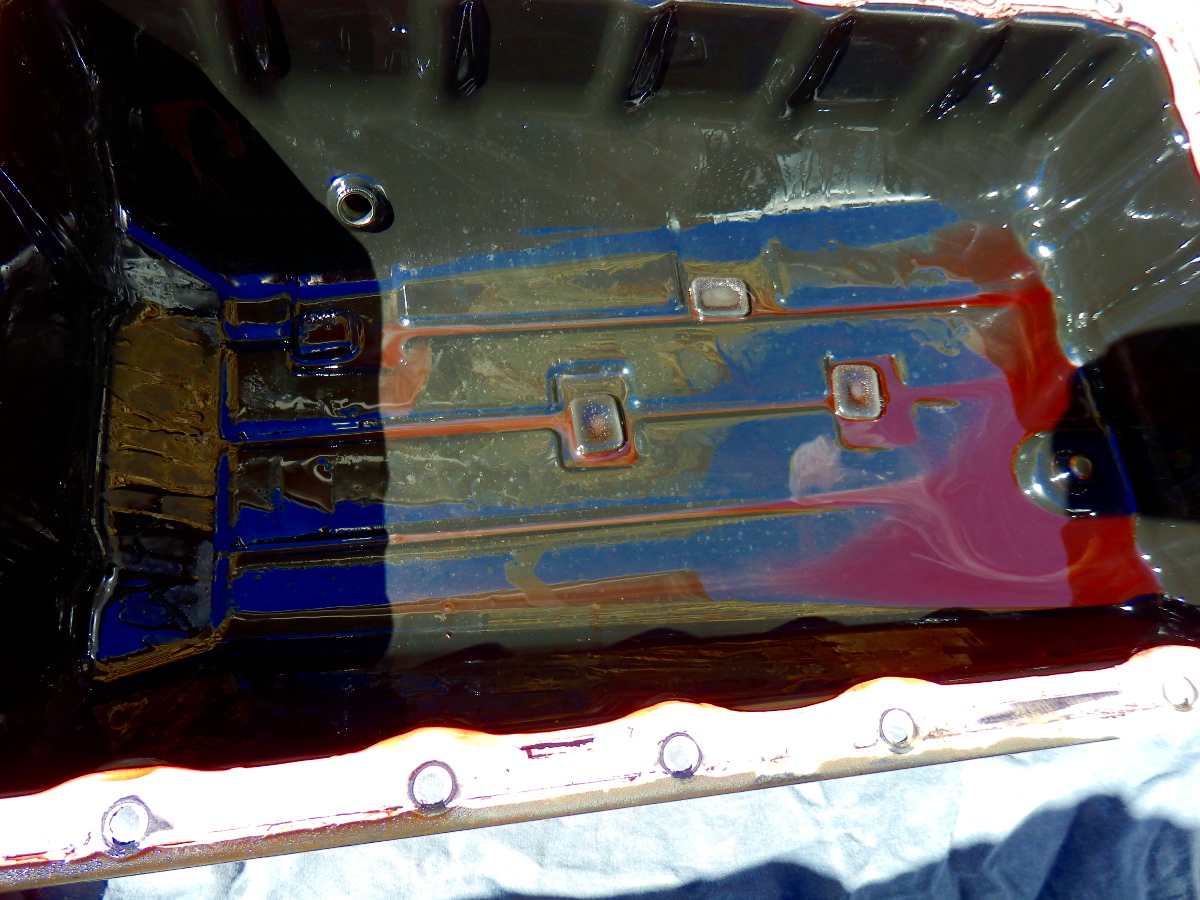
Pan right after dropping it. You can see the buildup on the magnets
T2.JPG


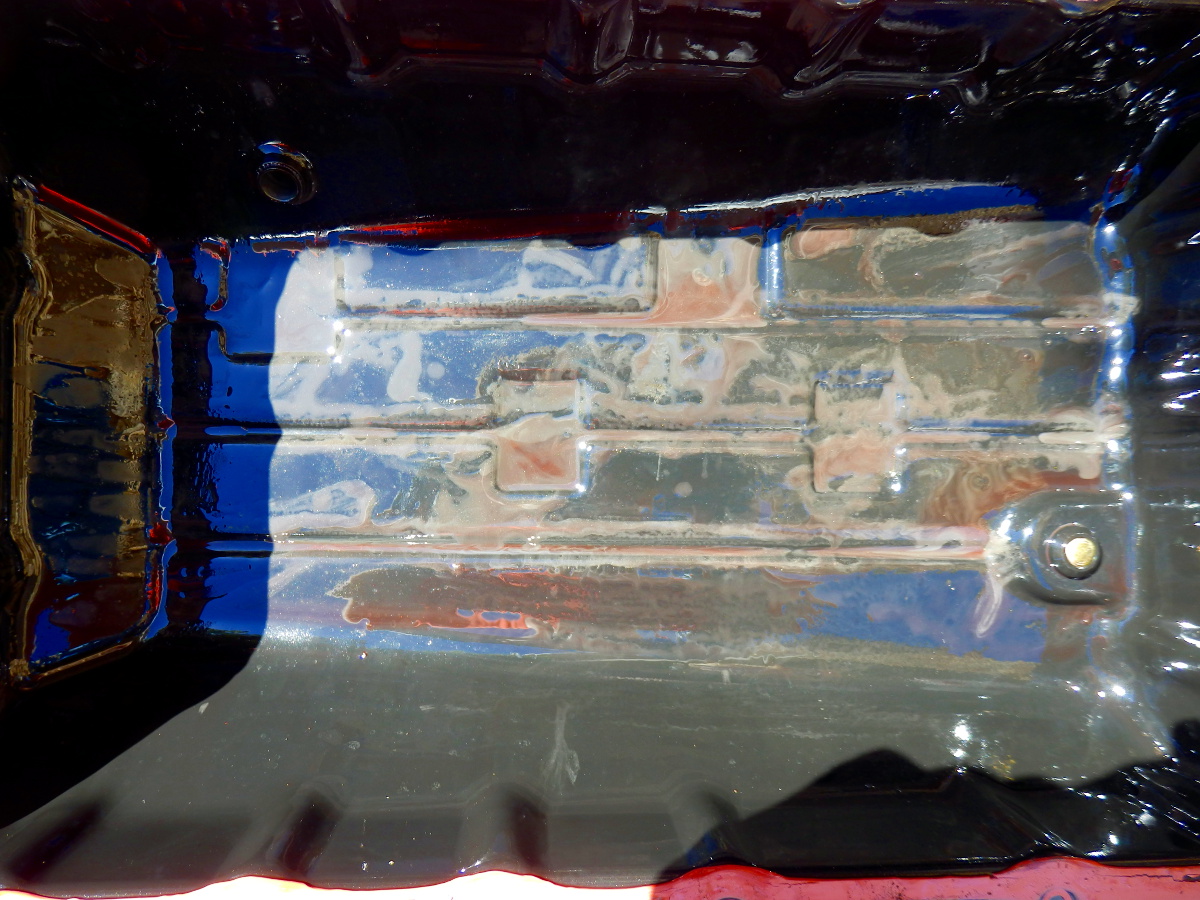
Some of the buildup and sludge that sits in the pan stirred up
T3.JPG


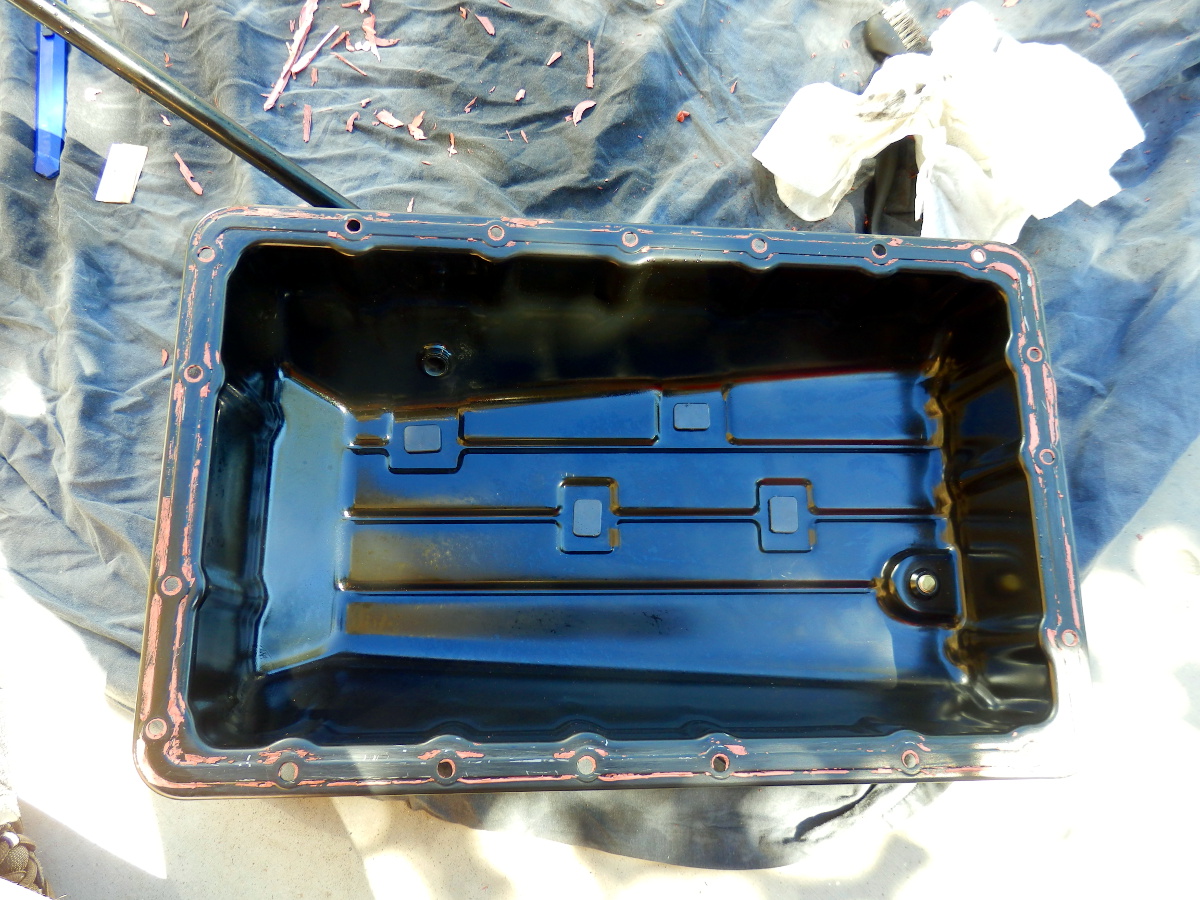
The pan all cleaned up and prepped
T4.JPG
 
My weekend fun and a trick on doing the t-belt. Did not take photos other than the parts going in as my camera man (son) was off duty today:

First the trick: You can remove the tensioner without taking off the ac compressor. Some may already know this but here is how.
- Use a LONG 1/4" extension and slip it between the oil pan and the brace. Just enough room for it to fit. Have it exit just below the tensioner
- Once through, put a 12mm short socket on the end of the extension and slide it up to that pesky rear tensioner bolt and remove! Saves a LOT of time. I know, because I had to do it 3 times this weekend! lol


Mind you, I have NEVER had an issue with a timing belt installation - always smooth as silk. My turn to get sucker punched a few times. If you cannot laugh at yourself... yeah..

So.. my Saturday:
Knocked the timing belt out. Re-assembled and filled with coolant. Fired her up and she idled fine. Revved the motor a little and knew right away something was off. Pulled the top cam cover and pulleys lined up, looked at the crank pulley and... oh hell. Looks to be off two teeth? What the heck?

So... time to do the whole timing belt job all over again woohoo! Somehow the belt slipped 2 full teeth and I freaking missed it. Tensioner was good, no issues with install at all. But there she was... slipped. :redbrick:

Pulled the tensioner out, compressed it and put everything back in - lined it up. Good to go! Then I put the crank pulley on with the bottom cover for a quick sanity check... WAY OFF. Ah F-me already... I put the belt on 180 out. Really? Two issues on one timing belt install? Just not my day.

Flipped the belt, compressed the tensioner and re-installed. Finally, good to go. Re-assembled it all and she is fine. So in short, I did 2.5ish timing belt jobs on the silver 4runner this weekend. And I feel every single bit of it.

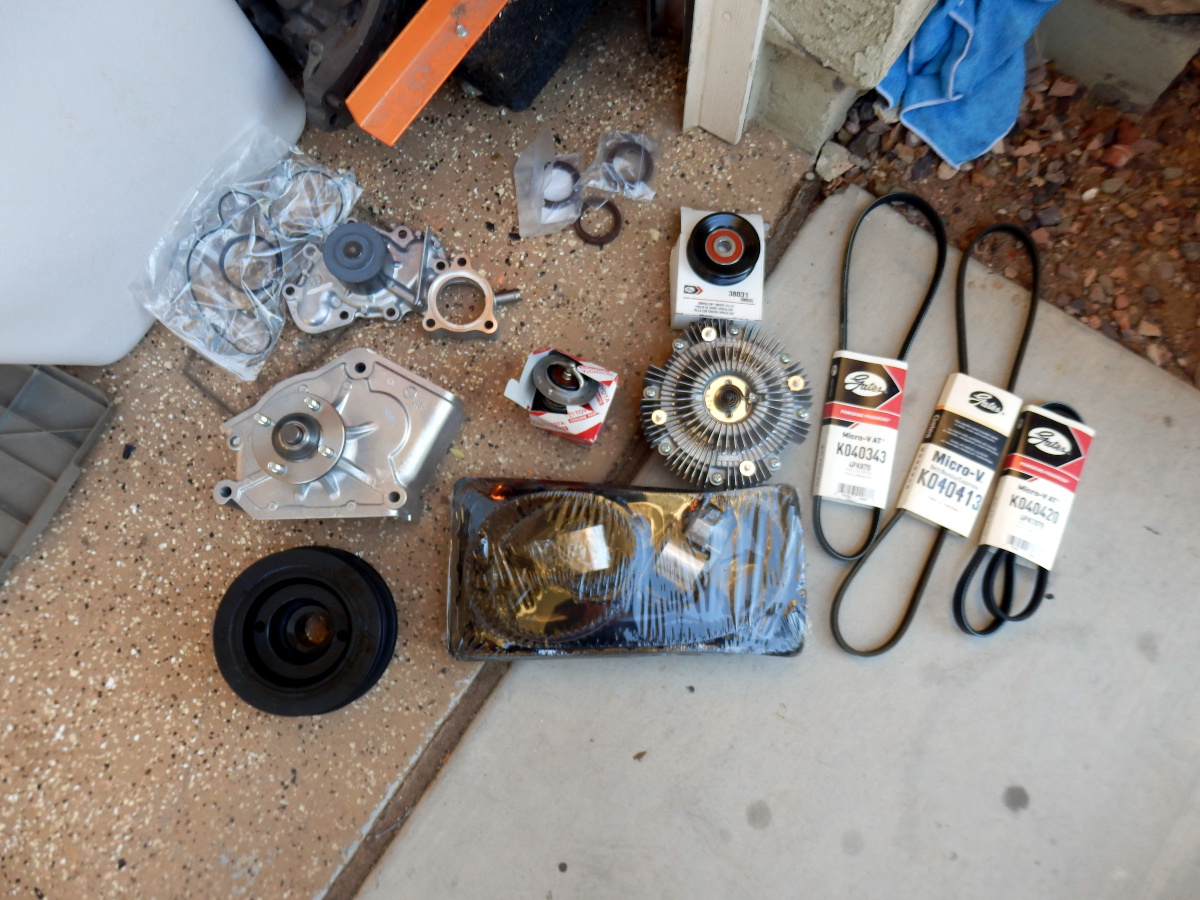
While I was in there, I also put in:
- New Aisin water pump PN: WPT-100
- All belts replaced with gates PN(s) K040413 K040343 and K040420
- AC idler pulley replaced / gates PN: 38031
- Gates timing belt kit with tensioner and idler PN: TCK271
- Crank seal / cam seals / toyota PN: Cam x 2 9031138051 / Crank PN:9031140022
- New Aisin false water pump idler PN: FBT-004
- New Aisin fan clutch PN: FCT-013
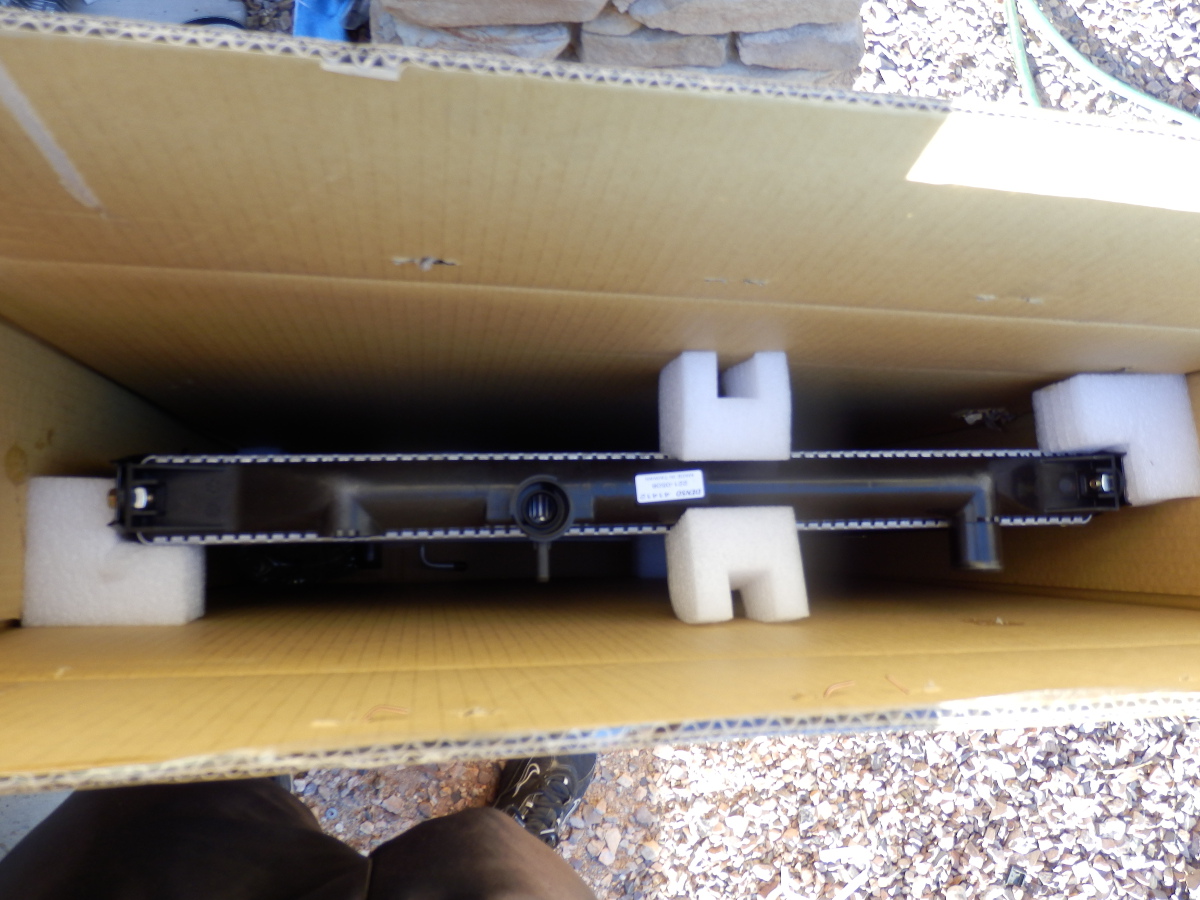
- New radiator PN: 221-0508
- Thermostat Toyota PN: 9091603075
- T-stat gasket PN: 1632562010

tb1.JPG


rad1.JPG
 
Last edited:
Nice! When I did my timing belt I could not for the life of me get the tensioner bolts out without taking off the compressor. I tried the long 1/4" extension, broke a u-joint, broke a nut driver, and couldn't get enough leverage on that super long extension to get the bolts off. After messing with it for 2 hours I decided to take the compressor off. That took another hour and a half probably taking it off and putting it back on (complete pain), but it made the tensioner bolts super easy to get too. I ended up having to replace one of mine too because I rounded it out trying to get to it with the 1/4" extension.
 
Nice! When I did my timing belt I could not for the life of me get the tensioner bolts out without taking off the compressor. I tried the long 1/4" extension, broke a u-joint, broke a nut driver, and couldn't get enough leverage on that super long extension to get the bolts off. After messing with it for 2 hours I decided to take the compressor off. That took another hour and a half probably taking it off and putting it back on (complete pain), but it made the tensioner bolts super easy to get too. I ended up having to replace one of mine too because I rounded it out trying to get to it with the 1/4" extension.

Oh man that sucks! I did not use a swivel / joint at all. The extension and short socket nailed the bolt nearly perfect. Just had to work the angle a little / best as you can. Came right out and was able to tighten it perfectly ALL THREE TIMES :frusty:

I will know if the trick works a 2nd time as my white gunner is due for the same work but will do it towards November / December.
 

Members online

No members online now.

Forum statistics

Threads
278,316
Messages
3,554,112
Members
248,016
Latest member
Advally Service

Trending content

Back
Top