DIY: Interior LED swap (cluster, HVAC, switches, window, *steering wheel)

look back a few posts...i list all the bulb types and quantities used everywhere on the truck (at least on an SR5) in an excel sheet.
 
look back a few posts...i list all the bulb types and quantities used everywhere on the truck (at least on an SR5) in an excel sheet.

Would you mind linking to this post? I just spent the past 25 minutes looking for this post in this thread and could not find it. Maybe i'm just blind? Thanks!
 
Post 1040, 1041 and 1081 all have it...yep youre blind...!!

Thanks for listing the post numbers. I was able to figure out that the reason I didnt see them is because I was going through the thread on my phone in the Tapatalk app. For some reason, the image of the spreadsheet doesnt show up in tapatalk. I hopped on here on my computer and found them much easier that way. Thought I was going crazy...went all the way back to in the 800's and didn't see anything.

Thanks for putting this thing together!
 
I bought my LEDs and was going to attempt to install them. I gave up 5 minutes after I opened it up. Promptly messaged Alex.

A little collage of before and after.


4b53eda0b8438c0bbe0576ef2a3ceb41.jpg
 
Solving the DIM reverse polarity mod............

Not completely happy with the brightness of the reverse polarity mod WITH the 12V mod, ordered these:

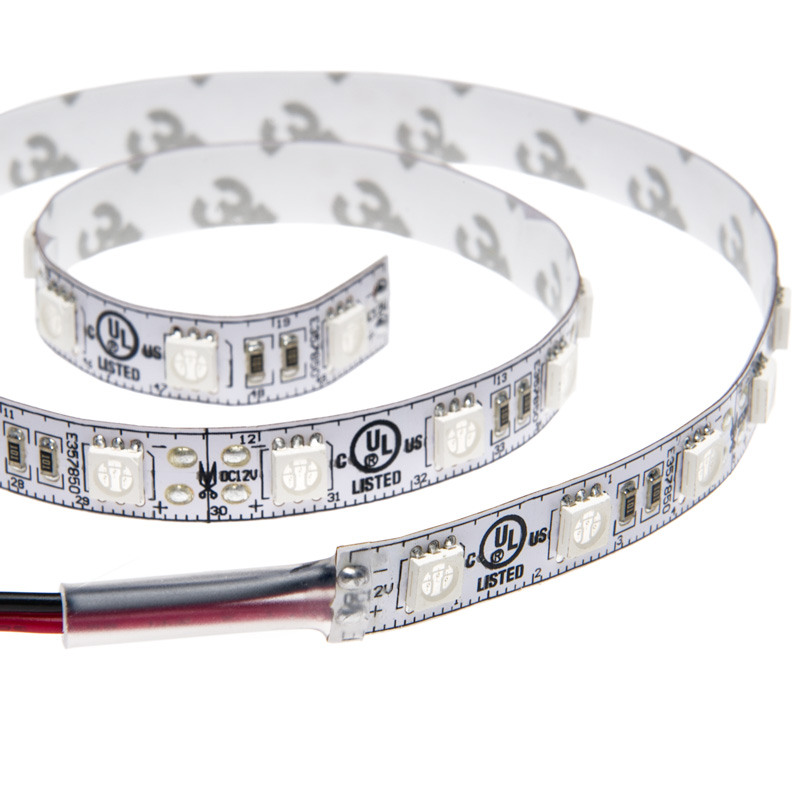
Even with the NEO bulbs, you only have 2 bulbs (LEDs) trying to light up the HVAC display. With these (pic below), you have 18 LEDs/ft. Our displays are 4 3/4" or about 5". That's about 7 LEDs per strip. What I had in mind was to put 2 strips in there. That's a total of 14 LEDs. These LEDs are also the brightness they had in the color/size we need. Will report back with Alex's findings.

nfls-x30x3-wht.jpg


linky: https://www.superbrightleds.com/mor...leds-per-foot-3-chip-5050-smd-leds/1465/3284/
 
anyone near the PNW (Washington) willing to do this mod for me if I send the cluster & HVAC to them?

I have no skill in the soldering world and really don't want to fk this up.
 
bumping up a old tired yet useful thread.


i love my cluster done by ^^^^^^ each and everyday i get into my truck.

now that it gets darker earlier in the winter time. i get to enjoy it more on the commute home!
 
i plan on making a new thread with all kinds of good info (pics, diagrams, required LED lists, etc) to be able to either help the DIYers swap or be able to easily arrange for me to swap stuff out for those that are a little too timid to take this on.
 
Last edited:
i plan on making a new thread with all kinds of good info (pics, diagrams, required LED lists, etc) to be able to either help the DIYers swap or be able to easily arrange for me to swap stuff out for those that are a little too timid to take this on.

you and alex should get together and do one. east vs west :)

you guys are both talented installers. Even with my years of soldering experience i didnt want to tackle this job with no prior experience or knowledge. these are just too small for a old man like me to dick around with hahahahaha
 
For everyone that hasn't seen what the HVAC screen looks like taken apart, here are some pics. These also show the process I used to take mine apart.

This is what you will see when you remove the circuit board from the housing. The pins you see going up to the lcd screen were run through the plastic and then soldered to the circuit board. The lcd is covered with some blue painters tape in this picture.


Here is what I did to get the pins for the lcd to separate from the plastic housing. This was done using a dremel with a small cutoff wheel and a small pair of snips. Take your time with this part as you can easily damage the pins for the lcd if you get in a hurry.


Here is the whole thing just for reference on where I cut it.


To get the plastic housing separated from the circuit board, there are a few screws that need to be removed on the backside of the board. Then you will need to tilt the plastic away from the board in the direction of the pins on the lcd. The pins will need to be bent a bit to get the lcd to dislodge from the plastic. There are also some leds for the airbag on/off indicators that will need to be bent in the same direction to get the plastic piece out. This is not a great picture for showing how I did this, but this is what you will end up with after you get the white plastic piece out.


There is a white piece of plastic that goes behind the screen and is used to diffuse the light.


Here is what the white plastic piece looks like after everything is taken apart.


I did leave as much plastic as I could where the pins for the lcd screen are so that they stay separated.


Here are some better pics that show how the bulbs are covered.


Here is the backside of the plastic. This is the side where the bulbs are inserted through the board.


It would take some work with a dremel to get an led strip in there but it could be done.

 
Last edited:
For everyone that hasn't seen what the HVAC screen looks like taken apart, here are some pics.

It would take some work with a dremel to get an led strip in there but it could be done.

Nice!! Alex [MENTION=63211]emelianenkov[/MENTION] is working on a "solution" to fit a couple of strips back there to accommodate more LEDs. Having 2 tiny bulbs/LEDs is pathetic. My brother's RAV4 radio suffers from the same "brightness". It's also pathetically dim.

We expect the following results:
blinded-by-the-light-427008.jpg
 
These all look great. I have all my stuff ordered and it should be here tomorrow.
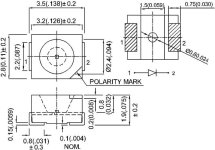
I have one simple question. I know the board has the arrow on it for the LED. How do you determine the direction on the LED itself? I have never looked at this type of LED before.

Thanks
 
see the attached photo taken from oznium's site that shows the polarity mark and how to be able to identify direction.

i highly suggest you take pictures of everything with a high resolution camera to be able to double check in case you have any questions during the job. do this BEFORE you take off any LEDs.
 

Attachments

  • W7G8.jpg
    W7G8.jpg
    58.7 KB · Views: 601

Members online

No members online now.

Forum statistics

Threads
278,316
Messages
3,554,121
Members
248,016
Latest member
Advally Service

Trending content

Back
Top