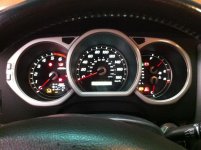
DIY: Interior LED swap (cluster, HVAC, switches, window, *steering wheel)

If you got the 12V Neo4 for the lights behind the HVAC LCD, the regular ones seem to light up, but very dim, and the HP ones don't light up at all.

This is because they are built for 12V and those two bulbs only receive 6-7V from the T4R. Why Toyota did this I don't know.

The way to fix this is to dismantle the bulb and change the resistor.

The bulb is glued in so I found the best way to get it out was by taking some pliers and carefully squeezing around the Neo plastic holder just below the LED. This should break the glue.

Then you can just undo the wire around the base of the Neo plastic holder and remove the LED/resistor/diode.

You'll see that on the anode side of the LED there is a resistor and on the cathode side there is a diode. All you need to do is unsolder the resistor and re-solder on a 100-180 ohm resistor. Takes a pretty steady hand (which I don't have, especially after a night of drinking) as these things are tiny but it can be done.

Just FYI, I have yet to actually do this myself (still waiting on the resistors I ordered) but in theory this should work.

Using Ohm's law (V=IR)

V(LED)=3.2 to 3.4V
V(Supply from T4R) = 6.3V (this is what my T4R was supplying when I tested it)
I = 20mA (reasonable current for these LED's)

V(required across resistor) = 6.3 - 3.3 = 3V
R (resistor) = V/I = 3V/0.02A = 150ohm

I think there is a bit of a voltage drop across the diode that is soldered to the cathode side of the LED so you may want to choose a bit lower resistor than 150ohm but anything in that 100-180ohm range should do the trick.

Best bet I would say is to connect 4 AA batteries in series (~6.4V) to test the LED with some different resistors in that 100-180ohm range to see what works best before you actually solder on a resistor.

Sorry for the long winded reply but hope this helps out some people as I imagine a lot are having the same problem as I did if they ordered the 12V Neo bulbs from superbrightled.com or somewhere similar.
 
Last edited:
Very helpful unclebeansie!!

For those that are thinking about doing this, here is something similar I used to test my LEDs: RadioShack® Enclosed 4 “AA” Battery Holder

pRS1C-2160160w345.jpg
 
If you got the 12V Neo4 for the lights behind the HVAC LCD, the regular ones seem to light up, but very dim, and the HP ones don't light up at all.

This is because they are built for 12V and those two bulbs only receive 6-7V from the T4R. Why Toyota did this I don't know.

The way to fix this is to dismantle the bulb and change the resistor.

The bulb is glued in so I found the best way to get it out was by taking some pliers and carefully squeezing around the Neo plastic holder just below the LED. This should break the glue.

Then you can just undo the wire around the base of the Neo plastic holder and remove the LED/resistor/diode.

You'll see that on the anode side of the LED there is a resistor and on the cathode side there is a diode. All you need to do is unsolder the resistor and re-solder on a 100-180 ohm resistor. Takes a pretty steady hand (which I don't have, especially after a night of drinking) as these things are tiny but it can be done.

Just FYI, I have yet to actually do this myself (still waiting on the resistors I ordered) but in theory this should work.

Using Ohm's law (V=IR)

V(LED)=3.2 to 3.4V
V(Supply from T4R) = 6.3V (this is what my T4R was supplying when I tested it)
I = 20mA (reasonable current for these LED's)

V(required across resistor) = 6.3 - 3.3 = 3V
R (resistor) = V/I = 3V/0.02A = 150ohm

I think there is a bit of a voltage drop across the diode that is soldered to the cathode side of the LED so you may want to choose a bit lower resistor than 150ohm but anything in that 100-180ohm range should do the trick.

Best bet I would say is to connect 4 AA batteries in series (~6.4V) to test the LED with some different resistors in that 100-180ohm range to see what works best before you actually solder on a resistor.

Sorry for the long winded reply but hope this helps out some people as I imagine a lot are having the same problem as I did if they ordered the 12V Neo bulbs from superbrightled.com or somewhere similar.
Thanks for the info I have a bunch of the 470 ohm resistors that are for the reg 3mm LED's. Anyways let me know if it worked out for you? I had to go back to the reg ones and it's just not bright enough, also the blue put's out a lower amount of light as is.
Have you seen or know anything about changing over the factory radio? I have the 6 disc non JBL one I decided to save a few bucks and keep it. The thing works fine hooked up 2 amp's to it, and did all the speakers and a sub. I just want to get rid of that orange color. I still need to do the door and steering wheel.
 
People need to start totalling more 4Runners! I'm having a hell of a time finding a new set of steering wheel controls. I hate having to move my arm over a foot and a half to change the radio. XD.
 
If anyone can find a way to get the instrument cluster to stay "full bright" when your lights are on, that would be awesome! All Lexus cars and my brother's RAV4 have this, but 4Runners don't (never understood why).

Lights on, instrument cluster lights dim. (on the dimmer switch, position right before it clicks for full brightness)
55df6f7e.jpg~original


Lights on, instrument lights on "full bright" (on the dimmer switch, clicked all the way to the "on" position)
82cee1aa.jpg~original


Anyway, I'll still waiting on darkie to "open up shop" and offer his services :hungry:
 
So I changed the LED's in the gauge cluster a while ago (thanks Darkie for all the info) and have been having some trouble with one of the lights (left most speedometer illumination).

When I first start it or turn the lights on, the LED comes on as it should however after about 5-10 minutes it turns off...

At first I thought maybe it was a bad solder so I re-soldered, tested it with a couple AA batteries and re-installed. Same problem still...

Next I just de-soldered the problem LED and soldered on a new one, tested it to make sure it worked then re-installed. Same problem still...

Any ideas on why this LED is turning on fine at first but then turns off 5-10min later?
 
So I changed the LED's in the gauge cluster a while ago (thanks Darkie for all the info) and have been having some trouble with one of the lights (left most speedometer illumination).

When I first start it or turn the lights on, the LED comes on as it should however after about 5-10 minutes it turns off...

At first I thought maybe it was a bad solder so I re-soldered, tested it with a couple AA batteries and re-installed. Same problem still...

Next I just de-soldered the problem LED and soldered on a new one, tested it to make sure it worked then re-installed. Same problem still...

Any ideas on why this LED is turning on fine at first but then turns off 5-10min later?

I have that same problem, but now that left-most LED doesn't even light up at all! Mine worked at first, then it started flickering a day or two after I installed it, and now it just doesn't light at all... Weird
 
So I changed the LED's in the gauge cluster a while ago (thanks Darkie for all the info) and have been having some trouble with one of the lights (left most speedometer illumination).

When I first start it or turn the lights on, the LED comes on as it should however after about 5-10 minutes it turns off...

At first I thought maybe it was a bad solder so I re-soldered, tested it with a couple AA batteries and re-installed. Same problem still...

Next I just de-soldered the problem LED and soldered on a new one, tested it to make sure it worked then re-installed. Same problem still...

Any ideas on why this LED is turning on fine at first but then turns off 5-10min later?

Haven't seen this issue before. Have you checked to see if the board is still supplying the LED with power after it turns off?

I have that same problem, but now that left-most LED doesn't even light up at all! Mine worked at first, then it started flickering a day or two after I installed it, and now it just doesn't light at all... Weird

Yours sounds like a blown LED. Try and swap them to see if it fixes it.
 
as an FYI if anyone is planning on doing the radio i count you need at least 66 leds for the radio alone, to replace the amber behind the screen and the buttons... lotsa work.. will make a post when i am done!!
 
as an FYI if anyone is planning on doing the radio i count you need at least 66 leds for the radio alone, to replace the amber behind the screen and the buttons... lotsa work.. will make a post when i am done!!
I would really like to know what you run into with the radio. I have changed out just about all I wanted but haven't touched the stereo, not sure that I will? But take picks if you can would love to see what is in there.
 
Got 2 of the size 74 wedge LED bulbs from superbrightleds.com and installed them yesterday. Taking out the factory bulb is a pain, but the swap took about 10 minutes, not too bad!

I'll post a pictute later because my phone won't let me paste the link in...
 
Last edited:
This swap is just off the chain!!!:thumb3::thumb3:

I wish I had your patience and skills to swap mine. I absolutely hate the OEM faded yellow look of the dash lights..........

Any chance you could fly out to Canada and do mine? ;)
 
This swap is just off the chain!!!:thumb3::thumb3:

I wish I had your patience and skills to swap mine. I absolutely hate the OEM faded yellow look of the dash lights..........

Any chance you could fly out to Canada and do mine? ;)

NOW HOLD ON JUSTA MINUTE . . . it Darkie is flying anywhere to do a swap it's the Sunny WARM SF Bay Area to do mine first. :lookout:

Every morning when those orange lights come on I think DANG IT I wish I knew how to solder.
 
If you got the 12V Neo4 for the lights behind the HVAC LCD, the regular ones seem to light up, but very dim, and the HP ones don't light up at all.

This is because they are built for 12V and those two bulbs only receive 6-7V from the T4R. Why Toyota did this I don't know.

The way to fix this is to dismantle the bulb and change the resistor.

The bulb is glued in so I found the best way to get it out was by taking some pliers and carefully squeezing around the Neo plastic holder just below the LED. This should break the glue.

Then you can just undo the wire around the base of the Neo plastic holder and remove the LED/resistor/diode.

You'll see that on the anode side of the LED there is a resistor and on the cathode side there is a diode. All you need to do is unsolder the resistor and re-solder on a 100-180 ohm resistor. Takes a pretty steady hand (which I don't have, especially after a night of drinking) as these things are tiny but it can be done.

Just FYI, I have yet to actually do this myself (still waiting on the resistors I ordered) but in theory this should work.

Using Ohm's law (V=IR)

V(LED)=3.2 to 3.4V
V(Supply from T4R) = 6.3V (this is what my T4R was supplying when I tested it)
I = 20mA (reasonable current for these LED's)

V(required across resistor) = 6.3 - 3.3 = 3V
R (resistor) = V/I = 3V/0.02A = 150ohm

I think there is a bit of a voltage drop across the diode that is soldered to the cathode side of the LED so you may want to choose a bit lower resistor than 150ohm but anything in that 100-180ohm range should do the trick.

Best bet I would say is to connect 4 AA batteries in series (~6.4V) to test the LED with some different resistors in that 100-180ohm range to see what works best before you actually solder on a resistor.

Sorry for the long winded reply but hope this helps out some people as I imagine a lot are having the same problem as I did if they ordered the 12V Neo bulbs from superbrightled.com or somewhere similar.


Finally got around to doing this...

I found that a 50ohm resistor worked best with the blue lights I had for the HVAC LCD.

Tried out 180, 150 and 100ohm resistors first but they all seemed just a bit too dim so settled on 50ohm. May be different though for different colour lights and how bright you want them.
 
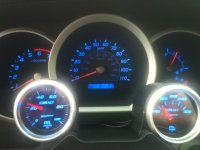
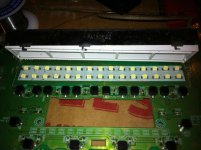
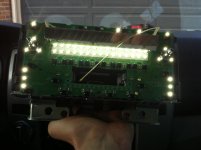
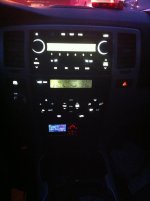
did the led swap,
i used 35 leds for the guage but wish i had about 40, 66 leds for the radio, they are smaller then the plcc2 but i used plcc2 and they worked great. heres some pics.

and does anyone know what i did to **** up the lcd display and how i fix it?
 

Attachments

  • IMG_1434.jpg
    IMG_1434.jpg
    129 KB · Views: 1,087
  • IMG_1442.jpg
    IMG_1442.jpg
    128.8 KB · Views: 1,080
  • IMG_1447.jpg
    IMG_1447.jpg
    139.1 KB · Views: 1,088
  • IMG_1450.jpg
    IMG_1450.jpg
    135.2 KB · Views: 1,060
  • IMG_1448.jpg
    IMG_1448.jpg
    179.8 KB · Views: 1,078
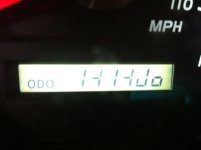
I have officially confirmed, last night, that not only do the LEDs work at 110, but my speedometer is absolutely accurate!... At 110.
 

Members online

Forum statistics

Threads
278,316
Messages
3,554,121
Members
248,016
Latest member
Advally Service

Trending content

Back
Top