Hi-desert Cheapskate build thread

Attachments

  • A1810532-EF13-4841-A767-302B7AADBD0E.jpg
    A1810532-EF13-4841-A767-302B7AADBD0E.jpg
    129.4 KB · Views: 1,040
Last edited:
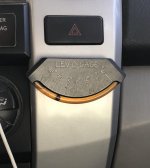
Almost forgot about this easy addition. Lev-O-gage. This was something I kept when I sold my old square body GMC High Sierra. I sticky back hook and looped it on there. I’ve seen guys put em on the B-pillar too.
 

Attachments

  • 16FC9D57-BA1D-489B-B4C7-4D1CB432586A.jpg
    16FC9D57-BA1D-489B-B4C7-4D1CB432586A.jpg
    115.7 KB · Views: 991
Last edited:
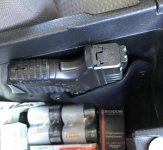
Kydex holster

Made a holster inside the center console a few years ago out of .95 Kydex plastic for my Springfield XD-S .45
It should go without saying. Be sure to check your local laws in regards to concealed carry of a firearm in your vehicle if doing a mod like this.
 

Attachments

  • 734672B4-ECA7-44D2-B14E-FA897FF66026.jpg
    734672B4-ECA7-44D2-B14E-FA897FF66026.jpg
    121.8 KB · Views: 819
Last edited:
The lighting has gone through a few changes.

Currently I have Auxbeam FT-1 H11 low beams, Auxbeam FT-1 9005 high beams and Sealight 3000k 9006 fog lights.
I’m researching new H11 low beams as I found out that these H11 LEDs are not legal according to NHTSA. Fog lights are going away once my bumper kit arrives.

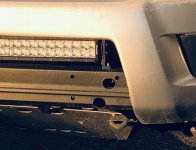
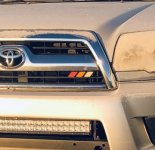
I mounted a 32” curved light bar to the top of the crash bar in the lower grille opening.

I bought the 40” light bar new in box from my buddy for forty bucks. I made brackets to mount it to the roof rack.

I bought these cheap GS Power ditch light brackets for a Tacoma off of Amazon along with some cheap Nilight light pods. The fit is decent.


You have any pictures of how you mounted the light bar to the front cross member? I've got a Stedi Light Bar and want to do the same!
 
You have any pictures of how you mounted the light bar to the front cross member? I've got a Stedi Light Bar and want to do the same!

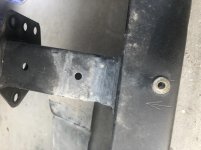
I used a right angle drill, a uni-bit and some rivnuts or nutserts or whatever you prefer to call them (shown in previous post #32)into the top of the crossmember. Pretty straightforward if you have access to this type of hardware.
 

Attachments

  • 8558B834-CAE4-4465-B108-807F73566528.jpg
    8558B834-CAE4-4465-B108-807F73566528.jpg
    108.1 KB · Views: 1,015
  • B9B01D90-A0E7-43CB-B4F3-AF495E183856.jpeg
    B9B01D90-A0E7-43CB-B4F3-AF495E183856.jpeg
    80.3 KB · Views: 994
Last edited:
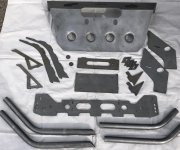
True North Fabrication DIY kit

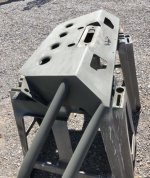
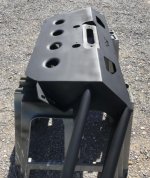
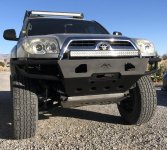
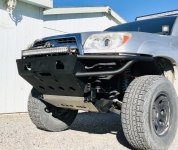
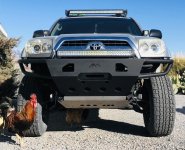
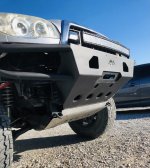
Started my True North bumper build.
 

Attachments

  • F819FB13-3D00-4CAB-9F10-940CF0EA8BD4.jpg
    F819FB13-3D00-4CAB-9F10-940CF0EA8BD4.jpg
    124 KB · Views: 854
  • 7837C99D-95CF-4908-B84F-9D133E4F0BD2.jpg
    7837C99D-95CF-4908-B84F-9D133E4F0BD2.jpg
    66.8 KB · Views: 835
  • F1052C10-8F7F-4F5C-AF20-06EA9E421331.jpg
    F1052C10-8F7F-4F5C-AF20-06EA9E421331.jpg
    62.6 KB · Views: 875
  • E377DA51-A43C-4CAD-AA1E-F811A5340ADB.jpg
    E377DA51-A43C-4CAD-AA1E-F811A5340ADB.jpg
    136.2 KB · Views: 859
Last edited:
More angles.
 

Attachments

  • F0E0B00F-514F-41B8-9887-CE03A8747FBA.jpg
    F0E0B00F-514F-41B8-9887-CE03A8747FBA.jpg
    135 KB · Views: 1,046
  • 2051F27E-C27A-47D3-BB1E-661C0AE2FBE1.jpg
    2051F27E-C27A-47D3-BB1E-661C0AE2FBE1.jpg
    138.1 KB · Views: 1,037
  • 6834327B-B57B-4425-A945-1899B1EA7F7B.jpg
    6834327B-B57B-4425-A945-1899B1EA7F7B.jpg
    132.6 KB · Views: 1,021
Last edited:
Nice build! I especially like that True North bumper and definitely like their slim rear bumper!

On the cowl snorkel, might try spraying some dry graphite lube on it to quiet it down.
 
Nice build! I especially like that True North bumper and definitely like their slim rear bumper!

On the cowl snorkel, might try spraying some dry graphite lube on it to quiet it down.

Thanks man, yeah I love how the bumper turned out. I do like the rear bumper kit they make but I’m gonna go in a different direction out back. Seeing the minimalist bumpers some of the other members on here have made lately has me inspired. Both [MENTION=83833]thegame7[/MENTION] and [MENTION=122249]originalg00kster[/MENTION] have built some awesome rear bumpers lately. I’m thinking something along those lines with a swing out similar to what @Porcupine82 had made. The wife informed me she wants her new kitchen before I get to do anything else besides maintenance to the T4R so it’ll be a while.

I’ll have to try some graphite for now but the real issue is that I’m a dumbass and used too large of a hole saw. Measure twice cut once as they say. If I can find a softer weatherstripping that’s thin enough to fill in the gap it’ll be ok.

 
Last edited:
Thanks man, yeah I love how the bumper turned out. I do like the rear bumper kit they make but I’m gonna go in a different direction out back. Seeing the minimalist bumpers some of the other members on here have made lately has me inspired. Both [MENTION=83833]thegame7[/MENTION] and [MENTION=122249]originalg00kster[/MENTION] have built some awesome rear bumpers lately. I’m thinking something along those lines with a swing out similar to what @Porcupine82 had made. The wife informed me she wants her new kitchen before I get to do anything else besides maintenance to the T4R so it’ll be a while.

I’ll have to try some graphite for now but the real issue is that I’m a dumbass and used too large of a hole saw. Measure twice cut once as they say. If I can find a softer weatherstripping that’s thin enough to fill in the gap it’ll be ok.

I’ll have to check out those other bumpers. I prefer the minimalist but functional bumpers. I started building a Coastal WIY rear bumper but even without the tire and ladder swing outs, it’s very heavy. Decisions, decisions.
 
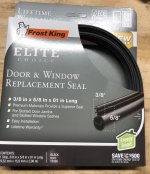
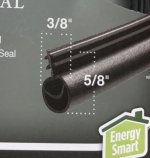
Found this weatherstripping at the Depot. It fills the gap that was left between the firewall and the pvc pipe I used for my intake. Yes, I cut the opening too large. Anyways this stuff holds tight due to ridges and is soft and pliable. No more squeaky intake on cold mornings.
 

Attachments

  • 6151BFC2-E367-4C67-BEB0-1AF6FD44F62A.jpg
    6151BFC2-E367-4C67-BEB0-1AF6FD44F62A.jpg
    126.1 KB · Views: 982
Found this weatherstripping at the Depot. It fills the gap that was left between the firewall and the pvc pipe I used for my intake. Yes, I cut the opening too large. Anyways this stuff holds tight due to ridges and is soft and pliable. No more squeaky intake on cold mornings.

use a heat gun to soften it up before you mold it into the hole. it'll help out a lot.
 
use a heat gun to soften it up before you mold it into the hole. it'll help out a lot.

As soon as I replace my heat gun lol.
The stuff I used first was automotive door edge molding that had the adhesive in it. I got it warm with a Mapp gas torch and it molded ok. It just wasn’t thick enough to fill the gap.

The new weatherstripping is pliable and the barbs on the edge hold it nicely to the firewall. It’s a cheap temporary fix.
 

Attachments

  • 6CABE535-15C4-4247-923B-DBD9C425279B.jpeg
    6CABE535-15C4-4247-923B-DBD9C425279B.jpeg
    77.7 KB · Views: 970
Last edited:
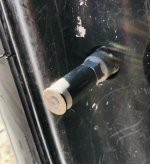
Made these a while back. Used 5minute epoxy to glue plastic valve stem caps into some spent .45 acp shells.
 

Attachments

  • 8F8ECE74-6DDD-4C69-9730-F289272718A1.jpg
    8F8ECE74-6DDD-4C69-9730-F289272718A1.jpg
    118 KB · Views: 964
Great build so far and love the dark window tint.

Do you know what percentage tint you put on is? Did they tint over the existing factory tint?

Thinking of having mine re-tinted darker.

Thanks much.

metramm
 
Great build so far and love the dark window tint.

Do you know what percentage tint you put on is? Did they tint over the existing factory tint?

Thinking of having mine re-tinted darker.

Thanks much.

metramm

You need to check the laws in your state for tinting windows, it varies from state to state, in my state it also varies for the rearward windows and the front driver's/passenger's windows.
 
Great build so far and love the dark window tint.

Do you know what percentage tint you put on is? Did they tint over the existing factory tint?

Thinking of having mine re-tinted darker.

Thanks much.

metramm

I’m sorry I don’t know the exact percentage. I had the tint done in 2008. It was what the legal limit in Las Vegas was. Maybe 30% IDK. They did tint over the factory rear tint. I also had a strip at the top of the windshield done too.

Edit: 35% is the limit for the front windows and no limit on rear window tint in NV. 35% is what all tint is.

Like [MENTION=149207]AuSeeker[/MENTION] mentioned, check your local laws.
 
Last edited:

Members online

Forum statistics

Threads
278,310
Messages
3,554,080
Members
248,016
Latest member
Advally Service

Trending content

Back
Top