Ruby Tuesday - rad4runner's Mods and Restoration

so it's a simple plug and play. ...I have Hellas now on silverstar halogen

Yup.
Those Hella housings are good, too. My previous were less expensive Autopals. However, the brighter Sylvania's do not last very long**, and LED's use less power...

** the company admits that...
According to Sylvania:
"Since our SilverStar(r) ULTRA
headlights are up to 50% brighter than standard halogen, they will have
a shorter life span when compared to our other products. Part number
9005SU will last for approximately 125 hours of "on time", 200 hours for
part 9006SU."
 
Toyota Dealership Screwed Up - Potentially-Deadly Issue

Why I do Not Trust Others Working on my Vehicle....
Yesterday, our friend picked us up from the bus terminal. On the way to her place we heard a rhythmic clunking sound emanating from the driver's side wheel well / transmission. It was audible only when one eases up on the gas pedal; stopped when accelerating.
I inspected the suspension, axle and CV joint/boot rotation and brake drag. I even shook the wheels while jacked up, and felt by hand if lug nuts were loose.. No finding.
Finally today, on our way to Costco, we noticed that the sound was finally audible even during acceleration. Stopping at Costo, we found this. I was able to loosen all lug nuts with my bare hands. WTF?
I think the lug nuts were tight enough that during earlier inspection checking with my bare hands did not loosen them, but further driving finally did.
Even if you trust your mechanic, FREAKING VERIFY that he did the job well.

To make matters worse, IF my friend brought the vehicle to the dealership, the mechanic would most likely NOT ADMIT the that the mech screwed up, and would have covered up the real problem by telling my friend the vehicle had a bad CV joint - which would cost $500 to $800 to fix.

Video here.
 
Beware the Beck-Arnley Ignition Switch PN 201-1410

Beware the Beck-Arnley Ignition Switch PN 201-1410

Brand-new part fell apart during installation. As I was inserting into its place, the white cap popped out of the housing and the contacts, springs, and a ball bearing flew all over the place.

The white plastic cap pops into place. It may have been designed well, but I believe the assembly process was poorly controlled. Apparently the assembly was not pressed together properly such that the hooks did not engage completely.

I could have re-assembled it but without any documentation, I would not know if I'm missing any parts. I called Beck-Arnley and explained what happened but was told that because I did not buy it from its distributor, it would not cover the part under any warranty.

I bought the part in 2012 thinking it would solve my intermittent click -no-crank issue but found out the real cause of my click-only but no-crank before I had the chance to install the switch. It sat in storage for a few years.

BeckArnley_Fell_Apart_zpsjfvhhgf7.jpg~original


LESSON LEARNT: For parts essential to safe and effective operation of the vehicle, go OEM!

I ordered Toyota Part No. 8445035060 (SWITCH ASSY, IGNITION OR STARTER) from Toyota Parts - Genuine OEM Toyota Parts & Accessories Online. It has the best deal among the three online stores I checked today, and much less expensive than the $135 dealer price.
 
Last edited:
Door Panels Replaced with Low-Maintenance Vinyl, Hidden Fasteners Deleted

Hi guys,
I detest hidden fasteners and dust-trapping velour on body panels so here goes...
Replacing stock hidden fasteners:
20151201_144157_zpsbzmksr08.jpg~original


Filed corners into hole to fit the expansion/nylon nut, and keep it from rotating
20151201_144213_zps0ou3z8ce.jpg~original


Nylon nut attached:
20151201_144219_zpsjyxgpv2p.jpg~original

I purchased nylon nuts for 7mmx7mm hole and #8 finishing screws from www.clipsandfasteners.com.

I replaced worn out foam in window sill cover cushion with 1/8-inch thick Ensolite:
20161012_172116_zpsiaqh76gw.jpg~original


I removed worn out foam and padded with 1/8-inch Ensolite, and wrapped that with utilitarian, wipe-down black vinyl (used black vinyl because the interior is already a mix of black and brown.
I got remnant of UV-resistant vinyl for $9.00 per yard at UFO Fabrics.
I used 3M Topliner spray adhesive to hold Ensolite on board. And the edges of the vinyl wrap on the backside of the board. I did not make vinyl wrap stick on the Ensoite.
2015-12-16%2016.46.45_zpsxsqgjk1a.jpg~original

Driver's side panel was replaced with foam-core poster board just because I had some lying around.

Top door panel and integrated window sill cover looked factory, but notice "Brown" noted under the carpet wrap of the bottom panel. Could it be possible that these things were customized here in the US, or they used English markings in Japan factory?
20161014_150630_zpszpnyxfav.jpg~original


Biggest challenge I think is getting a clean wrap around sharp corners.
20161017_133512_zpsv1ltd3ah.jpg~original

20161017_133523_zpsghzm3uz5.jpg~original


Rounded Corners aren't too bad:
20161016_164643_zpsmrt1zyay.jpg~original


BEFORE: Dated, dust-collecting velour/carpet material on door panel and door panel attached to window sill cover, making it a PITA to work on.
2015-12-16%2016.46.25_zpsgoc8hwiv.jpg~original


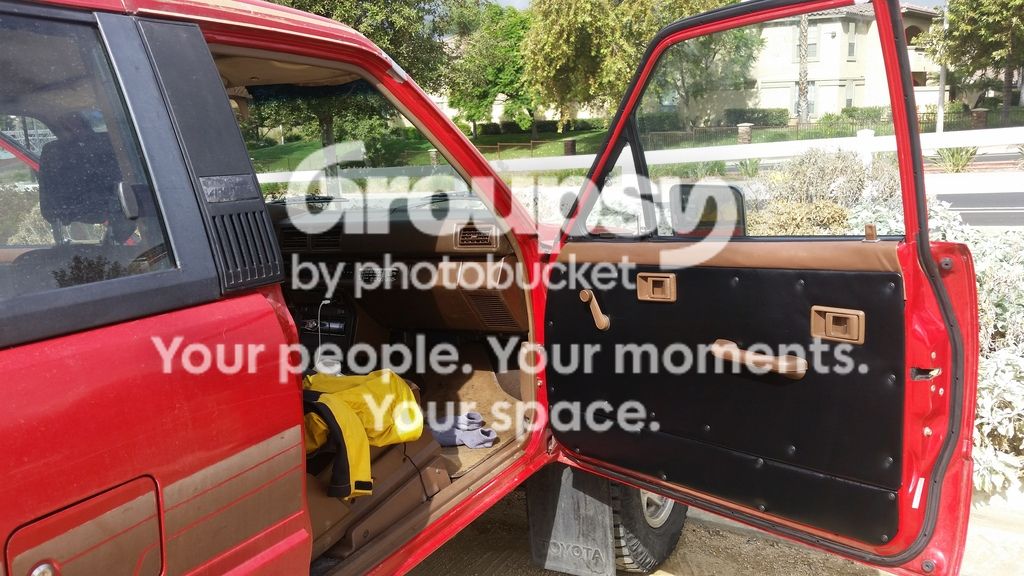
AFTER: Utilitarian black vinyl-clad door panel with simple screw fasteners. Now allows spray and wipe maintenance. Door panel and window sill cover independent of each other:
20161012_183733_zpsug78mac6.jpg~original

20161017_113133_zps1jpam4el.jpg~original

20161017_113152_zpslopiirzz.jpg~original


Now, because of easy access/removal/install, I can easily add my mesh pockets in the future.
 
Those panels look amazing man!
Thank you, Sir!
I'm really pleased at how much cleaner they are compared to the original velour.
If only I had dark grey or black handles :)
Would also like to replace the carpet with vinyl like Daniel (Honduras Coffee Mission) did. Carpet just does not belong on a truck that is really used as a truck.
14608837_10154013757632194_7553359374450706187_o.jpg
 
Last edited:
Cooling System: "Heavy-Duty" Flush

"Heavy-Duty" Flush, in Prestone's words...
Drained system and thoroughly rinsed. Refilled with plain water and flushing solution. Drove from Riverside County to Anza-Borrego desert, to camp in Salton Sea, then finally to Salvation Mountain and Slab City.
Screenshot_2016-10-24-22-34-19_1477373831601_zpshrojyjyk.jpg~original


Memorial for friend who passed away while driving out of the Anza-Borrego desert after easy exploration:
80-14712853_10154060334167194_1776045608506124934_o_a30bae9ced0f5de589397edb36f56567bebf393b.jpg~original


Screenshot_2016-10-24-22-35-14_1477373869392_zpsivgn2skh.jpg~original


Salt Creek Primitive camp on northeast shore of Salton Sea I had the whole beach to myself :)
salt_zps2dyi9q8e.jpg~original


Screenshot_2016-10-24-22-35-53_1477373895463_zpsnthyvwxk.jpg~original


Ruby Tuesday at Salvation Mountain...
80-14715087_10154060176742194_26239610151756700_o_zpsvlzutwdy_0f529638a0a5c6007c63585b3d9d43bc48e79864.jpg~original


Upon return home, drained,thoroughly rinsed, drained, and did the following:

Removed thermostat, cleaned thermostat housing, cold start injector timer switch, coolant temp sensor (ECU), temp gage sender, and the coolant temp sensing vacuum switching valve (I'll research official name later). Installed 2-stage thermostat. Also tested the CSI timer switch (brown connector) and coolant temp sensor (green connector).

Thermostat housing has lots of scaling. Picture shows after I soaked it in vinegar and steel-brushed. Although not that critical, I think that every little thing we do to help the cooling system is good.
20161024_114247_zpsqgjcvedd.jpg~original


Scale on threads for CSI timer switch. Contact between clean bare metal of CSI timer switch housing and shiny bare metal of engine block is critical because CSI timer switch provides ground to CSI in order to turn it on.
80-20161024_105753_1477376473633_zpsu0j7eitl_9c80ba1fd49682fbca2da7fd44f8f7b5b25edb96.jpg~original


Location of temp-sensing VSV and sensors:
Also shows shiny, silver metal on threads for CSI timer.
Locations_zpsxroyxyak.jpg~original


Temp-sensing vacuum switching valve:
20161024_110630_zpsqqdzjktc.jpg~original


20161024_110616_zpskjvodmya.jpg~original


20161024_110810_zpspl3zakdr.jpg~original

Badly scaled. I think this does not allow it to read temperature accurately. May contribute to hard cold start. (Would appreciate info on this).

AC Shut-off Temp sender ( Not sure of official name) also badly scaled:
20161024_120813_zpsunywyuwz.jpg~original


Cleaned:
20161024_112759_zpskdylsriv.jpg~original


Replaced original (left) thermostat with the 2-stage thermostat from LC Engineering. According to LCE, TAMA makes the 2-stage thermostat for Toyota. I paid $40 plus shipping for this. Other stores may carry same TAMA P/N for less.
20161024_115642_zpsiifkbsyo.jpg~original


TAKE-AWAYS:
I think the following would help with my hard cold stars:
Thorough cleaning of the CSI timer switch housing and the receiving thread because that's where CSI timer switch grounds on terminal of the CSI in order to actuate it.
Thorough cleaning of the temp-sensing vacuum switching valve because it may affect idle. Would appreciate correction if I'm wrong.
Chemical flushing of cooling system alone may not be enough. Best to mechanically clean (steel-brush, etc) accessible parts.

CONCERN:
I tested the CSI timer switch:
80-check_csi_timer_switch_zpsrqtonn3r_83f161638f157a181da1c1a1b84bf99bf8fd3ac2.jpg~original

STA - STJ, STA-GND readings were good.
However, FSM does not list spec for STJ to GROUND. This is actually the more critical spec because CSI timer switch grounds negative side of CSI during cold cranking in order to activate the CSI. Anyway I measured it at 68ºF and STJ to GND read 16 ohms, but later after sitting around, it read 125 ohms! In the morning before I re-installed it it read around 40ohms. This unit could be going bad.

WOULD APPRECIATE INFO ON CORRECT SPEC FOR STJ TO GROUND ON CSI TIMER SWITCH.

 
Last edited:
Installed Brighter Dome Light

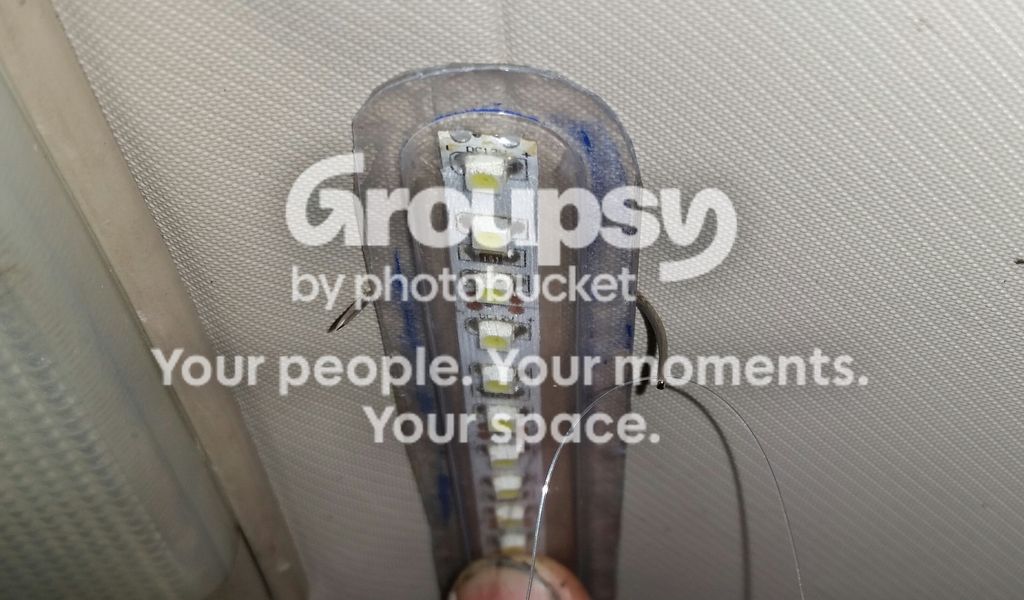
Even an LED dome light bulb replacement is anemic and I happen to have an extra LED array so:

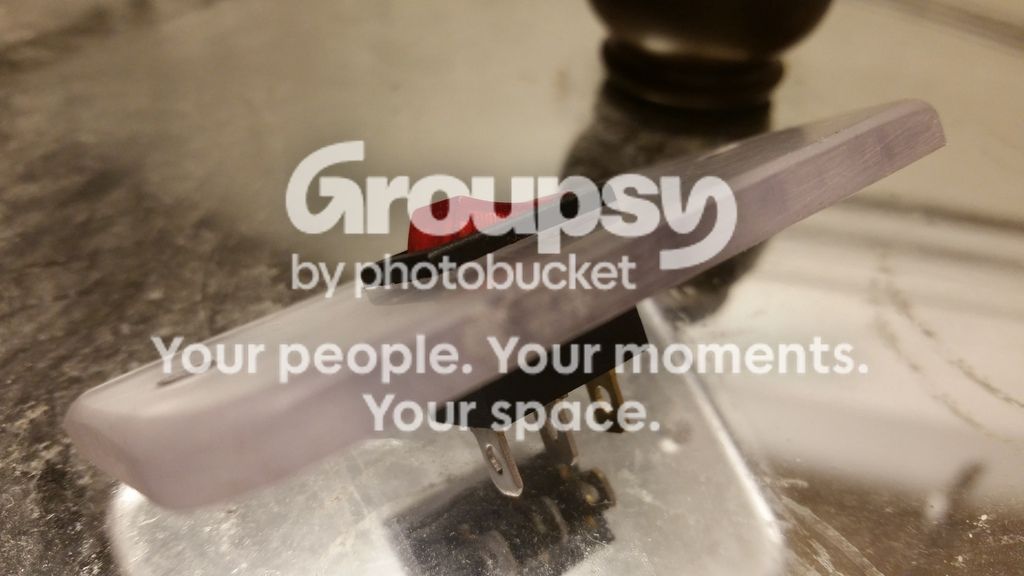
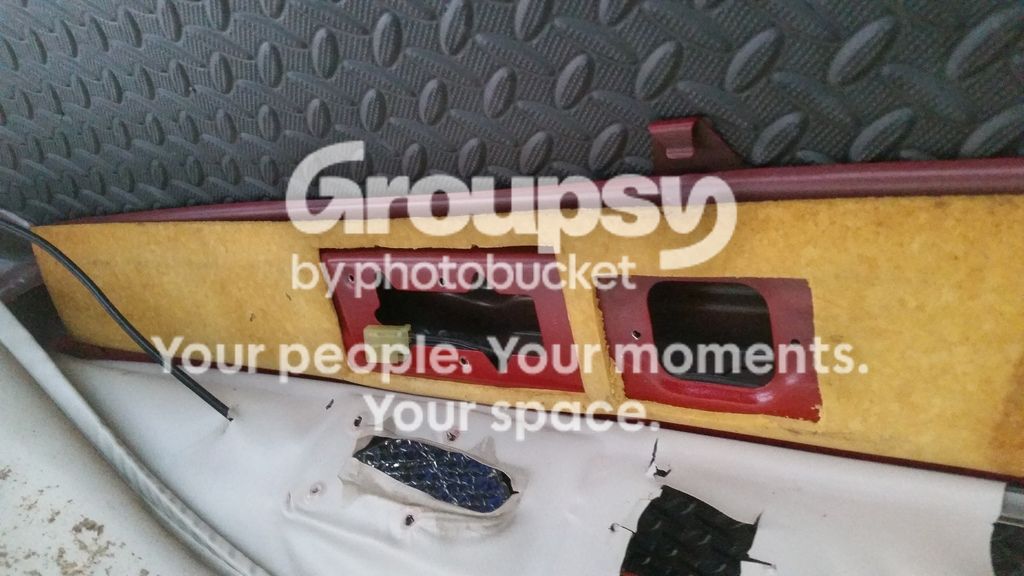
Made switch plate out of polycarbonate...

20161019_162408_zpstv1ovoko.jpg

20161019_221445-1_zps8xtcojzu.jpg

20161019_221039_zps7xygicxu.jpg


Made opening on right for the switch plate (on left is location of stock dome light):
20161019_172459_zpsh66qla45.jpg


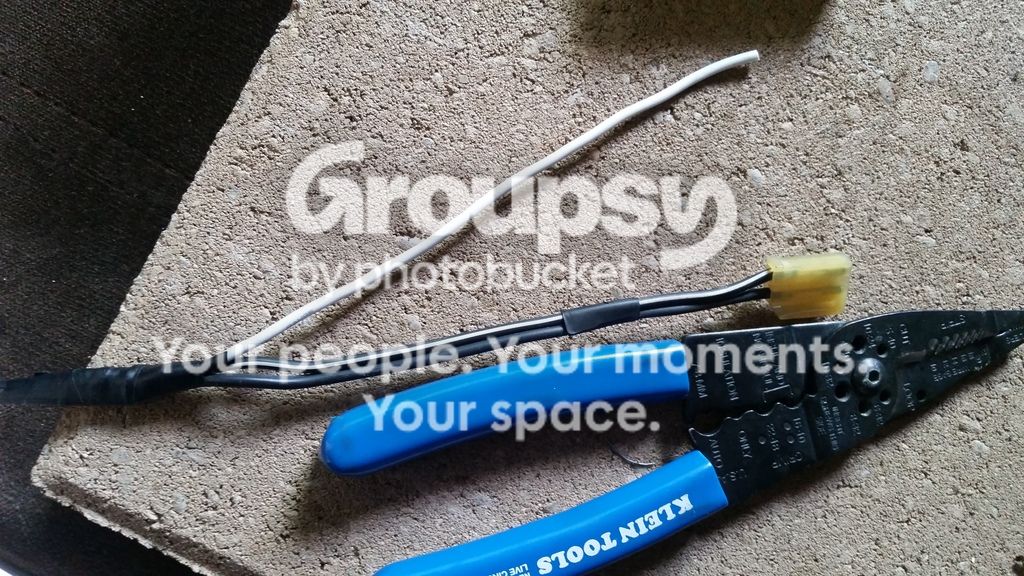
Tapped off the constant 12V line of the stock dome light wiring (black with white stripe):
20161020_130217_zps0j2iknv8.jpg


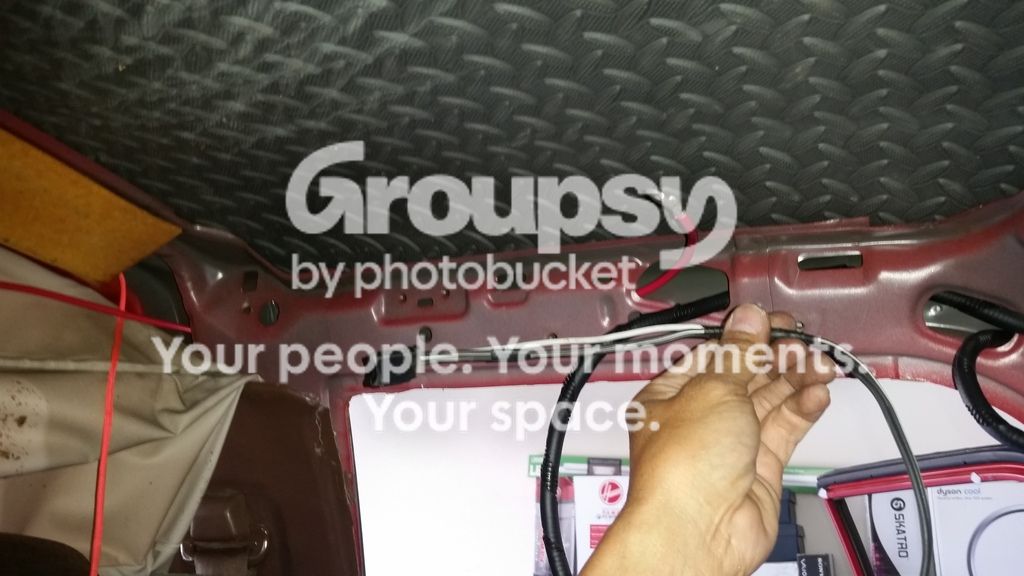
I had to pull stock wiring out of its run to facilitate splicing/soldering. (Ignore the red wire. I just used it as fish-tape.)
20161020_130713_zps7gq2k3qd.jpg


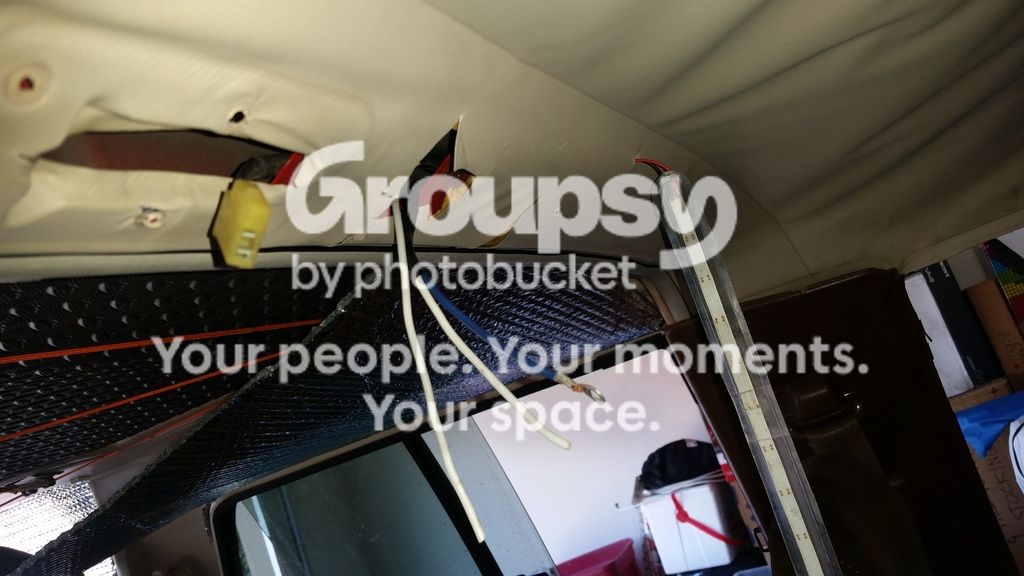
Ran wires back. Blue wire would be screwed into body ground and connected to negative side of LED array.
20161020_140452_zpsdt1gdlj4.jpg


Switch plate installed. One white wire is tapped off from constant 12V. The other goes to positive side of LED array.
20161114_105303-1-1_1479171955726_zpslodsez7e.jpg

Stock dome light was reconnected and re-installed.

"Sewed" on the LED array with curved needle and fine nylon fishing line:
20161114_161526-1_zpsucfw7chu.jpg


20161114_163520_zpsg0c1wgpz.jpg

Yeah, some bad LED's on the array, and not very bright. What do you expect... I bought it here - LOL!
72738_446303727193_3823138_n.jpg


Anyway, I wired it so I can quickly replace it with a brighter array/bulb when I find one.

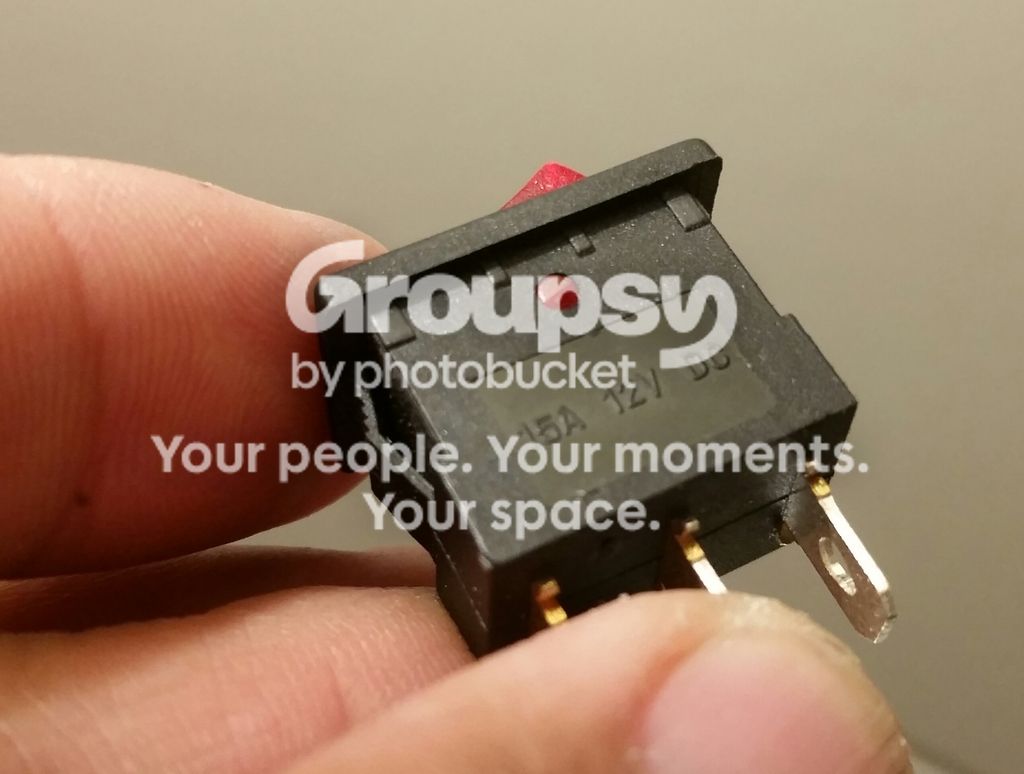
This is simply an on-off affair because I could not readily find a ON-Center OFF- ON rocker switch.
When I get the brighter bulb/array, stock dome light will be replaced with red LED for subtle lighting that will help preserve night vision.

No, you are not tripping; I really replaced the crumbling, dusty, messy headliner insulation with "Best Step" diamond-plate pattern anti-fatigue mat like I did with headliner on my cap.
20161019_172945_zpsbm55lxto.jpg

When I get the time, I'll stick vibration dampener on roof, too.
.
.
.
 
Last edited:
Replaced Windshield, POR-15 Rust-proofing

Well... Windshield leaked again and Safelite worked with me under warranty.
Thanks, Wallytoo and Adventure Copan for the inputs on POR-15.

Adhesive was not sticking to the spray paint- repaired surfaces:
20161108_132809_zpsj2wxtji5.jpg~original

80-20161108_133837_zpsbogcrzeb_f9c64a97b43bec6767031687eac7f8460ed0b0cb.jpg~original


As you can see, the rusted spots are where clips for the stupid chrome trim trapped dirt and moisture. That is why I detest the chrome trim with a passion!

This time I used POR-15 Starter Kit:
I removed all finish and most rust on the pinch weld and its sidewalls with a steel-brush.
20161109_154258_zpsgswdrzfy.jpg~original

20161109_154305_zpsptoz4r2j.jpg~original


Steel brush does not completely remove loose (brown) rust (merely glazes over it and makes it seems like you had hit bare metal) so I used tiny grinding wheels (part of Dremel-style kit) that I attached to my drill. This removed all the loose, brown rust, and I was left with tiny spots of grey metal where there was pitting. I think POR-15 would take care of sealing that.
A video of the pinch weld in process. I would further grind the brown, loose rust from pitted areas.


I used POR degreaser and then Metal Prep, then applied 3 coats of POR-15 (waited for each coat to get tacky before applying next coat). I was too busy to take picture of the POR'ed pinch weld and wall, but here's one already with bead of Sika brand windshield adhesive on it...
20161111_133507_zpsn91ju7la.jpg~original


A picture of bead being applied to bottom pinch weld. Bead is pretty thick so I hope that helps with sealing.
20161111_133416_zpsqrwfl66a.jpg~original

20161111_133501_zpsrme1fxrt.jpg~original


Glass now installed:
20161111_134307_zpsh4nqkm5c.jpg~original


Adhesive squeeze-out completely fills underneath edge of the glass.
20161111_133846_zpsg5jpnshi.jpg~original


NEXT STEPS:
Prime the POR-treated area inside the gap, feather the POR and paint on the lip, then repaint.
 
Last edited:
You have done a lot of work to your truck it looks really good. I am not a fan of that chrome piece either aroun the windshield. You did a good job of fixing the problem.
 
You have done a lot of work to your truck it looks really good. I am not a fan of that chrome piece either around the windshield. You did a good job of fixing the problem.
Thank you, Sir!
Getting her ready for Route 66 from So Cal to Amarillo, TX, then down to Houston Area.... Maybe up to New Orleans if I'll have time :)
The rubber trim is not as bad as the chrome, but it would still trap dirt and moisture, so I'm leaving gap on mine open so it will be easy to clean, rinse and dry quickly.
 
How to Troubleshoot for Dead-Short or Parasitic Current Draw

Just saying... :)

Sometimes, especially in the case of a dead-short, it is not safe to troubleshoot with power on.

This is just to share how to use resistance measurement to troubleshoot for dead-short OR excessive current draw while Ignition switch is in OFF position:
Disconnect entire positive battery terminal. Ensure IGN sw is in OFF position, and all light switches are off. Multi-meter in resistance (ohm) mode. Begin in Megohm or higher range. Switch to lower range IF reading is lower than Meg-ohms. It would be best to have an assistant or to use alligator clips for your test probes.
Normal resistance should be in meg-ohm range.
In my case:
All_Off_zpsap4akiql.jpg~original

The 1.7Meg0hm reading below includes continuity through alternator windings / Rectifier.
Current draw with all circuits off = 0.007 milliampere
Would appreciate if you could share your current draw, too.

If significantly lower (say, below 1k-ohms) resistance is seen with all systems off, take fuses off, AND/OR disconnect circuits one at a time until you see one that significantly affects your reading.

To demonstrate an example of a circuit causing current draw, I turned my LED Array deck light on:
20161118_114821_1479499255146_zpsszpchi8c.jpg~original
 
Comparing Good and Worn Out Fan Clutch aka Liquid Coupling

Here's my new fan clutch at operating temp after stopping and idling for about 5 minutes to make sure only fan (not highway air) is forcing air through the coupling:
https://youtu.be/7cpgTwdGssg
Fan stopped a couple of seconds after engine stopped, meaning fan speed follows engine speed more closely, meaning more coupling at operating temp.


Here's my old fan under same conditions:
https://youtu.be/qDyRjhWT79s

Fan kept on running for about 6 seconds after engine stopped, meaning fan speed did not follow engine speed as closely, meaning less coupling at operating temp, meaning less cooling effect.
 
The 86 Gets Her Kicks on Route 66 - Part 1

Started at Rialto Theater in Pasadena, CA:
80-15585259_10154218441027194_1392041903457034836_o_0eb8af7f450a4ef54b82965def9bcf63784abe82.jpg


Rainy day in So Cal...
Approaching Cajon Pass... Poor Visibility:

80-15622340_10154218649402194_4849586793094176441_n_d97954359f7f804a58be1585e176728bca23c52e.jpg


Descending Cajon Pass:
80-15590578_10154218649607194_1937002182648219103_n_bf524d5af3af859ef3904a6e37180ef1ca1e35fa.jpg


AMBOY, CA:
80-15591296_10154219943227194_7023460954155402030_o_c848763a1dfa36188561e2e80a13b45245553c0e.jpg


NEEDLES, CA:
80-15540943_10154219990842194_3119870545407491011_o_82839df1e04aaf44629fe23005971b6ad03bb514.jpg

80-15585203_10154221374592194_3433028130364029545_o_f90b1375d4212dbe1e99386c07143d1f819a4fb1.jpg


OATMAN, AZ, where asses roam the street... :)
80-15591493_10154222717107194_106311201292657551_o_440a8103410c4f23d2f137c96755a6eb027a987b.jpg


80-15542071_10154222717162194_3420116714488168592_n_0f1b768df4ed2052fdf07c490e0204b35675b807.jpg

DRIVING THROUGH OATMAN, AZ:
https://youtu.be/htUQygL2ZZc


ON OATMAN HIGHWAY / RTE66, BETWEEN OATMAN AND KINGMAN, AZ
80-15590362_10154222717872194_2732323347586087798_n_a9dc852bff820c40085c645ab053fe767b831665.jpg


CAMP IN WINONA, AZ...
80-15590125_10154224945572194_8776892427792553597_n_c960116dd0603bc275893273baaed62193643dc6.jpg

80-15541600_10154224945747194_3153521463113789843_n_a56a19a26c85b52c70a1f0588428d767398ca403.jpg
 
The 86 Gets Her Kicks on Route 66 - Part2

METEOR CRATER, AZ..
https://www.facebook.com/photo.php?fbid=10154224958077194&l=c3cff6c9d4


STANDING ON A CORNER IN WINSLOW, ARIZONA...
80-15542132_10154224193987194_8212801673168275373_n_6d9d1bebb8b03b8c1169ffcaba9917c9ce989205.jpg


SENT RESUME TO FRIEND FROM ROADSIDE, LEAVING AZ... :)
80-15540881_10154221538487194_155590969396956769_o_9c931a2379dd5cd4caf6685b79730cc44952ae70.jpg


SNOWED IN SANTA ROSA, NM.
Love's is a God-send for travelers. Even the floor towel felt warm from the dryer!
80-15626574_10154225439977194_4785616194606413348_o_1df6761e821d1c81384e5655a7a5301ad9f1855f.jpg


ORIGINAL SECTION FROM SANTA ROSA TO CUERVO, NM
(West Hwy156 then northeast on Cross Road). Nice dirt road with ruts, but can be done with high-clearance 2WD vehicles unless muddy or snow-filled:
https://youtu.be/LJ-kJL9A-WY


PIT STOP IN TUCUMCARI, NM...
80-15577901_10154226628117194_124162488255930492_o_2066ff2f6f7eb30adb36be0d01ca300e11029719.jpg


TRADE-IN (TUCUMCARI, NM)? HELL NO.
80-15675744_10154226698097194_7183650077297104784_o_7b7d12f843dd453555f48b7f6874ac33bc30b852.jpg


CHRISTMAS ON ROUTE 66:
ORIGINAL SECTION BETWEEN SAN JON, NM AND GLENRIO... RIGHT AT BORDER...
80-15171234_10154226943667194_7949177085756532868_n_0e1b0ba6b80b2aa7490eab272d708db384ad604b.jpg

Here, I met a couple, running low on gas, whom Google map sent through this dirt road to gas station. Mother of all ironies... They have a Highlander hybrid and he sells hybrids for a living. I shared with them one gallon out of my spare tank... :)
80-15492371_10154226943787194_8993367891637982669_n_52e698f0580f4a75018f35d87e53f7703c961924.jpg
 
Last edited:

Members online

Forum statistics

Threads
278,312
Messages
3,554,086
Members
248,016
Latest member
Advally Service

Trending content

Back
Top