0xfded's Build Thread: Unit III

0xfded

New member
65005.3
Unit III
1998 V6 SR5 Manual
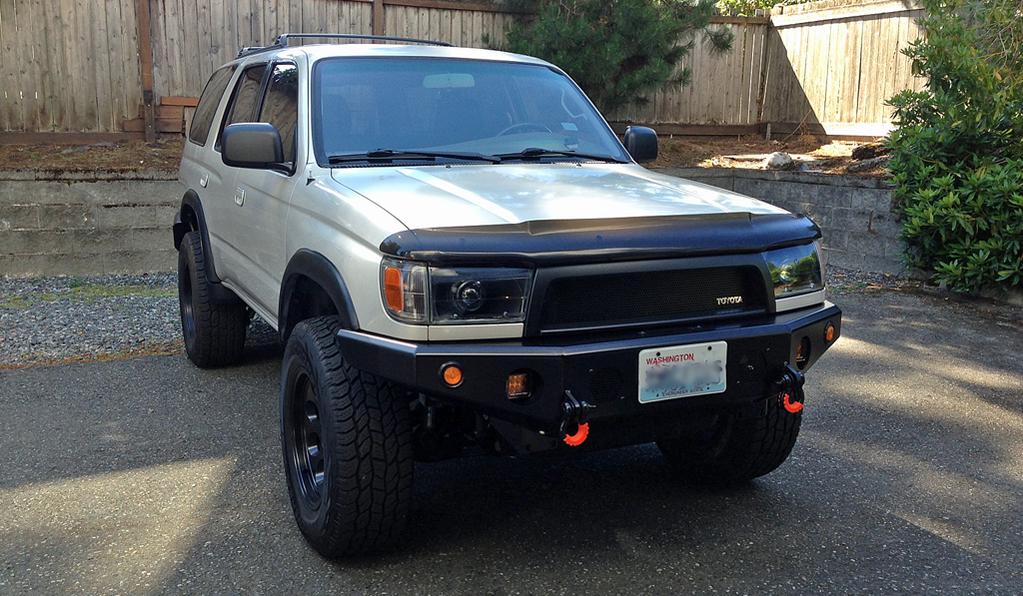
208525d1466387962-0xfdeds-build-thread-unit-iii-img_0869.jpg


EngineRoad InterfaceHuman InterfaceAudioStructuralIn Progress
  • MkII Sensor Unit
 
Last edited:
Register to hide this ad
Figured I'd start a thread after mostly lurking for a couple of years.

In short, I've been improving my runner to be good at two things: comfortable on an 8+ hour night drive in any season, and robust enough to handle light duty off-road for camping. It's not a rock crawler and will probably never go as far as of the amazing builds on this forum, but I could not settle for anything less than competency on an unplowed Canadian winter road.

This is my third Toy. Unit 1 was a '91 pickup that I loved a lot until it blew a head gasket at a bad time and got me thinking more seriously about a 4runner. Unit 2 was an '05 V8 4th gen, and while I admired the engine, I never grew very attached to it. The automatic transmisssion was part of that, I think. The other was the payment, for a vehicle that I drove maybe twice a month. I sold it and went without a four-wheeled vehicle for a couple of years.

I started looking for a third gen after lurking here and YT for a while.

I found it a few months later.

PO was in a rush to sell it. I obliged, buying it the day after it hit CL. At 210k miles, with a 1.5k idle, intermittent starter, shaking brakes, and failing battery, I figure he thought he was taking me for a ride. At $3500 for a 4WD manual with an e-locker, zero rust, and minor maintenance jobs, it was me that felt sort of bad.

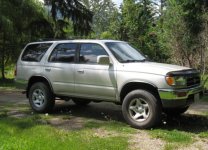
This is the earliest full picture I still have, the only visible mods being the "factory lift" and '99 clear headlights.

IMG_0137.jpg

It's been my hobby since.
 

Attachments

  • IMG_0137.jpg
    IMG_0137.jpg
    49.6 KB · Views: 2,023
My first problem was determining if this was a platform worth investing in at 210k miles. I knew from this forum that 200k isn't exactly the beginning of the end, so I wanted to make it work correctly and get caught up on maintenance.

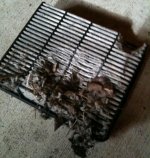
There was a bunch to catch up on. The air filter sums up the PO's attention to maintenance:

IMG_0244.jpg

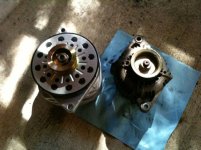
Turned out it was all pretty basic and good learning. The high idle was a bad IAC, resolved by replacing it. The bad battery was actually a bad alternator, which led to a CS-144 and Big-3 upgrade, my first proper mods.

IMG_0254.jpg

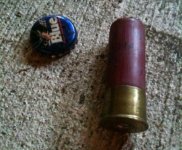
New belts, oil, PCV valve, plugs, and a motovac session followed. At this point, the engine seemed to have a new lease on life and has run well since. During this process, a thorough de-skunging of the interior was conducted, turning up fun artifacts like this one, found resting on top of the rear heater:

IMG_0248.jpg

With a happy engine, clean interior, and elimination of unaccounted for munitions, I felt like it was worth moving forward with.
 

Attachments

  • IMG_0244.jpg
    IMG_0244.jpg
    45.9 KB · Views: 2,191
  • IMG_0254.jpg
    IMG_0254.jpg
    48.8 KB · Views: 2,251
  • IMG_0248.jpg
    IMG_0248.jpg
    39.4 KB · Views: 2,161
More maintenance notes:

I went with Red Line fluids for the transmission and diffs:

Diff and Transfer Case: Red Line 75W90 GL-5
Transmission: Red Line MT-90 75W90 GL-4

The shop did these for me along with swapping out the starter, right before a winter trip to Canada. I know that it was probably just the contacts, but the idea of a faulty starter was anathema to my reliability goals, and the unit in there was 212k old, so a new unit went in.

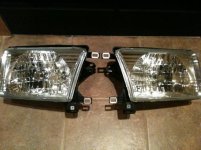
Around the same time, a coolant flush with Toyota Red, and '99 style headlights:

IMG_0322.jpg
IMG_0320.jpg

Depo units from ebay, purchased primarily because they have glass lenses. I kept the OEM housings for an eventual projector refit, intending to have the best of both worlds.

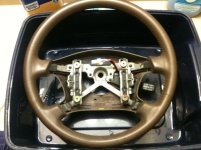
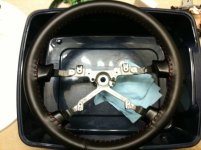
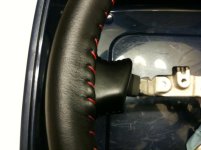
Around this time, I also replaced the chewed up steering wheel with a new one from ebay. The oak brown got dyed black using a vinyl dye, and then a Wheelskins cover. It's held up great so far, I would recommend to anyone wanting a quality cover.

IMG_0319.jpg
IMG_0323.jpg
IMG_0324.jpg

A first pass LED swap (gauges and dome lights) went in as well, but I later reprised all of these for brighter gauge lights and warmer dome lights.

Around this time I did the fuel filter and swaybar bushings too, but I lost my old notes, so not much else to say there. The bushings definitely helped tighten up the handling, and haven't squeaked since.
 

Attachments

  • IMG_0322.jpg
    IMG_0322.jpg
    51.4 KB · Views: 1,966
  • IMG_0320.jpg
    IMG_0320.jpg
    46 KB · Views: 1,989
  • IMG_0319.jpg
    IMG_0319.jpg
    43.7 KB · Views: 1,994
  • IMG_0323.jpg
    IMG_0323.jpg
    38.7 KB · Views: 1,996
  • IMG_0324.jpg
    IMG_0324.jpg
    32.9 KB · Views: 1,986
Last edited:
Im thinking about adding some mods to my 4runner. Im new to this aswell. Have any advice?
Basics first. Make sure it runs well, and you can rely on it. No point putting a bunch of time and money into something if it's about to break a ball joint on the highway and total itself.

Beyond that, depends what you want to do. I just spent a few months reading some of the threads here. Some favorites from my notes:
 
How did some of these threads help you? By asking questions?
Mostly by showing me how to do it right, by people who are loads better at this than I'll ever be. Gives you a good idea of what's possible.

Unless you're getting really technical on something, basically every question you might ask is covered somewhere. Finding the answer is easy once you know which question to ask, and the best way to do that is just read threads.
 
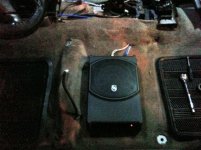
It's around an 8 hour drive to visit family on the holidays, so I had to do an audio upgrade. I went with a Kenwood KDCX897 head unit, Infinity Reference 6030cs components for the front, and a Sound Ordnance B-8PTD powered sub under the seat. I haven't gotten around to the rears yet, but as people have said, they're way less important than the fronts.

I would recommend any of them, except maybe the head unit if you're using an iOS device for audio (I had sound replay issues, and changed for a USB stick.) The sub in particular is fantastic for such a tidy package:

IMG_0360.jpg

Perfect fit under the seat, nice and tight kick. Perfect for bass-to-ass transmission. I like Crutchfield, and Sound Ordnance is their house brand.

I'll likely finish off with a pair of rears and some adjustments to the front tweeter grilles this year.
 

Attachments

  • IMG_0360.jpg
    IMG_0360.jpg
    47.2 KB · Views: 2,371
I had some brake shudder from the start, so I knew I was going to do the Tundra Brake Upgrade at some point, and I started sourcing the parts.

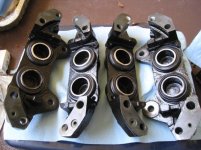
I went with refurbishing a pair of 13WL calipers from a Sequoia:

IMG_0129.jpg

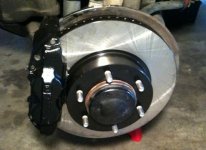
In retrospect, I didn't save much over just getting a new set of calipers, but I figure I know my brakes much more intimately now. Stainless steel speed bleeders (awesome! But, get the right size!) and coated Centric rotors rounded out the install, which actually didn't happen until much later, when I moved to a place with a garage.

IMG_0421.jpg

In terms of driving feel, the TBU was my second favorite upgrade and I can't recommend it enough.

My only regret was that the paint I used, G2 Brake Caliper paint, apparently wore through within six months. I'm not sure if I did something wrong, but I'm going to have to recoat them again at some point soon.
 

Attachments

  • IMG_0129.jpg
    IMG_0129.jpg
    54.1 KB · Views: 1,954
  • IMG_0421.jpg
    IMG_0421.jpg
    33.7 KB · Views: 1,941
Last edited:

Next up was a new set of Cooper Discoverer AT/3s (265/70/R17) and Level 8 Trackers, ahead of schedule, but they were on sale, sooo...

Not too long thereafter, this time on schedule, the Tundra/OME906/5100 2" lift. The end result was a much better ride and manners, much better winter traction, and looked something like this:

IMG_0143.jpg

Can't say a bad thing about this combination. It's been great so far. I'd recommend it to any road warrior.

At the same time, I finally took care of the LBJs as a bit of preventative maintenance, and doing so had the side effect of making the lift installation a lot easier. All OEM parts, and relatively cheap insurance. At this point, besides the timing belt, basically everything was where it should be.
 

Attachments

  • IMG_0143.jpg
    IMG_0143.jpg
    48.8 KB · Views: 26,761
More odds and ends. Slowly dumping my notepad here, hope nobody minds.

A new O2 sensor happened right after the brakes, to address a CEL. A tip here: go in through the top.

Also, the rear gate latch jammed right when I was moving, which was pretty brilliant timing. Nothing better than seeing your gate open when turning onto the road. OH SHI--, and panicked yet exquisitely cautious driving ensues.

Turns out Amazon sells an OEM latch assembly. We truly live in the future. That was an easy install.

Replaced the clutch spring (procedure) with one from a 2nd Gen, 90507-14030. This is a great little mod for anyone running manual, it addresses the squeak and I think the pedal feel is better. More linear and predictable.
 
Last edited:
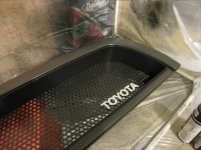
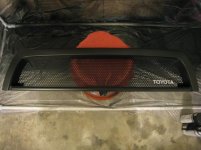
After catching up on the functional stuff and moving to a place with a garage where I could paint, I did the ubiquitous grille mod:

IMG_0147.jpg
IMG_0155.jpg
IMG_0156.jpg

Cleaner and simpler, which I like. Removing the chrome was a huge PITA though, should have just bought an unchromed one and saved a few evenings f peeling that stuff off.

And no, oven cleaner does not remove it. Yes, I did science on that.
 

Attachments

  • IMG_0147.jpg
    IMG_0147.jpg
    39.7 KB · Views: 1,702
  • IMG_0155.jpg
    IMG_0155.jpg
    40.1 KB · Views: 1,700
  • IMG_0156.jpg
    IMG_0156.jpg
    42.2 KB · Views: 1,691
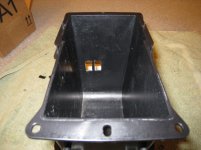
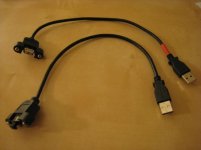
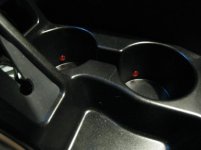
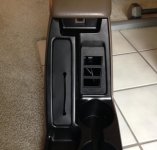
The next step 98 to 99 conversion campaign is the cupholder mod. Besides the normal swap, I tacked on a couple of other mods.

First, ran USB ports into the storage compartment. One leads to the input on the stereo, and is usually occupied by a 32gb thumb drive. The second runs to the Arduino that runs my Mk.I sensor package, and I can use it to talk to the OBD2 port to query and reset codes.

IMG_0159.jpg
IMG_0166.jpg

The cupholders are illuminated, tapping off the wiring for the rear window switch illumination so they correctly dim. The positioning shown here is not good--one of them gets in the way of a clip, so I had to cut that clip off. If I had it to do again, I'd rotate them in another 15 degrees.

IMG_0174.jpg

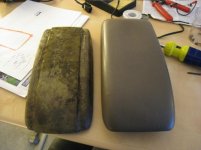
The pad on the console I got was trashed. A local leather upholsterer glanced at it and said "$150", so I said screw it and mounted the old 98 console pad to the 99 lid. Worked out just fine.

IMG_0176.jpg

For switch mounting, I did up a custom 3D printed switch panel. Had to do two iterations of this before I had something that fit well enough to mount, which meant waiting 2 weeks for Shapeways each time. I wanted to get something that was clip-secured plug-and-play so I could offer it up to the forum as a drop-in solution, but the iteration time just sucks. I mounted it with plastic epoxy and called it a day:

IMG_0477.jpg

If anyone wants the .stl file to print their own, I'd be happy to oblige. It fits in fine after sanding off some edges.
 

Attachments

  • IMG_0159.jpg
    IMG_0159.jpg
    38.2 KB · Views: 1,697
  • IMG_0166.jpg
    IMG_0166.jpg
    23.7 KB · Views: 1,682
  • IMG_0174.jpg
    IMG_0174.jpg
    23.6 KB · Views: 1,651
  • IMG_0176.jpg
    IMG_0176.jpg
    34.2 KB · Views: 1,678
  • IMG_0477.jpg
    IMG_0477.jpg
    26.1 KB · Views: 1,664
Last edited:
Earlier this year, another forum member graciously hooked me up with a set of SR5 flares, which were doubly perfect: I like the look of them, and they're a near perfect match to my slightly out-board tires.

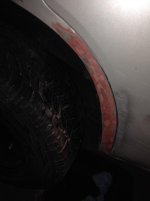
But shortly after they arrived, and shortly before I was going to install them, I decided to attempt the highly-technical "Concrete Pillar" mod.

IMG_0517.jpg

It did not go well. I do not recommend this mod.

IMG_0518.jpg

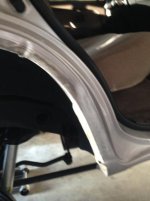
So before I could install my flares, I had to address this. A local body shop quoted me $3k to fix it (plus repaint essentially the entire side of the vehicle), which I politely declined. Stewing on it, I decided to try to sort it out myself, given that I had some matched paint on hand anyway.

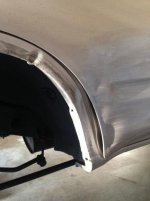
Banging away at the inner fender could only get me so far, as the fender liner and body panel divert just aft of the damage. So ahead of that I used a fiberglass reinforced body filler to recreate the fender. This ended up working Rather Well:

IMG_0526.jpg

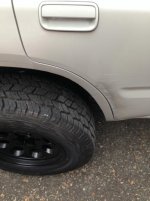
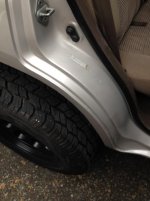
And after a coat of paint, the fender could be mistaken for being undamaged:
IMG_0529.jpg
IMG_0530.jpg

Maybe I'll just replace the door someday, but the scrapes ended up being mostly covered by the fender flares. I hit the scraped portions with some paint to ward off rust, and left it alone.
 

Attachments

  • IMG_0517.jpg
    IMG_0517.jpg
    28.6 KB · Views: 1,654
  • IMG_0518.jpg
    IMG_0518.jpg
    28.2 KB · Views: 1,663
  • IMG_0526.jpg
    IMG_0526.jpg
    19 KB · Views: 1,666
  • IMG_0529.jpg
    IMG_0529.jpg
    34.9 KB · Views: 1,676
  • IMG_0530.jpg
    IMG_0530.jpg
    33.6 KB · Views: 1,680
Shortly thereafter, I refinished the SR5 flares with Krylon Satin Black and Tacoma OEM flare gaskets (part #75696-35020, need 5 for all four fenders.)

This ended up working out rather well, but I didn't take any pictures, so not much more to say.

The front flares are a bit loose on the leading tips, but I have another mod in mind for those flares, so when I do that I'll hit them with some 3M adhesive tape to fix them in place.
 

Members online

Forum statistics

Threads
278,307
Messages
3,554,055
Members
248,016
Latest member
Advally Service

Trending content

Back
Top