0xfded's Build Thread: Unit III

This thread compelled me to add a component I skipped when I upgrade my audio setup: a four channel amp for the speakers.

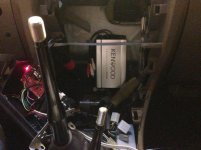
I went with a Kenwood KAC-M1804 on the strength of the reviews and recommendations. Turns out there's plenty of space to mount it after cleaning up the cables below the HU:
IMG_0672.jpg

Nice and tidy in there now. I've tucked the antenna lines away beside the passenger airbag and removed the antenna relay box, since I never use the radio. Cable management via (red) velcro strips, and I added a few adhesive backed velcro swatches to stick them onto.

Nice thing about mounting the amp here is that the RCA leads are just long enough to plug straight into the HU, without any extensions. I grabbed some male-male adaptors to do that.

Need to run power tomorrow, and replace the 6' RCA leading to my sub with a 4' replacement (which eliminates 2' of coiled RCA cable packed into that cubby.) Then I'm going to stuff some leftover melamine foam in there and see how it works.

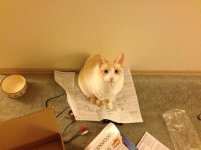
Bonus: Auxiliary helping keep the amp install instructions from blowing away. What a helpful assistant.

IMG_0673.jpg
 

Attachments

  • IMG_0672.jpg
    IMG_0672.jpg
    38.4 KB · Views: 3,167
  • IMG_0673.jpg
    IMG_0673.jpg
    36.7 KB · Views: 1,281
Follow-up: that little amp is surprisingly nice! Definitely recommend it.
Got everything put back together, and spent some time tweaking the audio settings on the HU and sub. Basically, the amp just seems to better define the sound, even at the same volume levels.
It wasn't a huge difference with simple drum & bass music, but when I switched to some relatively dense, noisy music (ie. industrial), I was surprised at how much more clearly it came through. Those sorts of tracks always had a muddy quality to them before now, and I always assumed that it was an unavoidable consequence of four speakers in a small cabin. The tweeters in particular are coming through more clearly without being shrill. Really happy in general.

I freaking love this sub too. I've boosted it up a bit too, and it's just great: punchy without being boomy. If it ever dies on me, I'm buying another without a second thought.
 
Got the front doors finished.

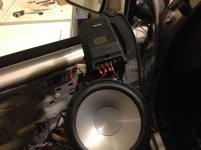
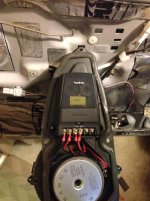
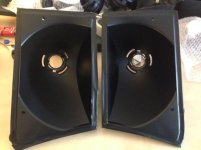
First thing I had to do was sort out the crossovers. I had previously mounted them on the front, which required them being at strange angles to fit behind the door panel (which they never entirely did):

IMG_0674.jpg

Any layer of sound blocker was clearly not going to fit over that.

So I drew inspiration from how [MENTION=115347]gamefreakgc[/MENTION] mounted his crossovers, and looked inward. Turns out they fit basically perfectly when mounted on the reverse side, so I went that route instead of mounting them to the door panel:

IMG_0675.jpg

They fit like they were designed to, and the speaker panels end up being much closer to stock:

IMG_0676.jpg

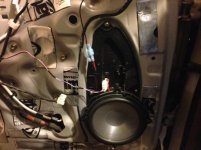
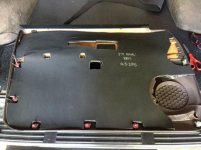
With that space reclaimed, I started in on the sound barriers. I did the driver's side last night and didn't take pictures because a) it was late, and b) it was irritating. The passenger side benefitted from experience and came out nice and neat:

IMG_0679.jpg

One layer of MLV sandwiched in CCF. It just barely fits in there (and actually, the clip on the forward edge on both doors refuses to stay stuck, so maybe less than "barely.") But it all holds together well enough, and it's hard to believe I could make this whole damn thing any quieter.

I'll grab some logSPL readings next time I have an errand to run.
 

Attachments

  • IMG_0674.jpg
    IMG_0674.jpg
    32.8 KB · Views: 1,212
  • IMG_0675.jpg
    IMG_0675.jpg
    48.3 KB · Views: 1,880
  • IMG_0676.jpg
    IMG_0676.jpg
    42.6 KB · Views: 1,253
  • IMG_0679.jpg
    IMG_0679.jpg
    40.8 KB · Views: 1,230
Well, with that project mainly done, time to sit back, slack off for a weekend, and ...

Wait, what's this lumber doing here? Are those drawer slides?

IMG_0684.jpg

Nooooo...
 

Attachments

  • IMG_0684.jpg
    IMG_0684.jpg
    38.5 KB · Views: 1,209
Sleeping Platform

Haven't done a woodworking project since shop class 20 years ago, so why not start with something really complicated? Yeah!

I have three goals with this build:
  1. Enough room for two to sleep.
  2. No components I have to remove and store in the garage.
  3. Maintain the flat cargo deck for regular usage. No folding legs or supports.
Basically, I wanted to keep this tidy and in the vehicle, without messing up the rear deck too much for when I need to carry a box or sheet of plywood.

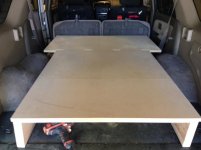
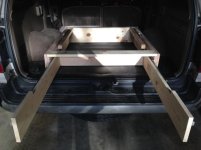
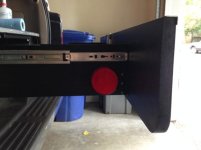
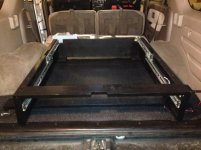
What I came up with was this: a slide-out support for a single folding extension.

IMG_0685.jpg
IMG_0686.jpg

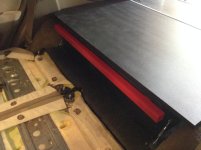
The supports are 2x2's, on slides rated for 220 pounds. Plus they are extended to brace against the bottom side of the platform, so the slides aren't bearing that entire weight. So far, it seems strong enough to support my weight, but in reality it only has to support the weight of my legs. I'm 6', so my toes will be dangling off the end regardless, but that's fine.

Taking my time fastening everything up, since I want to surface and paint it all, but there's plenty of surface area with the boards on:

IMG_0687.jpg

Using 3/4" MDF for the surface. Pretty nice to work with so far, easy to work in indentations for hinges and stuff.

Drawer frame is mostly done now too, but I need to get a 1/4" bit for my router to cut the groove for the base, so that's on hold till next weekend.

IMG_0688.jpg

Doing a monodrawer, partly to keep things simple and versatile, partly to save weight. The MDF is holding up fine, but I can always split it up if I ever decide to gain a hundred pounds.

Also, lesson of the week: goddamn, router bits are expensive as hell!
 

Attachments

  • IMG_0685.jpg
    IMG_0685.jpg
    37.6 KB · Views: 1,237
  • IMG_0686.jpg
    IMG_0686.jpg
    44.4 KB · Views: 1,202
  • IMG_0687.jpg
    IMG_0687.jpg
    30.5 KB · Views: 1,184
  • IMG_0688.jpg
    IMG_0688.jpg
    32.1 KB · Views: 1,175
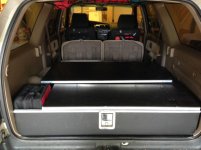
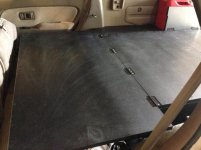
Took longer than expected, but I'm more or less finished the sleeping platform:

IMG_0694.jpg

The wood and MDF I coated using Rustoleum Truck Bed Liner, which basically did what I wanted: a reasonably durable, semigloss black finish that matches the vinyl floor. The edges exposed to wear and tear have an aluminum edge along them, just to keep things from getting too torn up.

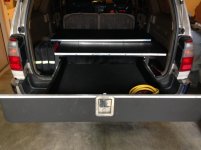
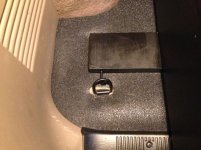
Single drawer with a paddle latch:

IMG_0695.jpg

The drawer is just crooked enough to irritate me, but works nice and smoothly otherwise. The latch holds nice and firm, and I didn't screw up in mounting it.

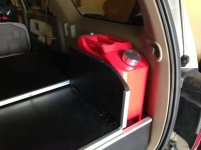
The passenger side wing folds up, and a jerry can fits just perfectly. I saw this on another member's build, but can't remember who...

IMG_0696.jpg

I left the driver side without a wing, partly because it leaves a perfect spot for my trouble kit:

IMG_0697.jpg

Started life as a Canadian Tire trouble kit, but I've thrown out everything in it and replaced them with higher quality components. Compressor, LED trouble lights, high vis vest, patch kit, et cetera. Easy to grab and I can get at it even if the rear gate is blocked (ie. I'm ass first in a snowbank, or worse.)

The panel on top is the fold out part of the sleeping platform, and it isn't sitting flush yet because of the wing panel hinges. Going to sort that out tomorrow with a router.
 

Attachments

  • IMG_0694.jpg
    IMG_0694.jpg
    37.2 KB · Views: 19,880
  • IMG_0695.jpg
    IMG_0695.jpg
    33.6 KB · Views: 1,160
  • IMG_0696.jpg
    IMG_0696.jpg
    33.1 KB · Views: 1,167
  • IMG_0697.jpg
    IMG_0697.jpg
    34.9 KB · Views: 1,697
I'm pretty happy with out the fold out platform itself worked out.

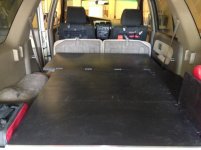
With the seats down (new seat covers on the way):

IMG_0698.jpg

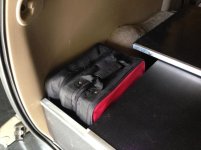
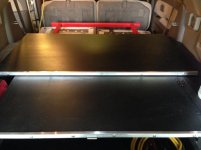
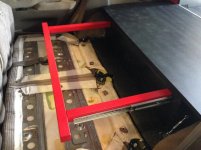
The red support pulls out. It's on 200lbs slides, and extends out 18":

IMG_0699.jpg

About 12" more on each leg of the support stays under the panel and braces against it, providing additional strength.

Then the platform itself just folds out onto the bracket:

IMG_0701.jpg

It's strong enough for me to sit on, but really it only has to support my legs (which dangle off the end with the seat cushions removed). Voila:

IMG_0702.jpg

At this point, I need to sort out the protruding hinges so that the platform rests flat, and find some good containers for inside the drawer. Then on to some other project.
 

Attachments

  • IMG_0698.jpg
    IMG_0698.jpg
    34.2 KB · Views: 1,127
  • IMG_0699.jpg
    IMG_0699.jpg
    42.1 KB · Views: 1,688
  • IMG_0701.jpg
    IMG_0701.jpg
    36.4 KB · Views: 1,702
  • IMG_0702.jpg
    IMG_0702.jpg
    37.5 KB · Views: 1,195
I'm pretty happy with out the fold out platform itself worked out. With the seats down (new seat covers on the way): It's strong enough for me to sit on, but really it only has to support my legs (which dangle off the end with the seat cushions removed). At this point, I need to sort out the protruding hinges so that the platform rests flat, and find some good containers for inside the drawer. Then on to some other project.

Great progress on your build. Looking good.
 
really diggin that sleep platform. What type of wood did you use for the support underneath? Looks like 2x10 or something. Got some rough dimensions of the MDF cut?
 
Great progress on your build. Looking good.
Hell of a platform man. One of the best I've seen on here!
Appreciate the kind words. It feels a little banged together, not nearly as nice as some of the cargo boxes here, but I figure I'll be a lot better at it if I ever build another. Might have better tools too.

Sorted out the folding platform by routing in a couple of grooves, so it rests flat now, and there's no longer pressure trying to pop the hinges out. Ta-da:

IMG_0703.jpg

Also, a bit of feature creep: threw a pair of reflectors on the drawer, to ward off the unlikely event of someone bumping into the drawer in the dark. It is pretty much pitch black from the side, figure it's cheap insurance at $3.

IMG_0707.jpg

And come to think of it, I have some reflective tape that would probably fit perfectly on the edge of the drawer... hmm!
 

Attachments

  • IMG_0703.jpg
    IMG_0703.jpg
    30.7 KB · Views: 1,081
  • IMG_0707.jpg
    IMG_0707.jpg
    25.6 KB · Views: 1,077
really diggin that sleep platform. What type of wood did you use for the support underneath? Looks like 2x10 or something. Got some rough dimensions of the MDF cut?
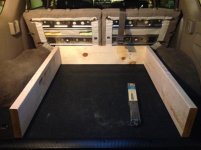
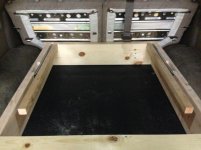
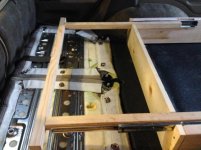
The side beams are 2x8, but they end up being as tall as a 2x10 because the platform rests on a 1x4 crossbeam and corner braces, to provide stiffness and hook in to the factory D-rings. You can sort of see them in this picture:

IMG_0692.jpg

And how the front crossbeam links in:

IMG_0693.jpg

2x10 is basically the perfect height to clear the passenger side hump, and close on the driver side. I was going to use that at first, but went with the 2x8 when I decided on that method to link them in to the D-rings.

I ended up needing 3 2'x4' MDF panels. I would have preferred to use one 4'x4' for the main platform, but couldn't find one locally, so I joined two of them and used a third for the fold-out.

From memory, the rough dimensions are ~38"x38" for the main platform (not including the wings, which you just have to shape to fit) and then a full 24"x48" panel for the foldout, which just barely fits when it's being folded out.
 

Attachments

  • IMG_0692.jpg
    IMG_0692.jpg
    43.3 KB · Views: 1,109
  • IMG_0693.jpg
    IMG_0693.jpg
    46 KB · Views: 1,118
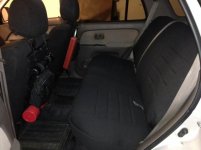
Wet Okoles arrived for my rear seats, to match the fronts. Phone photo of a mostly black interior follows, SET EXPECTATIONS TO HIGH!

IMG_0709.jpg

I was going to get red and black, but they actually emailed me to warn me that "the red fades quickly, are you sure?" so I just went with the same black as the fronts.

They're segmented, so the seats still fold up and the backs fold down correctly. Appropriate holes for all of the latches and stuff, pleased with them. Only complaint is that they don't leave an opening for the pockets that you can tuck the seatbelts into. Oh well.

Some black fabric dye in the future for the belt and pull handles.
 

Attachments

  • IMG_0709.jpg
    IMG_0709.jpg
    29.3 KB · Views: 964
Projectors

Two projects on the go, and finally some time to work on them.

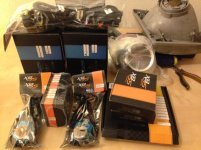
First, I'm following in the footsteps of the pioneers here and trying my hand at a Morimoto D2S projector retrofit. Bunch of winter driving ahead this year, and I covet the light output.

IMG_0722.jpg

Inspiration credit to BrianSD_42's take on the refit (not to mention step-by-step guide and helpful answers to newbie questions).

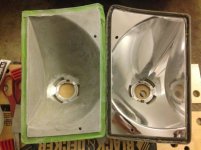
I'm using my OEM housings and TYC glass. I didn't know until I cracked them open that the 98 and earlier frosted lights had a smooth reflector. No facets certainly made it easier to prep for painting.

IMG_0726.jpg

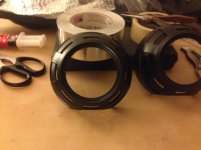
I'll be going with a simple black look, on the housings and the shrouds both, with amber halos. Went with the Apollo 3.0 shrouds, which blacked out nicely with the semi-gloss black I'm using:

IMG_0730.jpg

Housings are painted now too, just giving the paint the recommended 48 hours to cure to full hardness before I start putting them back together again.

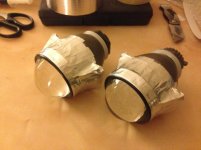
In the meantime, the projectors got sealed up against light spillage:

IMG_0728.jpg

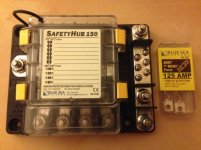
And I've got some wiring to do for the halos. But installation is going to wait till next weekend, cause my second concurrent project is revising the wiring setup around my fusebox with this big boy:

IMG_0729.jpg

I've got a clever idea how to mount it, and I'm just waiting for the materials to arrive to try it out.
 

Attachments

  • IMG_0722.jpg
    IMG_0722.jpg
    48.6 KB · Views: 889
  • IMG_0726.jpg
    IMG_0726.jpg
    39.7 KB · Views: 899
  • IMG_0730.jpg
    IMG_0730.jpg
    34.1 KB · Views: 892
  • IMG_0728.jpg
    IMG_0728.jpg
    33.7 KB · Views: 904
  • IMG_0729.jpg
    IMG_0729.jpg
    44.5 KB · Views: 928
Housings painted, just waiting for it to harden now before I start manhandling them. This SEM paint is awesome, so forgiving of sketchy painters like me. Used the same stuff on my grille mod, so everything will match across the front end.

IMG_0732.jpg

Need to enlarge one of the holes in the back for the hi-beam and halo wires. Should have done that before I painted, but it'll all be hidden behind the shrouds (I hope).

Shroud and halo assembly during the week, big wiring job and installation next weekend. Excited!

Nice progress! Let me know if you have any questions- I have done quite a few of these now.

Much appreciated! I think I'm past the worrisome parts now, but we'll see how the assembly, wiring, and alignment goes.
 

Attachments

  • IMG_0732.jpg
    IMG_0732.jpg
    30.2 KB · Views: 884

Members online

Forum statistics

Threads
278,310
Messages
3,554,077
Members
248,016
Latest member
Advally Service

Trending content

Back
Top