Ruby Tuesday - rad4runner's Mods and Restoration

this is all awesome information. I will test today and let you know the results. I was hoping to stay away from the dealership and it looks like I can do most of the testing myself. Thanks again!

Sorry jbjamo07, Above only works on first-gen 4Runner. Your 2002 may have a different setup. However, chances are generally same in that there are 2 separate power sources for operating rear window:
When operated by tailgate switch it takes always-on power from battery, bypassing ignition switch.
When operating by console switch, relay module needs power coming from ignition switch- most likely from IG switch, through a circuit breaker OR different fuse.
 
Ruby Tuesday is happy :)

1908130_10152790812747194_1624640220297359400_n.jpg
 
Check against schematic here:

Rear_Window-Copy_zpsb4d9f347.jpg~original


How backdoor window control switch (aka key switch) works:
Wire to pin 11 (light blue-white stripe) when connected to ground (via terminal 3 of top-off switch) will lower window.
Wire to pin 12 (lt blue-blk stripe) when connected to ground (via terminal 3 of top-off switch) will raise window.
(To test relay function, touching directly to chassis ground will work regardless of state of top off switch)

Console switch Operation:
Connecting wire going to pin 4 (Green with yel stripe) to ground (via window Down button, door lock button, top-off switch, and rear door clock switch) will lower window,
Connecting Pin5 to ground (Red yellow stripe) in same manner as above will raise it.

<b>To test relay function</b> (see schematic), assuming it has power, bypass up/down switch, door lock switch, top-off switch,a nd rear door lock detect switch:
<b>Jump one of the pins above at a time, directly to ground</b> and see if relay produces proper out voltage and polarity at pins 1 & 3

[MENTION=11952]rad[/MENTION]4 (or anyone that can clarify),

What are my exact steps to do this?
Am I slicing a little of the wire insulation and connecting that with an extra wire directly to a ground?
Am I pulling the wire out of the pin in the relay and replacing that with a wire end that is connected to a ground?
Am I using a back probe needle to poke the pin wire and the other connects to ground?

Thank you! Clearly I'm a rookie to testing electricalhttp://im.toyota-4runner.org/images/smilies/help.gif

THANK YOU!
 
[MENTION=11952]rad[/MENTION]4 (or anyone that can clarify),

What are my exact steps to do this?
Am I slicing a little of the wire insulation and connecting that with an extra wire directly to a ground?
Am I pulling the wire out of the pin in the relay and replacing that with a wire end that is connected to a ground?
Am I using a back probe needle to poke the pin wire and the other connects to ground?

Thank you! Clearly I'm a rookie to testing electricalhttp://im.toyota-4runner.org/images/smilies/help.gif

THANK YOU!
Either would work.

probing the back of each pin with a wire connected to ground would work, as well...

Cheers! :)

11045468_10152893657682194_2577219708448657124_n.jpg
 
Either would work.

probing the back of each pin with a wire connected to ground would work, as well...

Cheers! :)

I just spent some time on the rear window diagnosis - still haven't solved the problem. Here's what I just did, I'm hoping you can point me to my next step..???
1. cleaned window lock and window up/down switch @ console.

2. tested relay, #6 has 12v. #11 & #12 when touched to ground both move the window accordingly. #4 & #5 when touched to ground, and ACC on, move the window accordingly.
3. I cleaned a ground point on the tailgate that has two white wires connected to it. This was the only ground I could find that looks tied to the various switches for rear window operation.

Knowns:
1. The rear wiper switch works the sprayer and the operation of the wiper with no problem.
2. The top-on bolt is screwed in and pushes the button down.
3. The wiper motor is just disconnected with these tests.
4. The tailgate switch doesn't work either to raise or lower window

What should I look at next?

Thank you much!
 
Last edited:
I just spent some time on the rear window diagnosis - still haven't solved the problem. Here's what I just did, I'm hoping you can point me to my next step..???
1. cleaned window lock and window up/down switch @ console.
2. tested relay, #6 has 12v. #11 & #12 when touched to ground both move the window accordingly. #4 & #5 when touched to ground, and ACC on, move the window accordingly.
3. I cleaned a ground point on the tailgate that has two white wires connected to it. This was the only ground I could find that looks tied to the various switches for rear window operation.

Knowns:
1. The rear wiper switch works the sprayer and the operation of the wiper with no problem.
2. The top-on bolt is screwed in and pushes the button down.
3. The wiper motor is just disconnected with these tests.
4. The tailgate switch doesn't work either to raise or lower window

What should I look at next?

Thank you much!

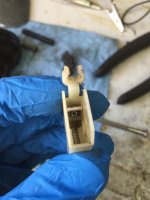
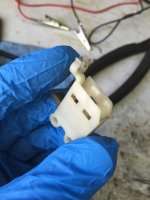
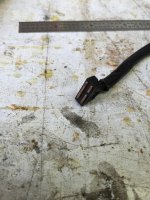
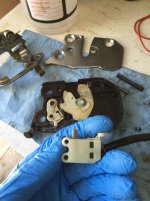
I got 100% of the rear window solved today, thanks to some help from rad4runner!
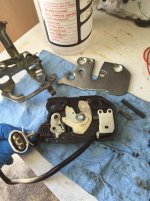
The issue was the tailgate "lock detection switch". I removed the latch, disassembled it, cleaned all the parts and re-greased before re-assembly. I've attached a photo of the latch assembly and the switch itself open.
 

Attachments

  • IMG_4343.jpg
    IMG_4343.jpg
    116.8 KB · Views: 1,154
  • IMG_4344.jpg
    IMG_4344.jpg
    115.3 KB · Views: 1,166
  • IMG_4345.jpg
    IMG_4345.jpg
    136.2 KB · Views: 1,133
  • IMG_4346.jpg
    IMG_4346.jpg
    123.2 KB · Views: 1,148
  • IMG_4347.jpg
    IMG_4347.jpg
    136.4 KB · Views: 1,147
I got 100% of the rear window solved today, thanks to some help from rad4runner!
The issue was the tailgate "lock detection switch". I removed the latch, disassembled it, cleaned all the parts and re-greased before re-assembly. I've attached a photo of the latch assembly and the switch itself open.

Thanks a lot, Shawski for sharing your experience...
 
First-Gen Cup Holder Mod (Work In Progress)

Previously, I relocated my console switches...

Now...
user101367_pic27282_1354239332_zps9382a735.jpg~original


Cut the insert up to accommodate "standard" ceramic coffee mug with handle. Gold marking is reference for hole I will make for smaller diamater base of skinny but tall "travel" cup.
20130901_008_zps81bfabdf.jpg~original


Slotted for mug handle.
20130901_009_zps028740c1.jpg~original

Bottom of cut level with transmission cover trim, so that's the lowest the mug could sit. Placing mug deeper will not work because mug handle will bottom out on transmission cover trim.

Right now it works in this configuration, altho not pretty. Mug would rest on the stock bottom.
20130901_002_zps1c755206.jpg~original


I have now opened up opening on stock bottom.
IMG_3488_zps7e2a7a98.jpg~original

IMG_3491_zps27af1621.jpg~original


Taller, skinnier travel cup will rest in that step below stock bottom...
001_zpsa36fab10.jpg~original


Next step is do fiberglas and resin work to make it pretty...
 
Last edited:
Back to the Future...

... for the mother of all throwbacks... My friend with his 1986* More-funner in December 1986...
01_zpscp6julcu.jpg~original

His 4Runner was stolen and found and recovered in Mexico back in those day.
*My educated guess is that it was a 1986 based on the exterior and interior colors. Stripes are not visible on his picture.

... Now back to the future with my Ruby Tuesday in August 2015...
02_zpskihh2tik.jpg~original

... All Together now...
03_zpsex2zux1m.jpg~original
 
Last edited:
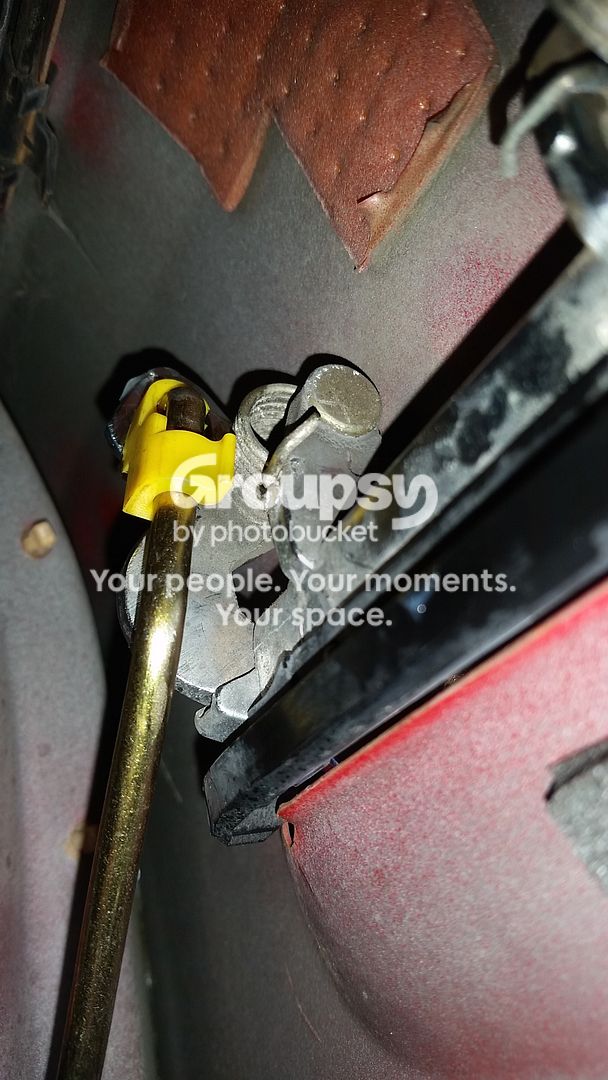
Replaced Broken Plastic Snap on Outside Door Handle

Yellow plastic snap on outside door lock (driver side) that locks link rod between door latch and outside door handle broke...

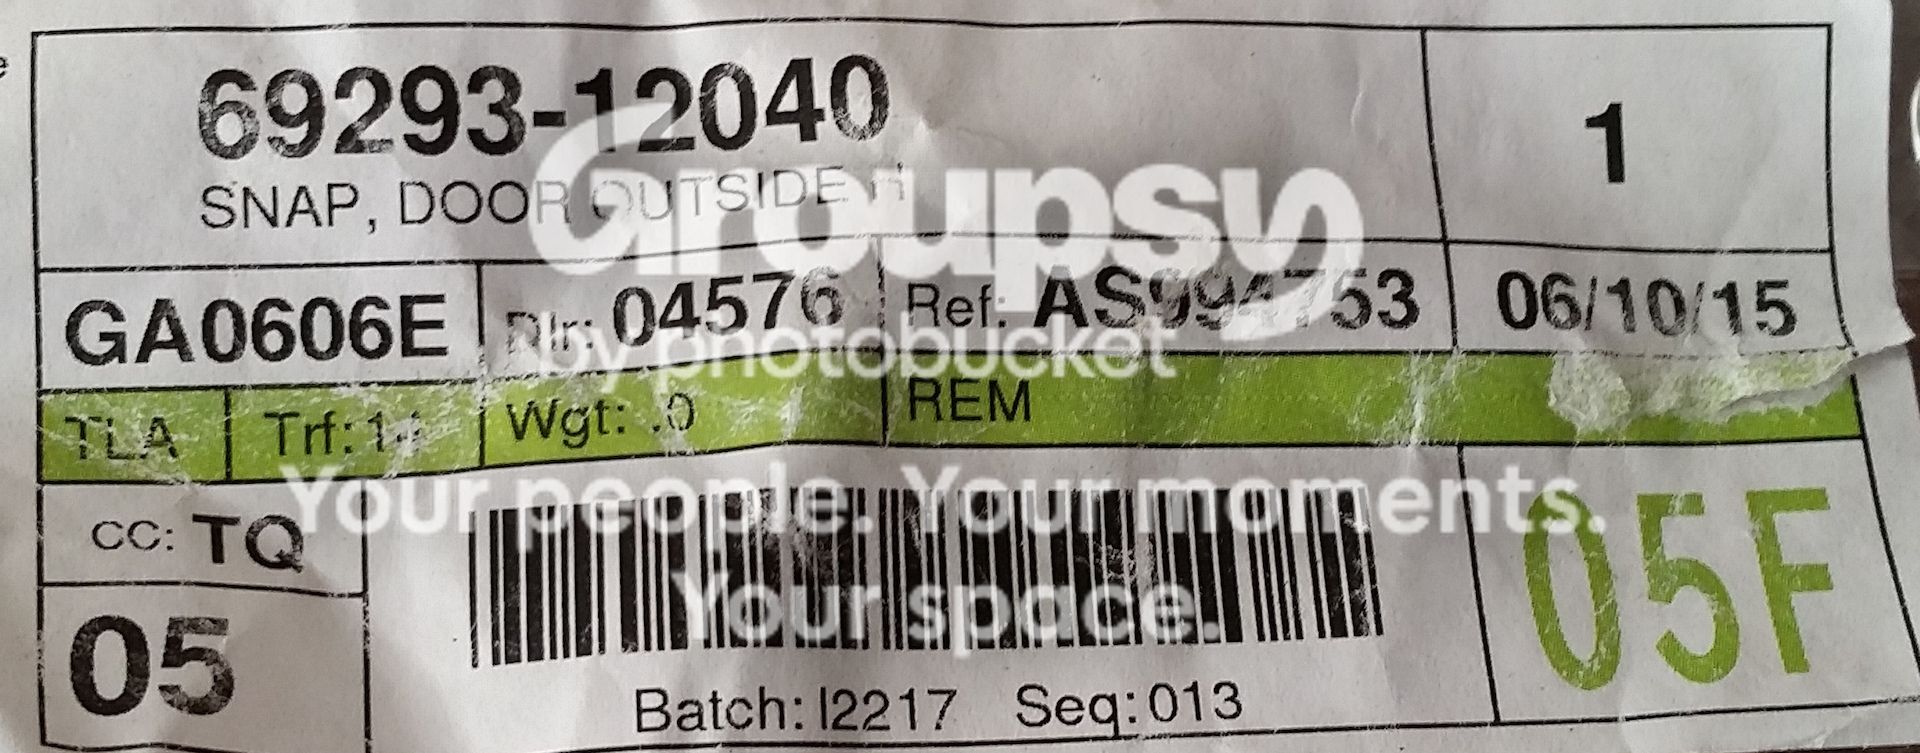
This is the correct part from dealer:
20150817_181821_zpsnazkgeez.jpg~original


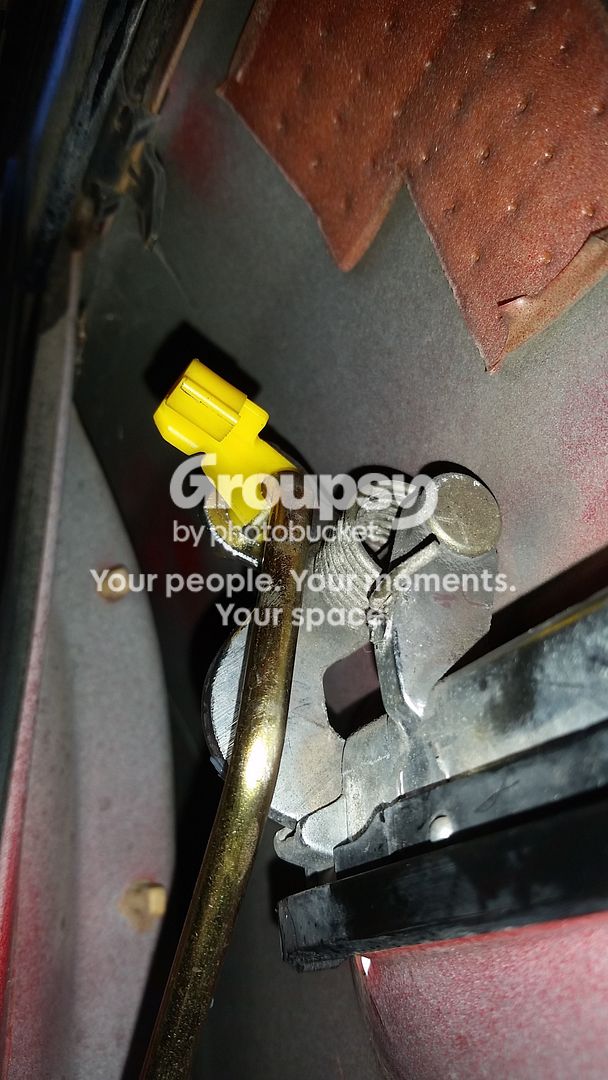
Yellow Snap/Clip goes into here:
20150816_191139%20copy_zps3nomginq.jpg~original


Insert snap into opening on door handle:
975aa4d5-2d80-4d89-8518-75b116988d79_zpsb3s6nklk.jpg~original


Insert Link rod into snap:
20150817_171950_zpsqmqeysbm.jpg~original


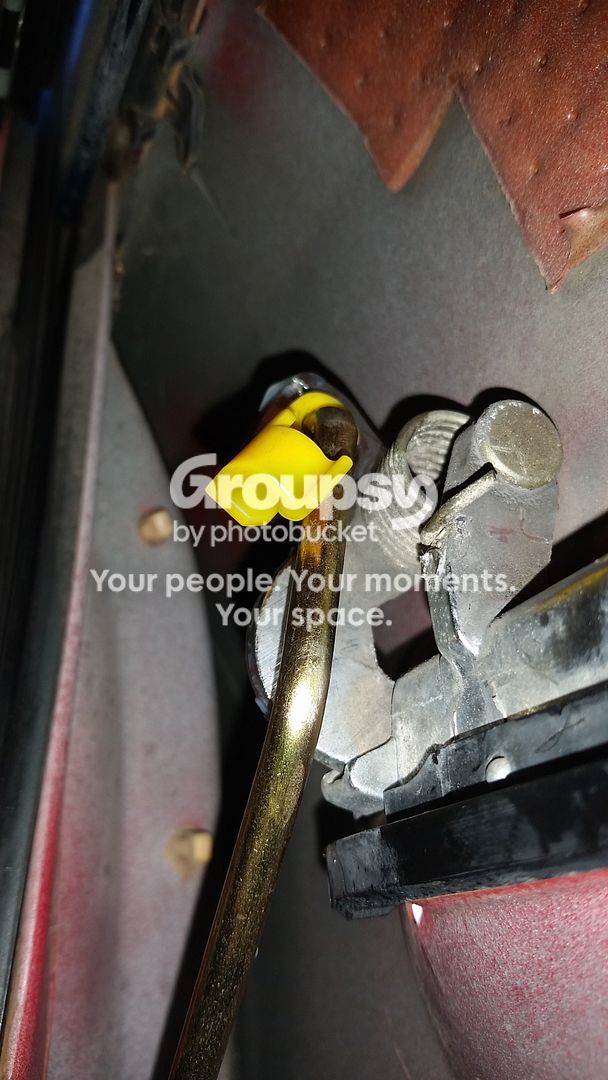
Swing snap down to wrap around link rod:
20150817_171959_zpssn0ngcys.jpg~original


20150817_172021_zpsabjpwgxb.jpg~original


Recommendation, buy a set (try ebay), at least for the driver side (most used) and keep it in vehicle. Set will take up tiny space and does not cost much, but will save you time and money when needed.
 
Driver Side Door Handle Link Assembly

Appreciate the part number for the plastic. The metal rod broke. Amazing the plastic out lasted the metal link. Would anyone happen to have the part number for the metal link?
 
Starter Relay (or absence of) Issue Fix Simplified

Many people are still lost on the starter relay issue. Putting this info here for ease of retrieving. This is the simplest I could make it and still cover most models (1984 to 1991 so far).

Trucks up to 1991's have proven issues with cranking system causing intermittent no-crank. This is the simplest way I could present it and still cover all known affected models (So far, from 1984 to 1991).

Trucks before the Mid-1986's do not have a starter relay (location here); Without a starter relay the ignition switch carries high-current to the starter solenoid and same current goes over a very long path (here).
Here's how to fix it:
Add a Hot Shot system (off-the-shelf but instructions are confusing), OR
add a relay with at least 30-amp rating (DYI) as follows:
B5j4loCPeotLRWzxrQBdpCfm5cfCc8h_6TSyEvRvvmh1ZkfmgKnifj7TU-KLLulWurI9tmV0NVGlIV1HHjHFshSsZmArcdz5KdMQQA4g4ncA1bG44OL4DQYvoTumsIjsM3PEzFlX6ta5AmR0fgpMTJ_SijaqxBSuPbOBaHZQhpWqToVUJGlKC-sn4Z3zO6NsIWurGM9TnW8-_cQHqwrtbwhdurcEHW9iMUEzpBaHs0wU4BPWBxt_bSJGC1N66rA_Vdxh0Xeu0sZcVGq8Az7gZwEG8cIXwysv8001_Q6fmZV64R32pBzbLwMcJ9-YEmIt2XvxAsUKaUCLMYK7Qd46QhhyF6TkCxtLwdp3rWqsBQNu8hKGdUt8iBky3Y2P1W0fRI0geu1SNOK0om14Y53eQKQd_-P94cMMRRu2oyd3twLwUxuL6MRTpNoTP6UmvXzXoAFz80Q2PlFc5BOxYUfoqQqt29TktI2Bm_MGQDHAuZIsVK_O9cNFZyxrk9gpdE4514HVOIRz9SA2mO1a9tCgLHugqDjc3m8BipexrdsneeJ05G69k_8HsFaswfiynJTXSMmUo83RDQE8yvZqZA2UdNMjquU-QOUoL1v39GgGgHu8TNVsA7yOWXXp=w867-h611-no


Late-1986 and later already have the starter relay, but they were wired wrong at the factory.
Z8KL6CMlcUTSTgbi7NHhhjioxnQRgm82GSjoUVIcAFMwDZcGKpLruaQY0XoUbpElj1yFVPtX9aMfcNc4CUNC8Kj3dJEC4_h_47PKjUldEK9O258edtqSDCoZ7HmCmlf-kvyoBg1FACTpshzPBpmdqNETdZK_siYUyANJQD6BidCcoNbvDTJlWpUEqy73IrugPGZDxy8LqBS-drRXMEkVQVSIAUPBkXRrehkoJFxNHzgil4ha52pnlXeiveEWndh5JKSQ8QsIgzgOjbSuw5VA3E2dS3E_UGbm2EUO4HblF3PLMm5VjUeSduZ4cJbAjXsD09IeiEqoVNkC0MqAe2fc3XxEIckFGpBzTPA0Ts-IZjrh1ZXGX9ONvGp5teCaN8-MxEHLvWqhUSh-tf5gFzunCiBqzo-Et43ypbEIQX3fuo-sEXi85XxjRP8eKtEAkSGolgnV07mKkJMBNzR3--aX4Vy5D32g_Vr2FQiy0j3REs5xBsLAIV9suLp94Q409AuMsBA4QvtfhwBBOqo9u9x6oJaS8b0dF9gw0ZuPdn7p3EhU-EOjmX6VoF9a-7bfPjFjP2NbjilUBcIvLXNEJ2CndWcsyaoEsMS4mbUZ4BdaNrNwFXqPNBo=w494-h776-no


ALWAYS VERIFY HANDS-ON EVEN IF YOU TRUST THE INFORMATION OR THE SOURCE.

ALWAYS VERIFY HANDS-ON EVEN IF YOU TRUST THE INFORMATION OR THE SOURCE^^^.

IF verified that the wiring is broken, fix it:
(Hot shot is off-the-shelf but it requires more work than the simple re-wire below)
mMO2dIcFE0F6CPG3q6uFVBXPJD8Ii4utr4-MiT6_hbwRLG_OtmlNn0kiivhslKGpQtbHe6EpAivSyg1awAo7j5Zlzwen5BlAUbUDkv48142DngkwNhRWWp6Z31yt1PyWJ-2X5X863X7U_4dTkh0KCwj78CRPrz1VV_7k0PBi0MVgnfTWgPQ7XE_FV9yfyDH_5PfGwpbTIiJqYVP4BW4Dny4Bih9ukdBq6wpvHDThYhP8Zqq5JUAvkbrrmEy1o31SBsq2u5ncbuh0T-VS3dKNm8lOcEE3SuoFpnjfk2OD4dpF_aT36BcX8ezrMx9eORC4V23-TxDfaAPTUSq7HC33ogmPp8CcD-xzvNPdK4Zy5YWXrKpNZi3T_YsOCUiYNebkDtrHRQXEGCEN4s1v8Cb8YsaqAdQTrZXlekNsAjyRb1FH61PDZz6pJTiqhFlbx1HC_nziBVG4iD3irb_VvyHNBBKjrY3cqU7hms2Dbg7IDe4bb_2onAo4lBf4zbUN-_1A5HQ-HpVGISEOtU3Ps7orhcIu9n5aZlGj53GOR73thgwVsWJ09IMDtLdGAPuUCoSMHIFX-EL2dIhwIzUegDRaNUAnLs1RvS8_UET2qVP-tgLb7z9zvp8ovqUH=w600-h400-no


Suggested Install Layout:
P2XgkWAiDUOoSYNb4tb9PF-VC1RRhig5d2yaunmNgZztu9MvJL8g2br93QxrJGoO82z3H6gLDXi2vmWt3Lsa1aK9AbJSexNc0IdBpq-OZy7_7UfCCkavyg2ke-S5_RWEh-kxmU2RcjJWjUEefOT2SUZx6AK7XUevWhKjh5G0u1EaJcMPkKHxzesnchYgPEOBW9pI_u_NEPzSakqLfv8htGSJqzre-XNJsEwwvQgRrZgLkqKn7x-smoPUKtodTd2ZNpbIhTwUn5EB5C5LcUYJbmpRpWC-FY3EsM1vTBrgG8ABxXd7bULv0egGMt2_r5cnn8ayVA2TdtTGRTztBDhPwoFqUG7y7cEoFGVnLZV3V0vHFjqKuKSfJFWZ23NwSJWjnVVwB0vNJjVfY-AxLS9jznY6myEYpRIR-PCGESPZok18jgygHb1slqVby0l-ZnVAVAqG6YqbKkI03FWJ88AJR7lRzhI5gxPhhFv5Kw1gLDsQmRHNnpwzy1QE1hzmRQNFFQAag8i3_Boic749Hzrv6w9Zl3HzId7gXegnyf_w752topm-EIMmQby-Y0d0uc-QKtKeEMjjdTKW7qLiZ2tBlj20Oc2pTB-pB6ZqYFwUDP6nf67rQKih=w1380-h776-no


keywords:
click-only, no-start, no crank, no start, no-crank, simple, simplified, concise, simple, quick, clickonlynostart, clicknostart
 
Last edited:
Did the hotshot and it has been trouble free since.
Yep. Same concept but Hot Shot is only needed if you do not have an existing starter relay.
Post ^^^ edited to reflect that.
BTW, what model-year do you have? KidV and I have are trying to zero in on when the factory starter relay appeared on the first-gen 4Runners. We know, of course that auto transmission first-gens do not have it.
 
Last edited:
Safe Harbor Along Fwy 15 Corridor...

Hi folks,
We plan to spend Thanksgiving in Las Vegas, then on Friday drive to Zion National Park, camp there and back to San Diego on Monday.
I do my best to keep the truck in tip-top shape but, like a good captain I want to know where safe harbors are ahead of time, in case truck happens to have serious unforeseen issues I could not handle with my multi-meter and toolbox.
Do you know of any trusted/good shops/mechs along the 160 mile stretch of Fwy 15 between Vegas and Zion here
Vegas_Zion_zpsl2nuadlt.png~original


How about the 330-mile stretch between SD and LV here?
SD_Vegas_zps5zsjnwx2.png~original


If you do, pls comment with their location and contact info. I'm sure it could also help fellow members traveling along same routes someday.

Thanks in advance and Happy Thanksgiving!
 
Last edited:
Roof Rack Mounting

This is not a complete write-up, yet, but I want to share lessons learned ASAP ...will update as I have time.

Lesson Learned on Mounting Holes [so hopefully fellow members will not make same mistake] :

I find the edge of rear window to be most consistent/precise reference point.
20140706_003_zpsc2bjfvo2.jpg~original


I drilled rearmost mounting hole 11 inches from that edge. This put the mounting holes for rear feet too far to the back so they ended up on a sloped section of the ceiling.
20140706_013_zpsf2ldql7y.jpg~original


Not critical but not very clean and not as easy to work with or seal.

If you're doing this, I recommend placing the mounting hole at least 11.5 inches from that edge of the rear window. This will put the hole on flat surface of the ceiling.
20140706_004_Measured_from_RearWindow_Edge%20copy_zpssd9x1aab.jpg~original


I used raised-rail rack from a Blazer, trimmed to go as far back as possible and as far forward as possible on the fiberglas caP, and spread as wide as possible to still clear the quarter window.
20140014_0016_Center_Foot_Loaded_zpswqbd9ayt.jpg~original

Note that I added center feet, to positively carry some of the weight, because load-bearing part of main feet are made of plastic and I do not trust load-bearing plastic. For the same reason, I am now using Thule cross-bars (metal resting on the raised-rails), instead of the stock cross-bars.
 
Last edited:
Getting Rid of Hidden Fasteners on Door Panel

HAPPPY NEW YEAR, guys and gals!

I detest hidden fasteners and dust-trapping velour on body panels so here goes...
Replacing stock hidden fasteners:
20151201_144157_zpsbzmksr08.jpg~original

File corners into hole to fit the expansion/nylon nut, and keep it from rotating
20151201_144213_zps0ou3z8ce.jpg~original

Nylon nut attached:
I purchased nylon nuts for 7mmx7mm hole and #8 finishing screws from ClipsAndFasteners.com - Automotive Retainers,Clips and Fasteners.
20151201_144219_zpsjyxgpv2p.jpg~original


I replaced the existing wooden panel with lighter 1/4-inch thick foam-core poster board wrapped with vinyl for wipe-down/spray and wipe maintenance.

Dated looking Stock Brown that traps dust (note simple screw mounts):
2015-12-16%2016.46.25_zpsgoc8hwiv.jpg~original


Simple, Clean, Utilitarian Black Vinyl Covering (note simple screw mounts):
20160115_112810_zpsnmzmth7u.jpg~original


Lower dust-magnet will also be replaced with vinyl, eventually will have mesh pockets.
 
Last edited:
Cold-Start Injector (CSI) and Timer Circuit Errors in FSM

FOUND SOME ERRORS AND SHORTCOMINGS IN THE FSM.

While analyzing my intermittent hard-starts (long cranks) issue, I came across an article (HERE) that mentioned shortcomings of procedures for checking/inspecting Cold Start Injector timer Switch covered in the FSM.
So I verified both 1986 (print) and 1988 (pdf) FSM's and found errors and shortcomings ...
The good: Both 1986 (print) and 1988 (pdf) schematics are correct.
Cold_Start_Injector_Circuit_zpsbm5c2mtm.png~original


The Mistakes:
1988 (pdf) FSM section for checking the CSI timer (page FI-75) shows a wrong circuit, and says that STA and positive side of CSI take power from IG Switch. No they do not. They take power from starter relay (if manual), or neutral safety switch (if auto). Corrected circuit is here:
1988FSM_pageFI-75_CSI_Schem_Wrong_zpsmny1rcmt.png~original


Both the 1986 and 1988 checks section fail to specify STJ to ground resistance. While one side of the CSI takes full12V, the STJ pin of CSI timer switch provides ground. Therefore, like the article mentioned above says, resistance between STJ and ground (brass body of the CSI timer switch) should be the significant measurement. It should be close to zero ohms when engine is cold. (I will measure mine next time I get the chance).
Check_CSI_Timer_Switch_zpsrqtonn3r.jpg~original

Because STJ amy have some resistance to ground, it is possible that measuring voltage at the CSI connector may not yield a full 12Volts. (Again I'll measure mine when I get the chance).
 
Nylon nut attached:
20151201_144219_zpsjyxgpv2p.jpg~original

I purchased nylon nuts for 7mmx7mm hole and #8 finishing screws from ClipsAndFasteners.com - Automotive Retainers,Clips and Fasteners. [/QUOTE]

Looking good!

For what it's worth the Lowe's in my area carry those snap in nylon nut inserts #008236715767. They also Cary the push Fasteners aka "Christmas tree fasteners" that secure the plastic panels in the cargo area of the first gen. I used #008236715910 which unfortunately are black in color instead of gray. They had some gray ones also but they were too short. Could probably research it thru the manufacturer- Hillman and possibly get some gray ones the correct length.
They are in the hardware section in the drawers marked automotive Fasteners or hard to find Fasteners.

Keep up the good work RAD4runner! I've been following this thread for some time...good stuff!
 
Looking good!
Thanks!
The nylon nuts are a around $6.00 plus a couple dollars shipping, so happy with it. It's also good to find square or rectangular ones. Round ones would tend to turn in the hole and make it hard to screw in or unscrew.

Love working on, customizing and making the truck more reliable than stock :)

... They also Cary the push Fasteners aka "Christmas tree fasteners" that secure the plastic panels in the cargo area of the first gen....
Yeah... but that's exactly the "hidden" fasteners I'm trying to get rid of. I prefer simple screw attachment that only requires a Philips screw driver.
 

Members online

Forum statistics

Threads
278,312
Messages
3,554,088
Members
248,016
Latest member
Advally Service

Trending content

Back
Top